Asset & Configuration management
Glossary
Overview
How to (de)activate the plugin
How to set access to custom tables
How to create a custom table
How to delete a custom table
How to add records to the Custom tables
How to show custom table’s records on projects, tasks and other entities in a field
How to show data from custom tables on dashboards
How to add graphs & charts based on Assets to the customisable page
How to import data to custom tables
How to integrate (synchronize) data from custom tables
How to use Alerts (early warning system) with custom tables
Glossary
Asset & Configuration management - plugin name.
Custom tables - custom entities created with custom fields like assets’ types.

Custom records - records in the custom table, like assets.
Custom fields - Easy Project custom fields are used to create custom tables. One custom field represents one column in the table, like Name, Location, Client name etc.
ACM Dashboard - a customizable page dedicated to the Asset & Configuration management plugin.
Overview
The Asset & Configuration management plugin is a tool that empowers Easy Project users to design and create custom data tables easily and extends functionality. By utilizing the system's custom fields, these tables can be tailored to efficiently organize and store necessary information. The plugin also allows users to connect their tables to various elements within Easy Project, such as projects, tasks, users, and others. This provides users with greater flexibility and control over their data whether it’s assets, warehouse, contacts or just a spreadsheet where you want to store your data directly in Easy Project.
Key features:
- No code experience.
- Ability to design and create custom data elements.
- Use of custom fields to tailor tables for efficient organization and storage of information.
- Connection of tables to various elements within Easy Project.
- Custom database creation for data that cannot be accurately represented using native entities and fields.
- Greater flexibility and control over data for users.
- Full-text search.
- Variable access permissions.
- Custom visibility for tables and custom fields.
- Export data to PDF, XLSX, and CSV formats.
- Import data in CSV format.
- Export and import for table structures.
- Custom table templates.
- Define your own alerts and get notified when the defined conditions are met.
- Customize your dashboards with custom tables' data.
- Manage your assets through API (Swagger) and WebHooks.
- Link your existing data to tasks, projects or users without duplicating the information.
- Create tasks directly from custom records.
- Customizable page dedicated to asset management.
How to (de)activate the plugin
The plugin is available in the Global menu under the Add-ons section.
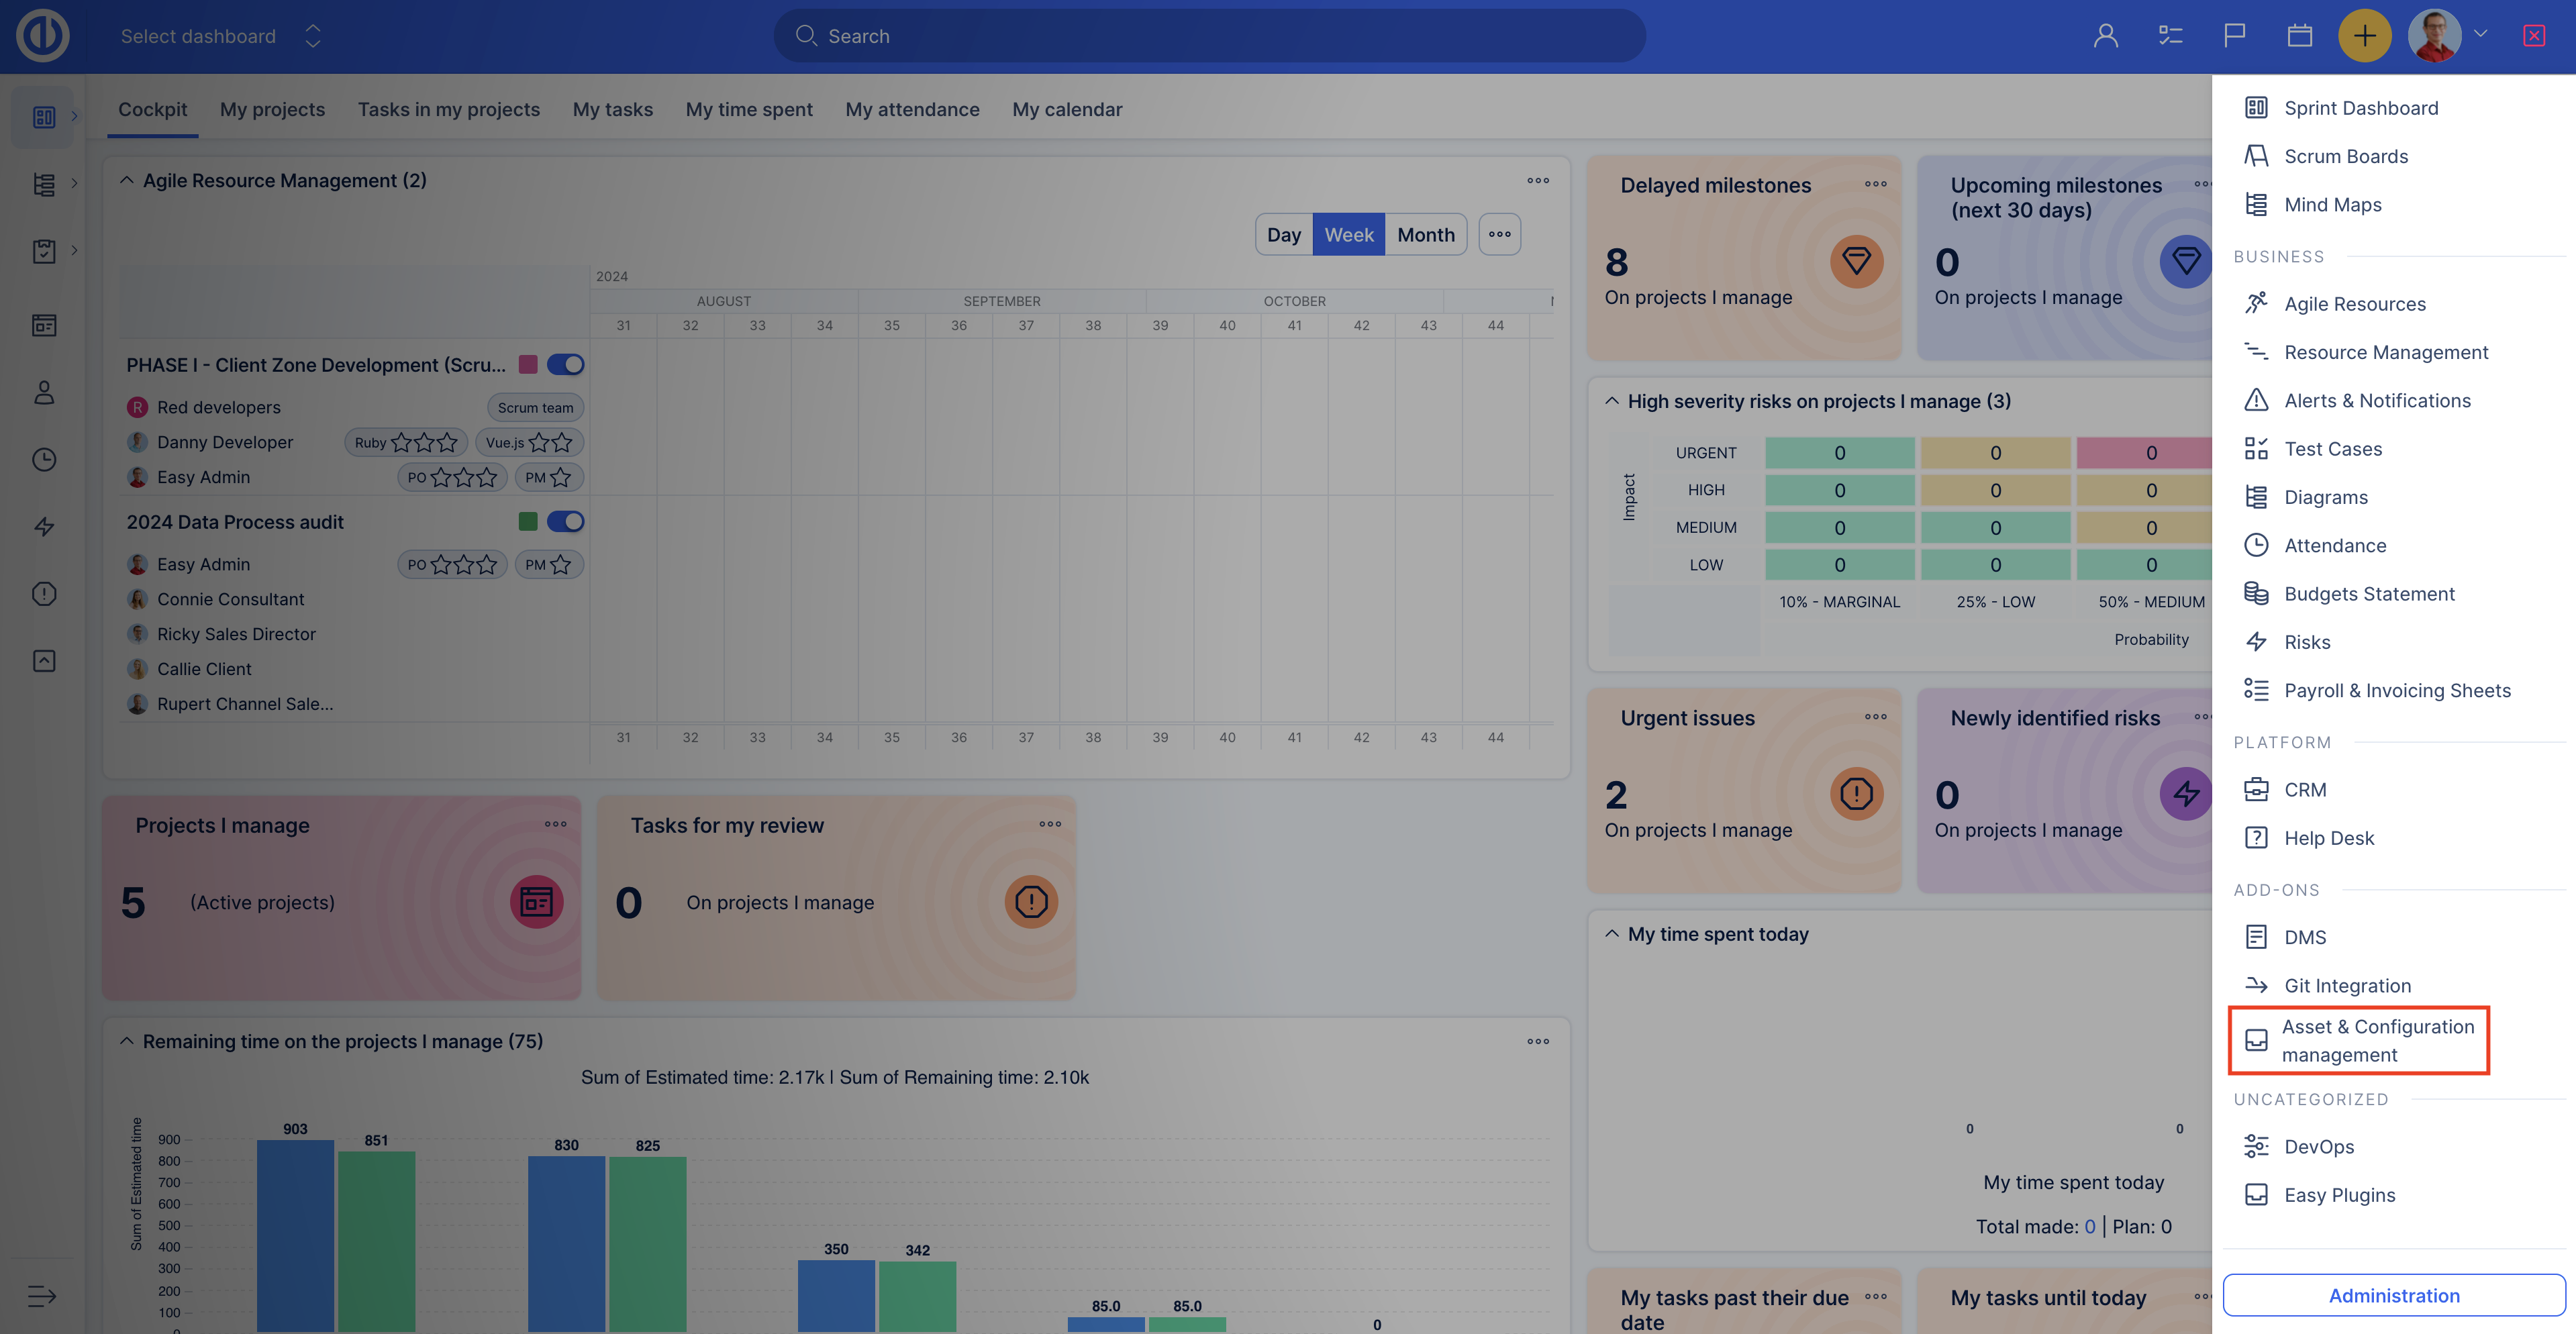
Also, the custom tables' settings can be found in the Administration >> Custom tables.
Administrators can check whether the plugin is installed by going to Administration >> Plugins and searching for Custom table.

How to set access to custom tables
Managing Custom tables
To create, edit or delete a Custom table user must have one of the following options:
- Partial administrator
- Custom fields
- Asset & Configuration management
- Administrator
Partial administrators without permission for Custom fields won’t be able to add custom fields to the Custom tables.
In addition to that in the Administration >> Roles and permissions you can decide what user roles have permission to view and edit custom records.
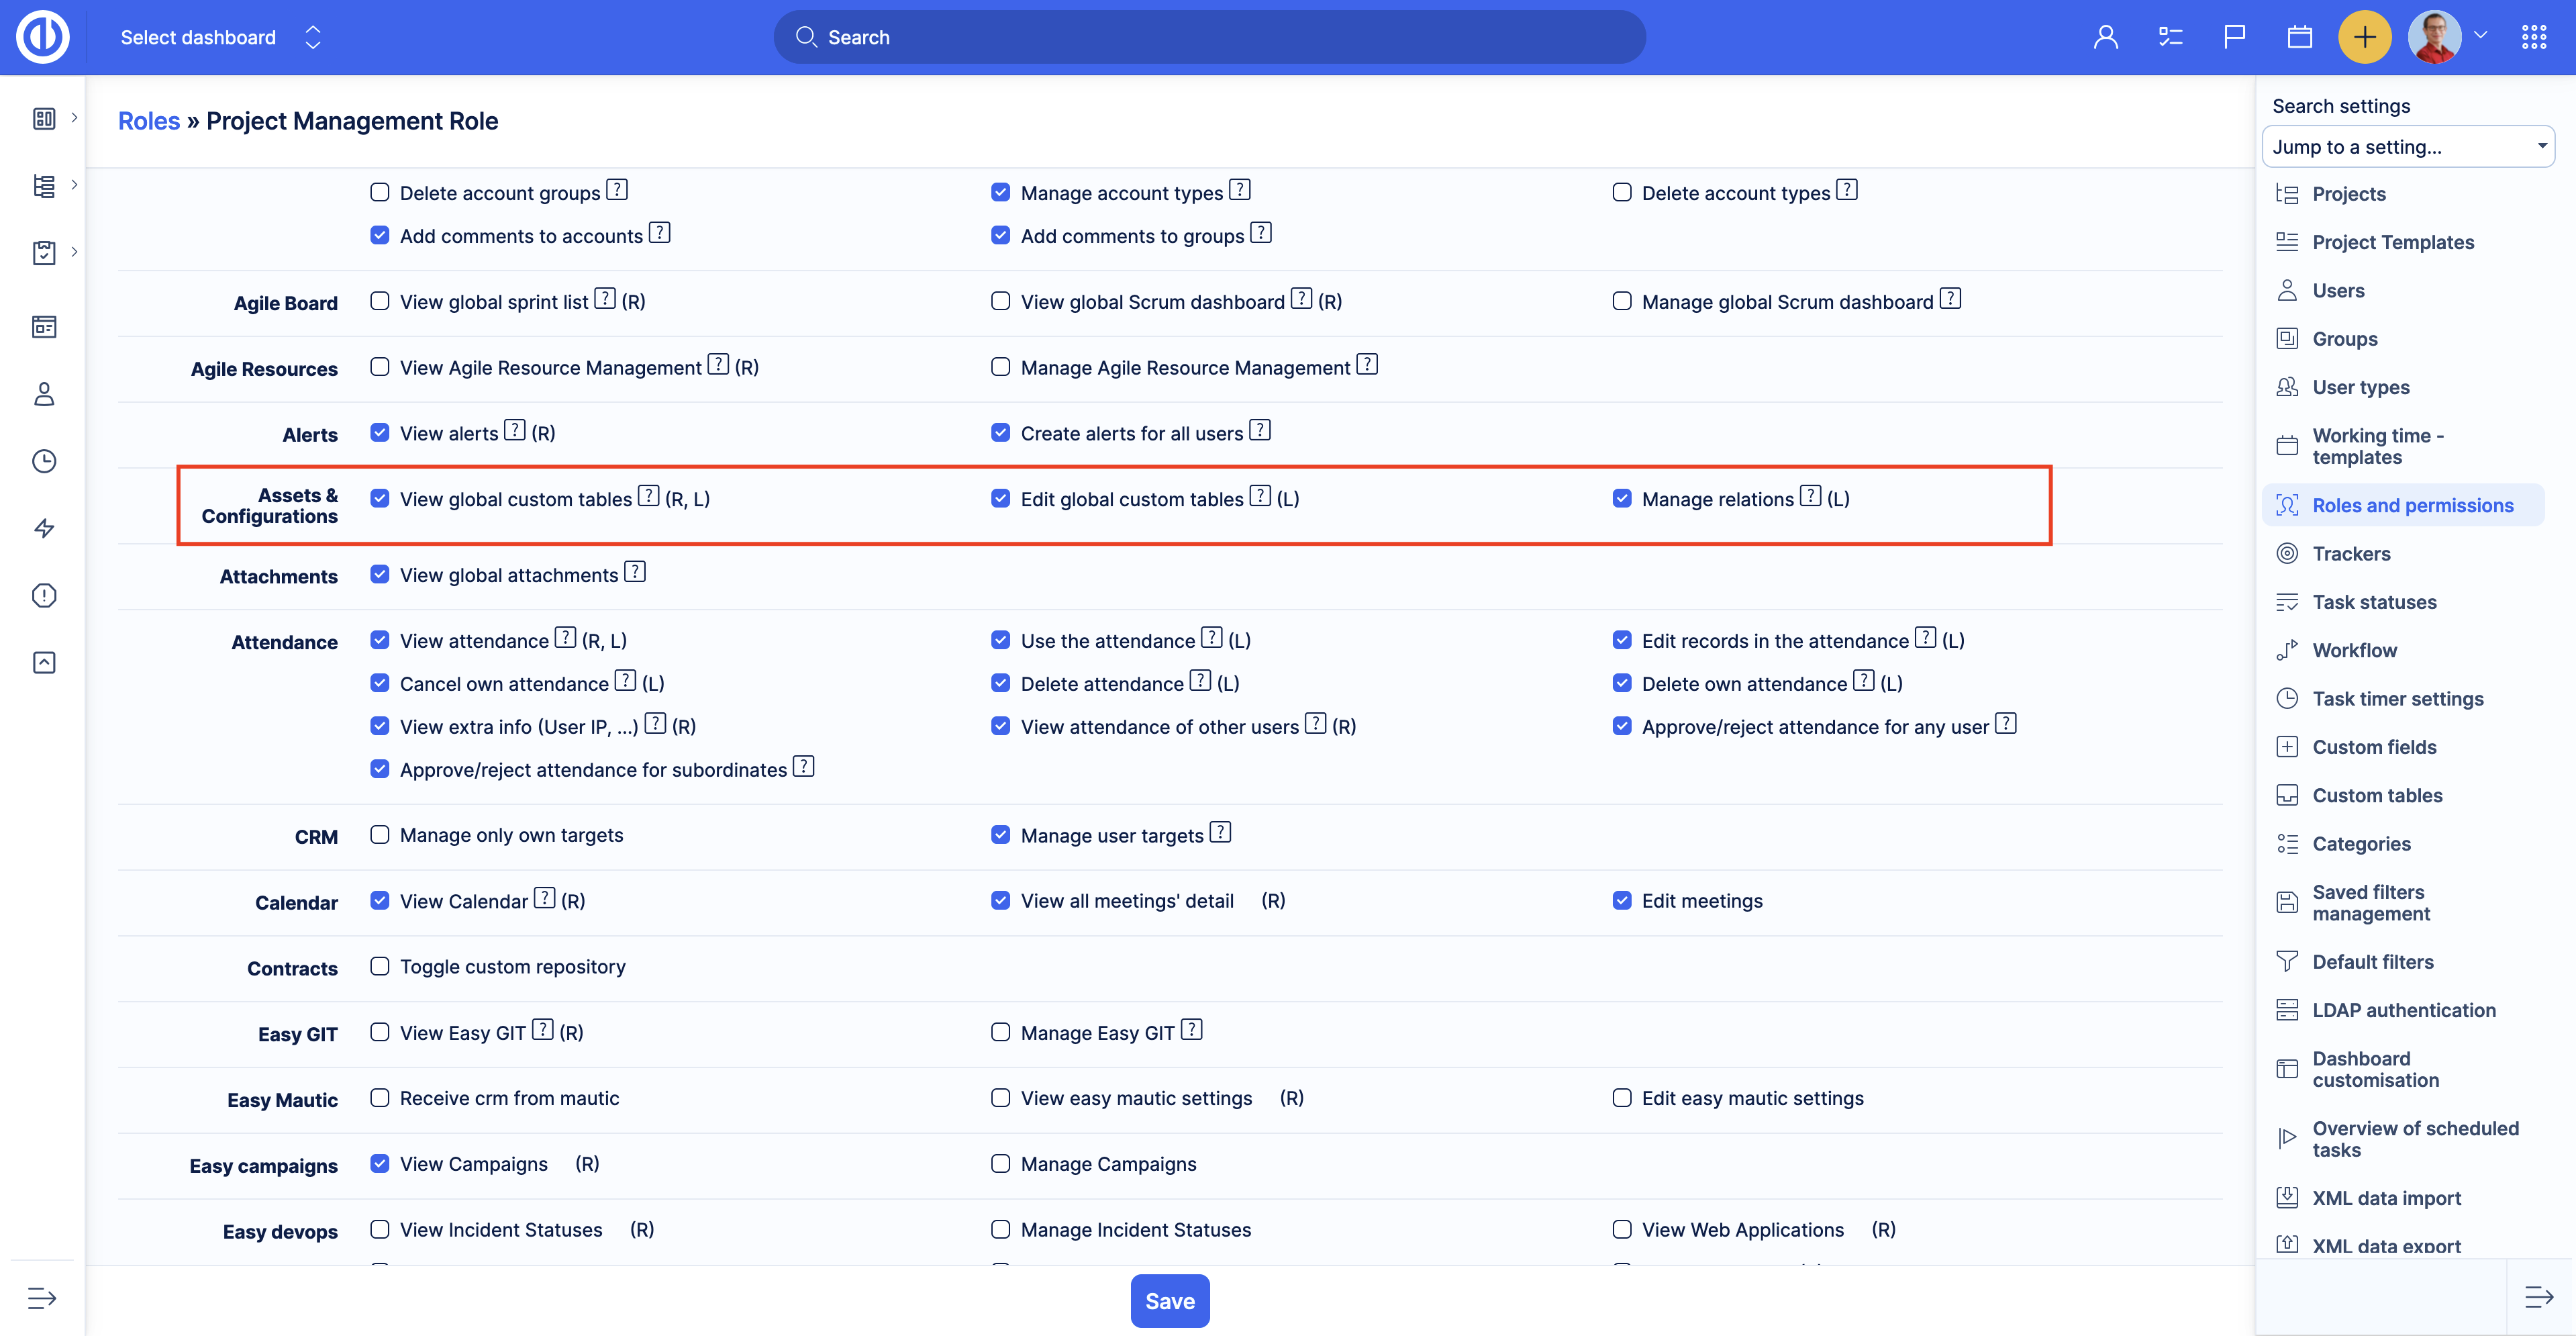
Roles & permissions
- View global custom tables - allows logged-in users to access the Asset & Configuration management module and view custom tables.
- Edit global custom tables - allows logged-in users to create, edit and delete custom records. Requires permission ‘View global custom tables’.
- Manage relations - allows logged-in users to add and remove related custom records. Requires permission ‘View global custom tables’ and ‘Edit global custom tables’.
Custom tables permissions
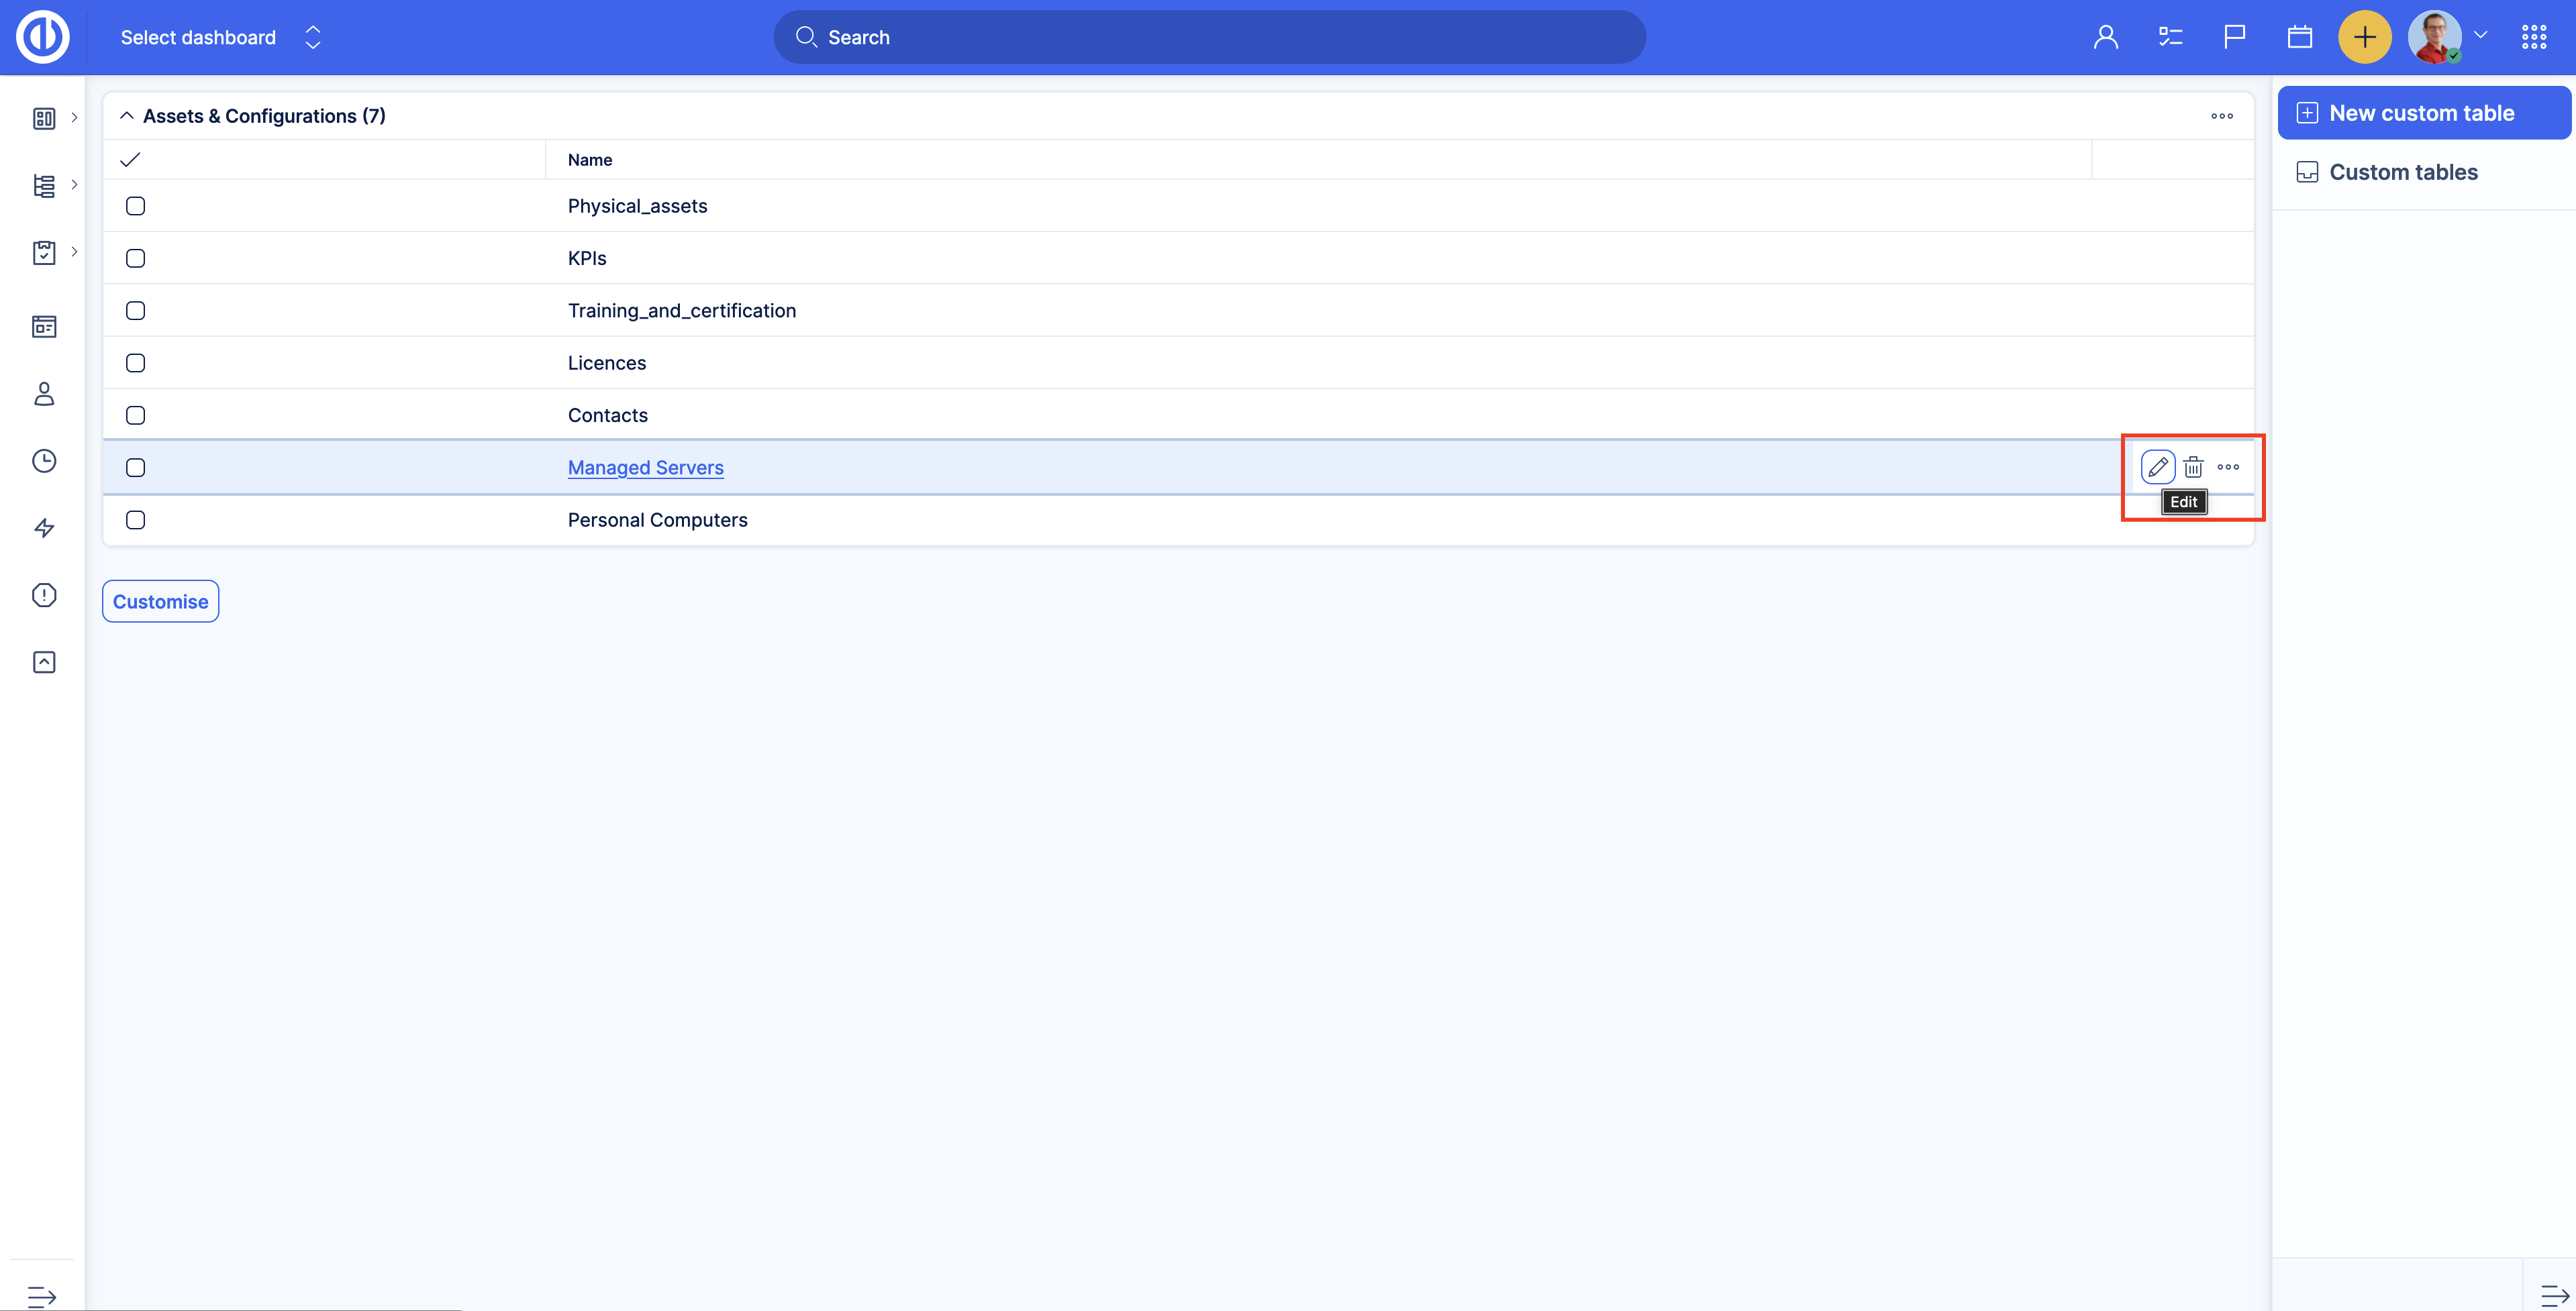
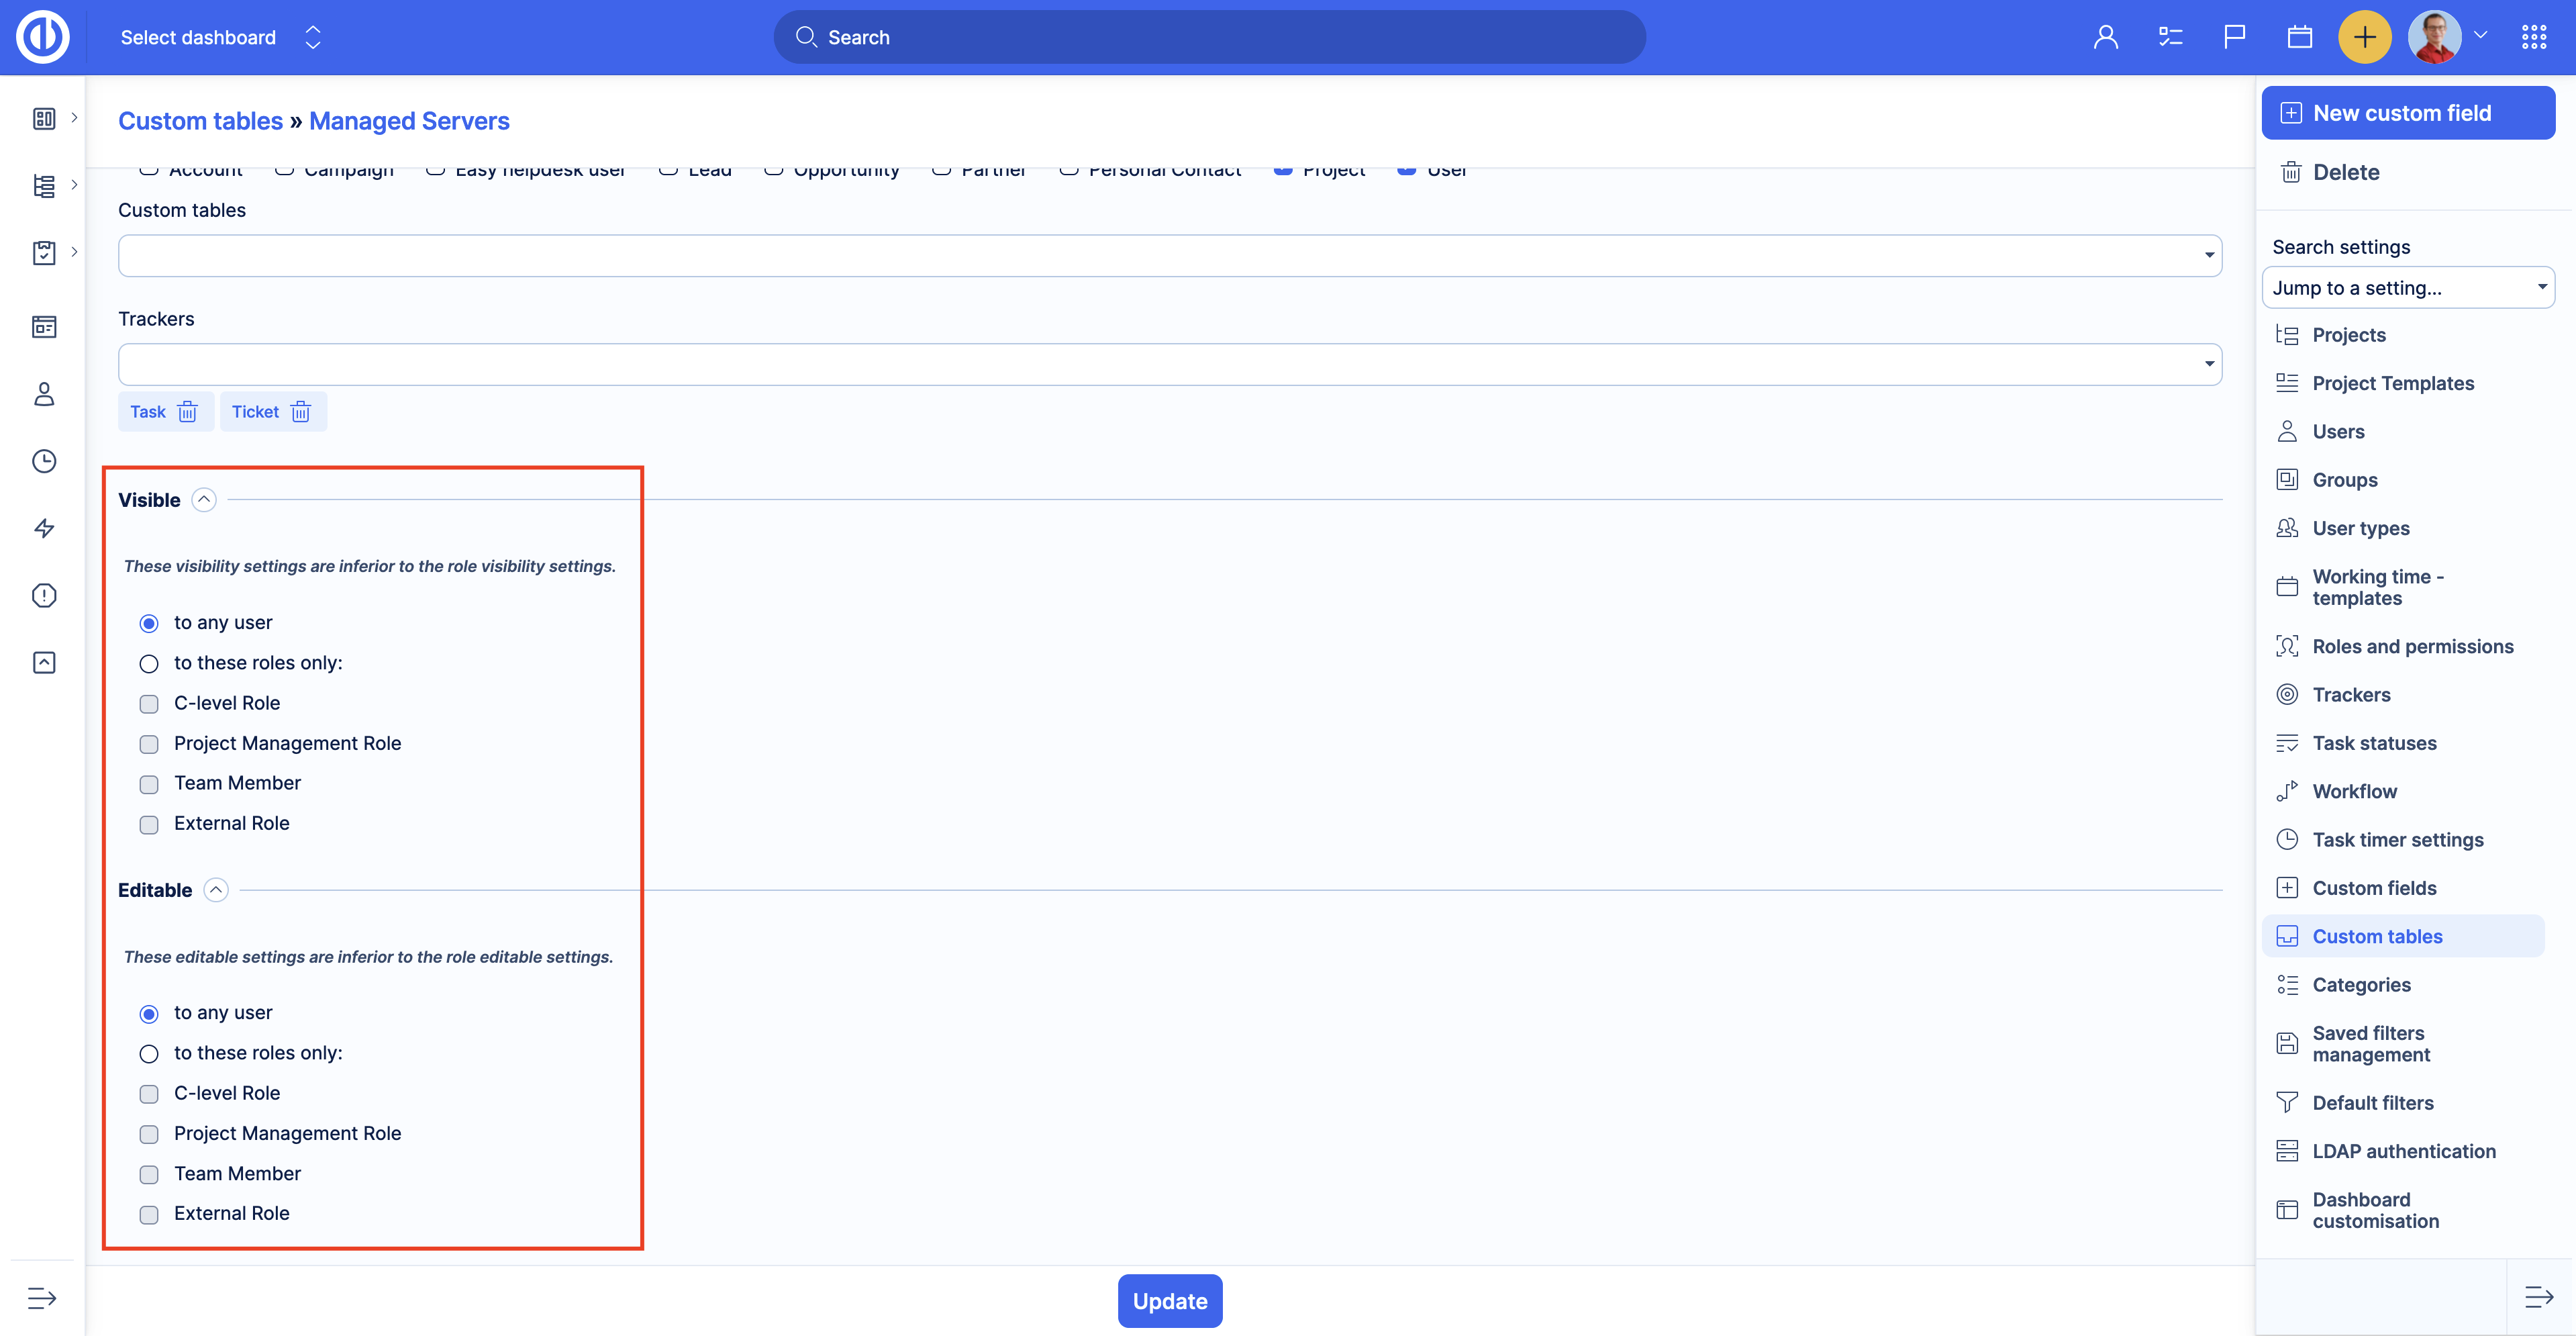
For every Custom table, you can set up additional permissions to view and edit the records. To do so, go to the Custom table settings page. Global menu >> Asset & Configuration management, then click on the pencil icon on the right.
- Visible - Settings that allow defining roles that can see the records of this particular table.
- Editable - Settings that allow defining roles that can edit the records of this particular table.
Important to know
Visible and Editable settings don’t copy or replace the role's global permissions. Imagine you have two roles - role A and role B, and two Custom tables - Custom table 1 and Custom table 2. You need role A to see Custom table 1 only and role B to see Custom table 2 only. You should allow appropriate permissions for both roles A and B in the roles & permissions settings. After that, for Custom table 1, the Visible settings should be set to role A, and for Custom table B, the Visible settings should be set to role B. As a result, you will have two roles with the same permissions. However, role A will see only Custom table 1 and role B will see only Custom table 2. The same way it works with the edit permissions and Editable settings on the table.
Custom fields' special visibility
Since Custom tables are made of custom fields you can apply Special visibility settings to every custom field added to the Custom table. For more information, please see the custom fields documentation.
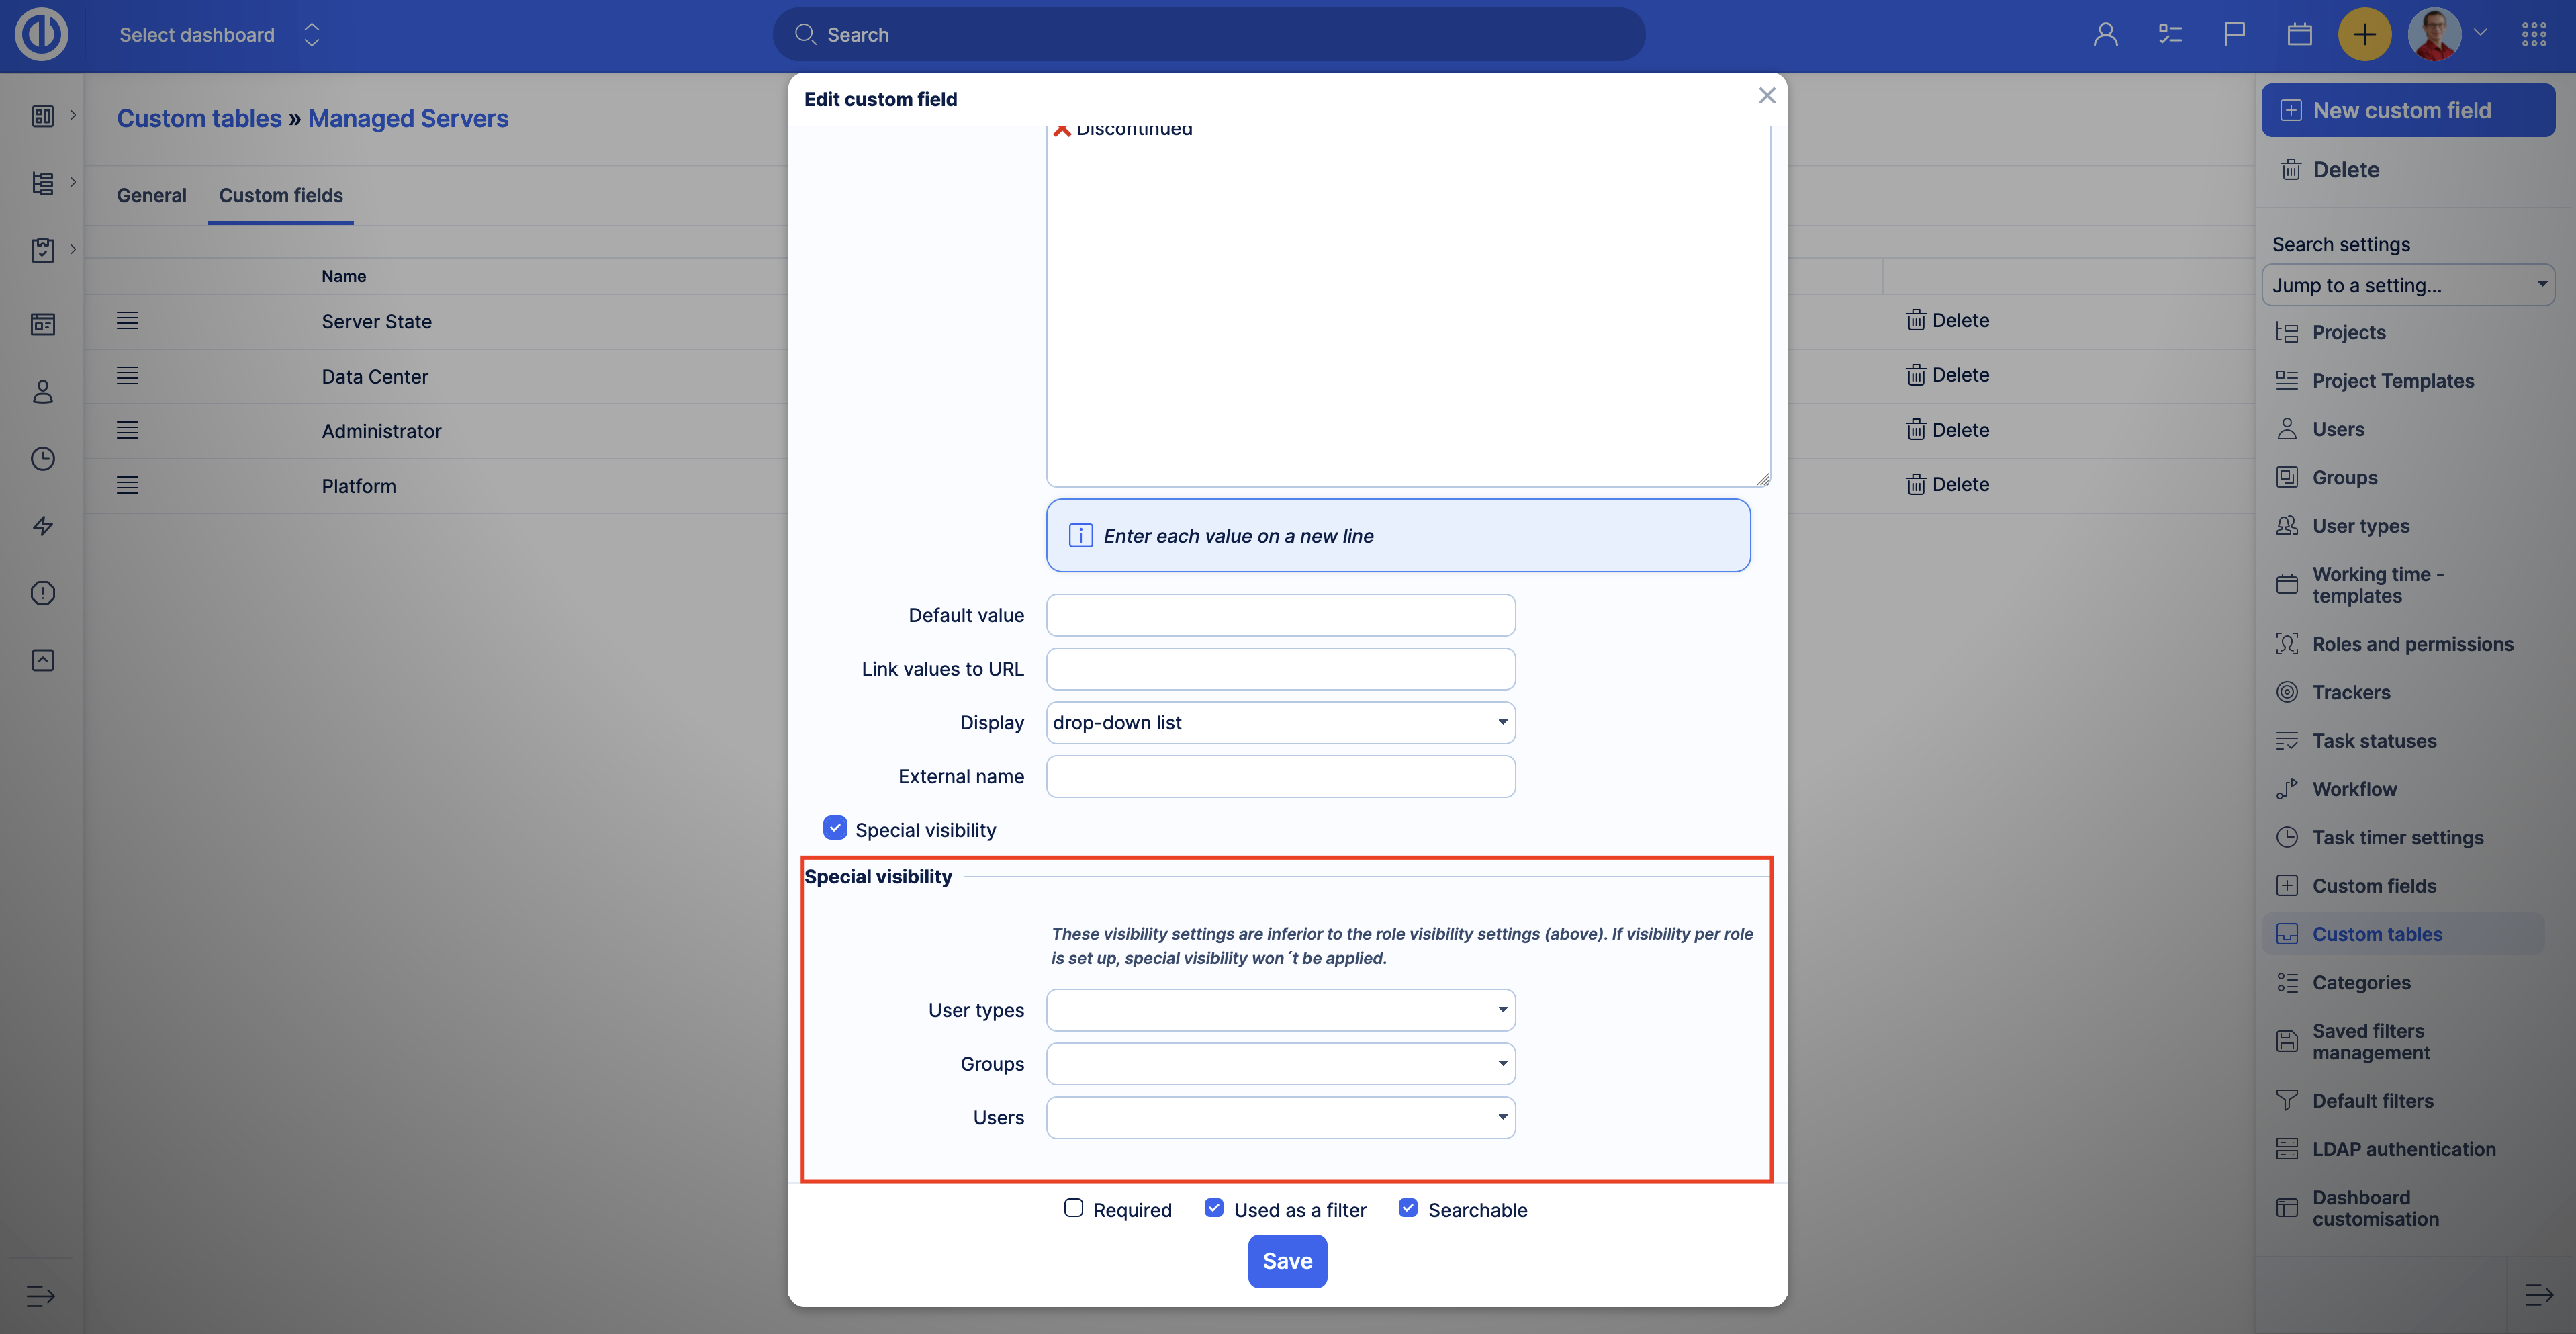
Important to know
Special visibility settings of the custom fields are evaluated after roles’ permissions and Visible and Editable settings. Imagine you have two roles - role A and role B. Both roles have appropriate permissions to see records and are selected in the Visible setting on the Custom table. So, users with both roles can see the records of the particular table. However, you want to hide one field of the Custom table from the user with role B. In the special visibility settings for the custom field, you should select only the user with role A. As a result, both roles will see the records, but users with role B won’t see the field with the special visibility selected.
How to manage custom tables
How to create a custom table
Custom tables can be created by admins or partial admins. For more information please see "How to set access to custom tables".
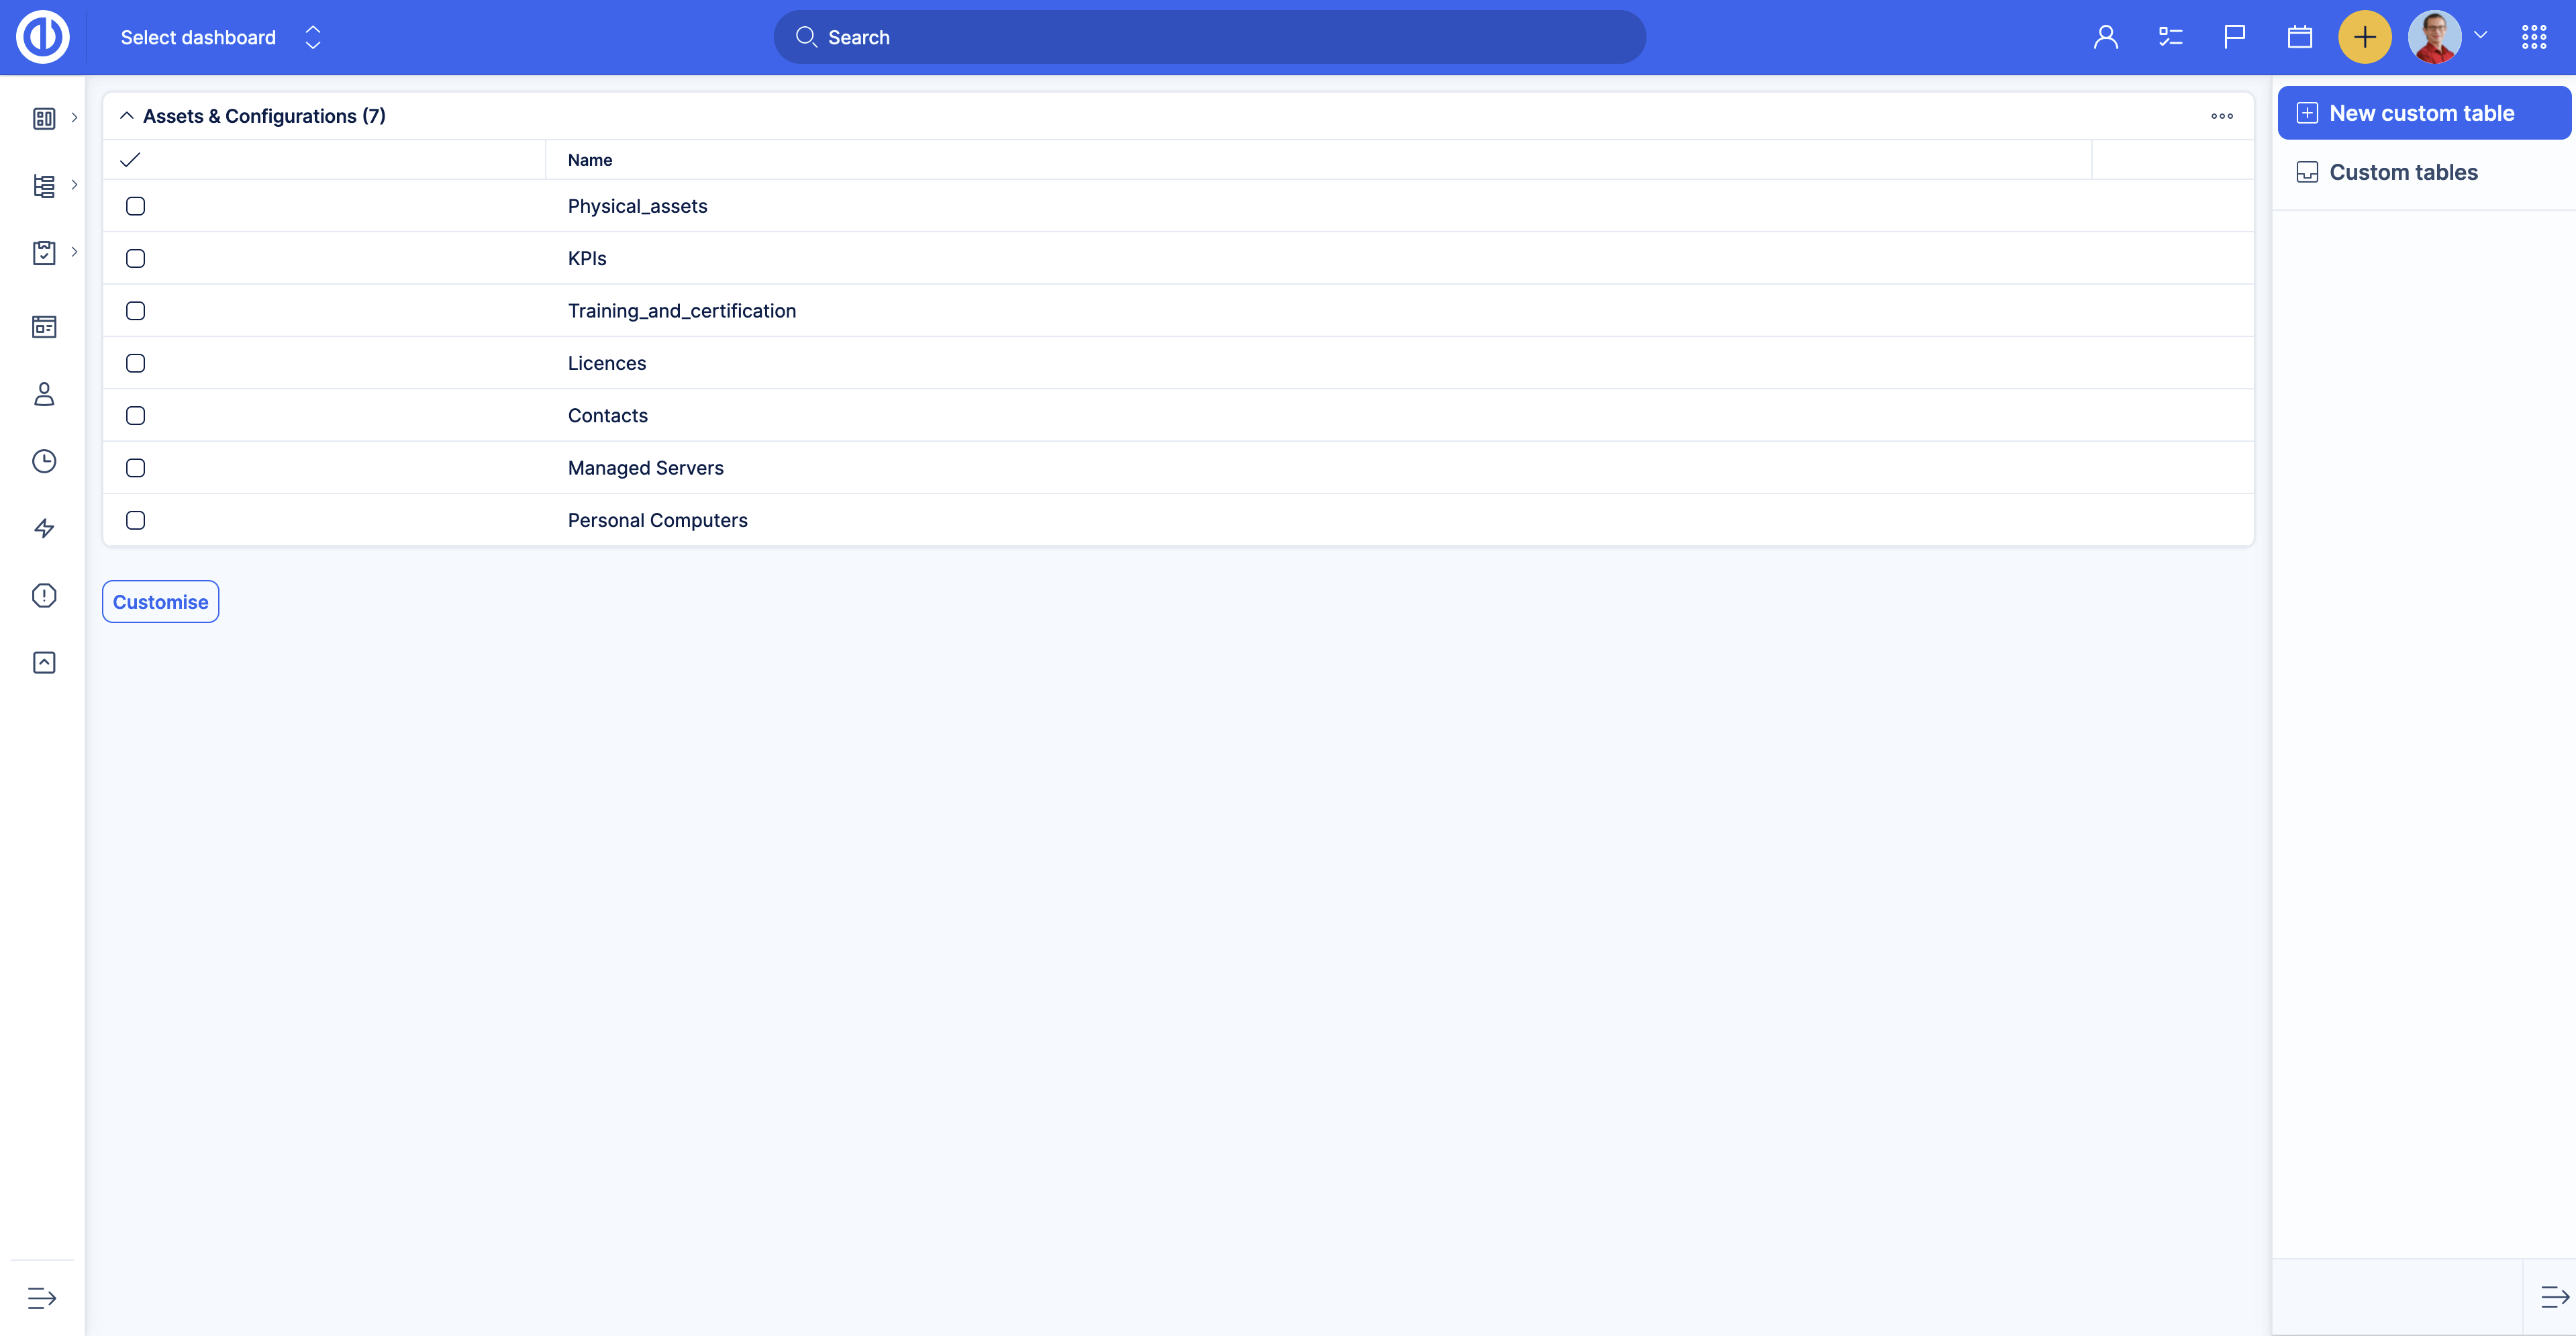
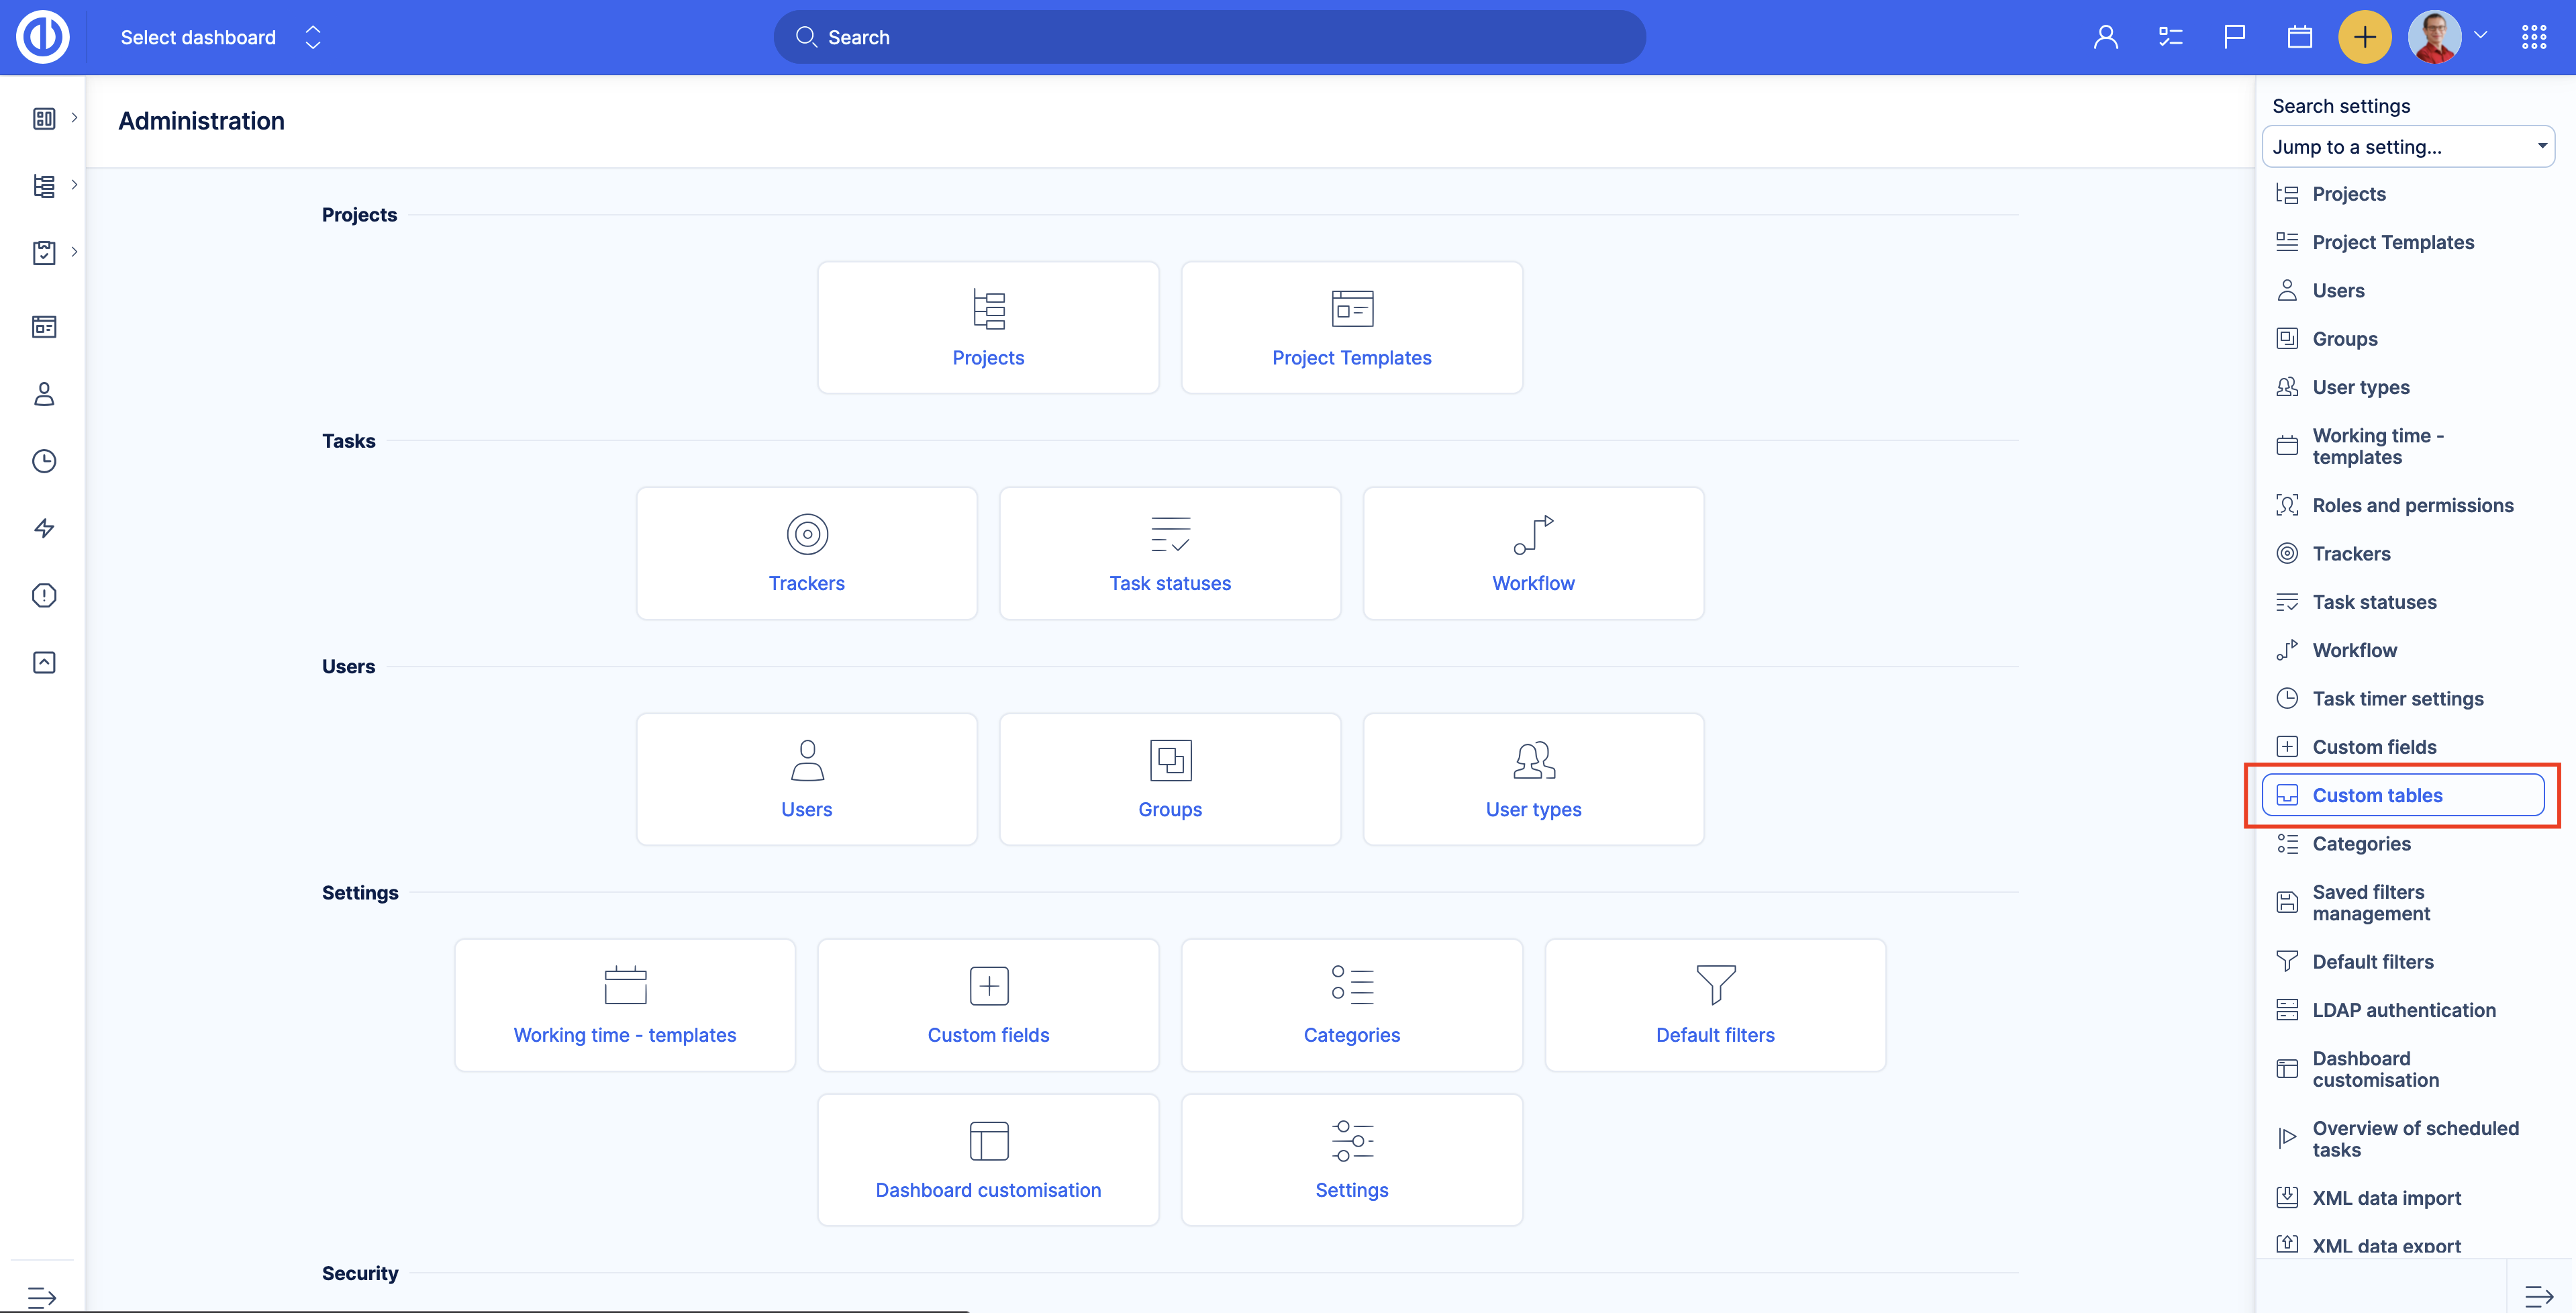
Go to Administration >> Custom tables. You will see the list of all custom tables in the application.
Click the New custom table button.
From this stage, you have a choice:
- Create a custom table from scratch.
- Create a custom table from a template.
- Import custom table configuration.
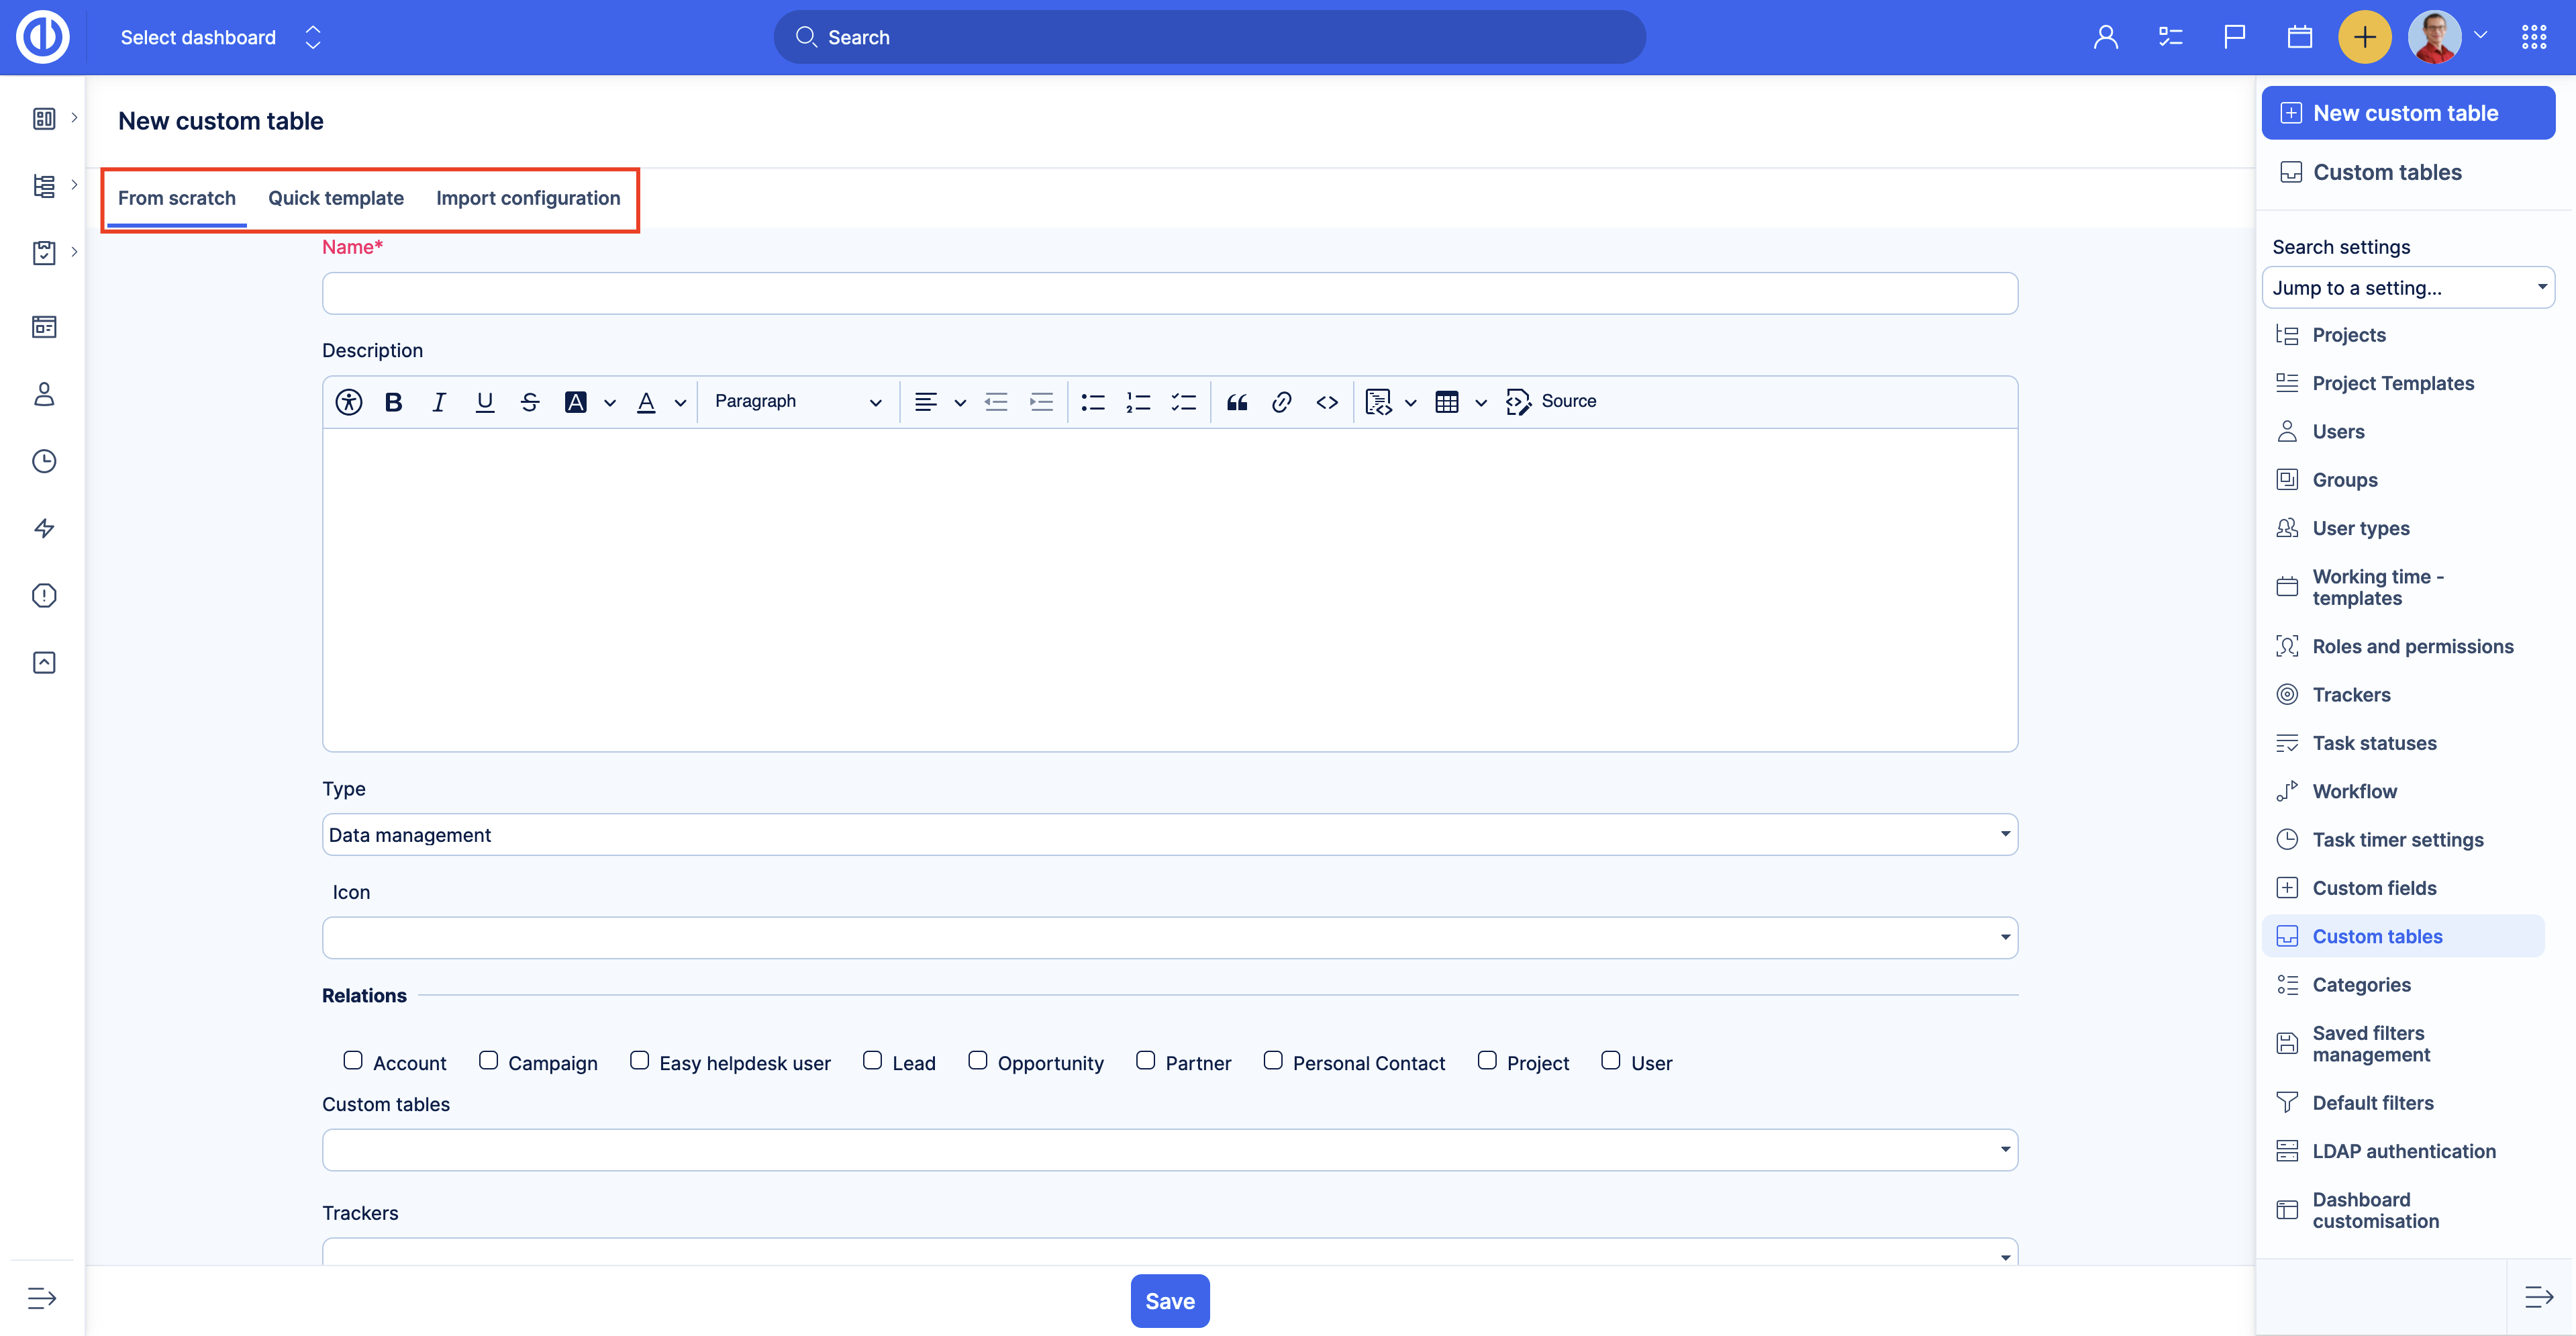
How to create a custom table from scratch
Select the From scratch tab, specify the Custom table name and other settings to create a Custom table. All the settings can be changed later.
- Name - Custom table name.
- Description - Custom table description.
- Type - Custom table type. This setting allows you to group your tables by area of business. Types can be defined in the Administration >> Categories >> Others >> Assets & Configurations types.
- Icon - Custom table icon.
- Relations - Select modules with which Custom tables can create relations. Select custom tables to allow relations with other Tables and trackers to allow relations with Tasks.
- Visible - Specify what roles can view the Custom table. For more information please refer to Custom tables permissions.
- Editable - Specify what roles can edit the Custom table. For more information please see Custom tables permissions.
After creating a Custom table, you will be redirected to the Custom table settings page, Custom fields tab.
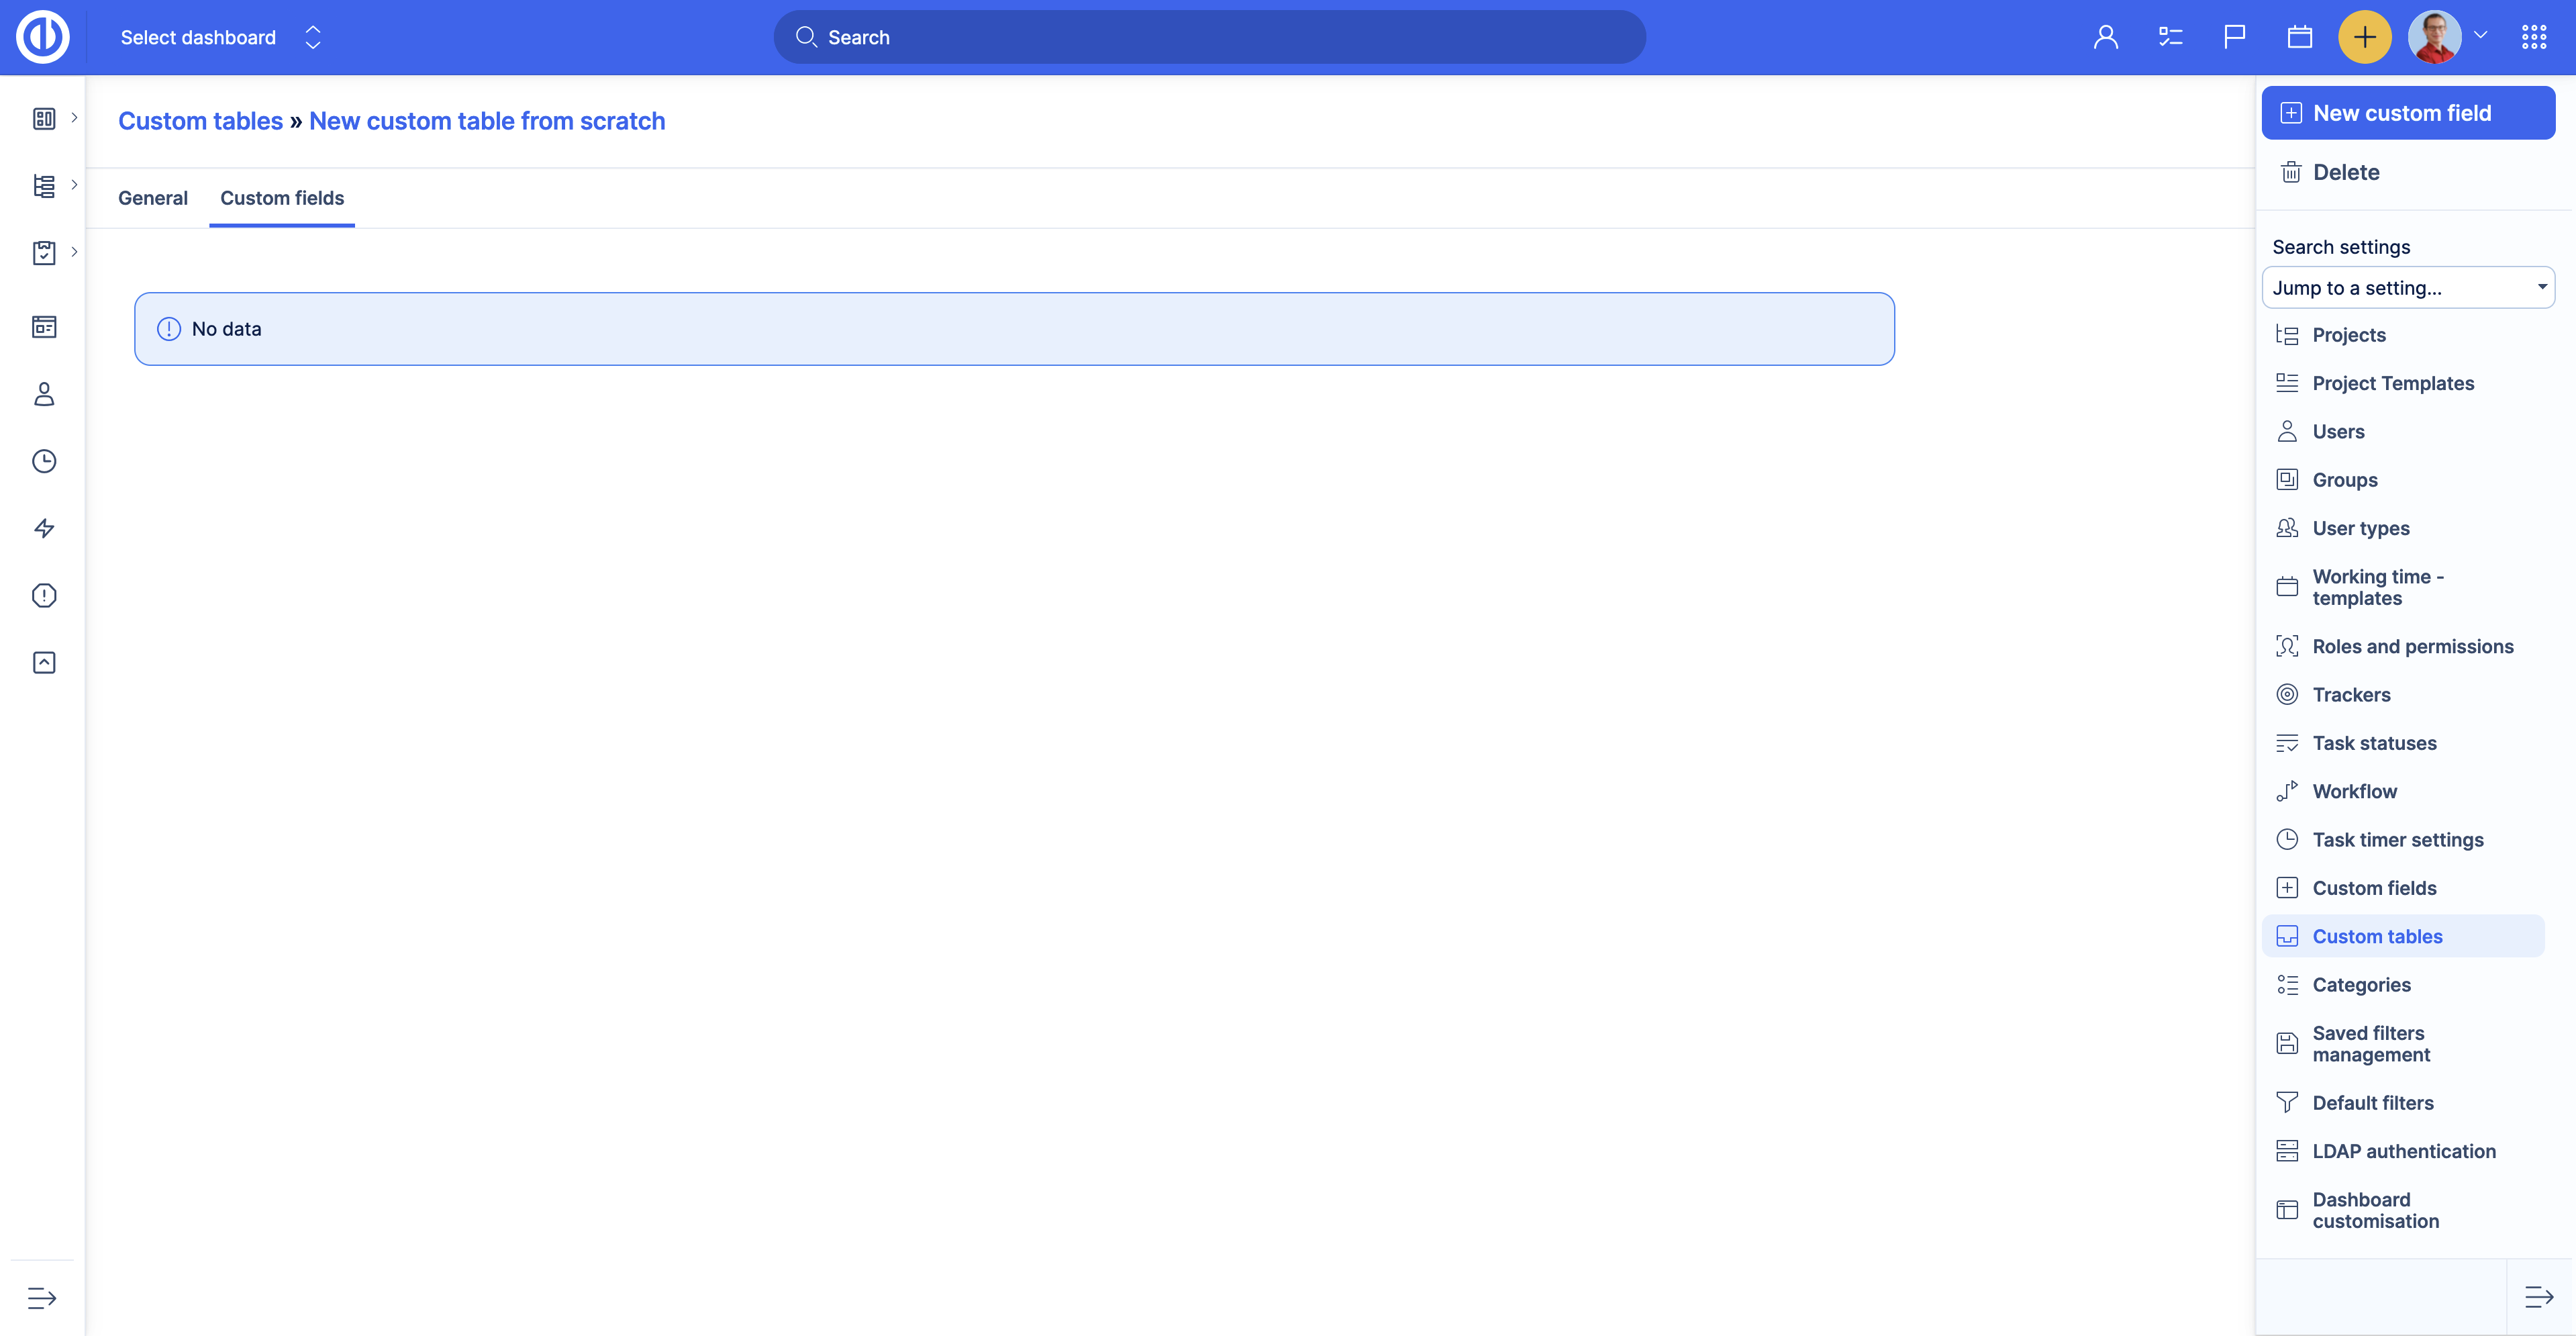
Add the custom fields you need in the Custom table. The Custom table is ready to use.
Example
Let’s say we have a big office with a lot of printers and we want to have an overview of all the devices in our Easy Project application.
First, we need to create a custom table to store the data about our printers. We go to the Administration >> Custom tables page and click the New custom table button.
After that, we set up our table.
- Name - Printers.
- Type - Asset management.
- Icon - Printer icon.
- Description - All printers that are used in the office.
- Relations - We are not sure about the relations we need at this point, so we skip this setting.
- Visible - We want anybody to see the table except the external workers. We select C-level, Project Management and Team Member roles.
- Editable - We want only the Project managers to edit the table. We select the Project Management Role.
Once the settings are ready, we click the Save button. We have successfully created the table.
How to create a custom table from a template
To create a custom table from a template, select the Quick template tab. After that check the available templates. Once you find the template you want to use, click the Select button.
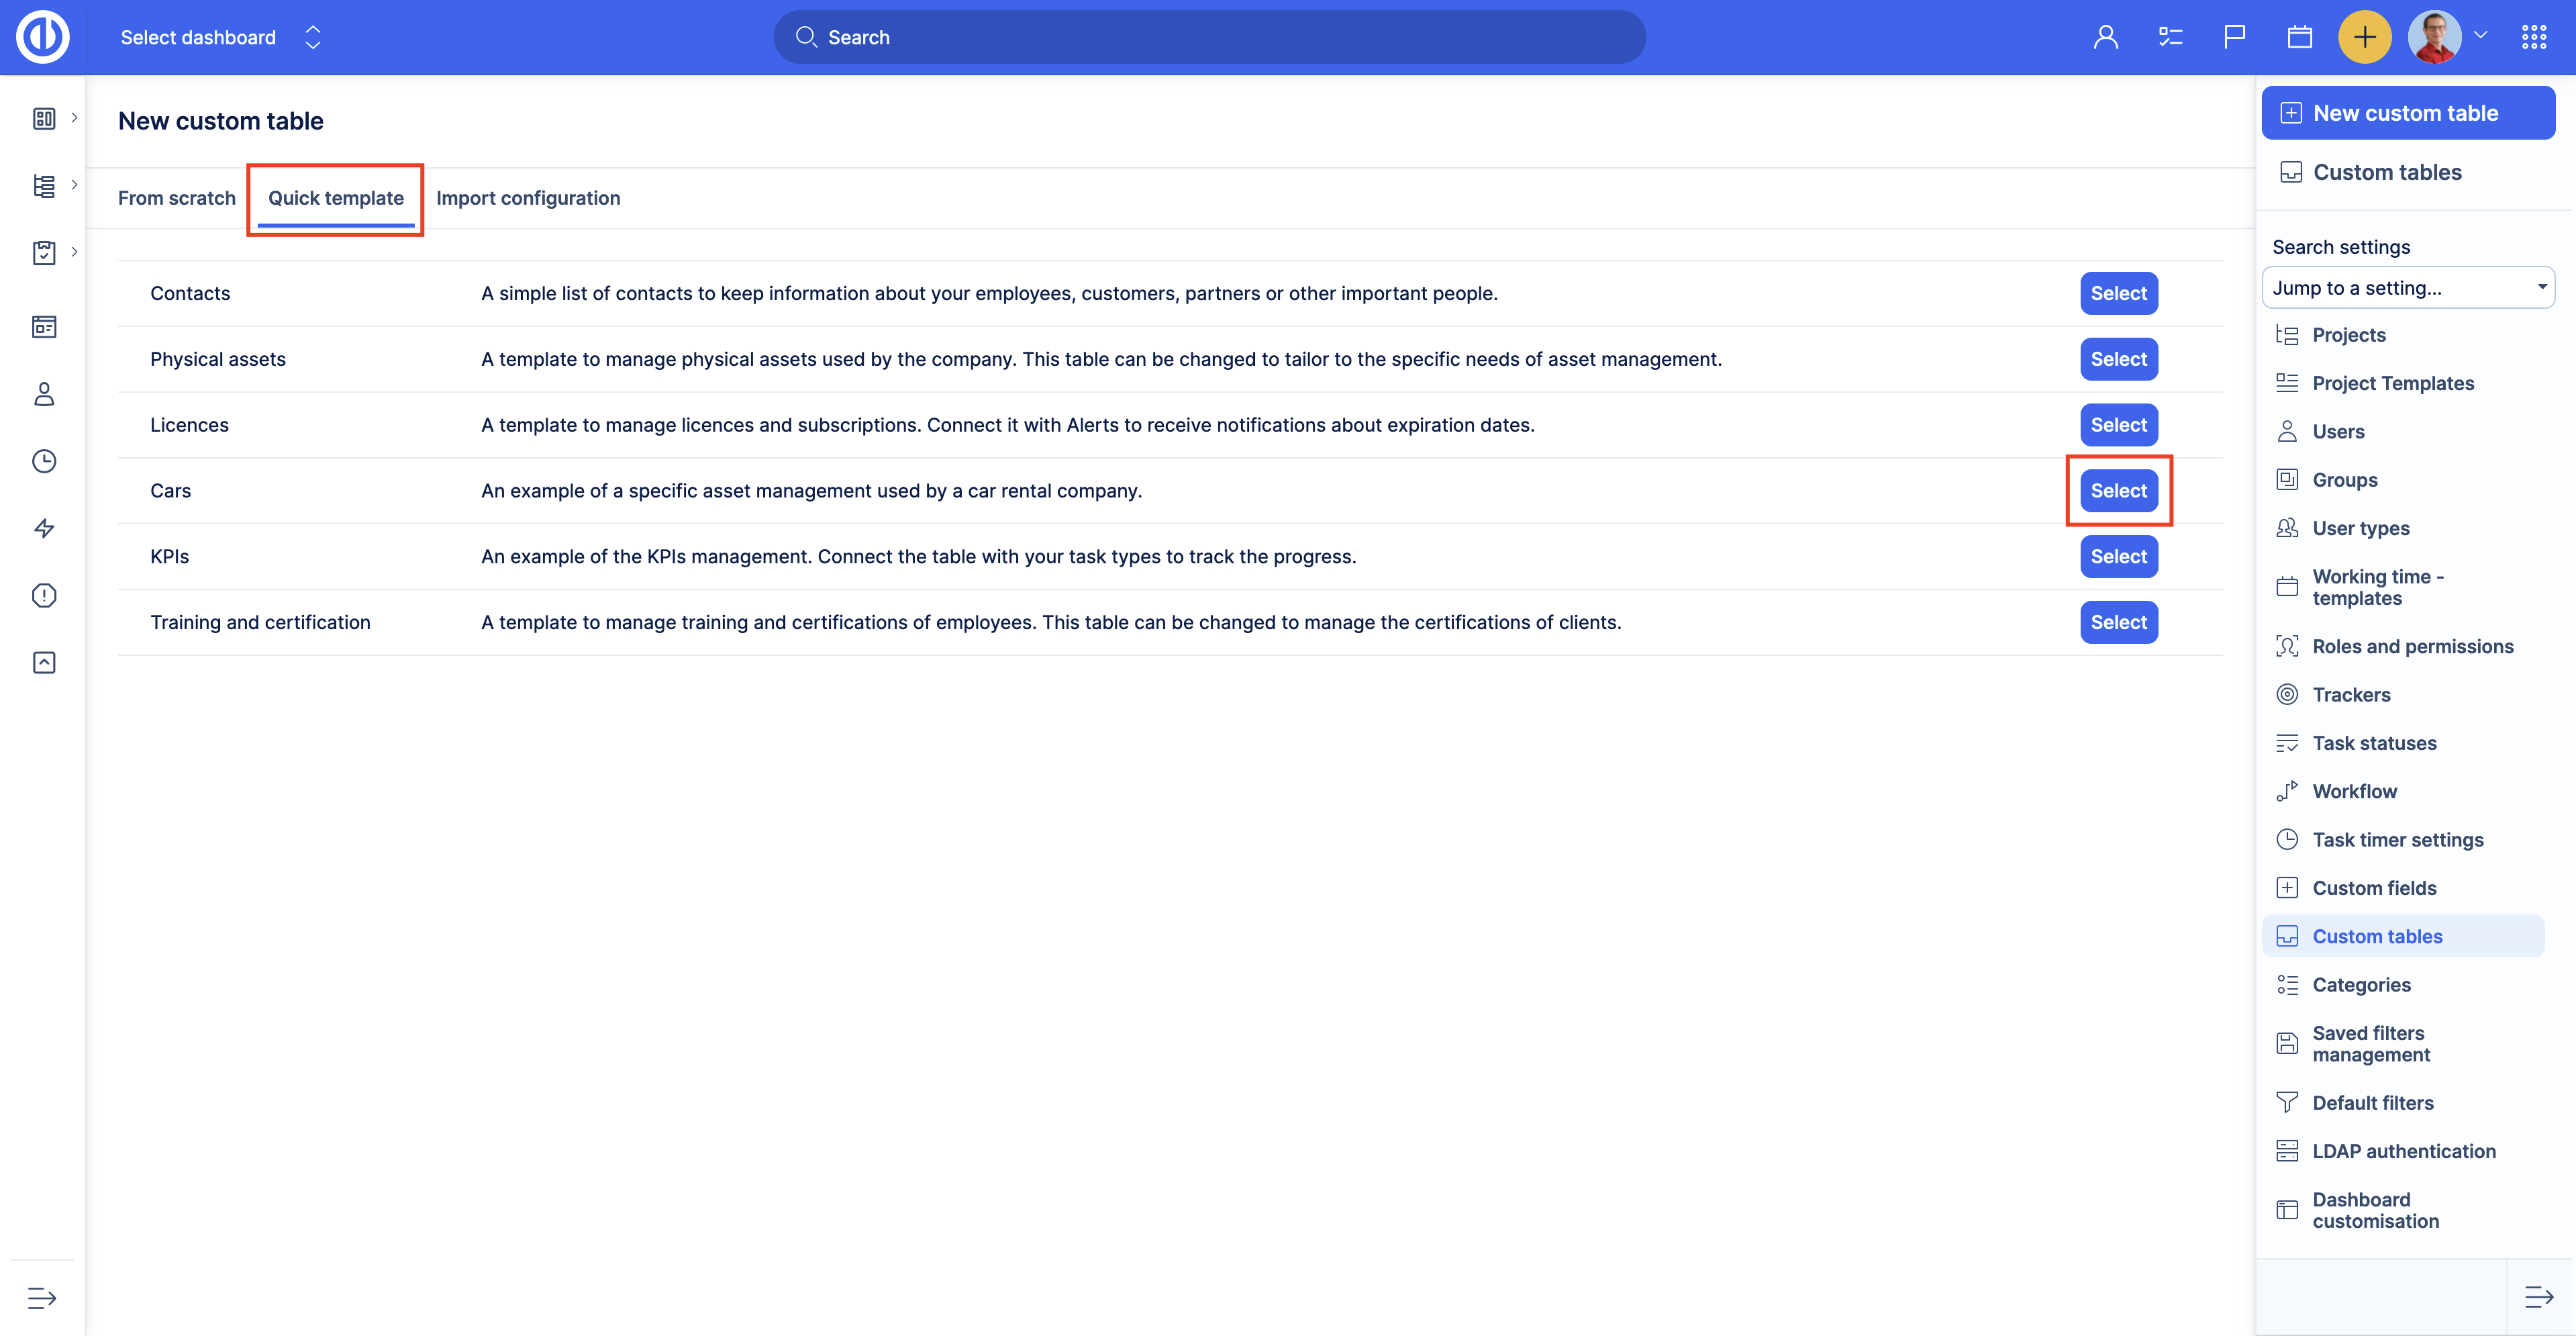
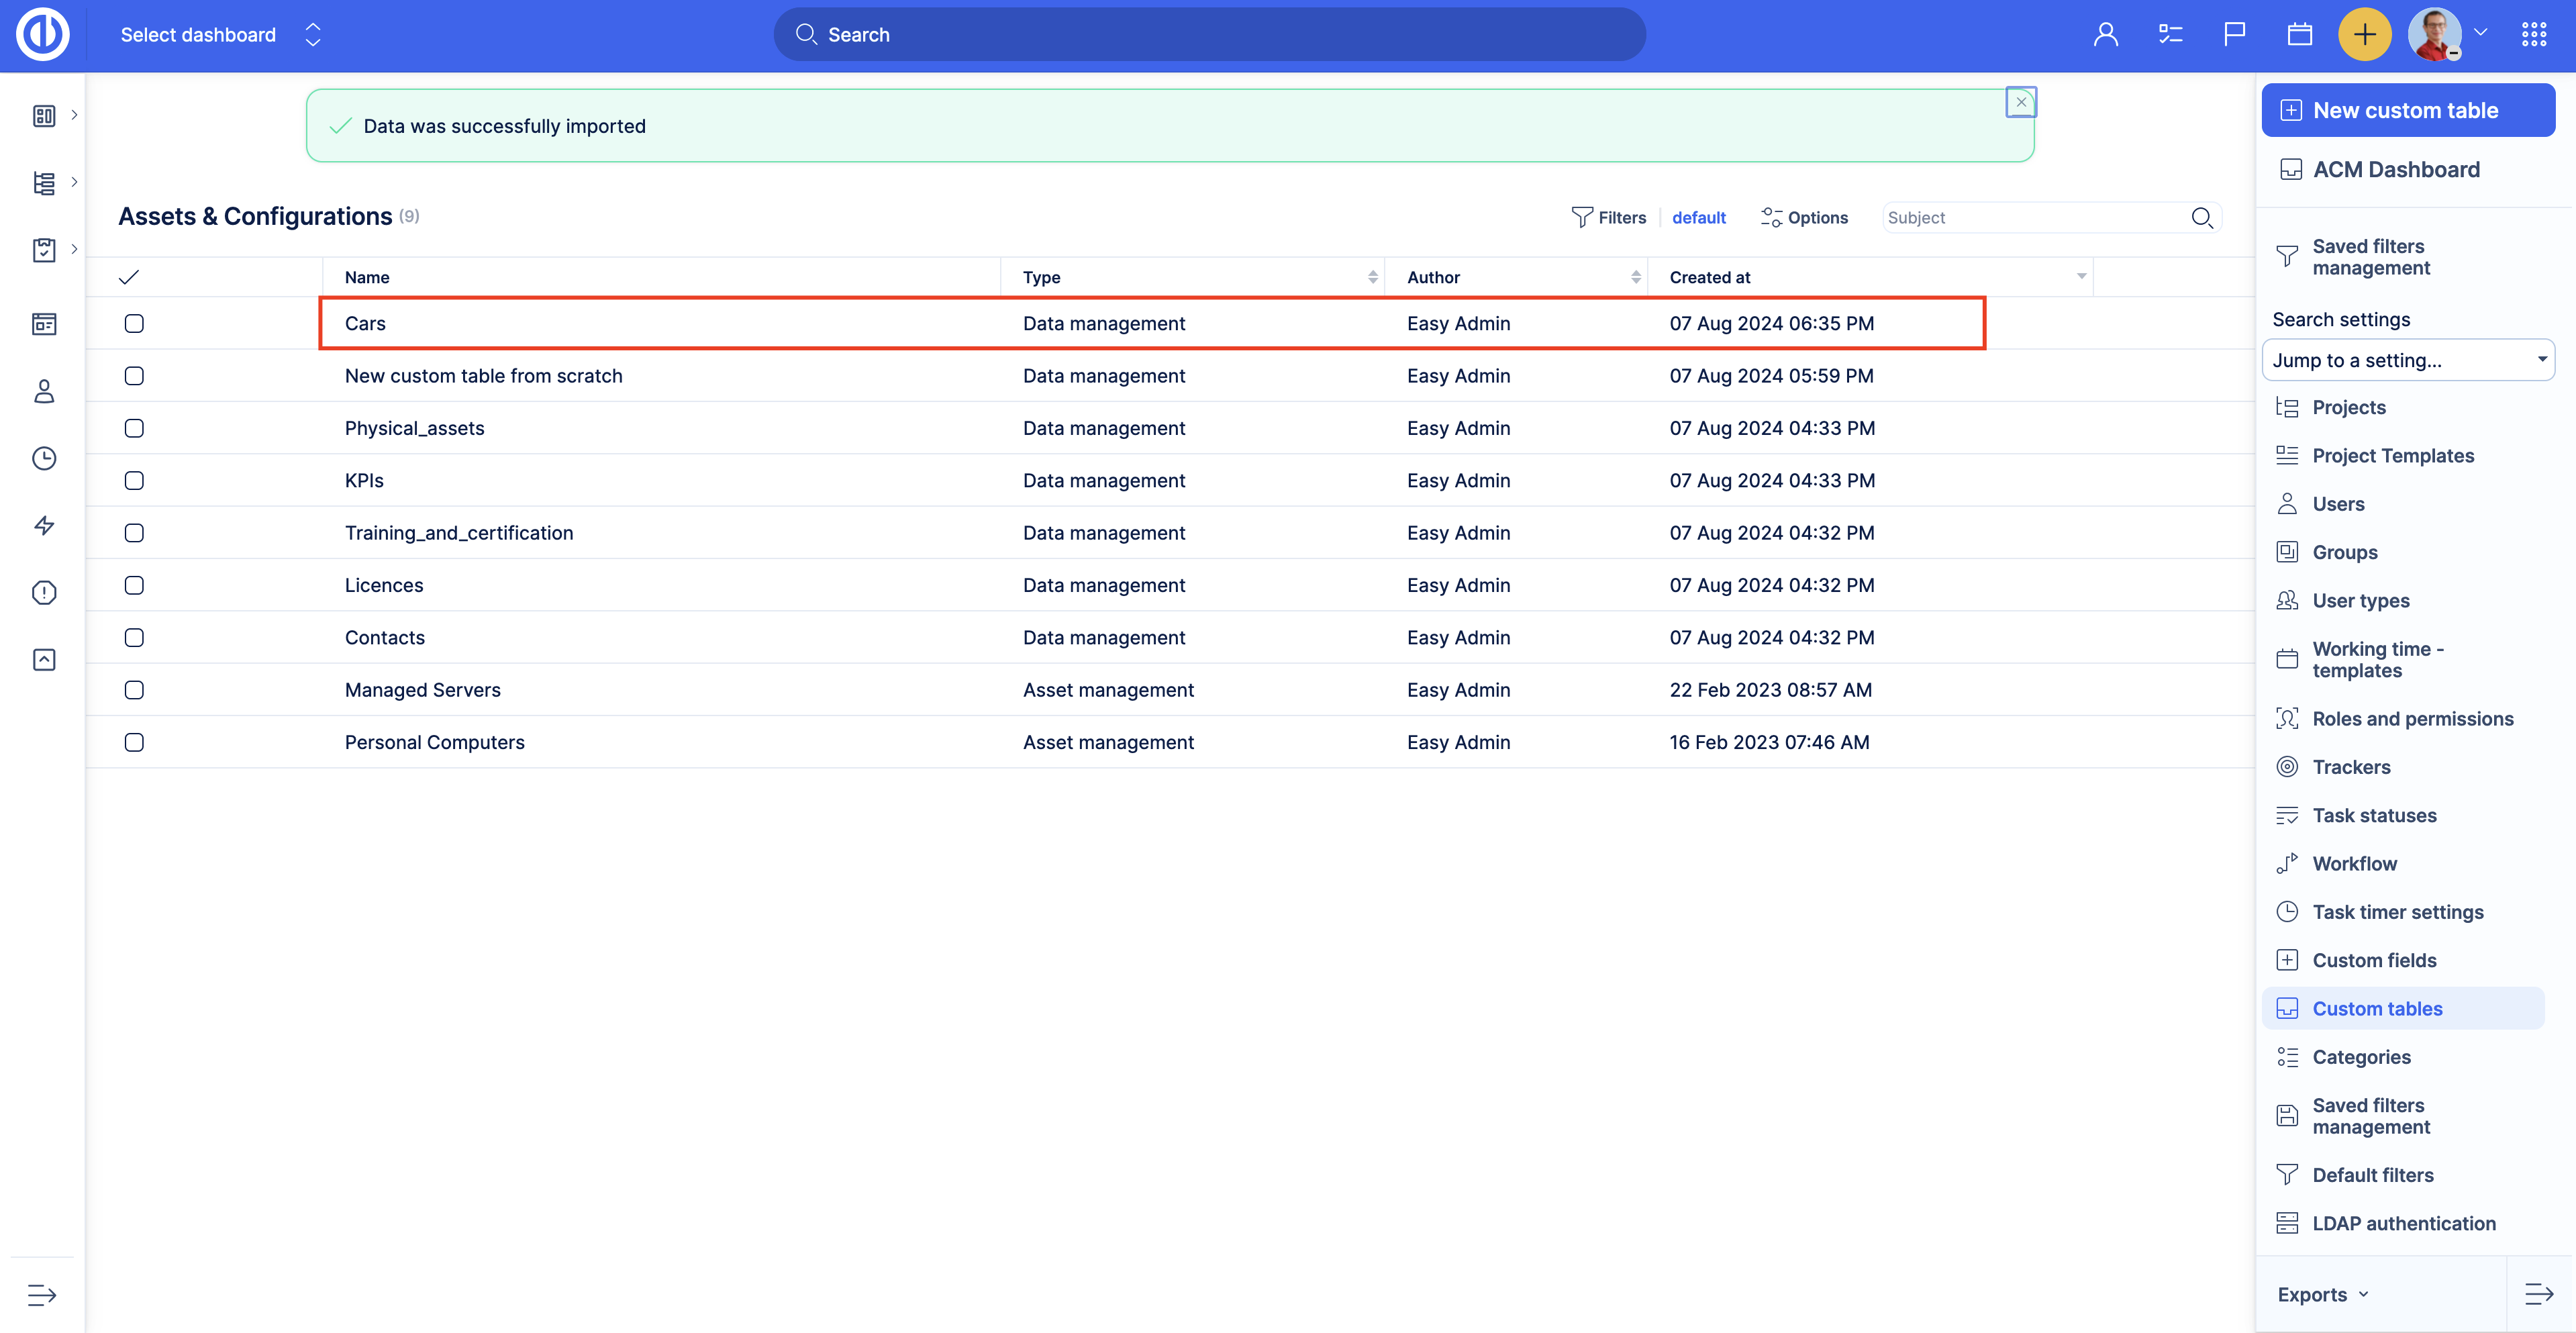
After clicking the Select button you will be redirected to the Custom tables list. The table is created and ready to use. However, you have the full control of the table and can modify it as you need.
How to import a custom table
Custom table configuration can be exported. To do so, go to Administration >> Custom table. Hover the cursor over one of the custom tables. Click the three dots button, then click Export configuration.
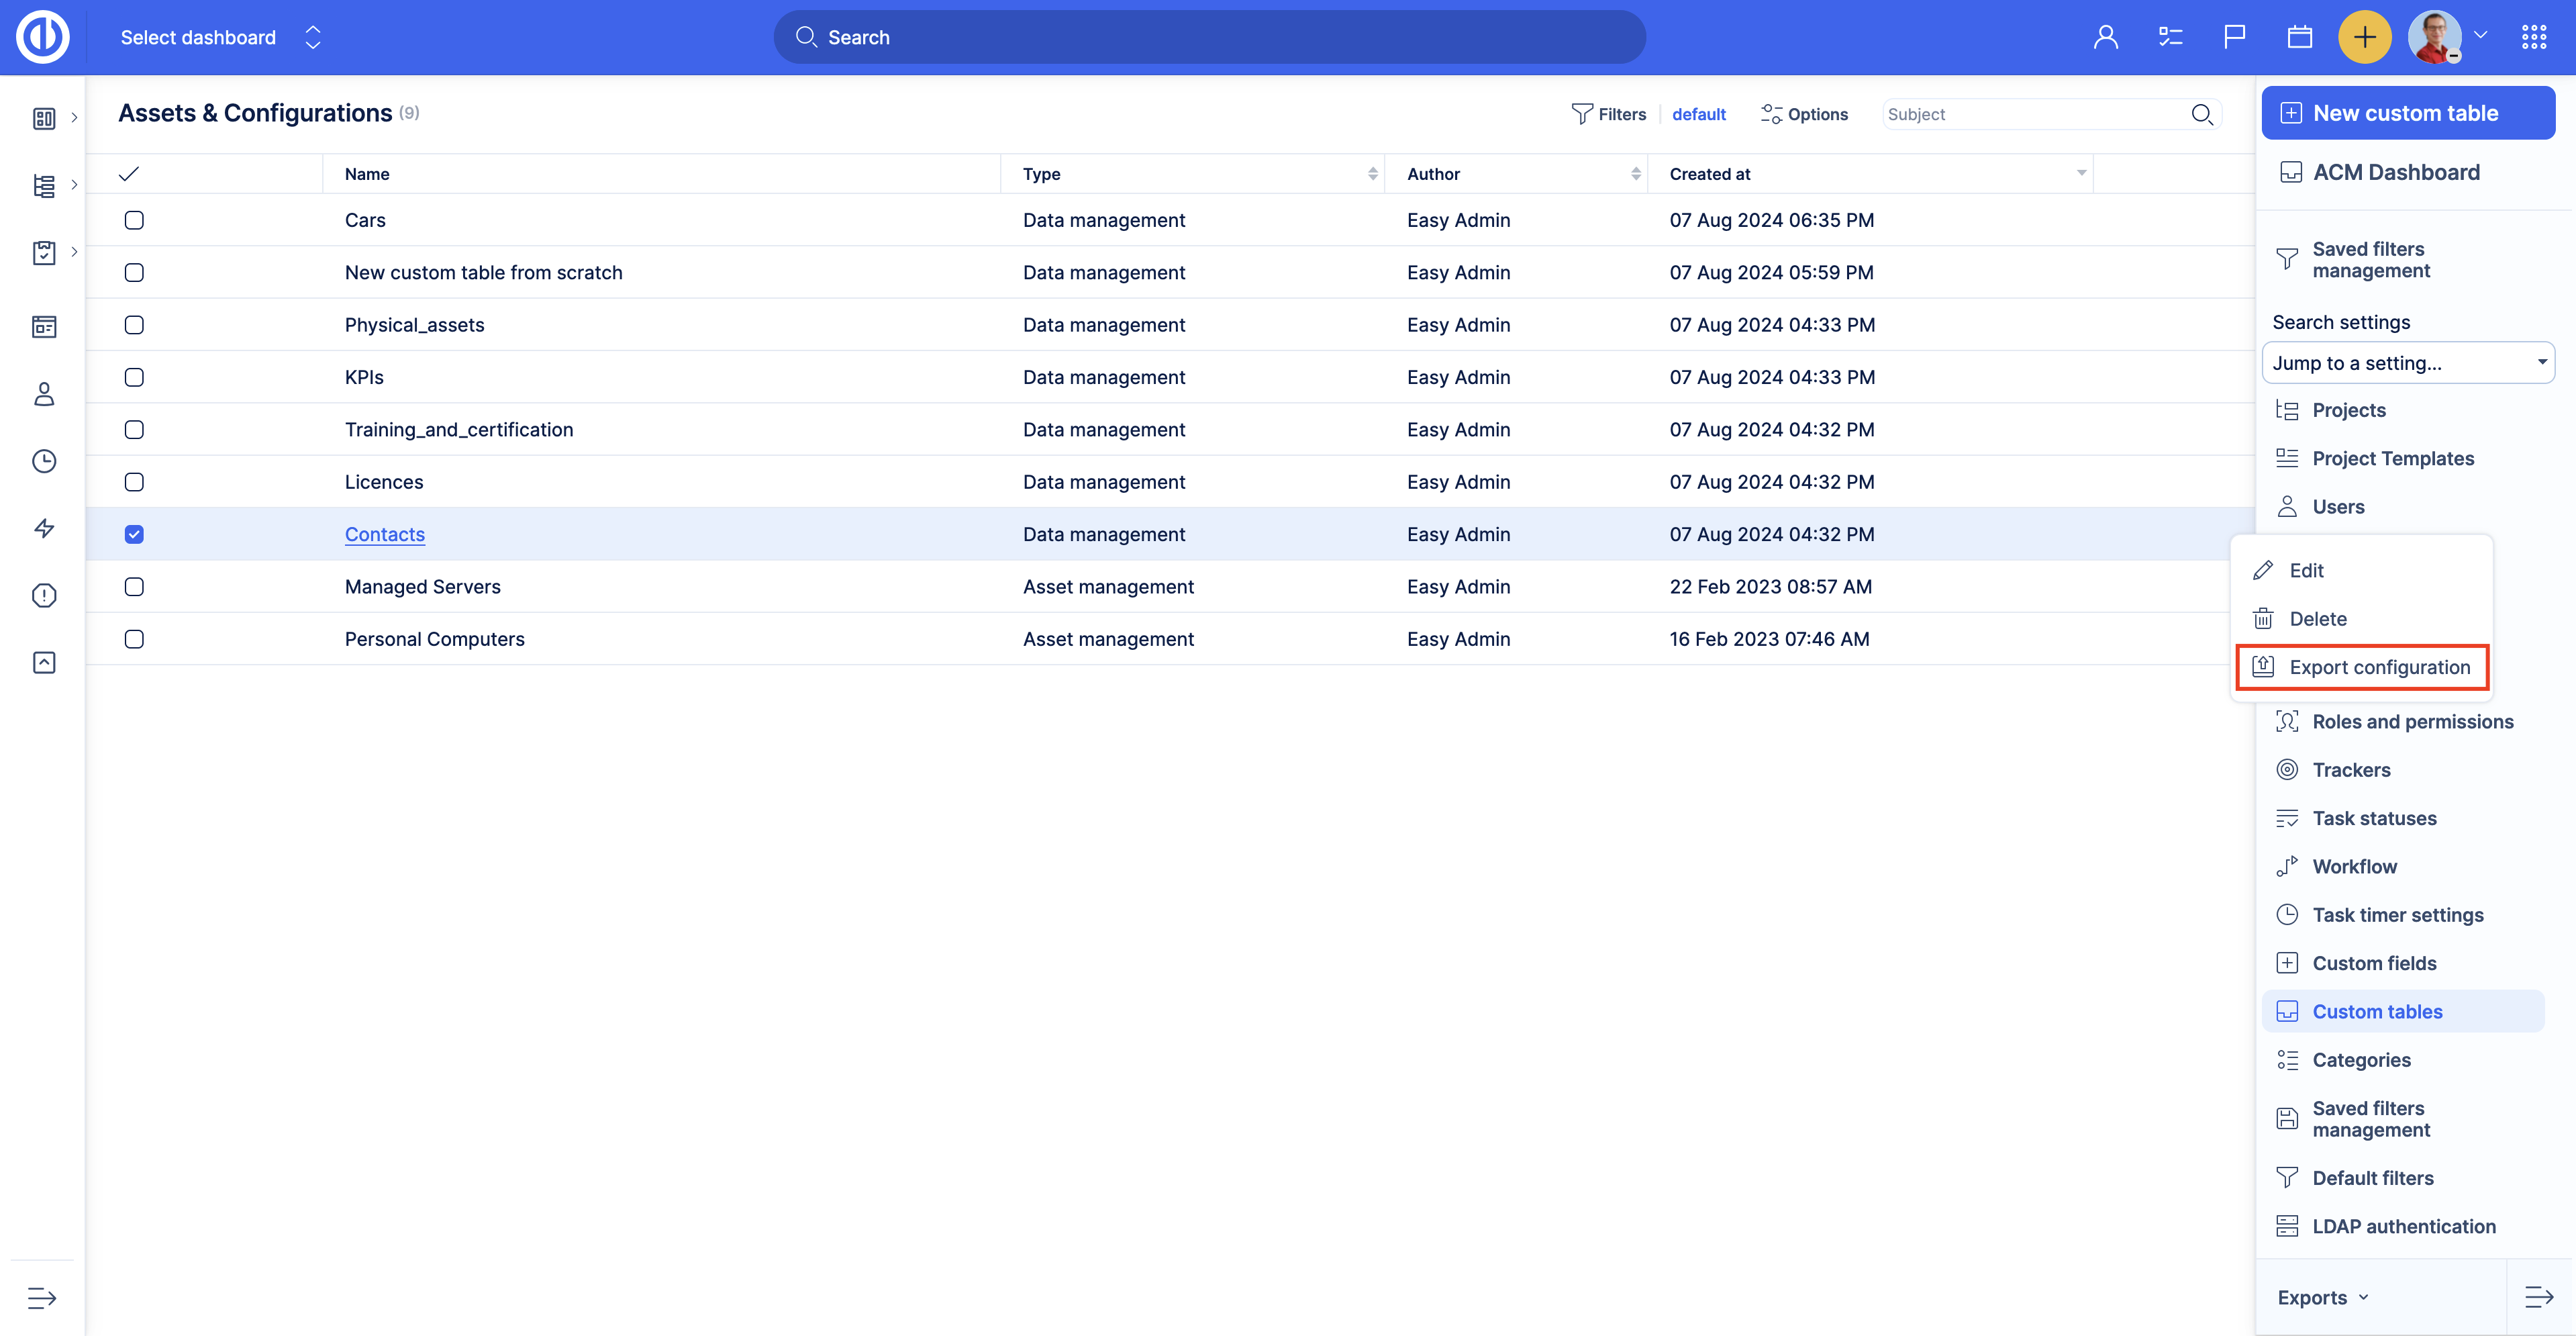
A .zip file will be downloaded to your device. This file contains custom table settings including data structure (custom fields). Please note, that this file doesn’t contain the custom records (table’s data), it is a configuration file only.
To import a custom table configuration, select the Import configuration tab. Click the Browse button. Select the configuration file.
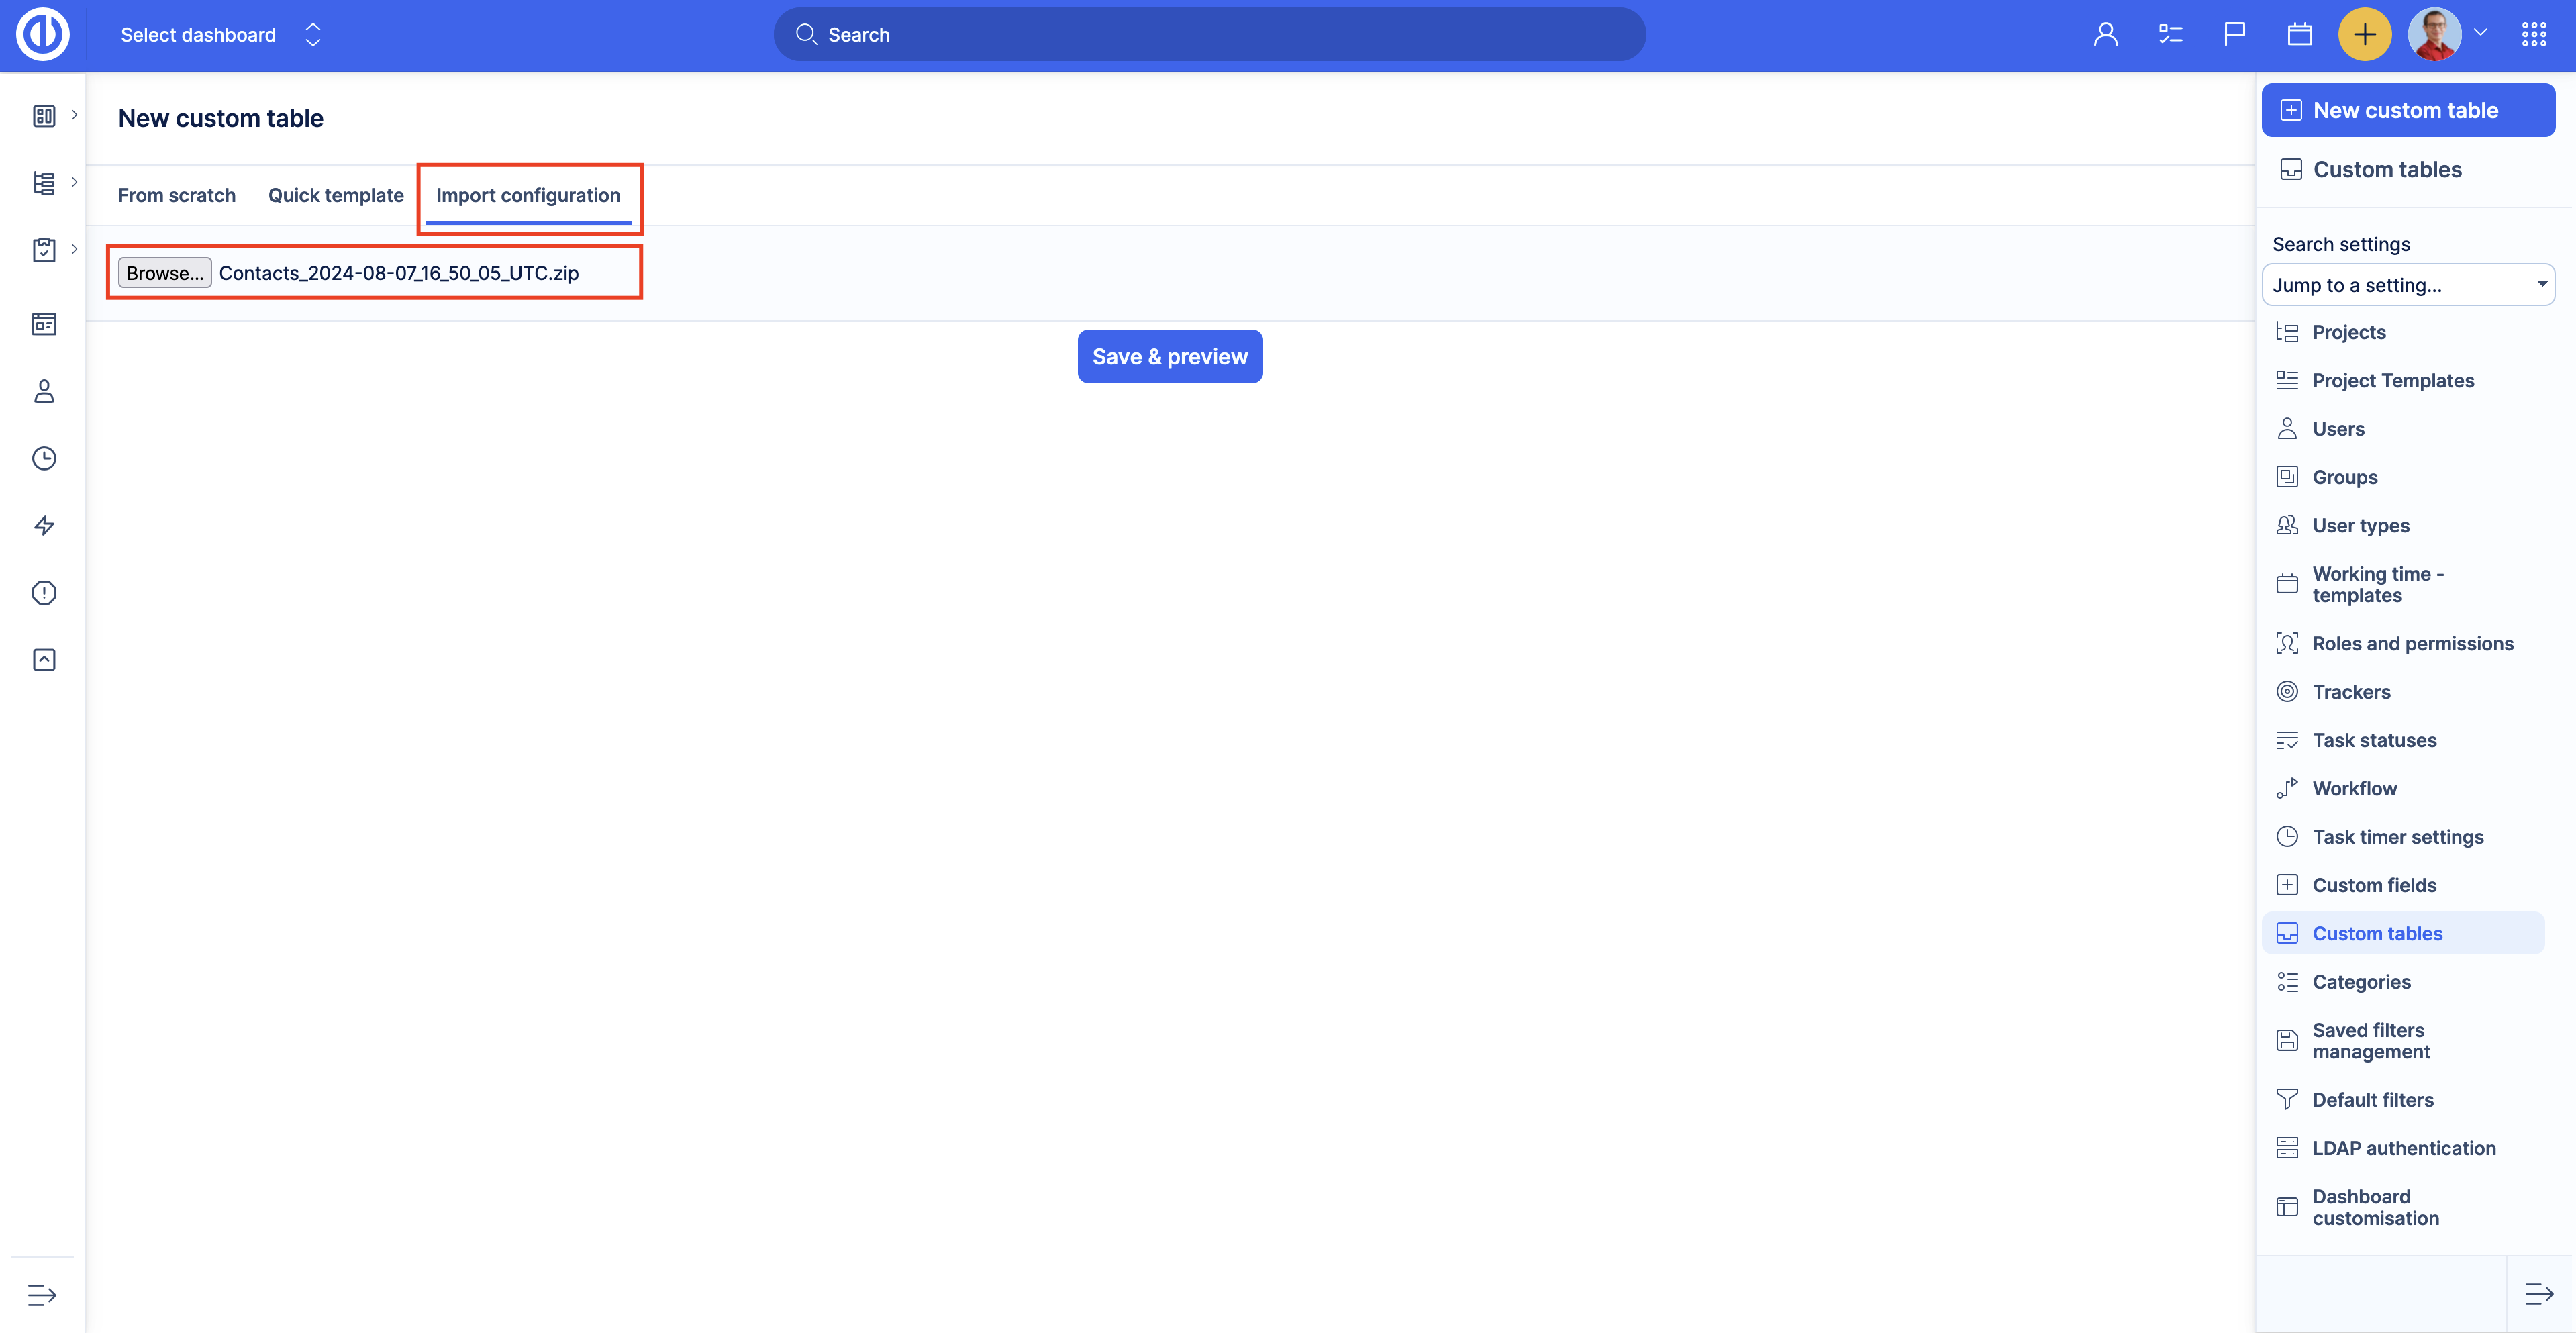
Then click the Save & preview button. Check the custom table name and the file and click Import. Should you find any mistake, click Cancel.
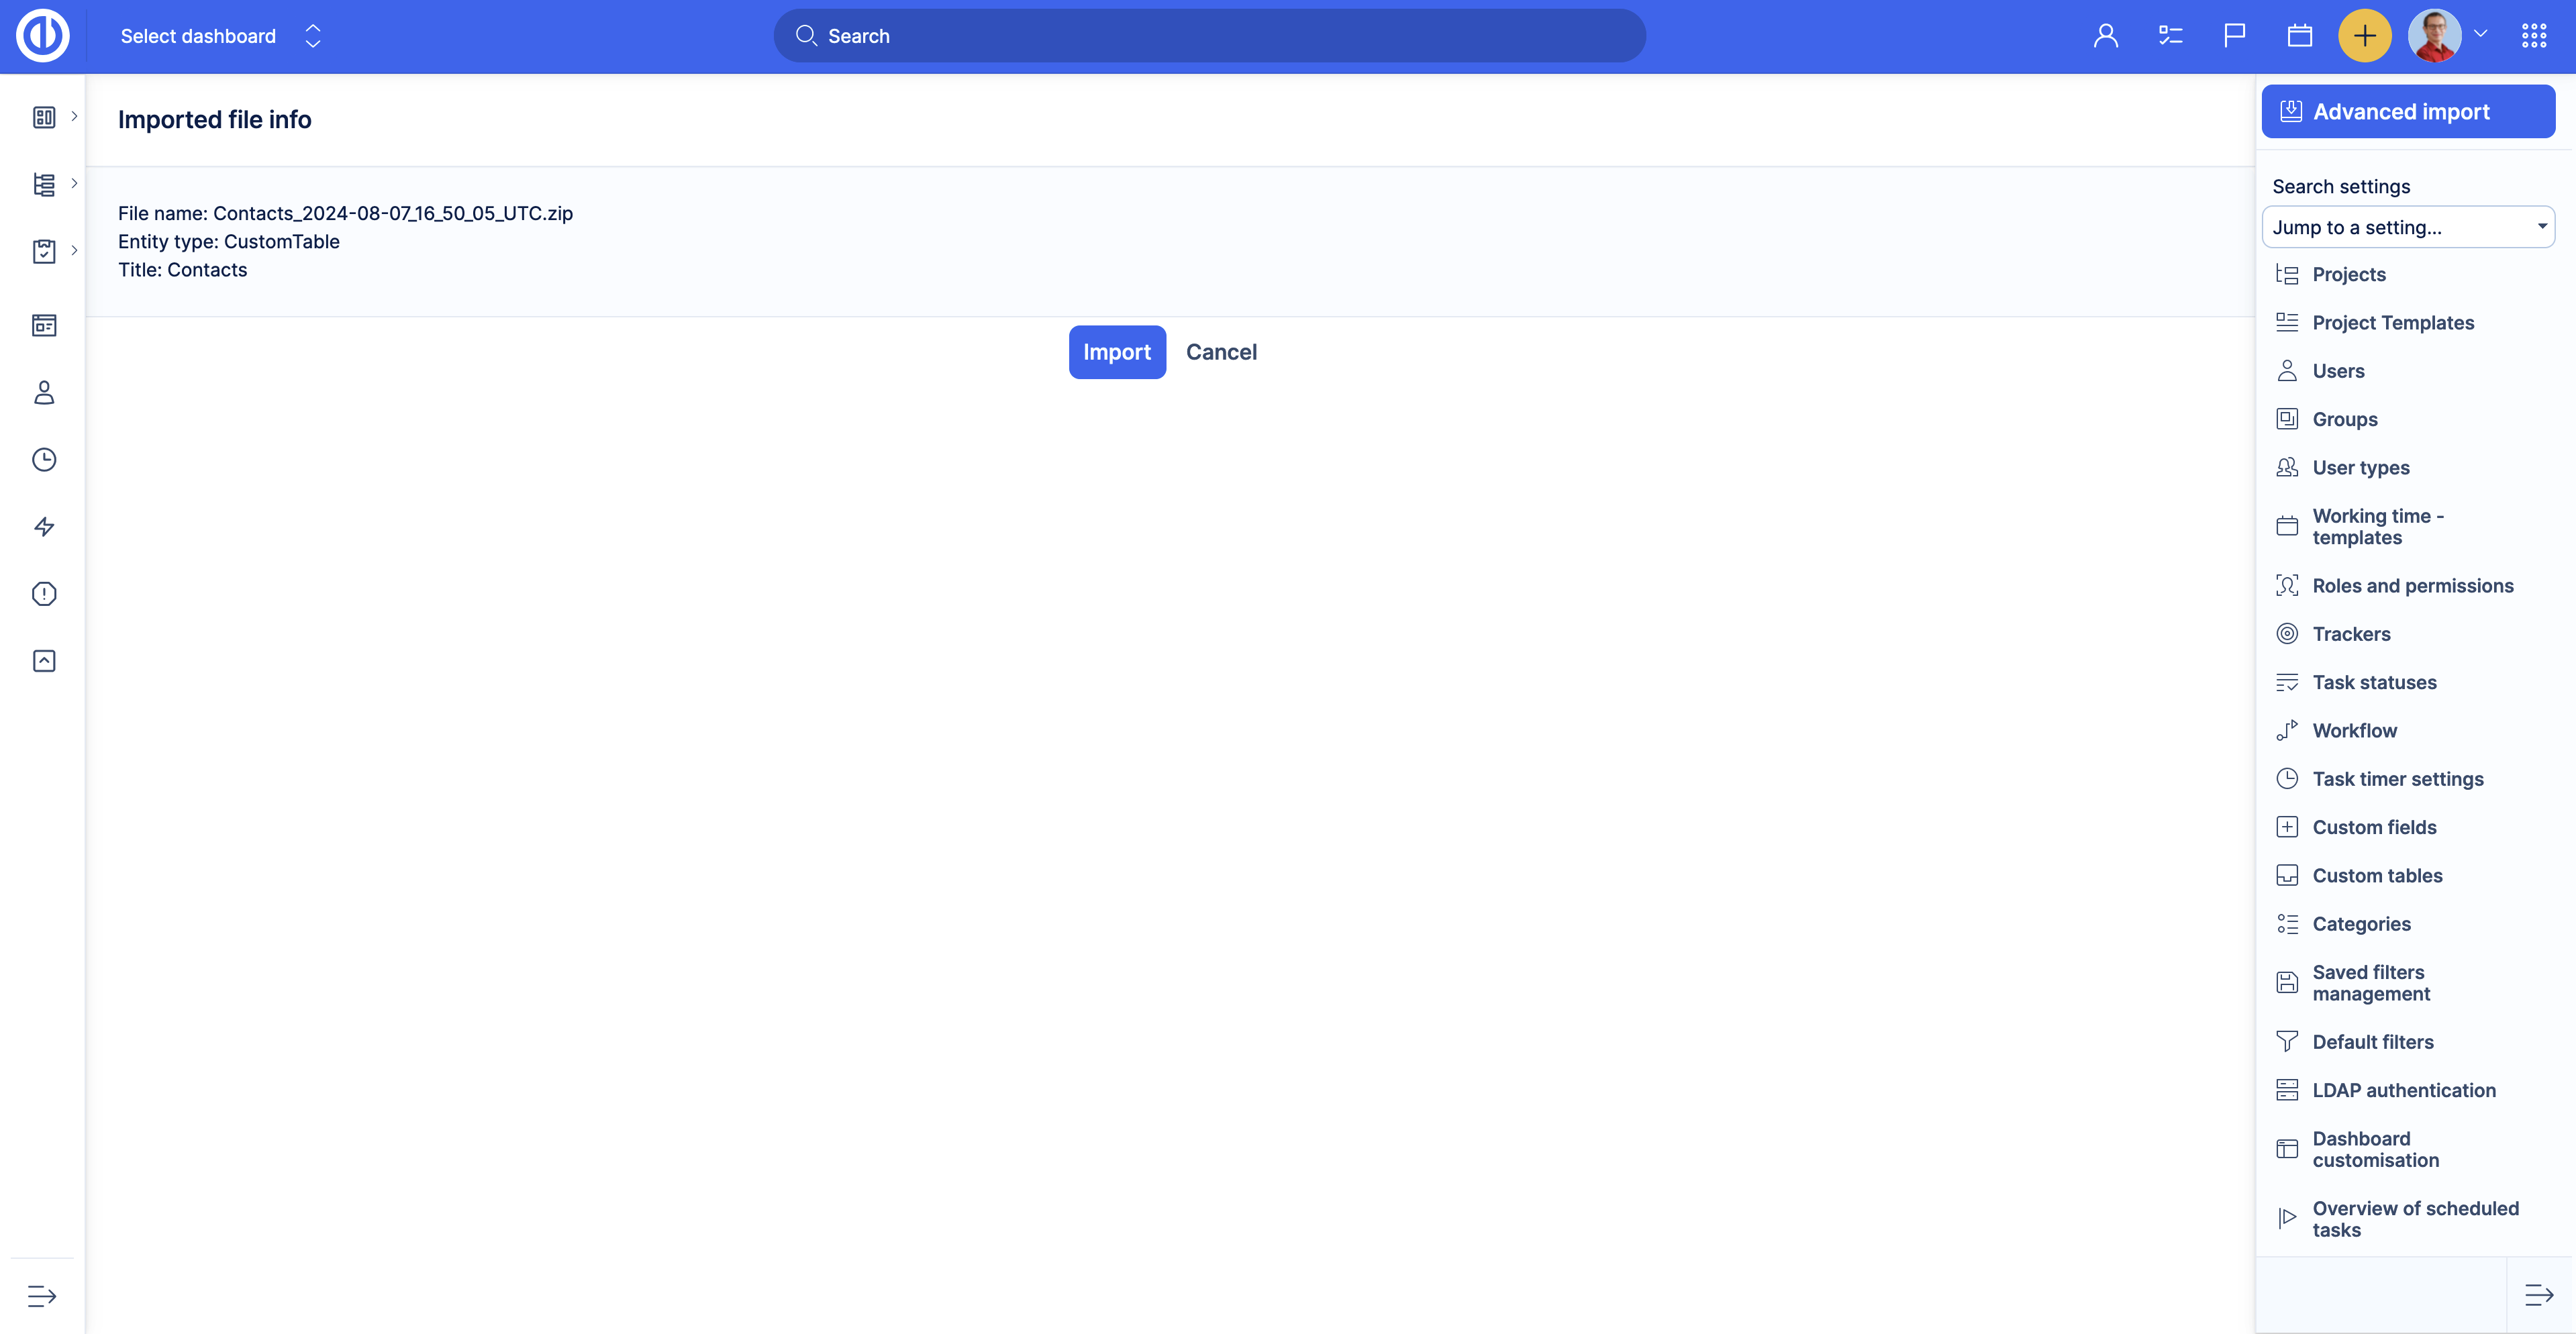
The custom table is imported and ready to use. Don’t worry if you have a custom table with the same name, the system will automatically add an index to the custom table name.

How to add custom fields to custom tables
The Custom tables are formed with one native field Name which cannot be deleted and custom fields. There is no limit to the number of custom fields you can add per Custom table. However, we recommend adding the necessary fields only as the best practice. The more fields you add, the more time it will take to show queries, dashboards etc.
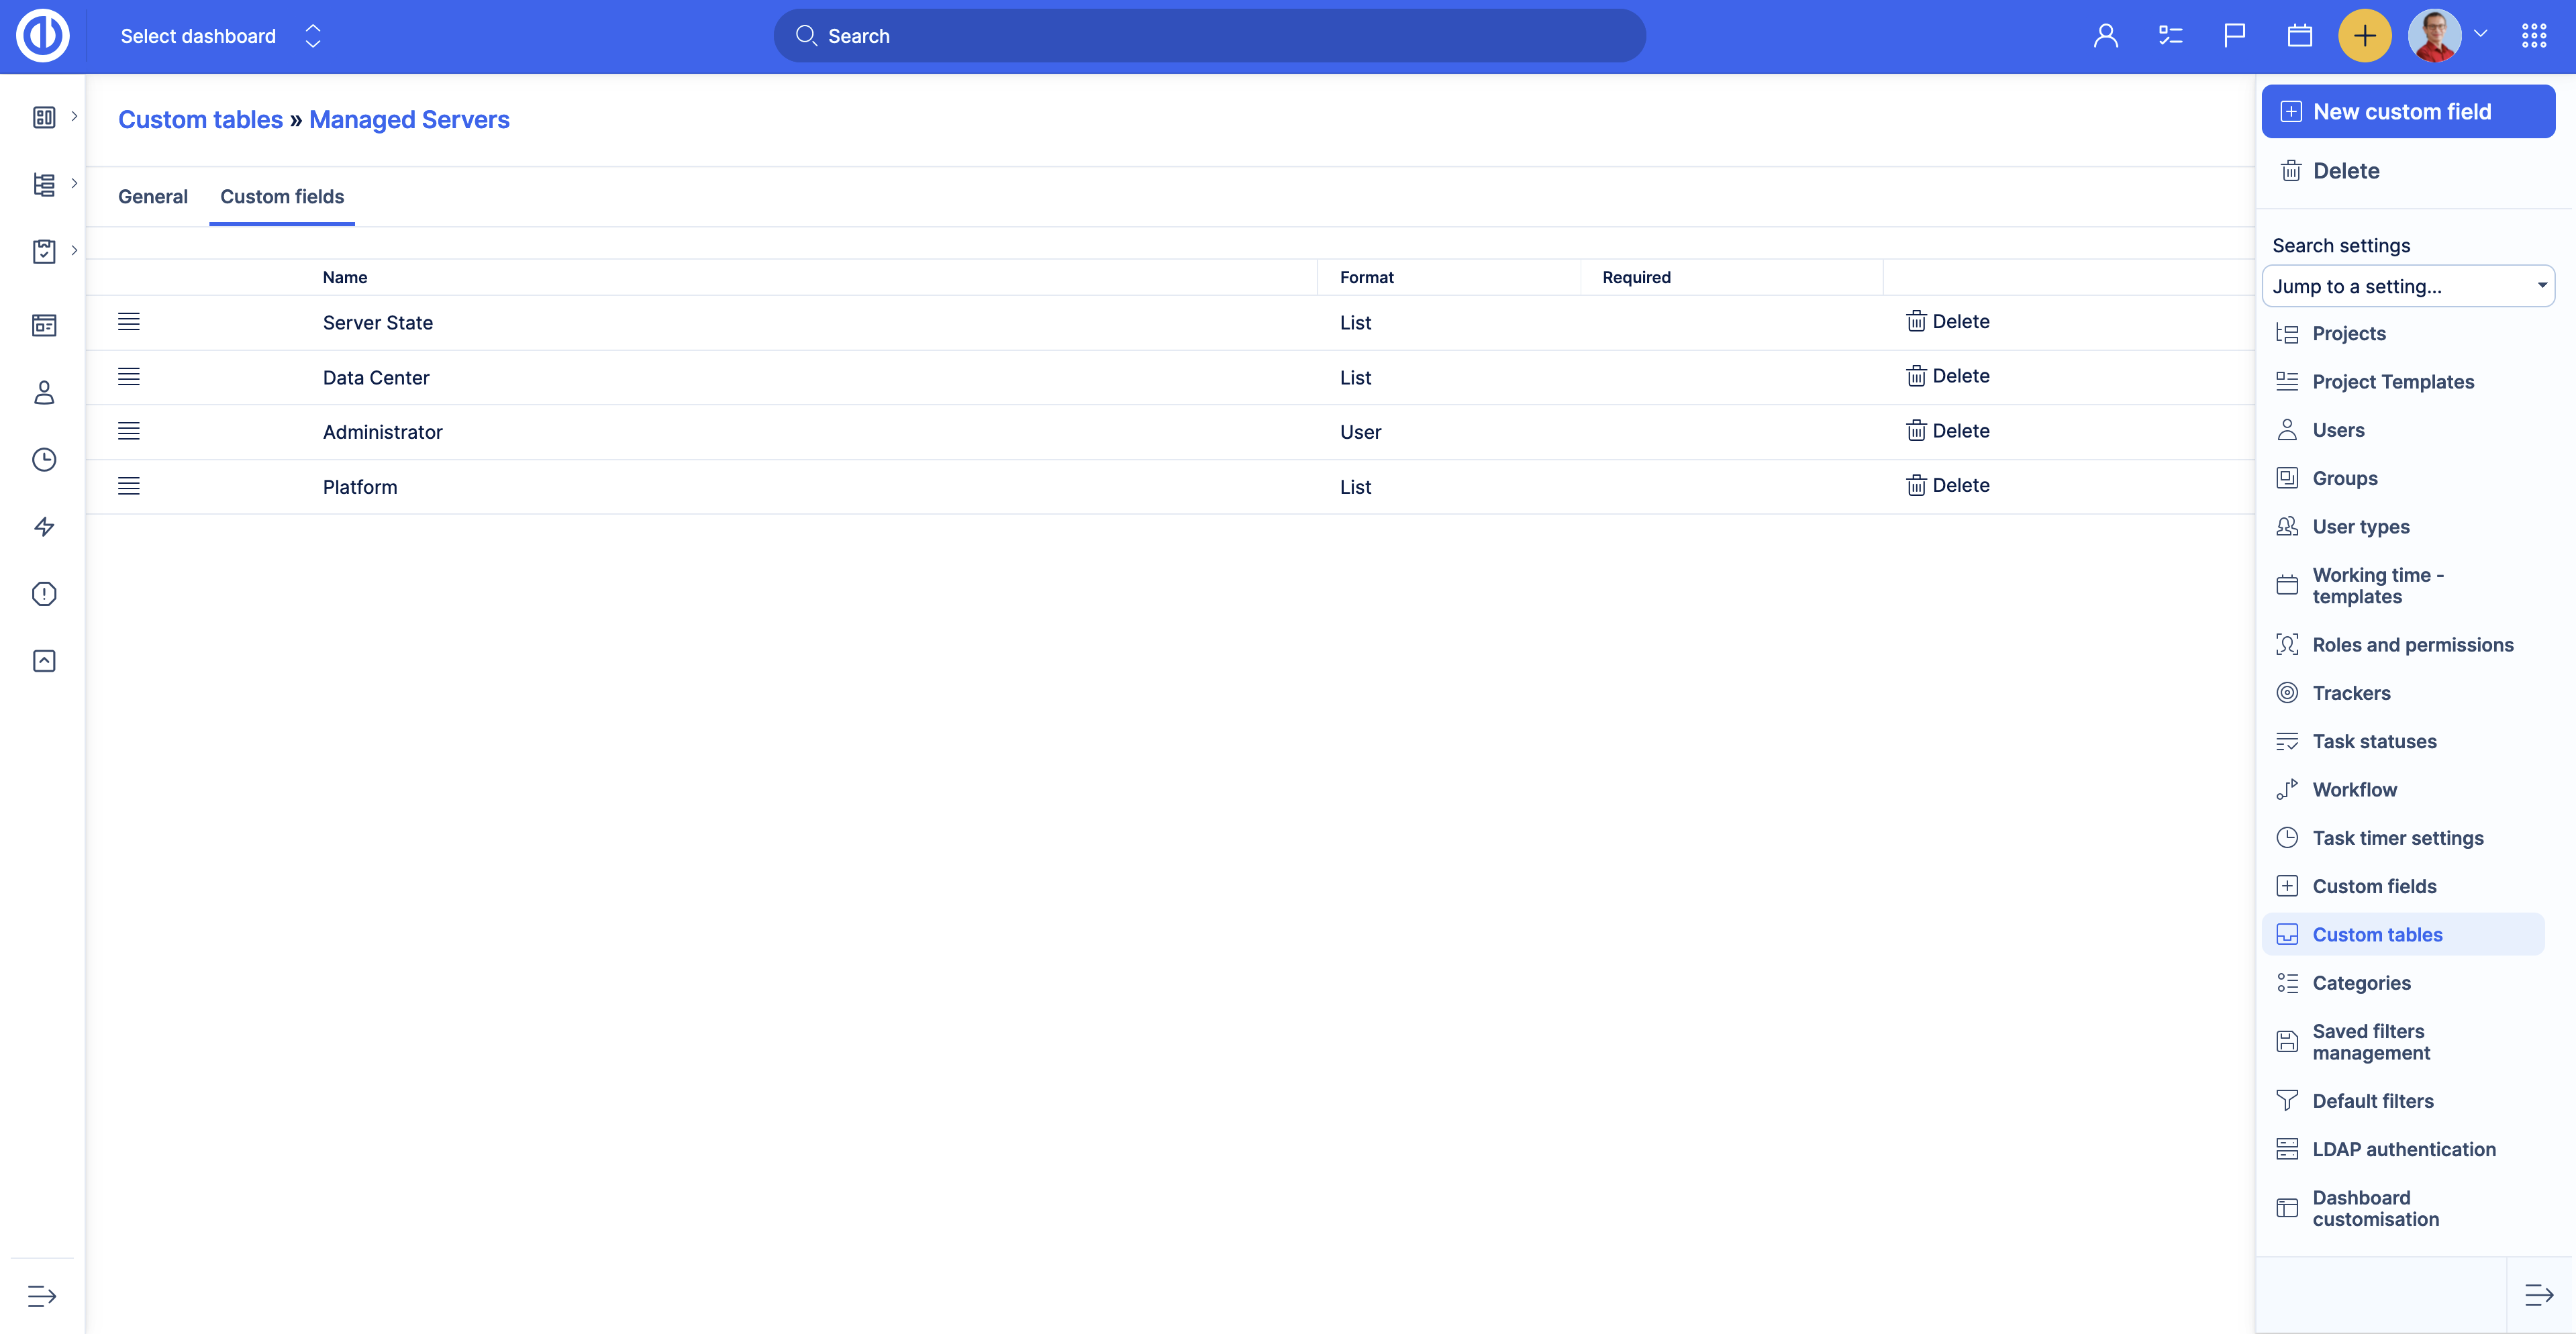
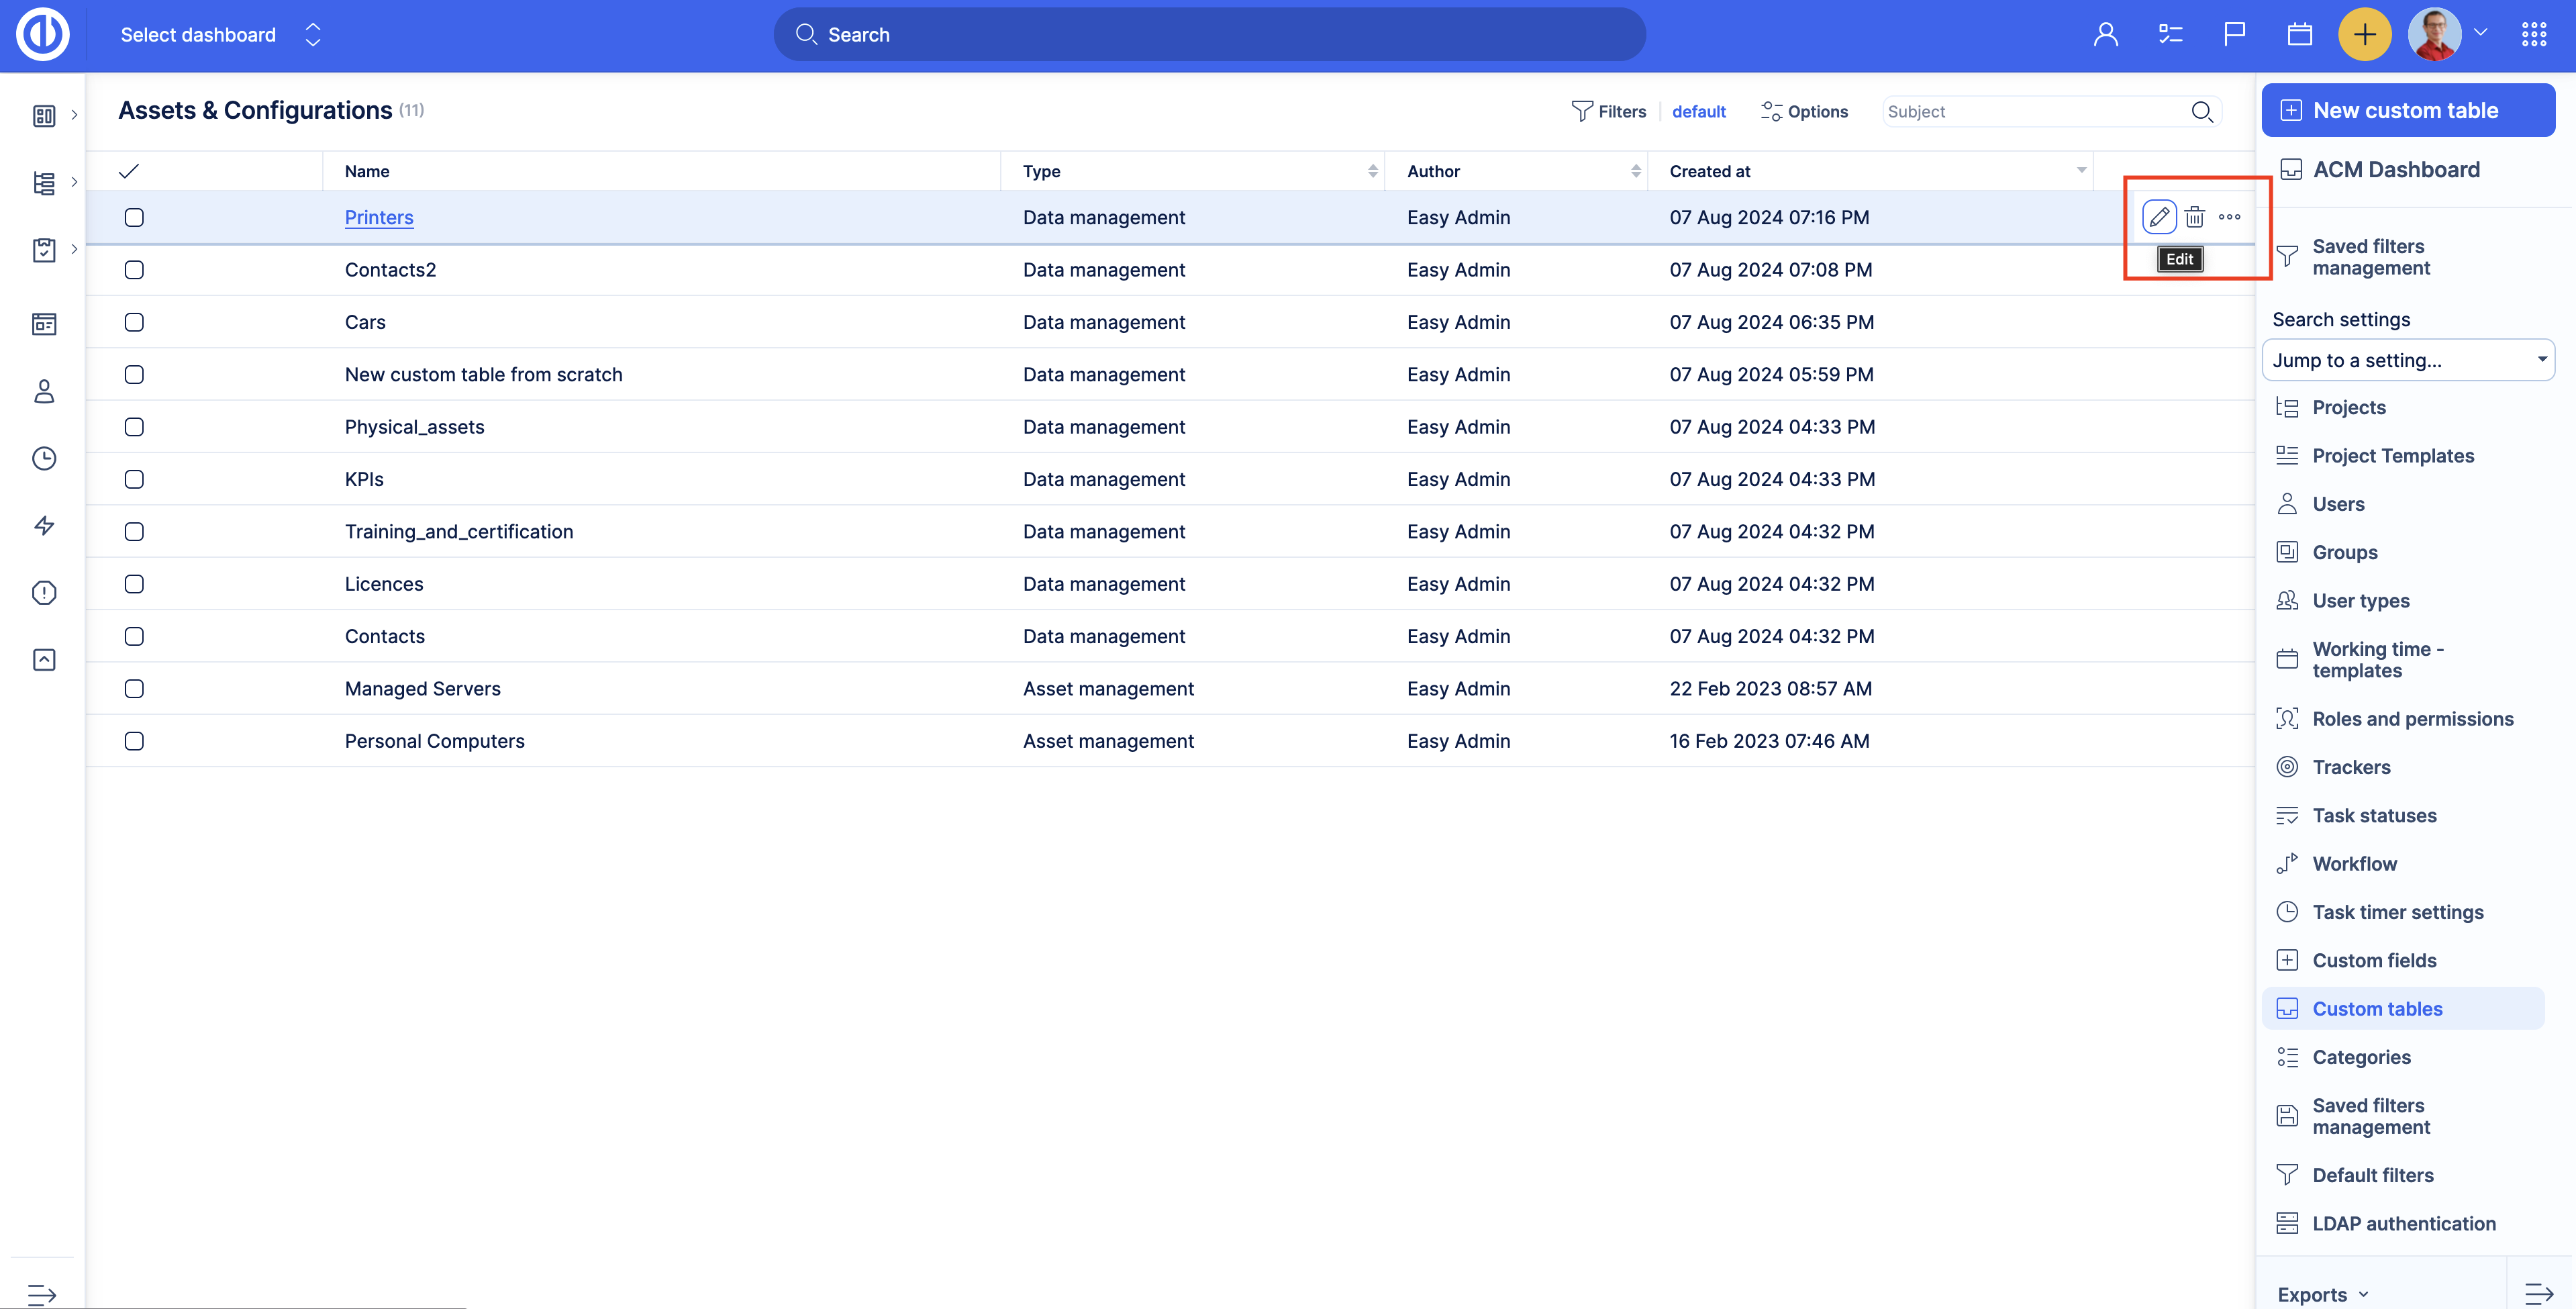
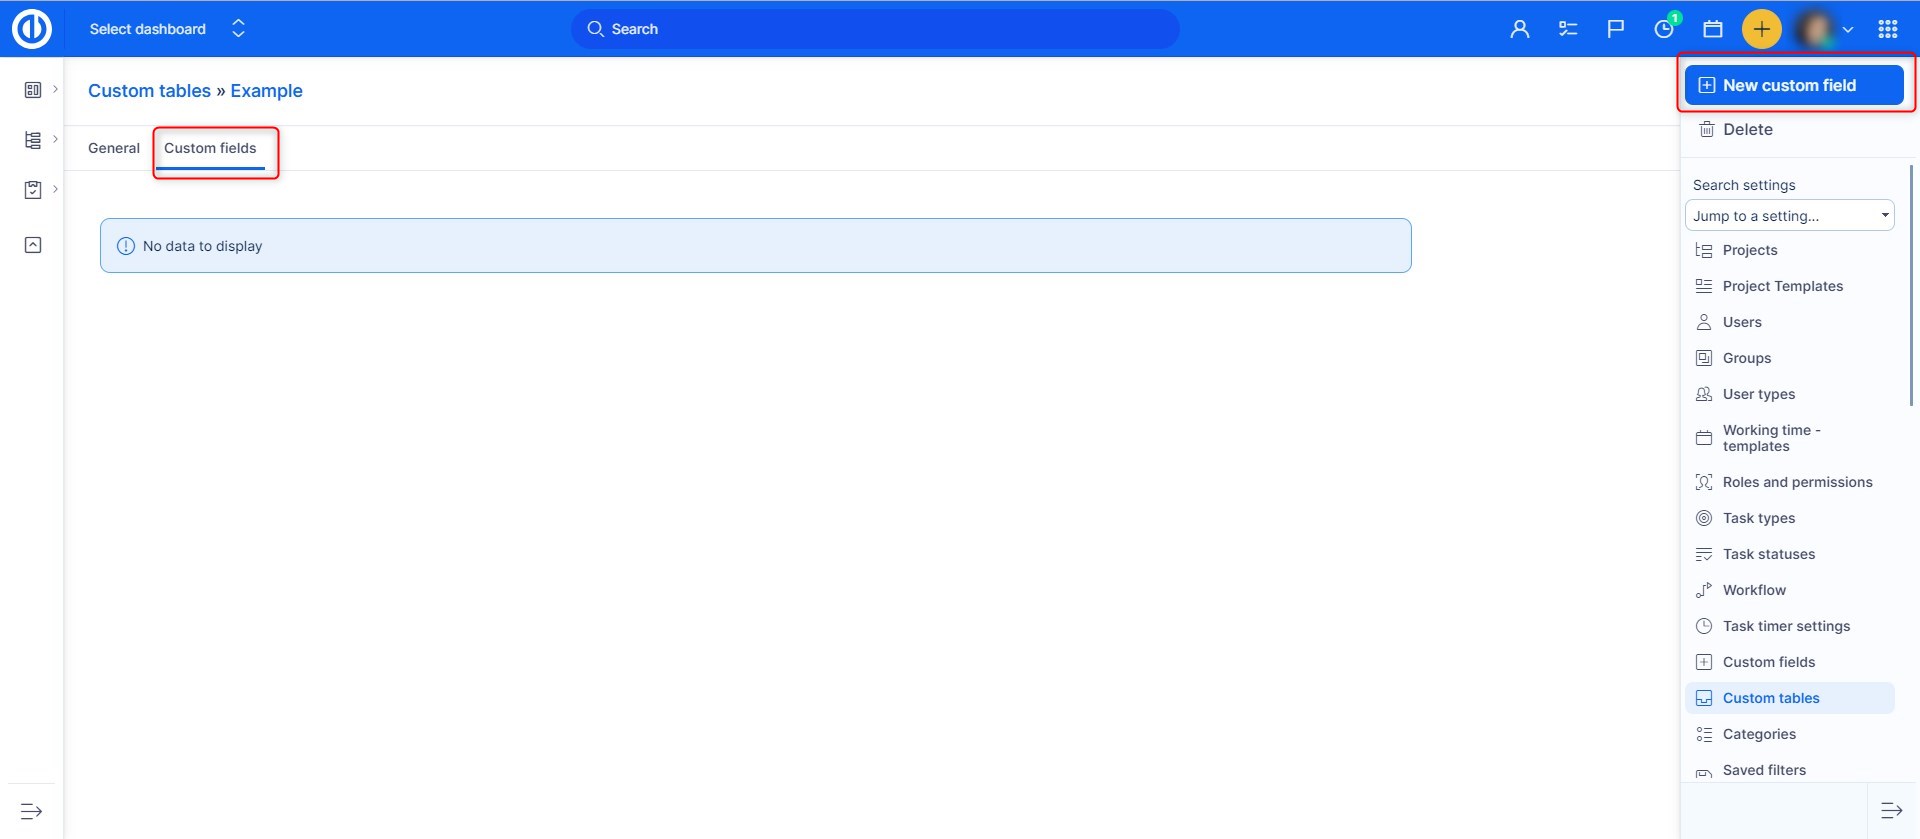
To add custom fields to the custom table go to the custom table settings page. Administration >> Custom tables, then click on the pencil icon on the right.
Then go to the Custom fields tab. On this page, you will see all the custom fields of the table (if there are any).
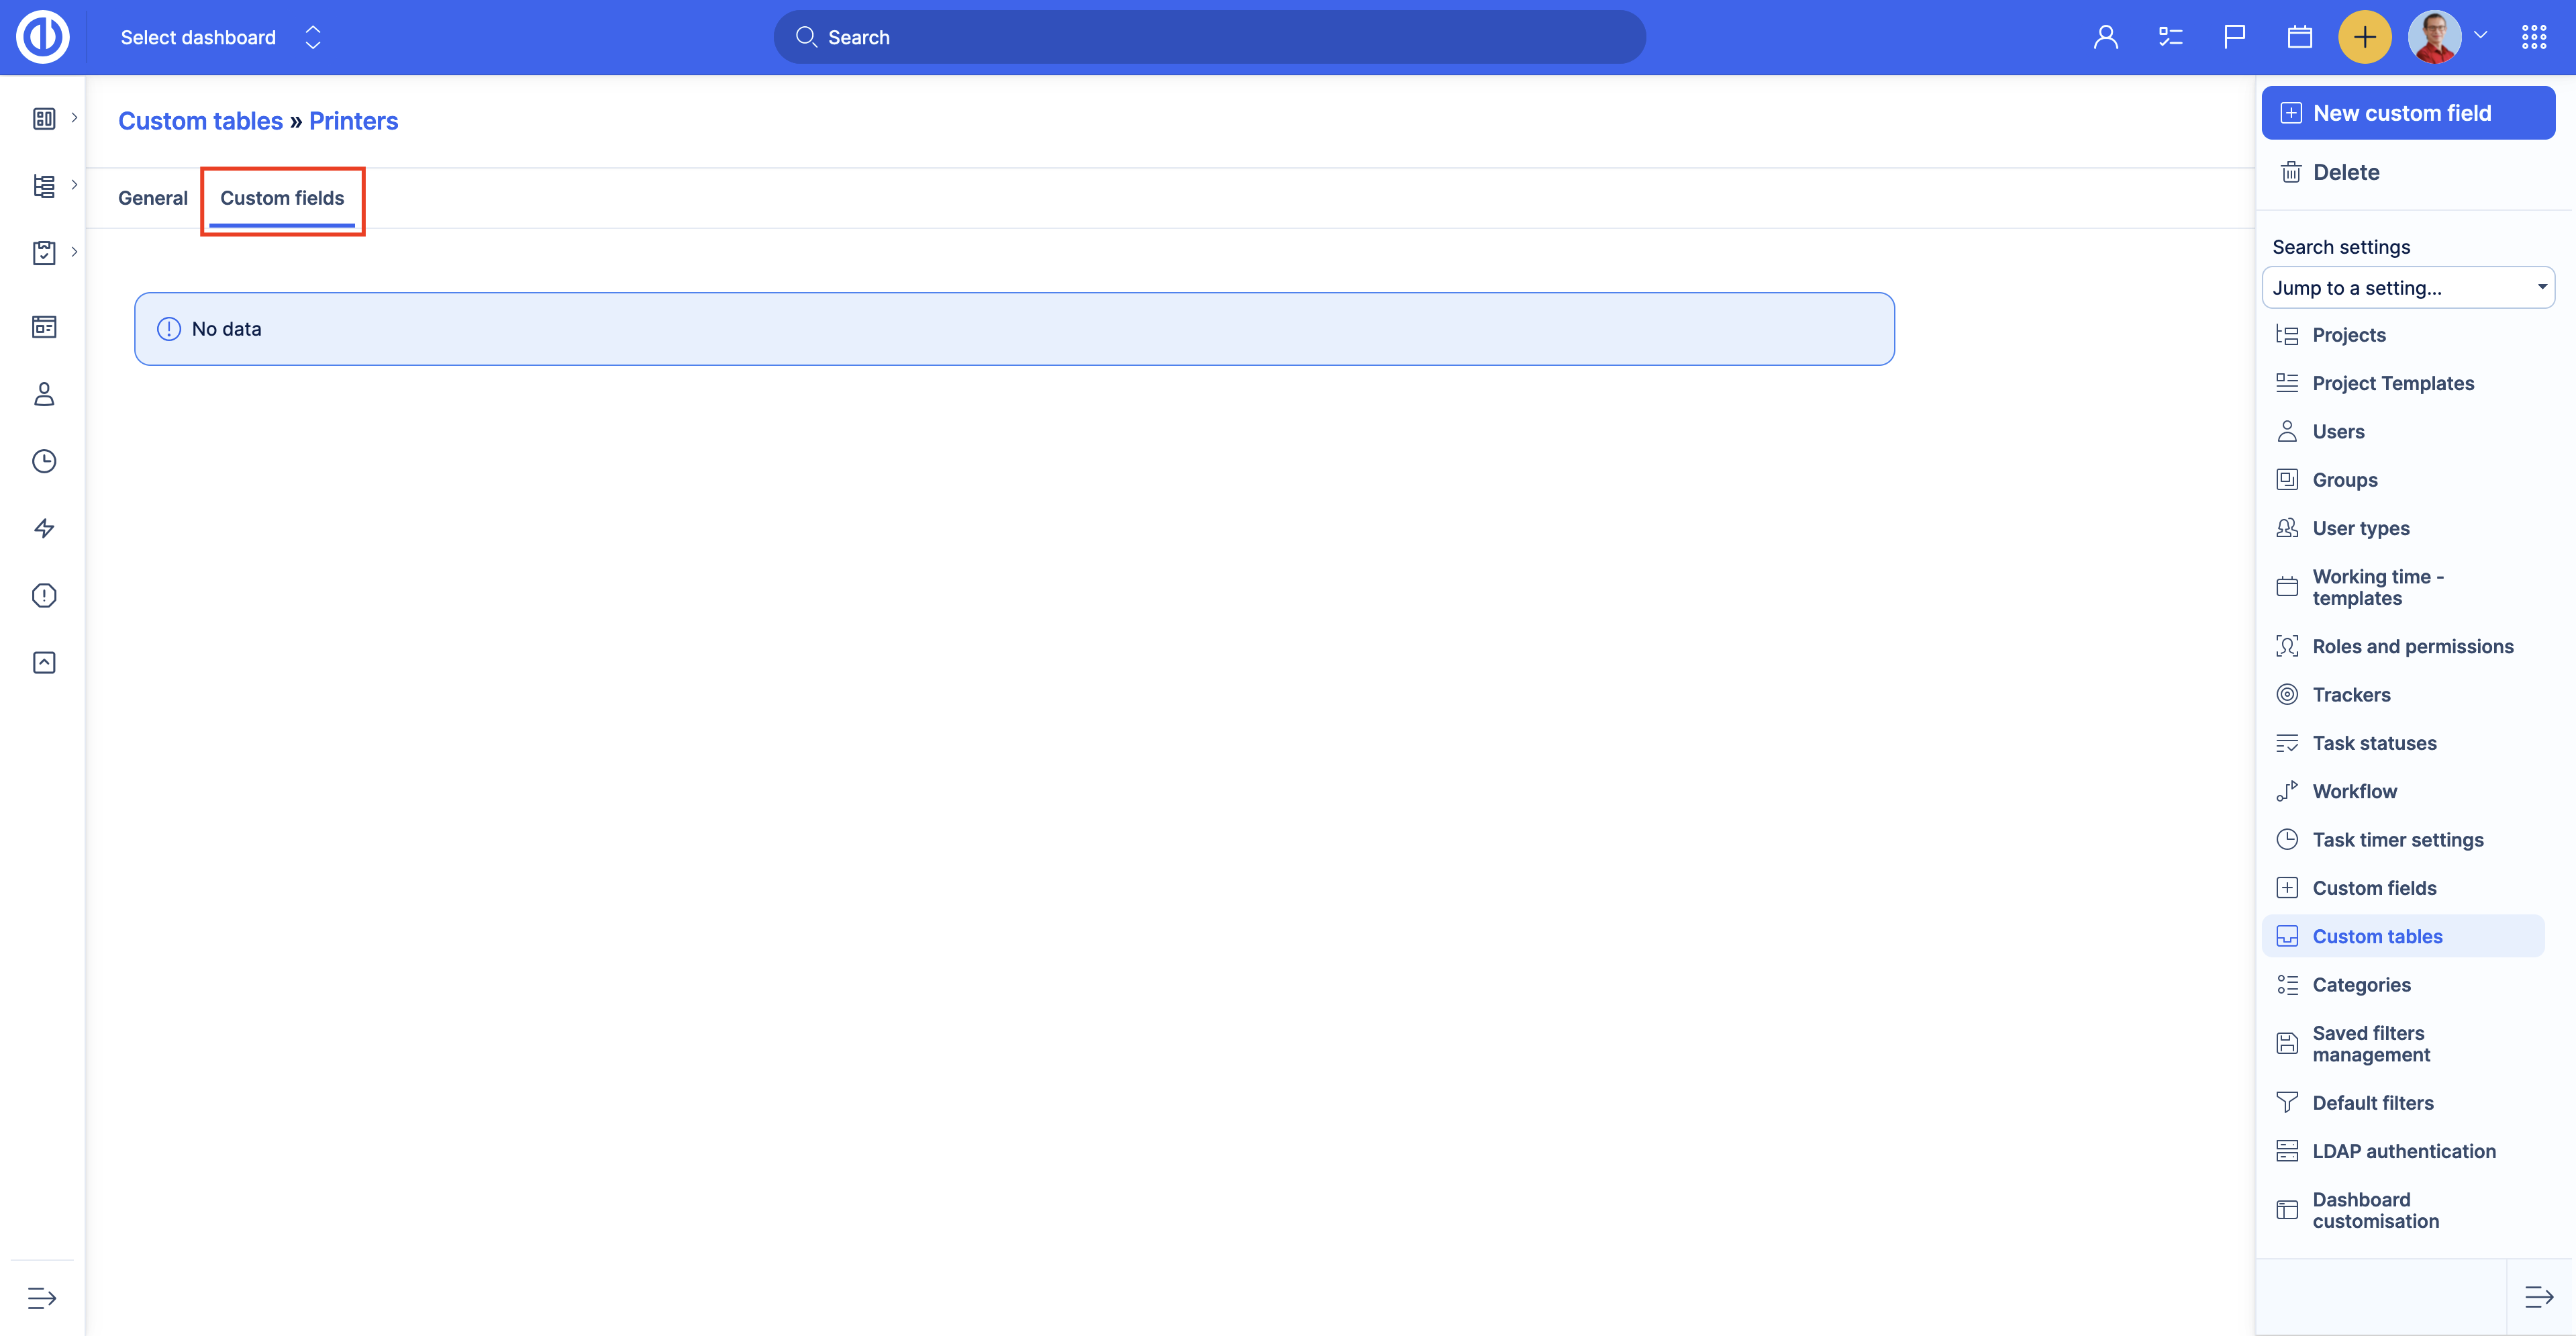
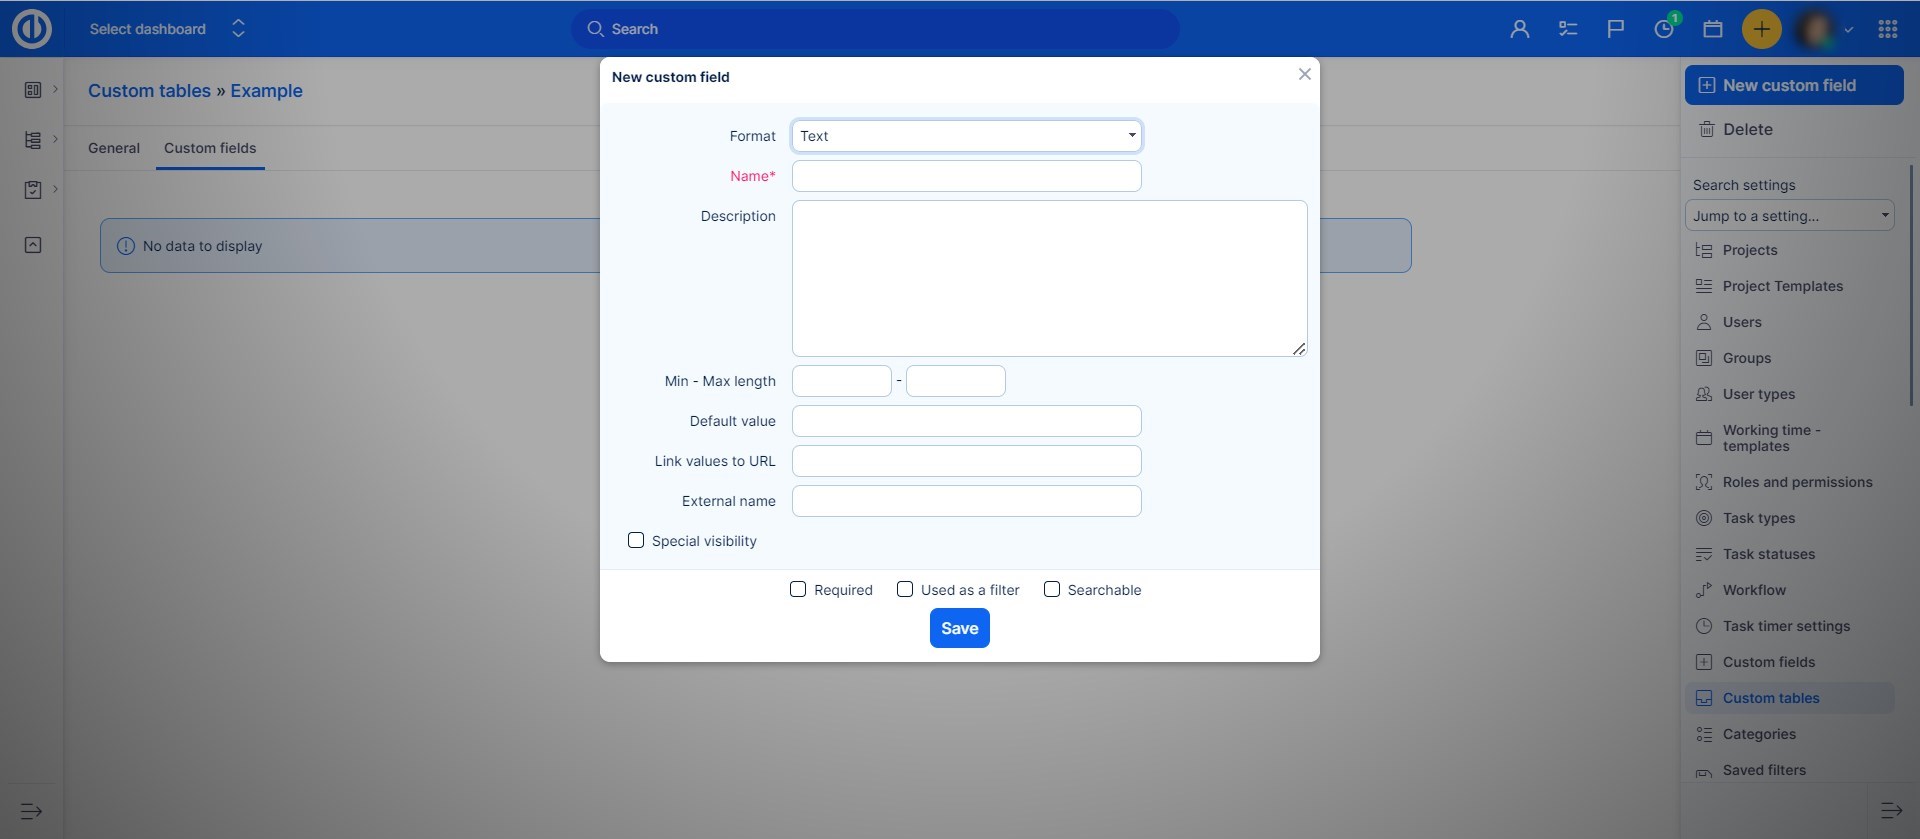
To add a new custom field click the New custom field button.
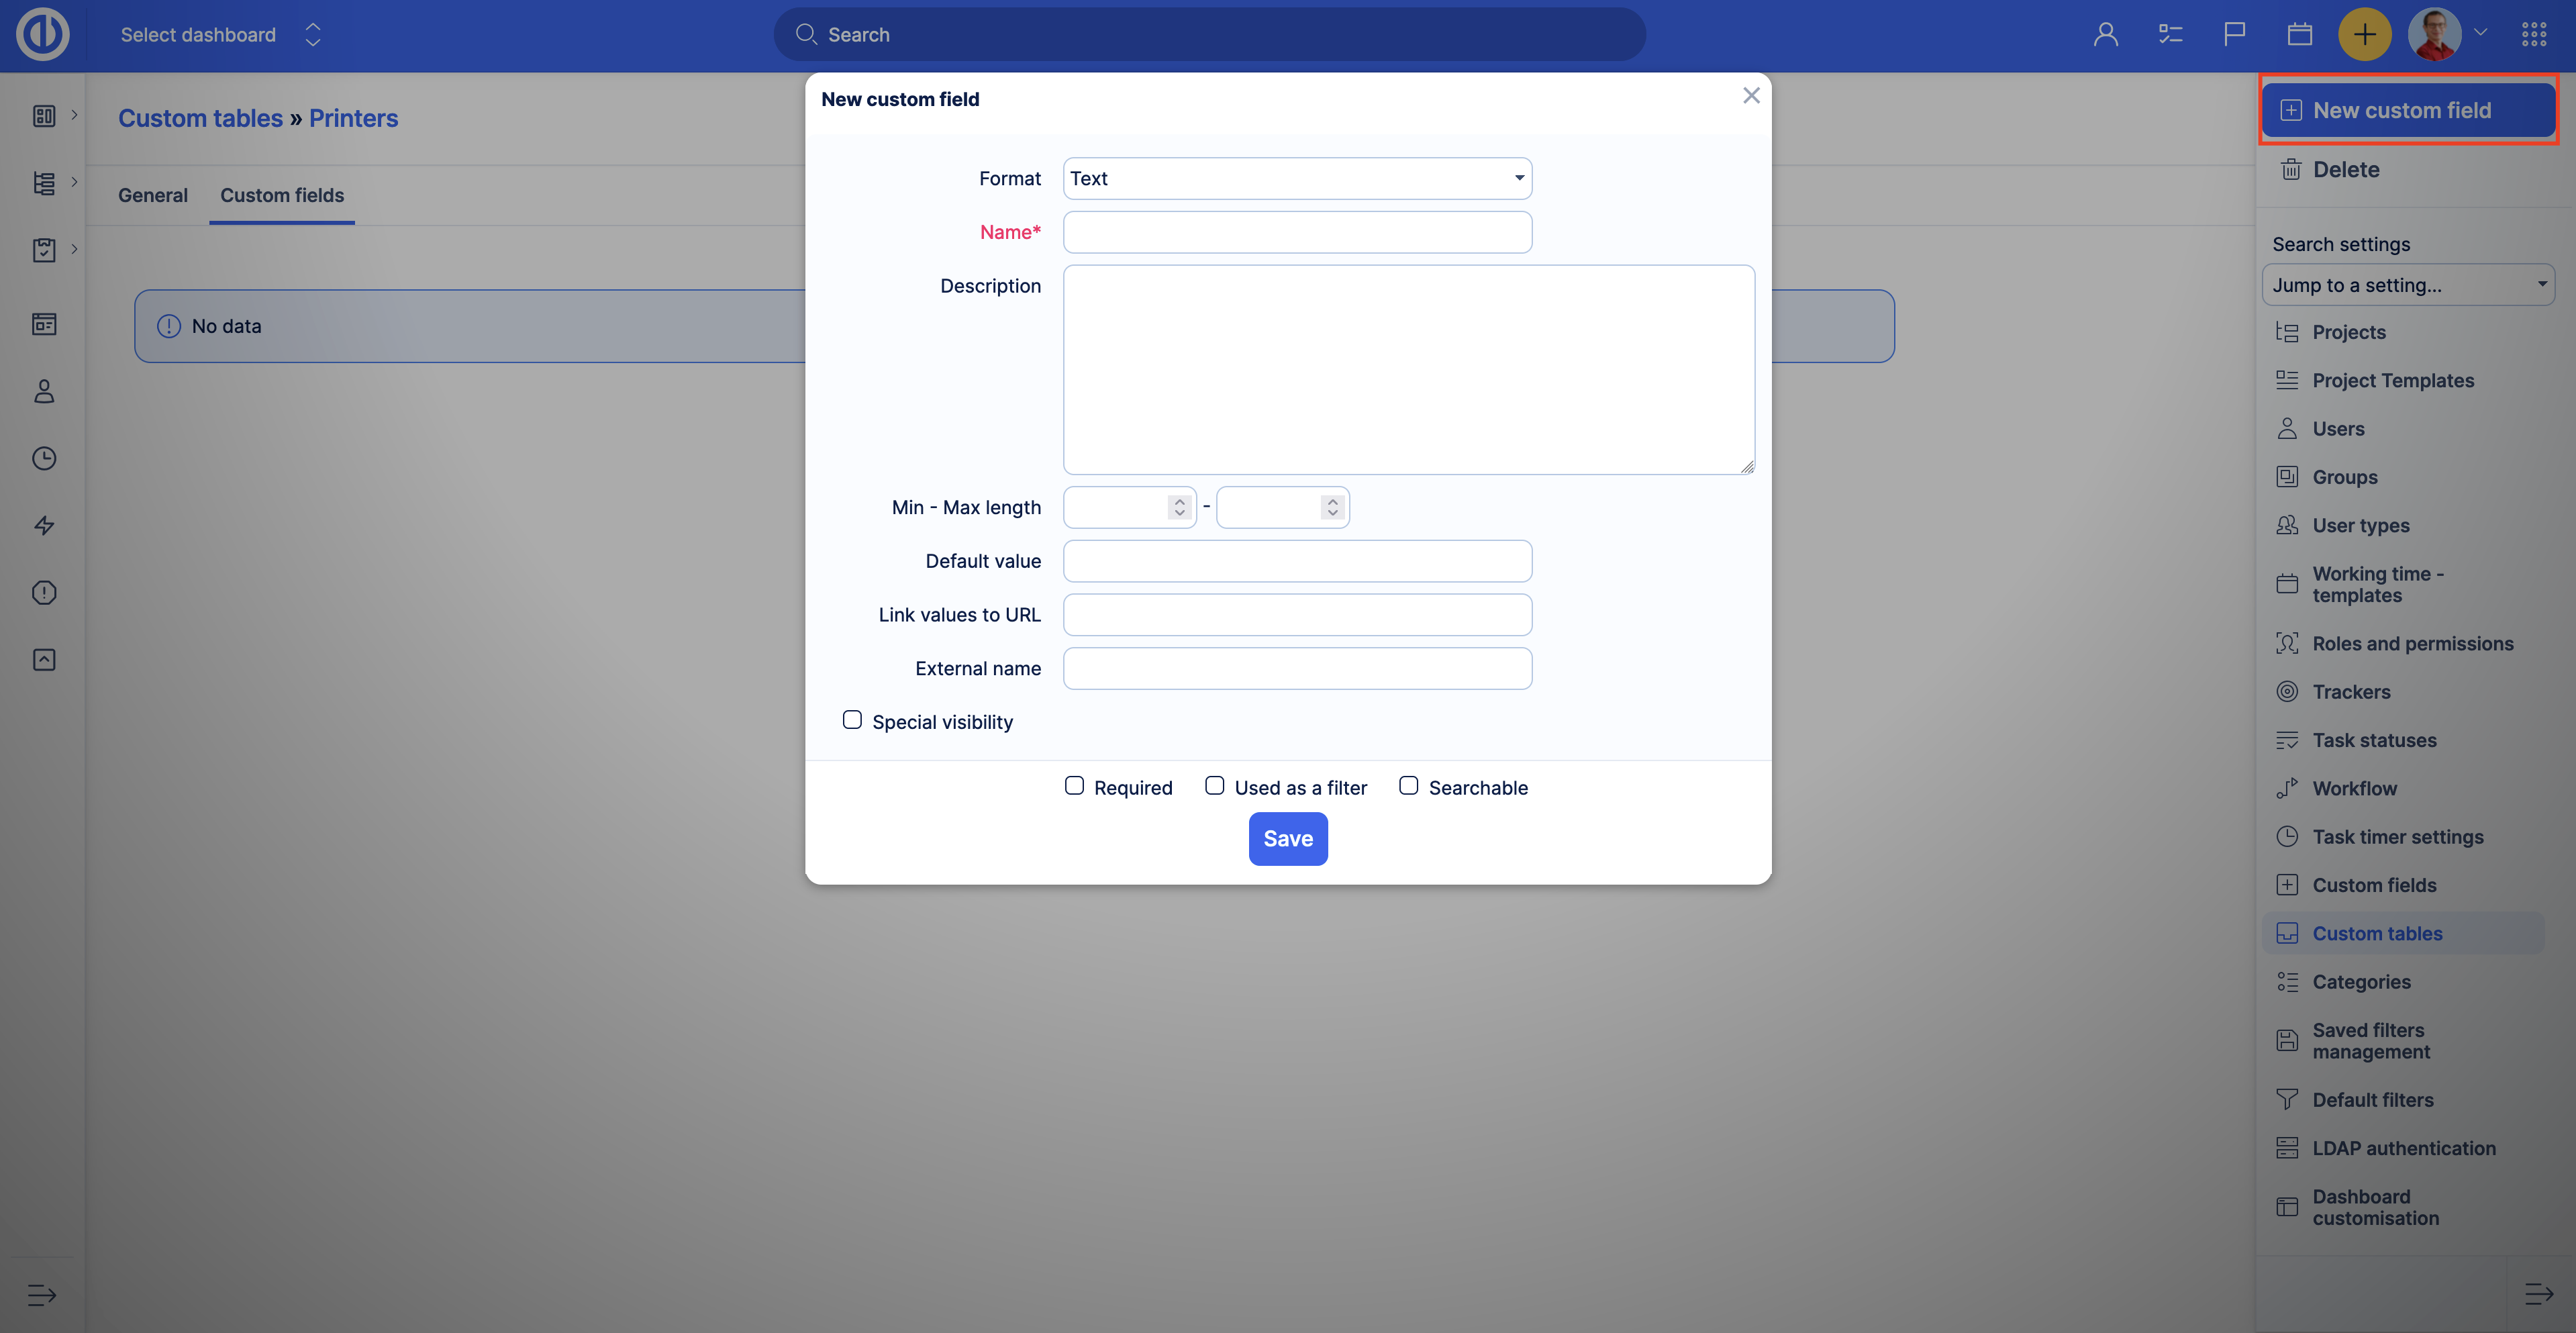
Select the format and specify all the necessary settings, then click the Save button.
For more information about custom field settings, please read the documentation.
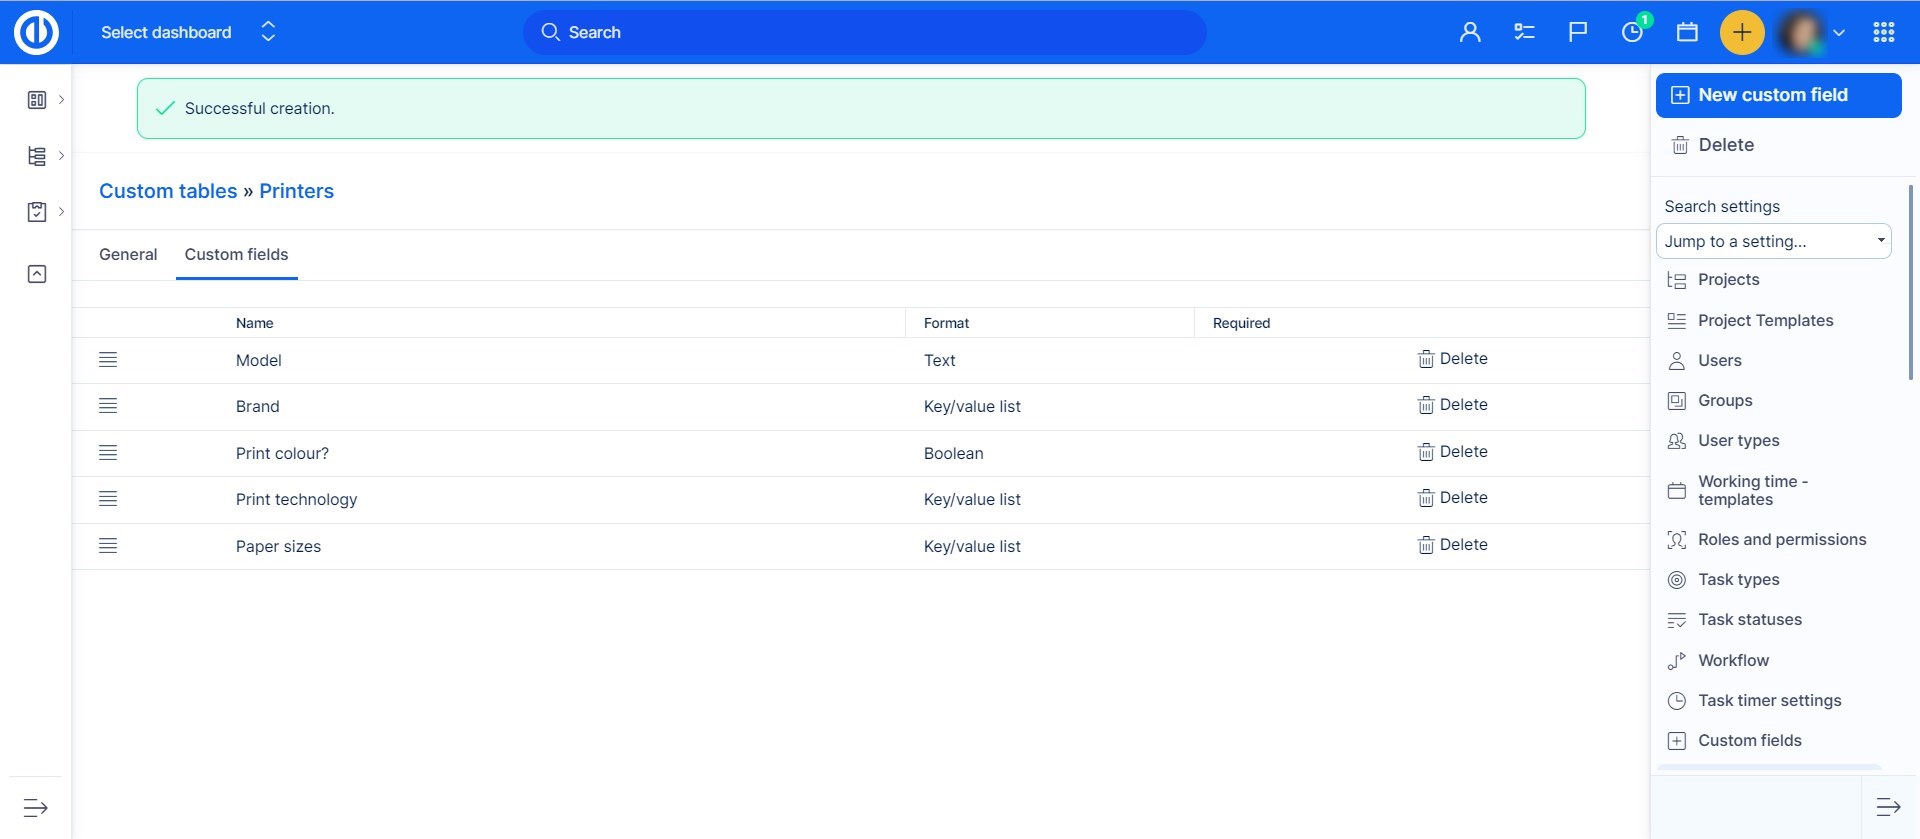
After adding several custom fields, you can edit, delete and change the positions of the custom fields on this page.
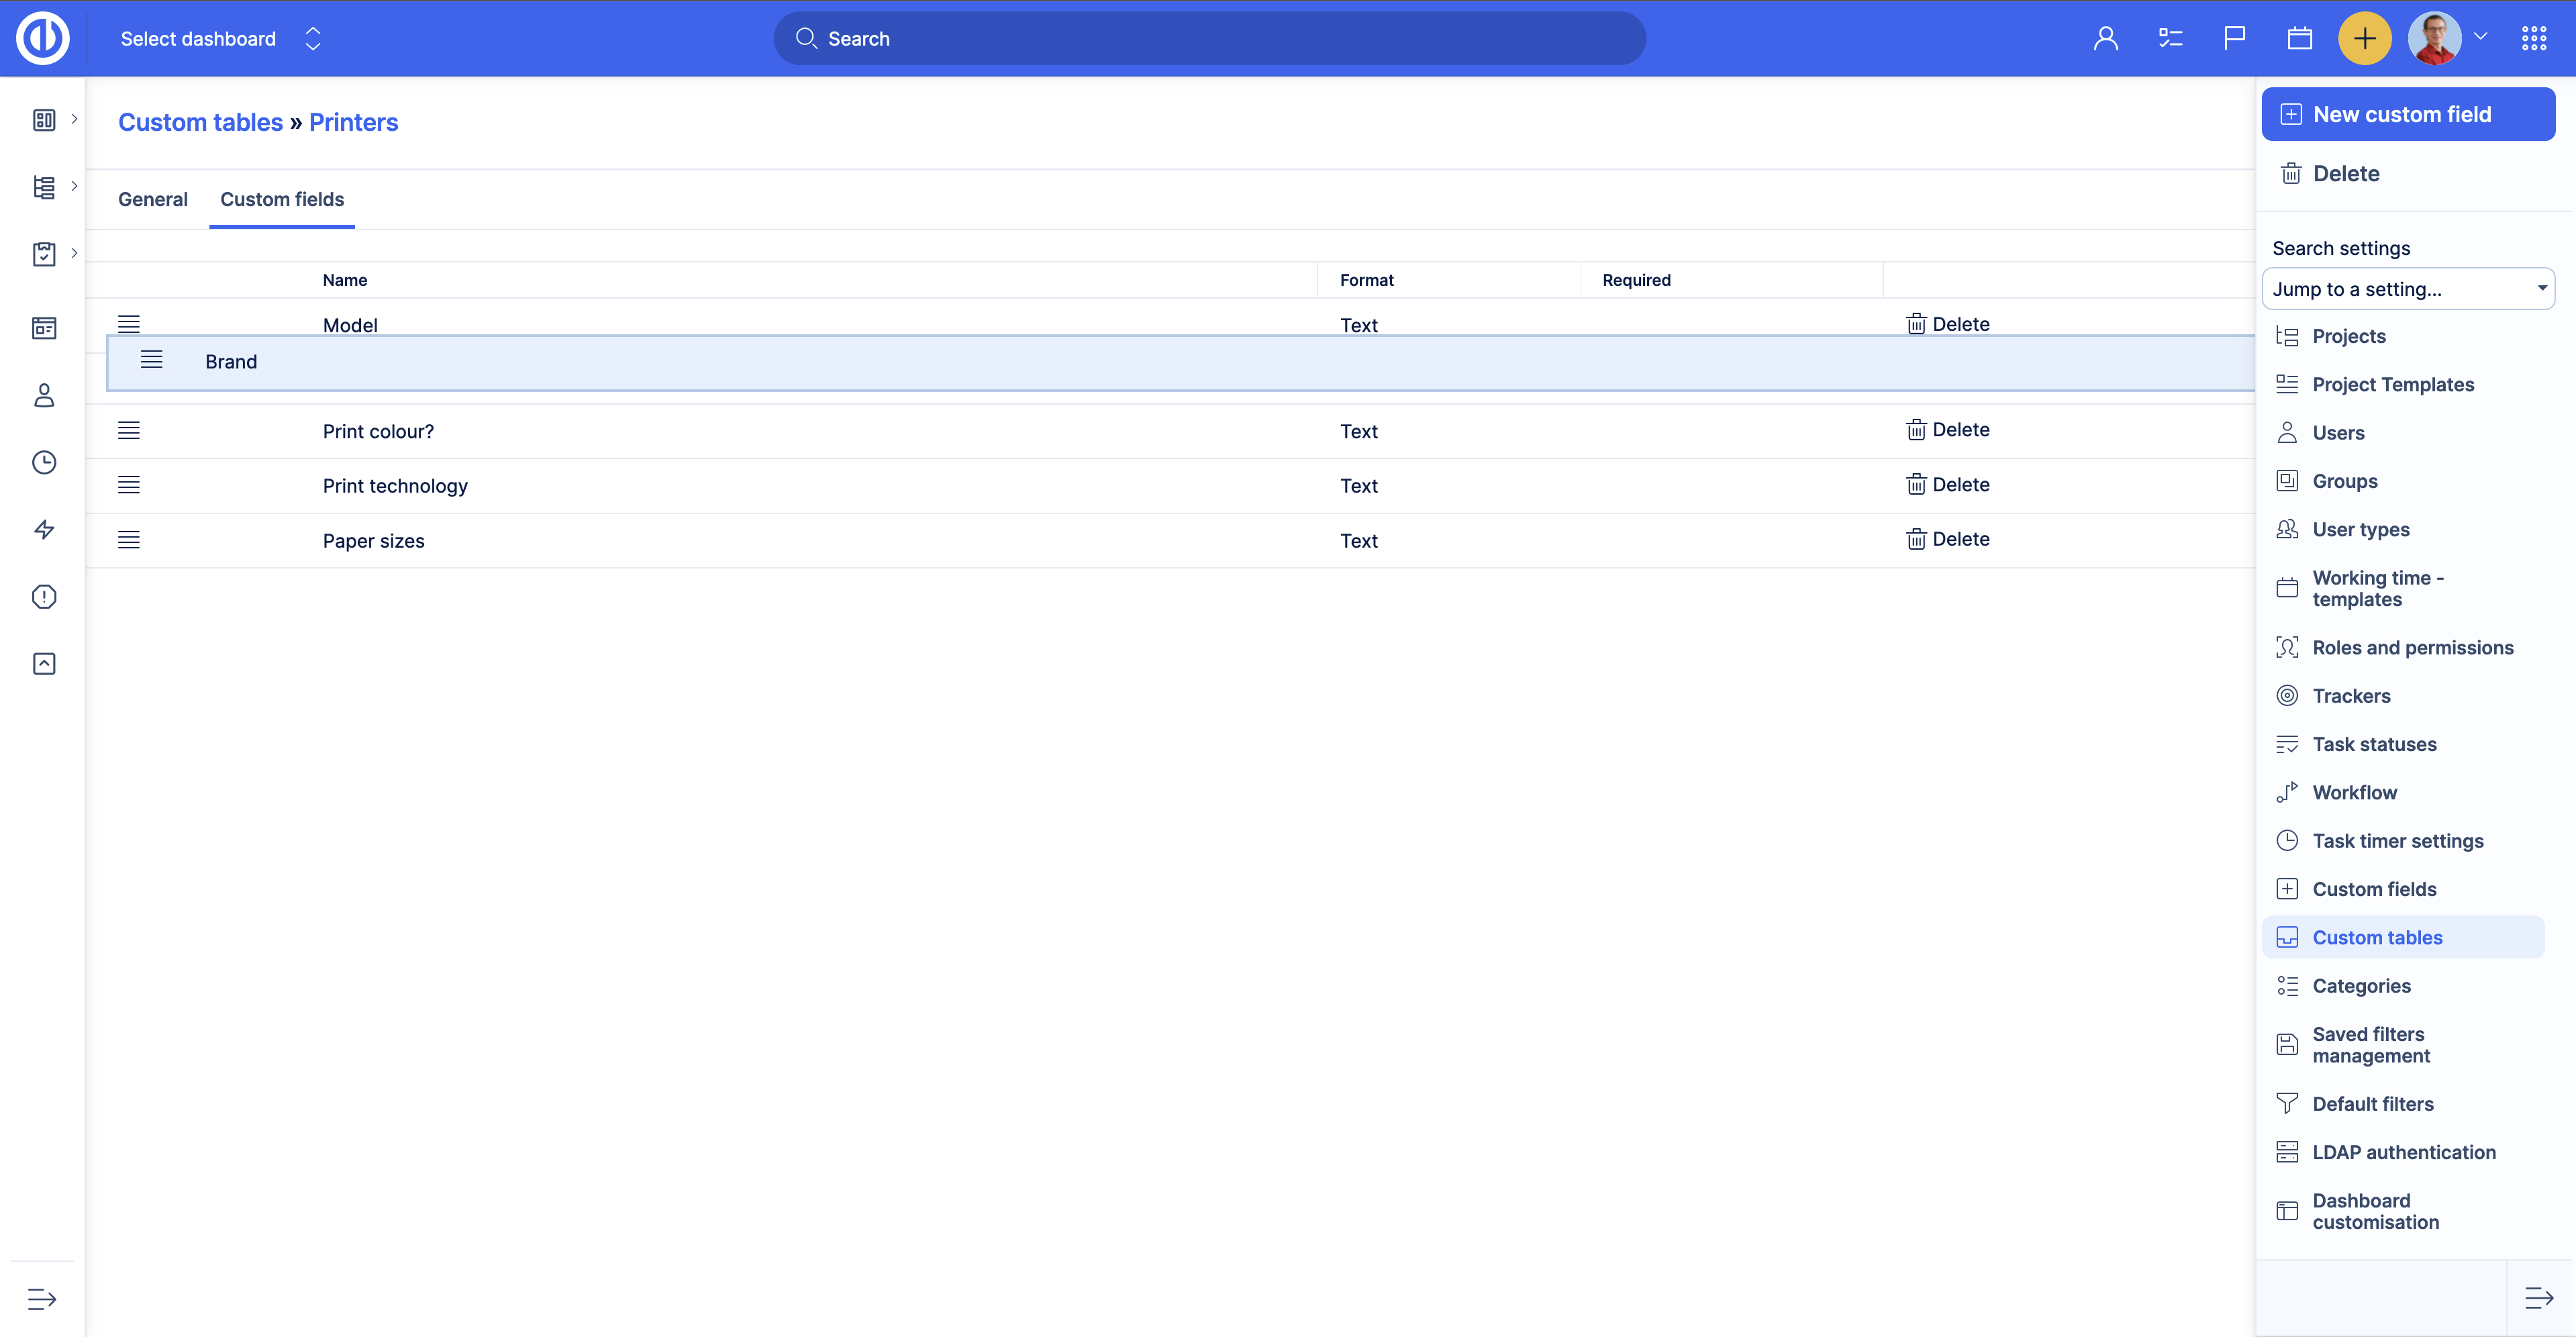
Reordering custom fields will change how the table overview looks as well as change the custom field order on the New record page.
Compare the following examples:
- Model
- Brand
- Print colour?
- Print technology
- Paper sizes
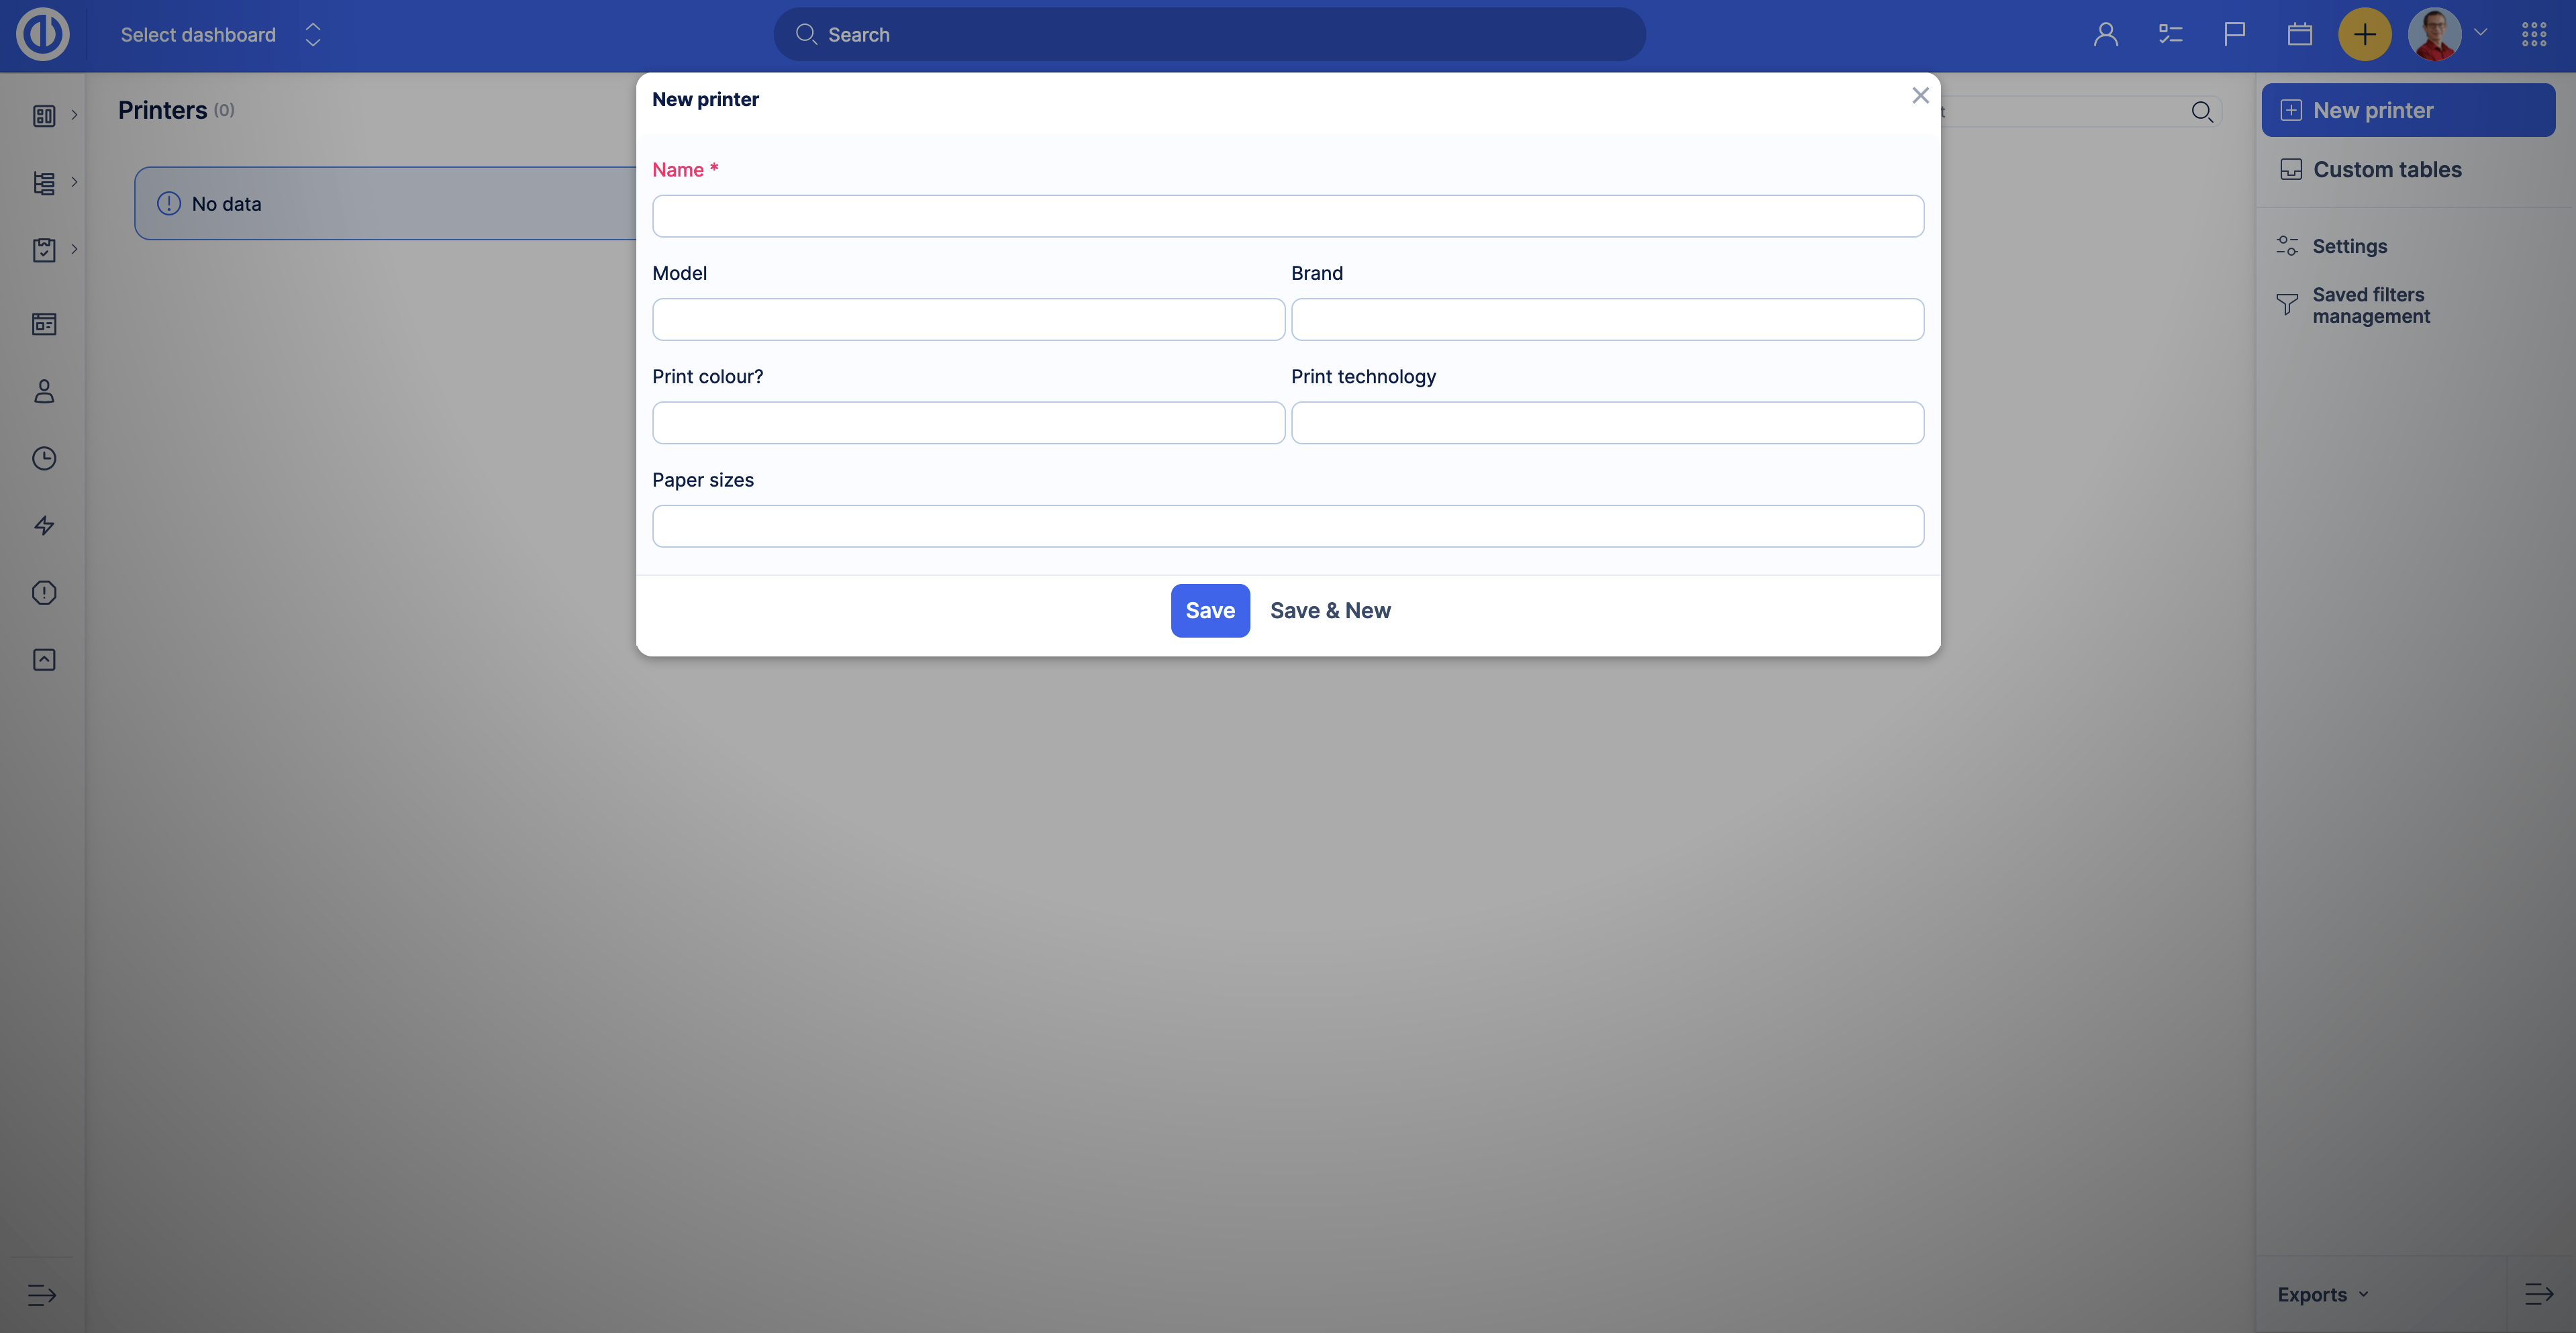
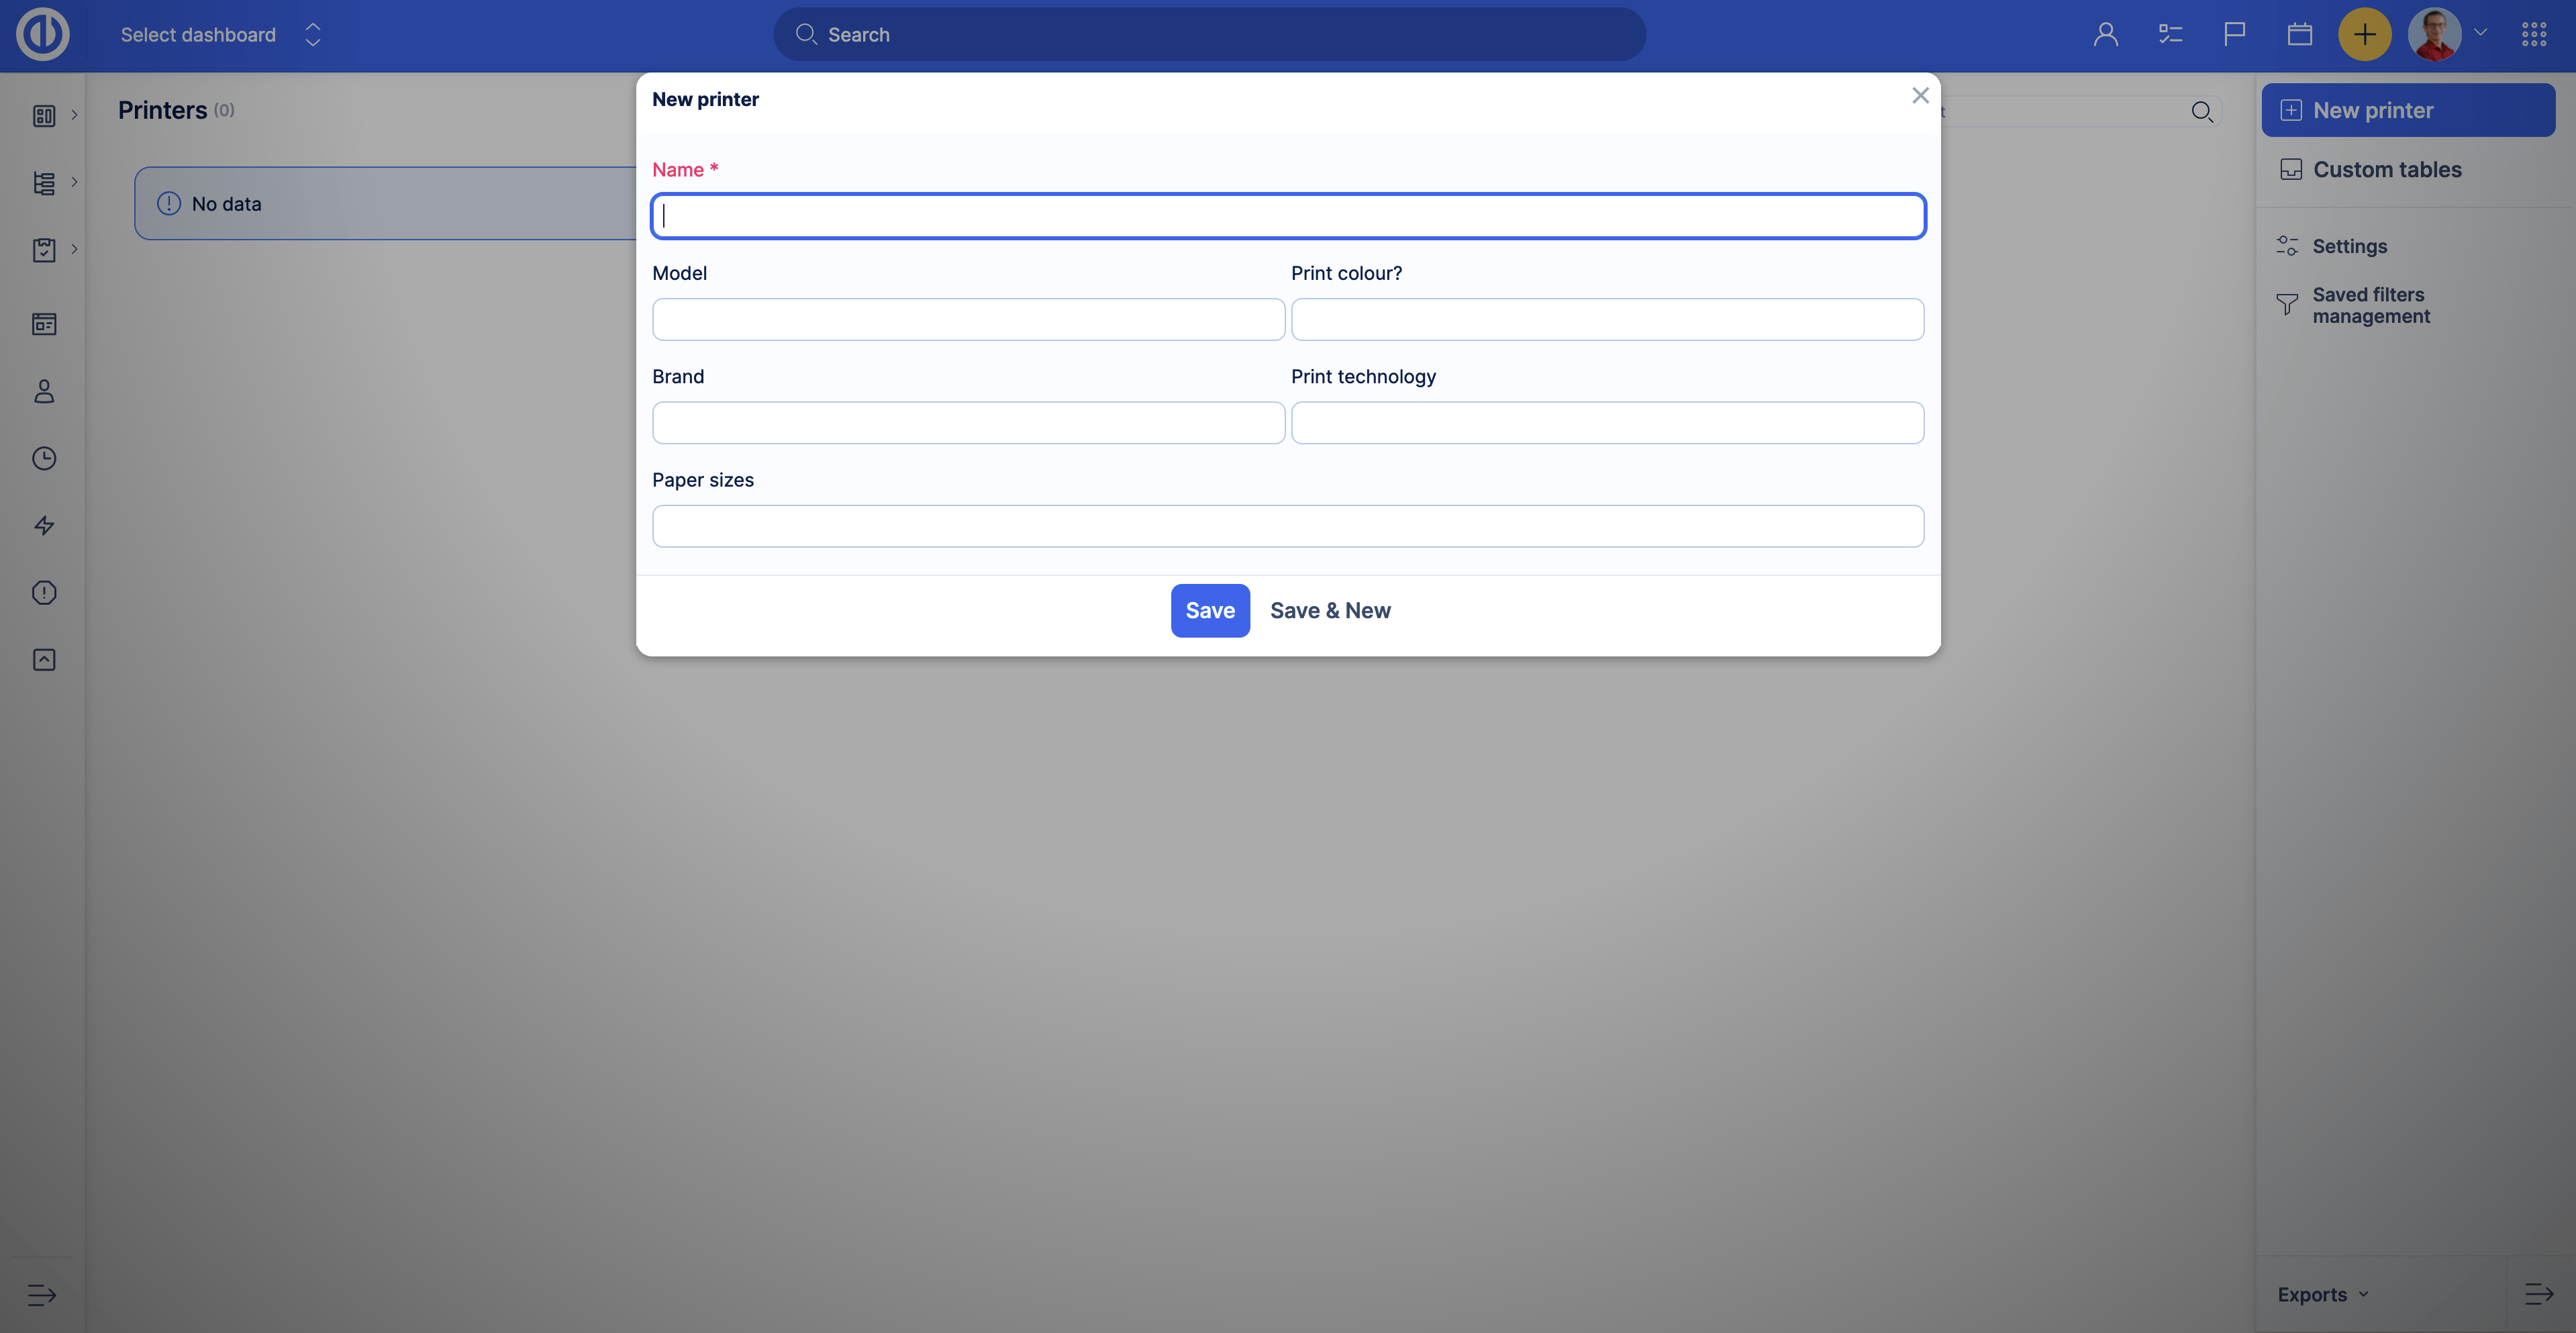
- Model
- Print colour?
- Brand
- Print technology
- Paper sizes
Example
In the How to create a custom table example we created table Printers. Now, let’s add custom fields to the table.
First of all, we need to open the table’s edit page, and Custom fields tab.

Let’s start with the custom field that will represent the model of the printers. Click the New custom field button, select the Text format and enter Model in the Name setting. After that click the Save button.
You successfully added the first custom field to your table.
Now you should add the other custom fields you need in the table. In our example, we will add the following fields:
- Brand - key/value list, with the following options:
- HP
- Canon
- Epson
- Print colour? - boolean
- Print technology - key/value list, with the following options:
- Laser
- Inkjet
- LED
- Paper Sizes - key/value list, with the following options (multiple values):
- A0
- A1
- A3
- A3+
- A4
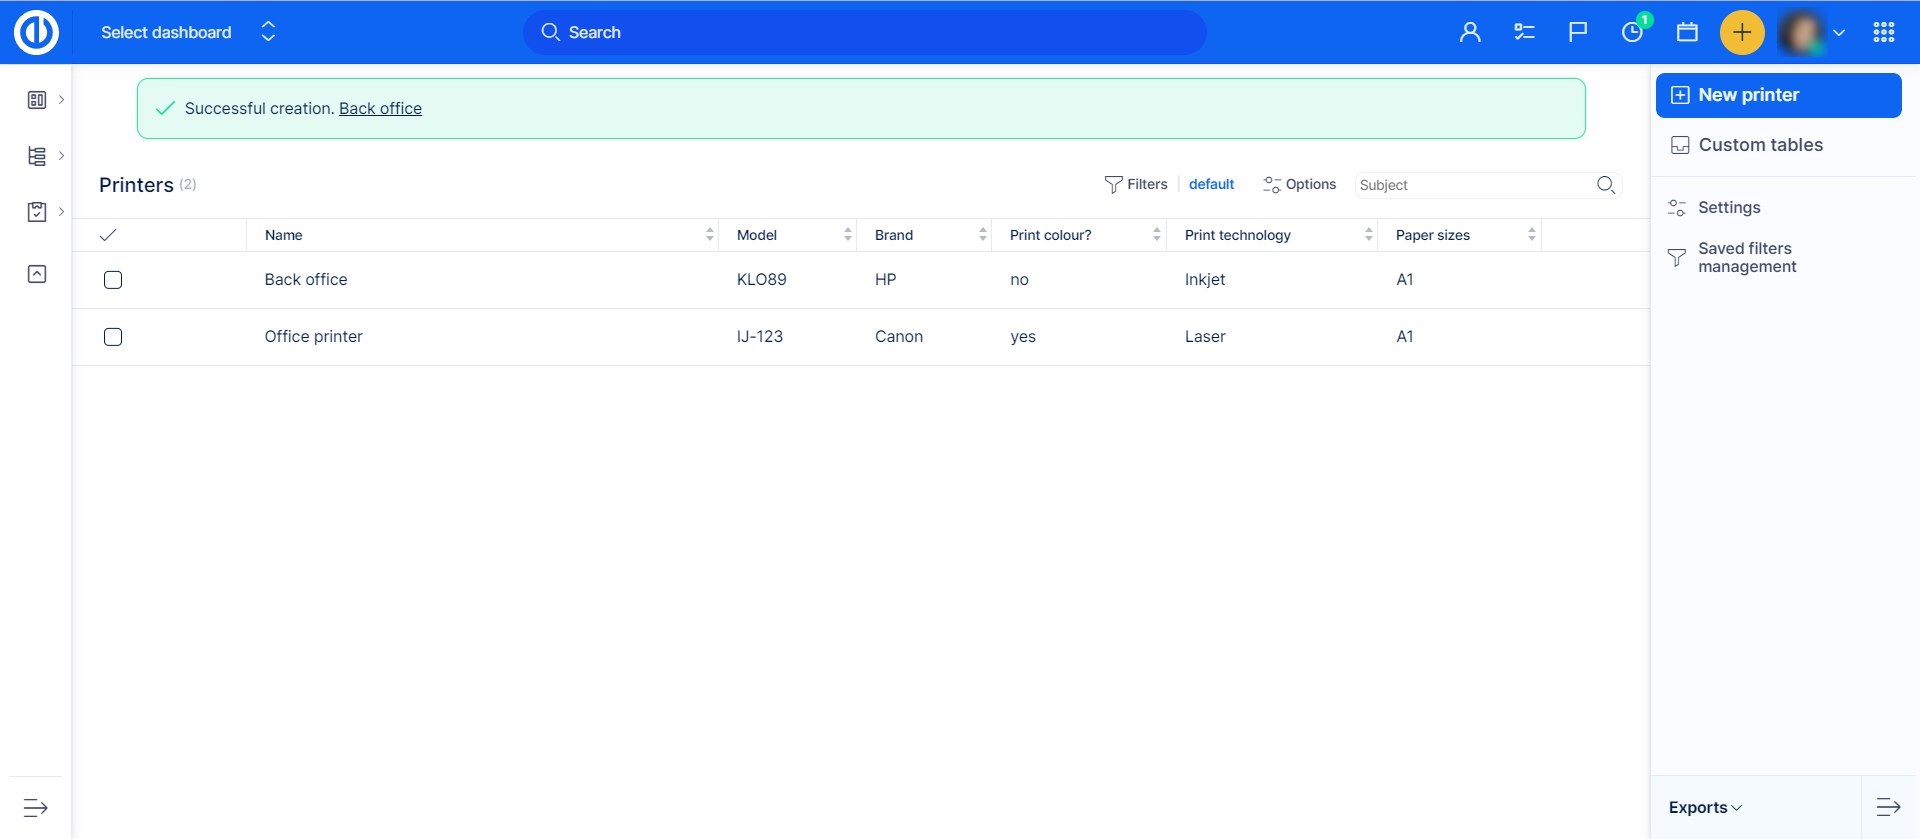
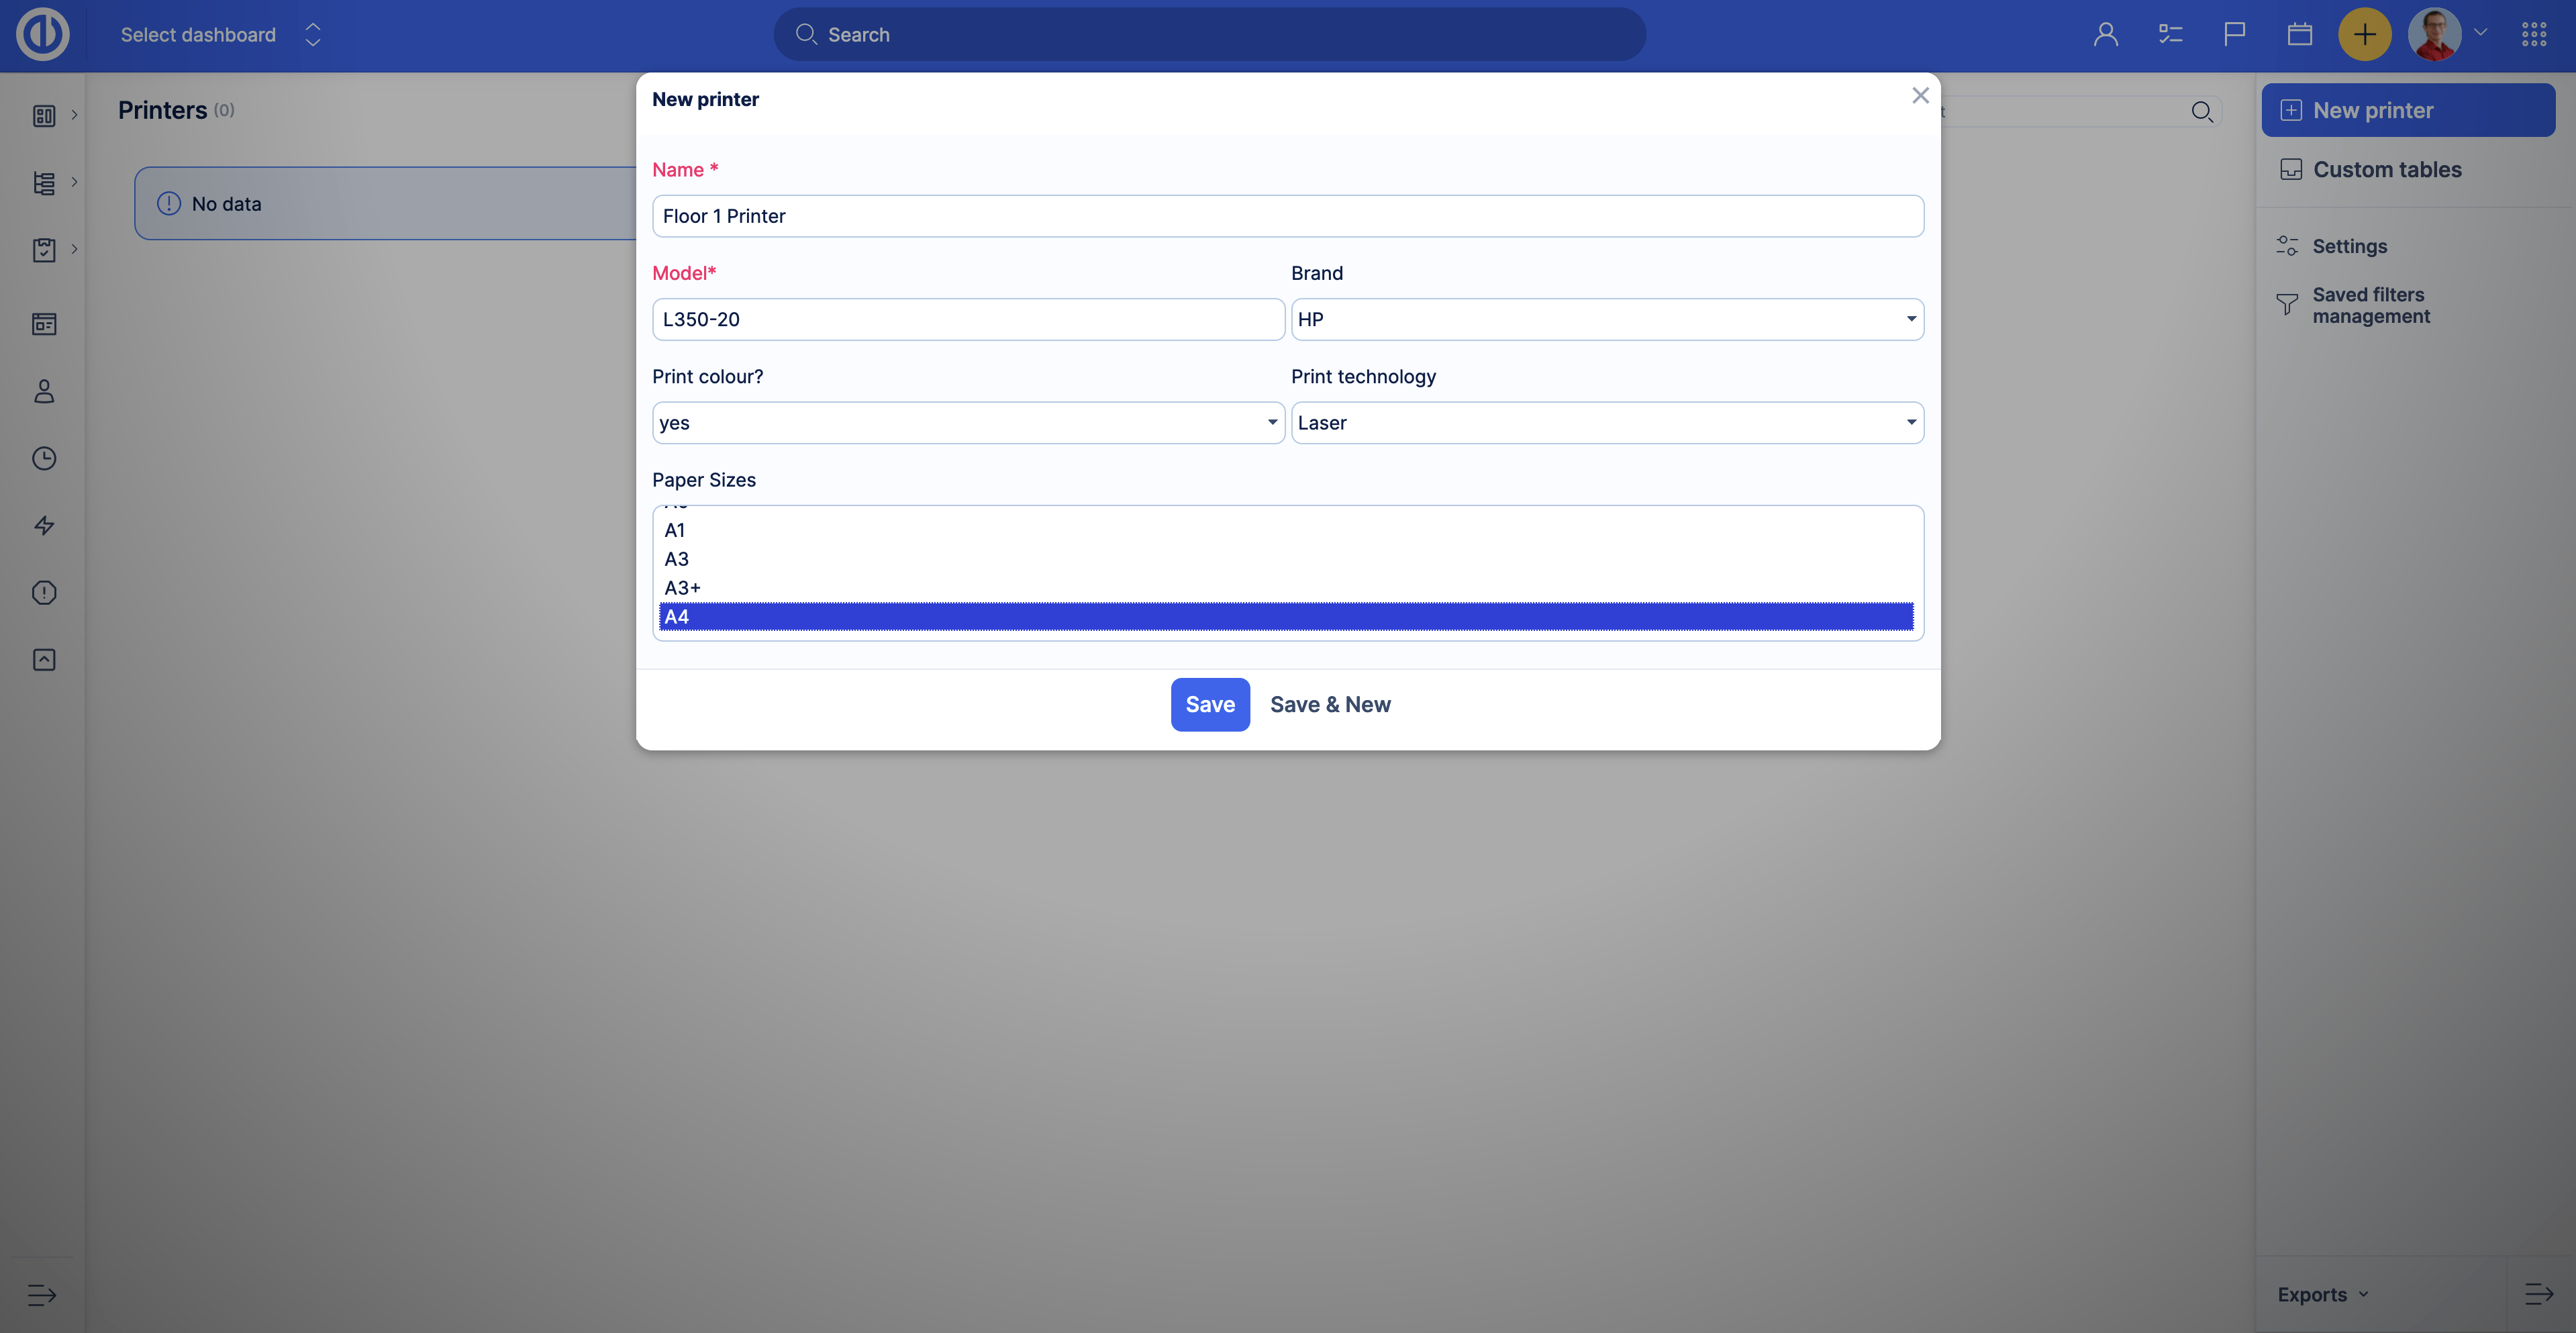
After adding custom fields, click the table name to go to the table overview page. To add the first record click the New printer button, fill in the fields and click Save.

NOTICE:
Previously, you had to create every field for assets manually, one of them you needed to marked as Main.
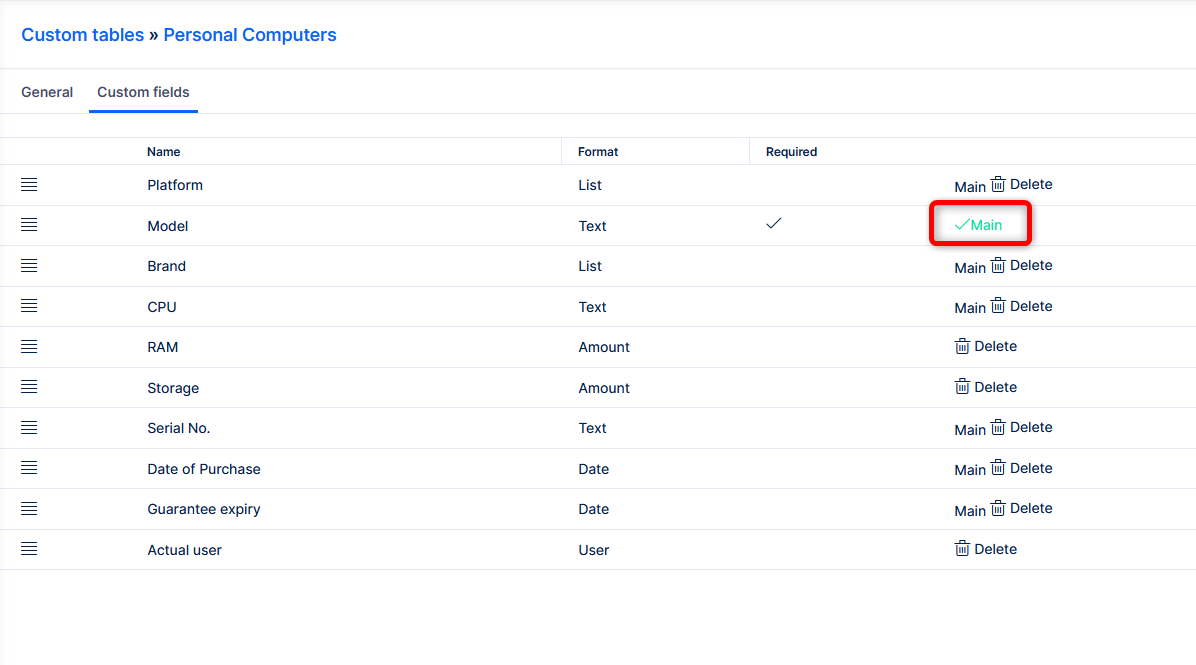
As of version 13.7.0, due to performance optimization, there is a native field Name, which is activated automatically for all Assets. Please reffer to release notes for more information
How to delete a custom table
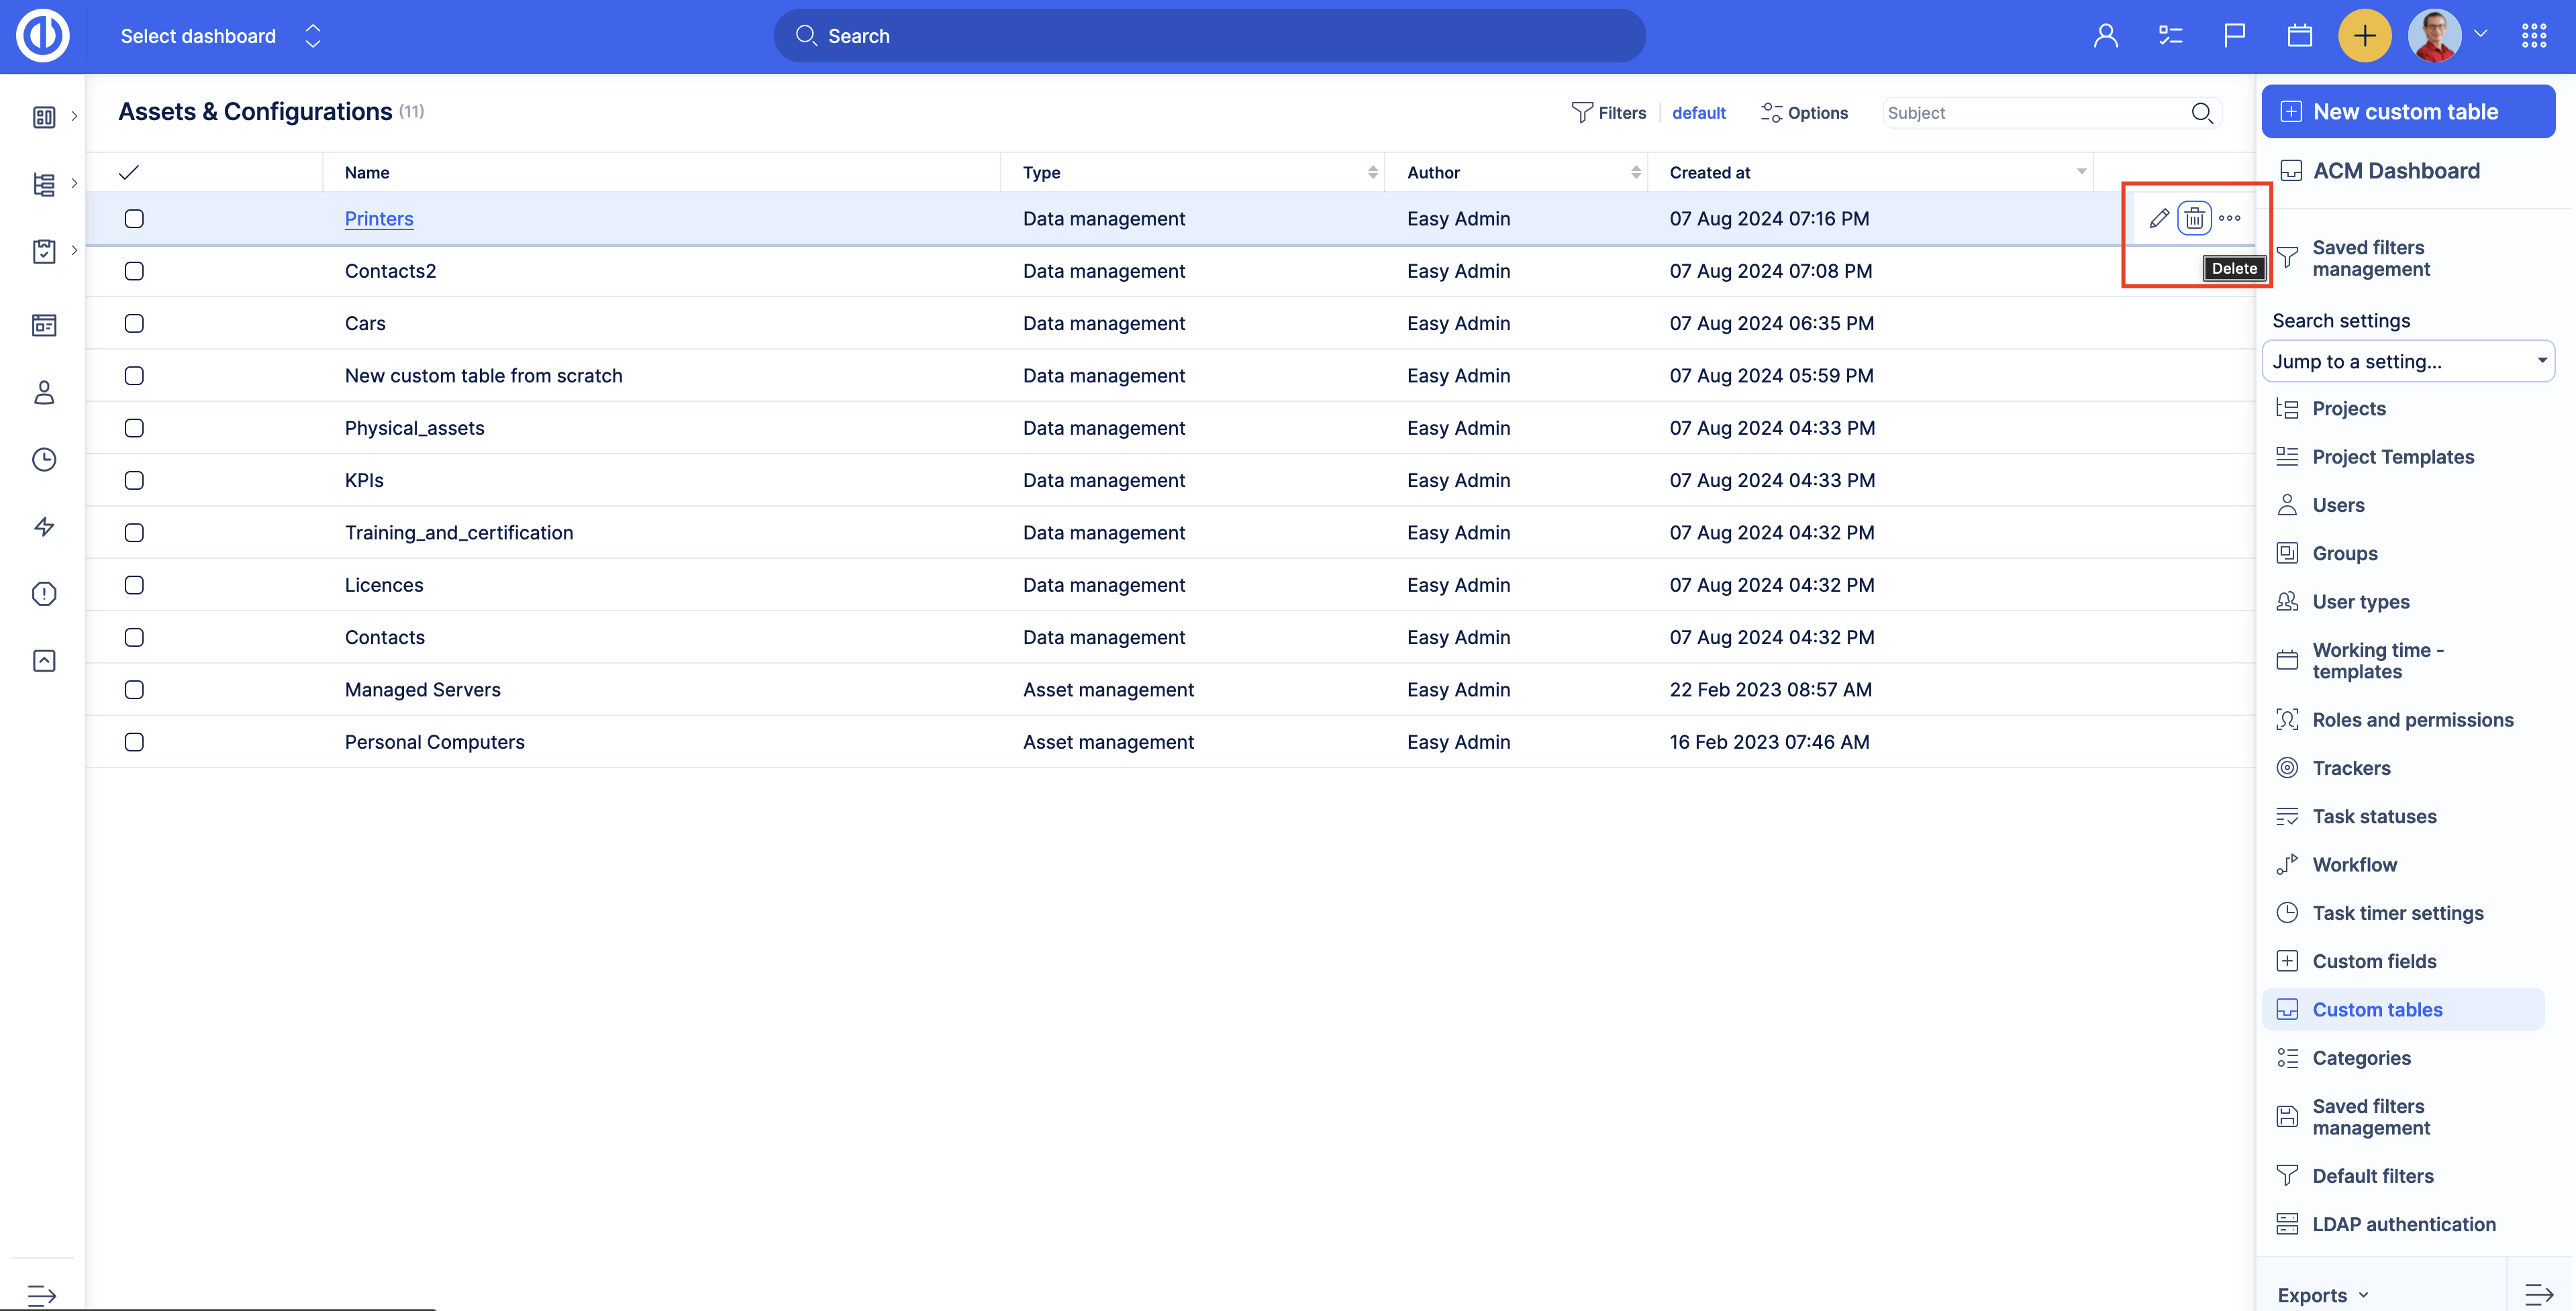
To delete a custom table go to the custom tables administration page Administration >> Custom tables. You can delete the table from here by clicking on the delete button. Also, you can press the pencil icon go to the custom table edit page and delete the custom table there.
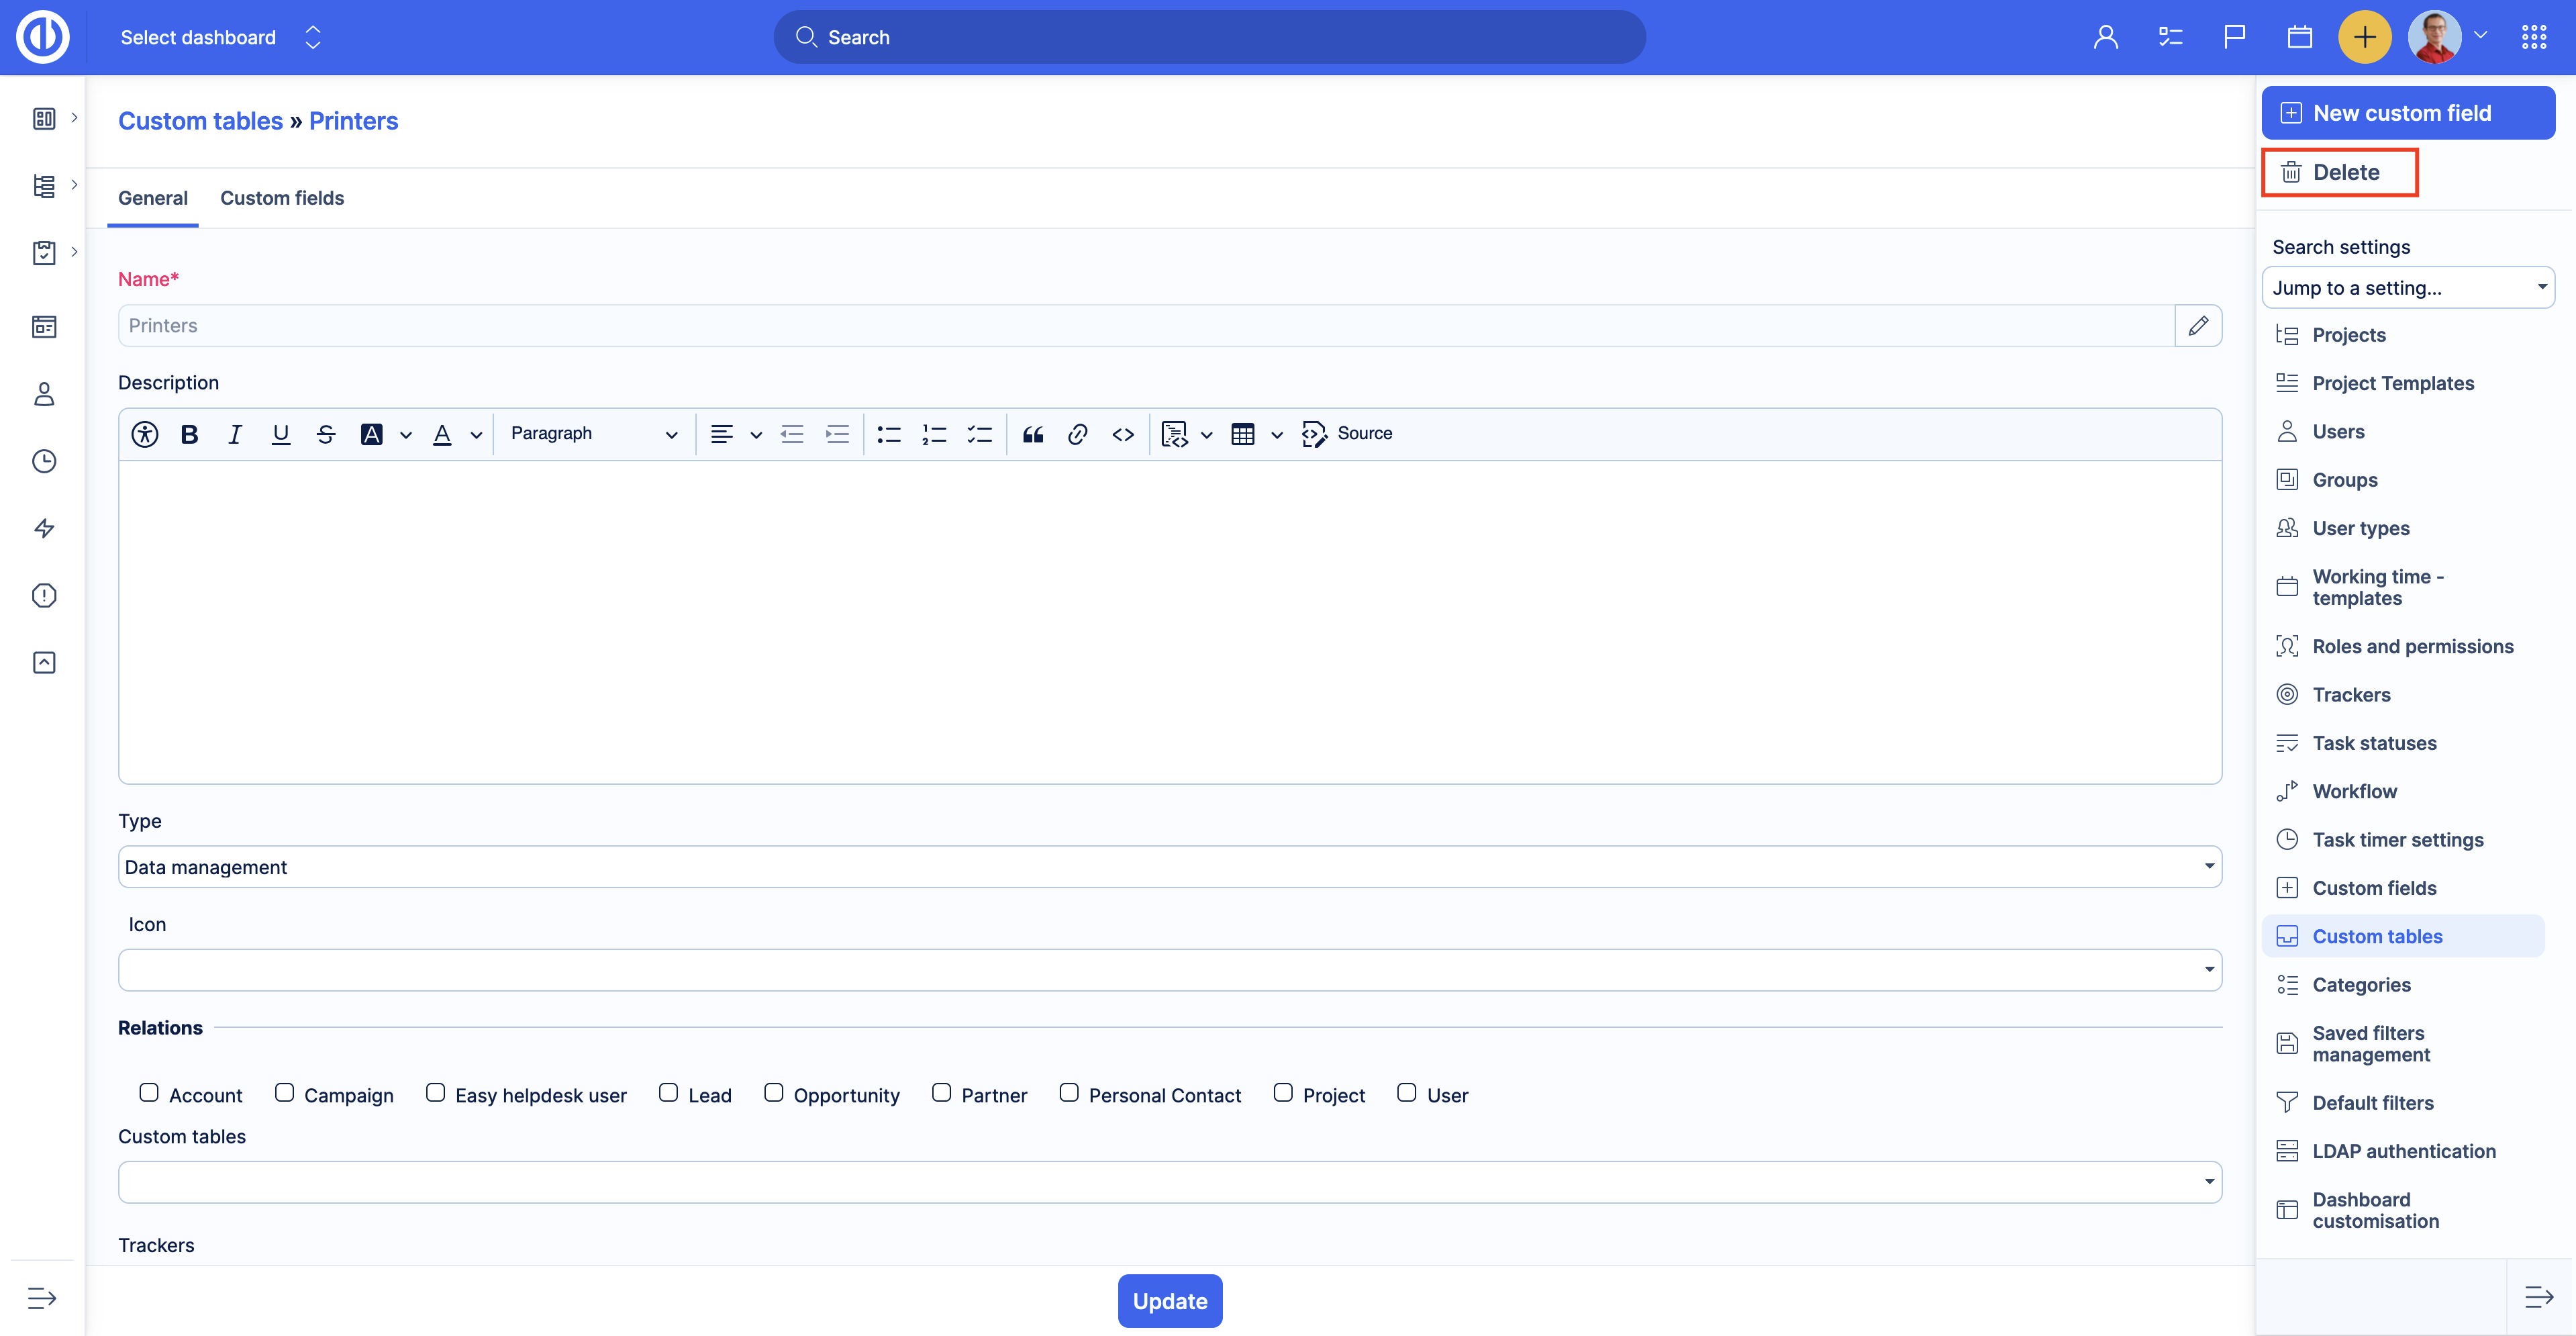
On the settings page, click the Delete button on the right.
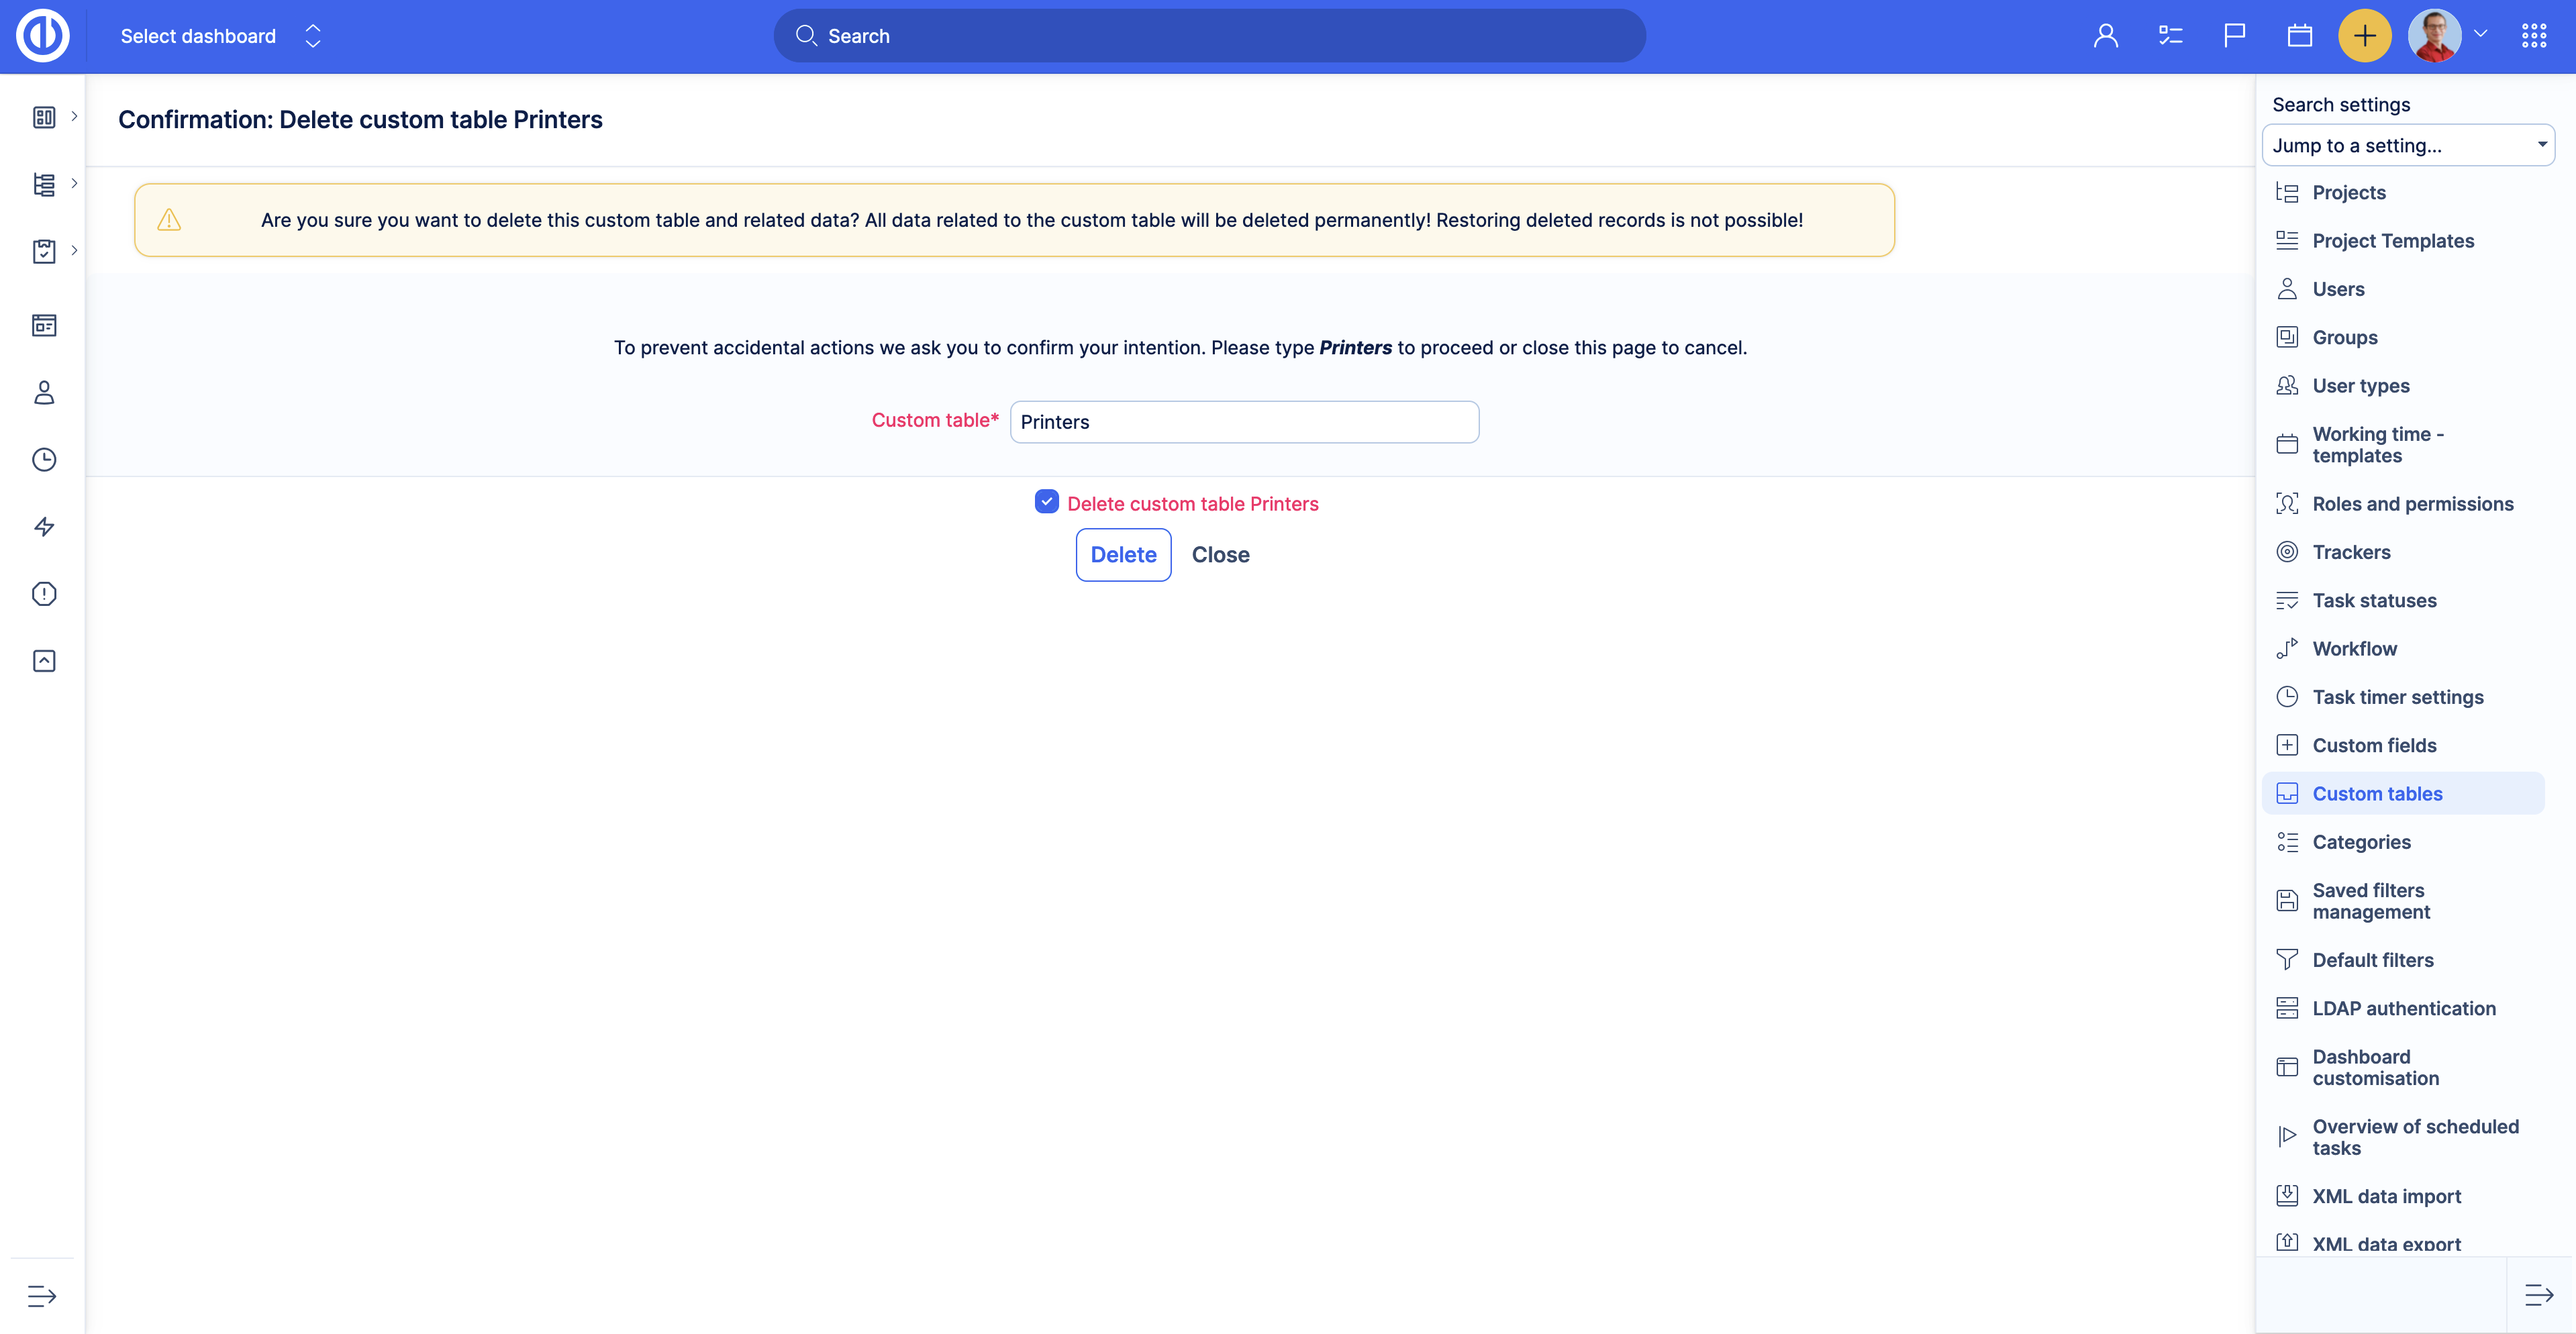
Type in the custom table name and check the Delete custom table. Then click the Delete button.
Important to know
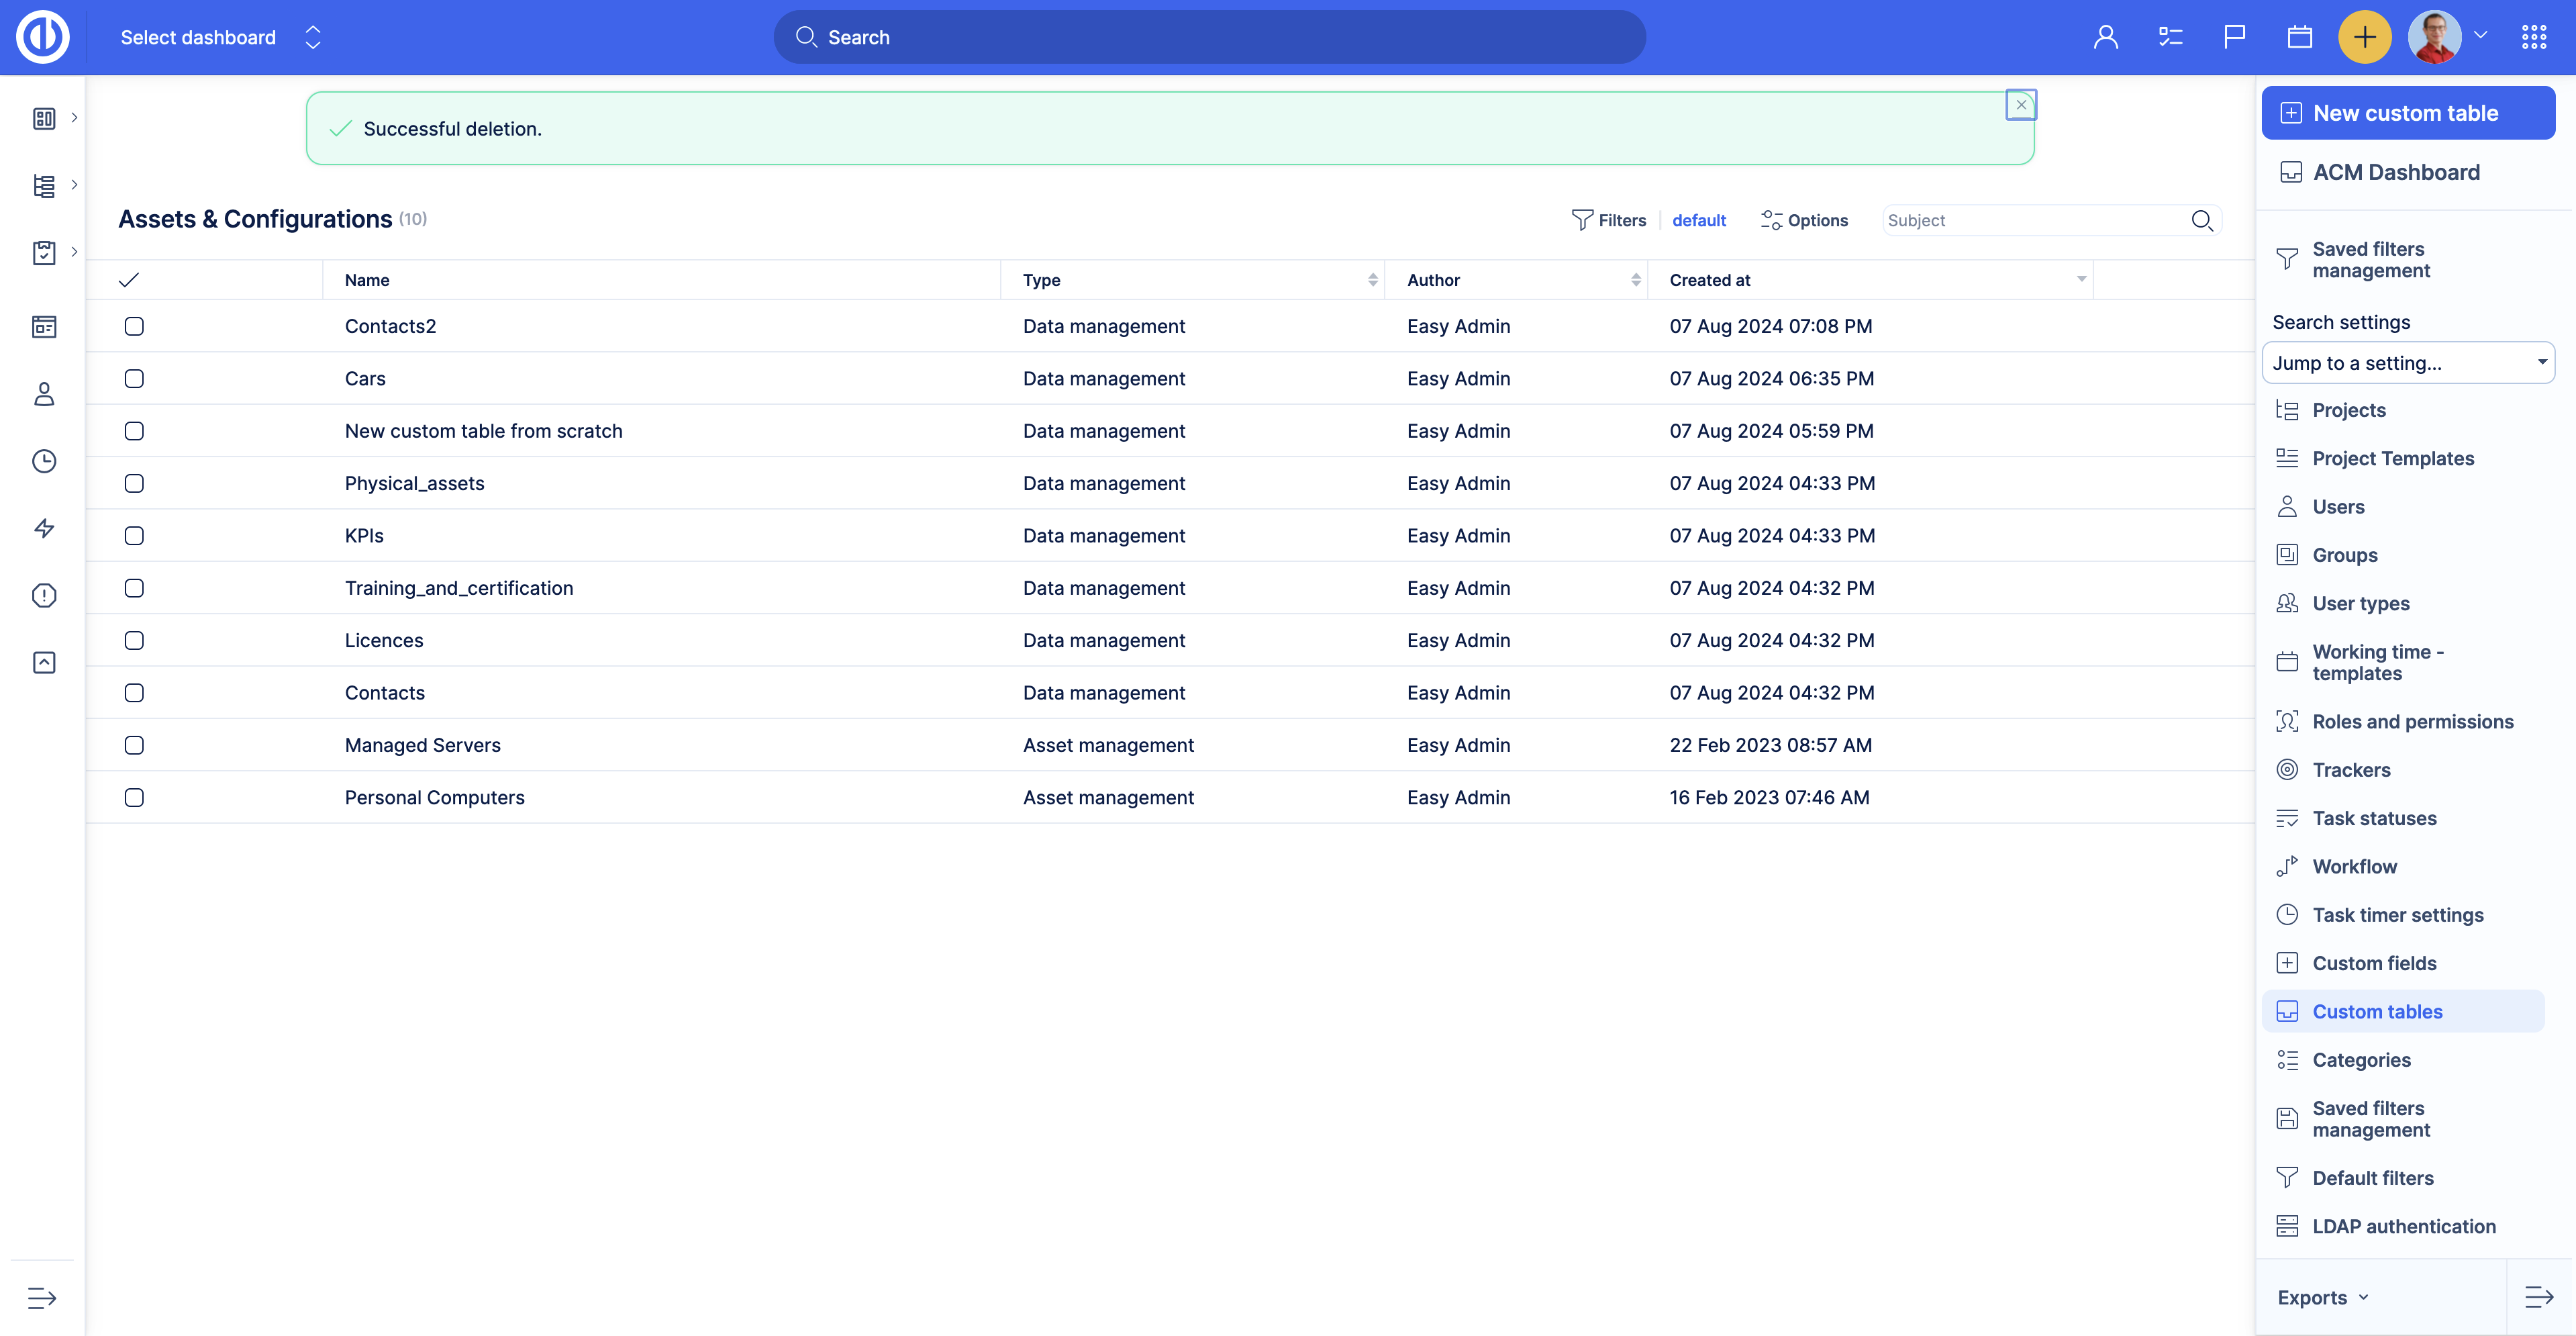
Deleting a table means deleting all the data stored in this table and all its relations. There is no way back. Once you delete the table all the information will be deleted. Please ensure you don’t need the data before deleting a custom table.
How to add records to the Custom tables
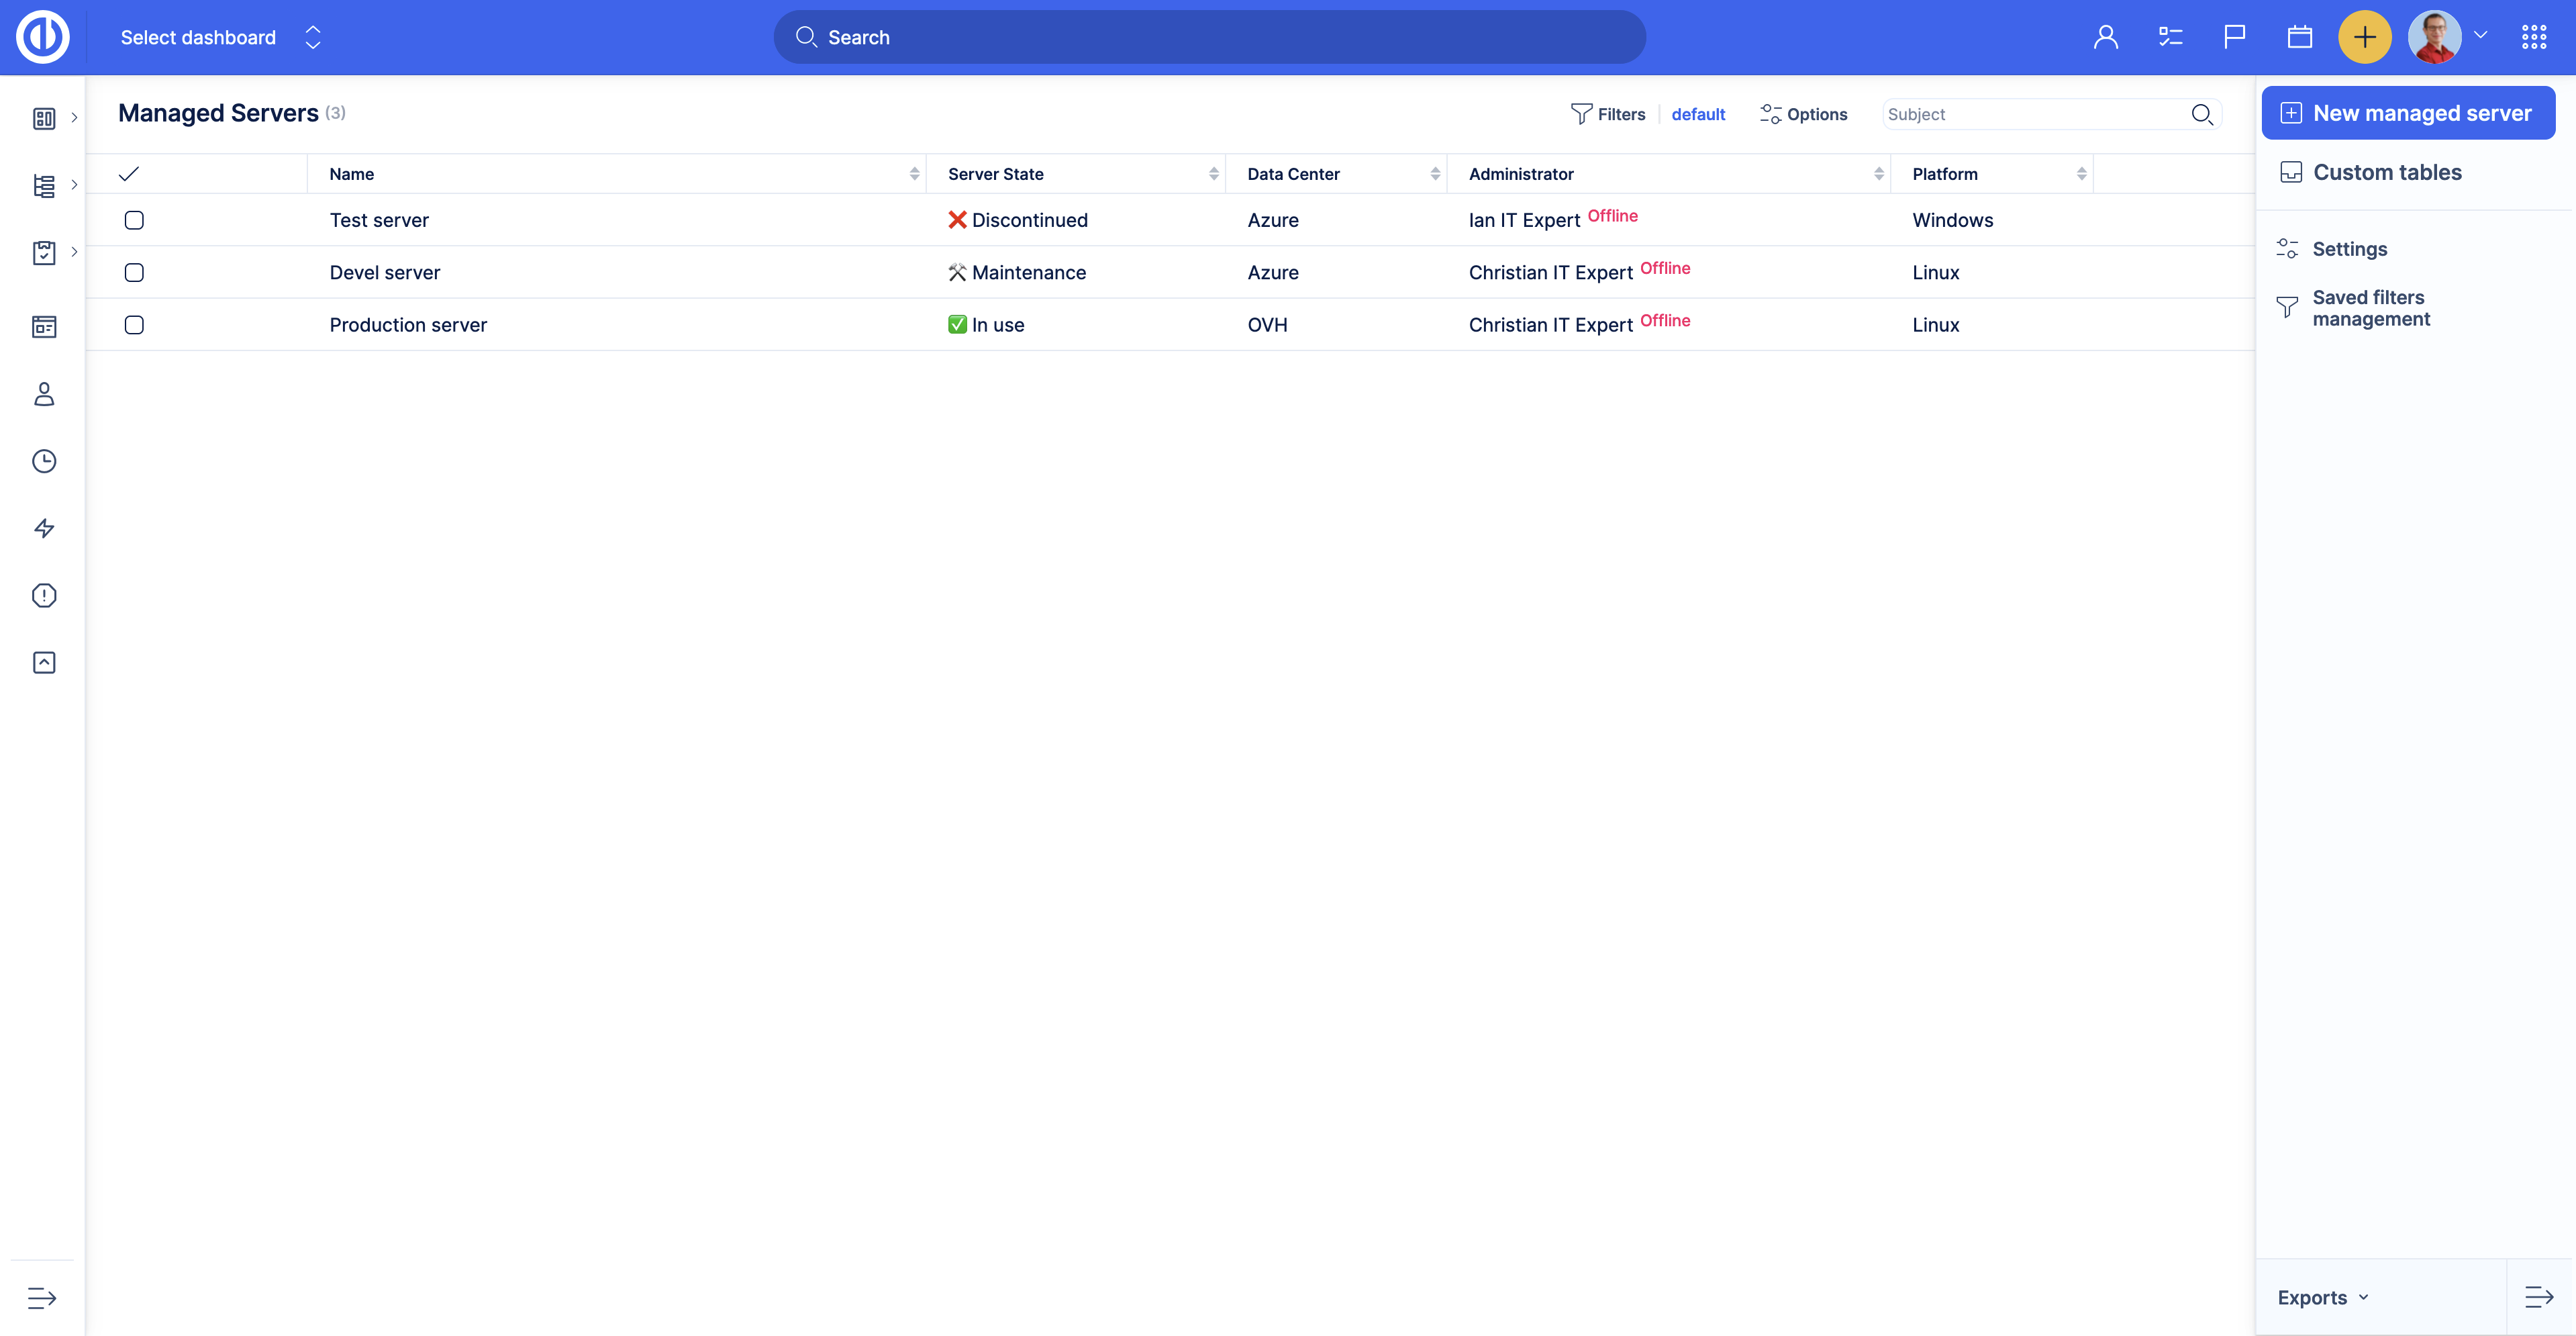
Records in the custom tables can be created on the custom table overview page and related entities pages. Go to Administration >> Custom tables. Then choose a table by clicking the table name.
You will see the custom table overview page with all the records. Click the New button, fill in the fields and click the Save button.
Should you require to create more records, use the Save & New option.
When the custom table is connected to other entities like tasks, you can create records straight from the entity. To do so, open a task overview page.
Then in the right menu find the custom table type. In our example, custom table Printers has type Asset management.
Click the Asset management button, then Add related printer.
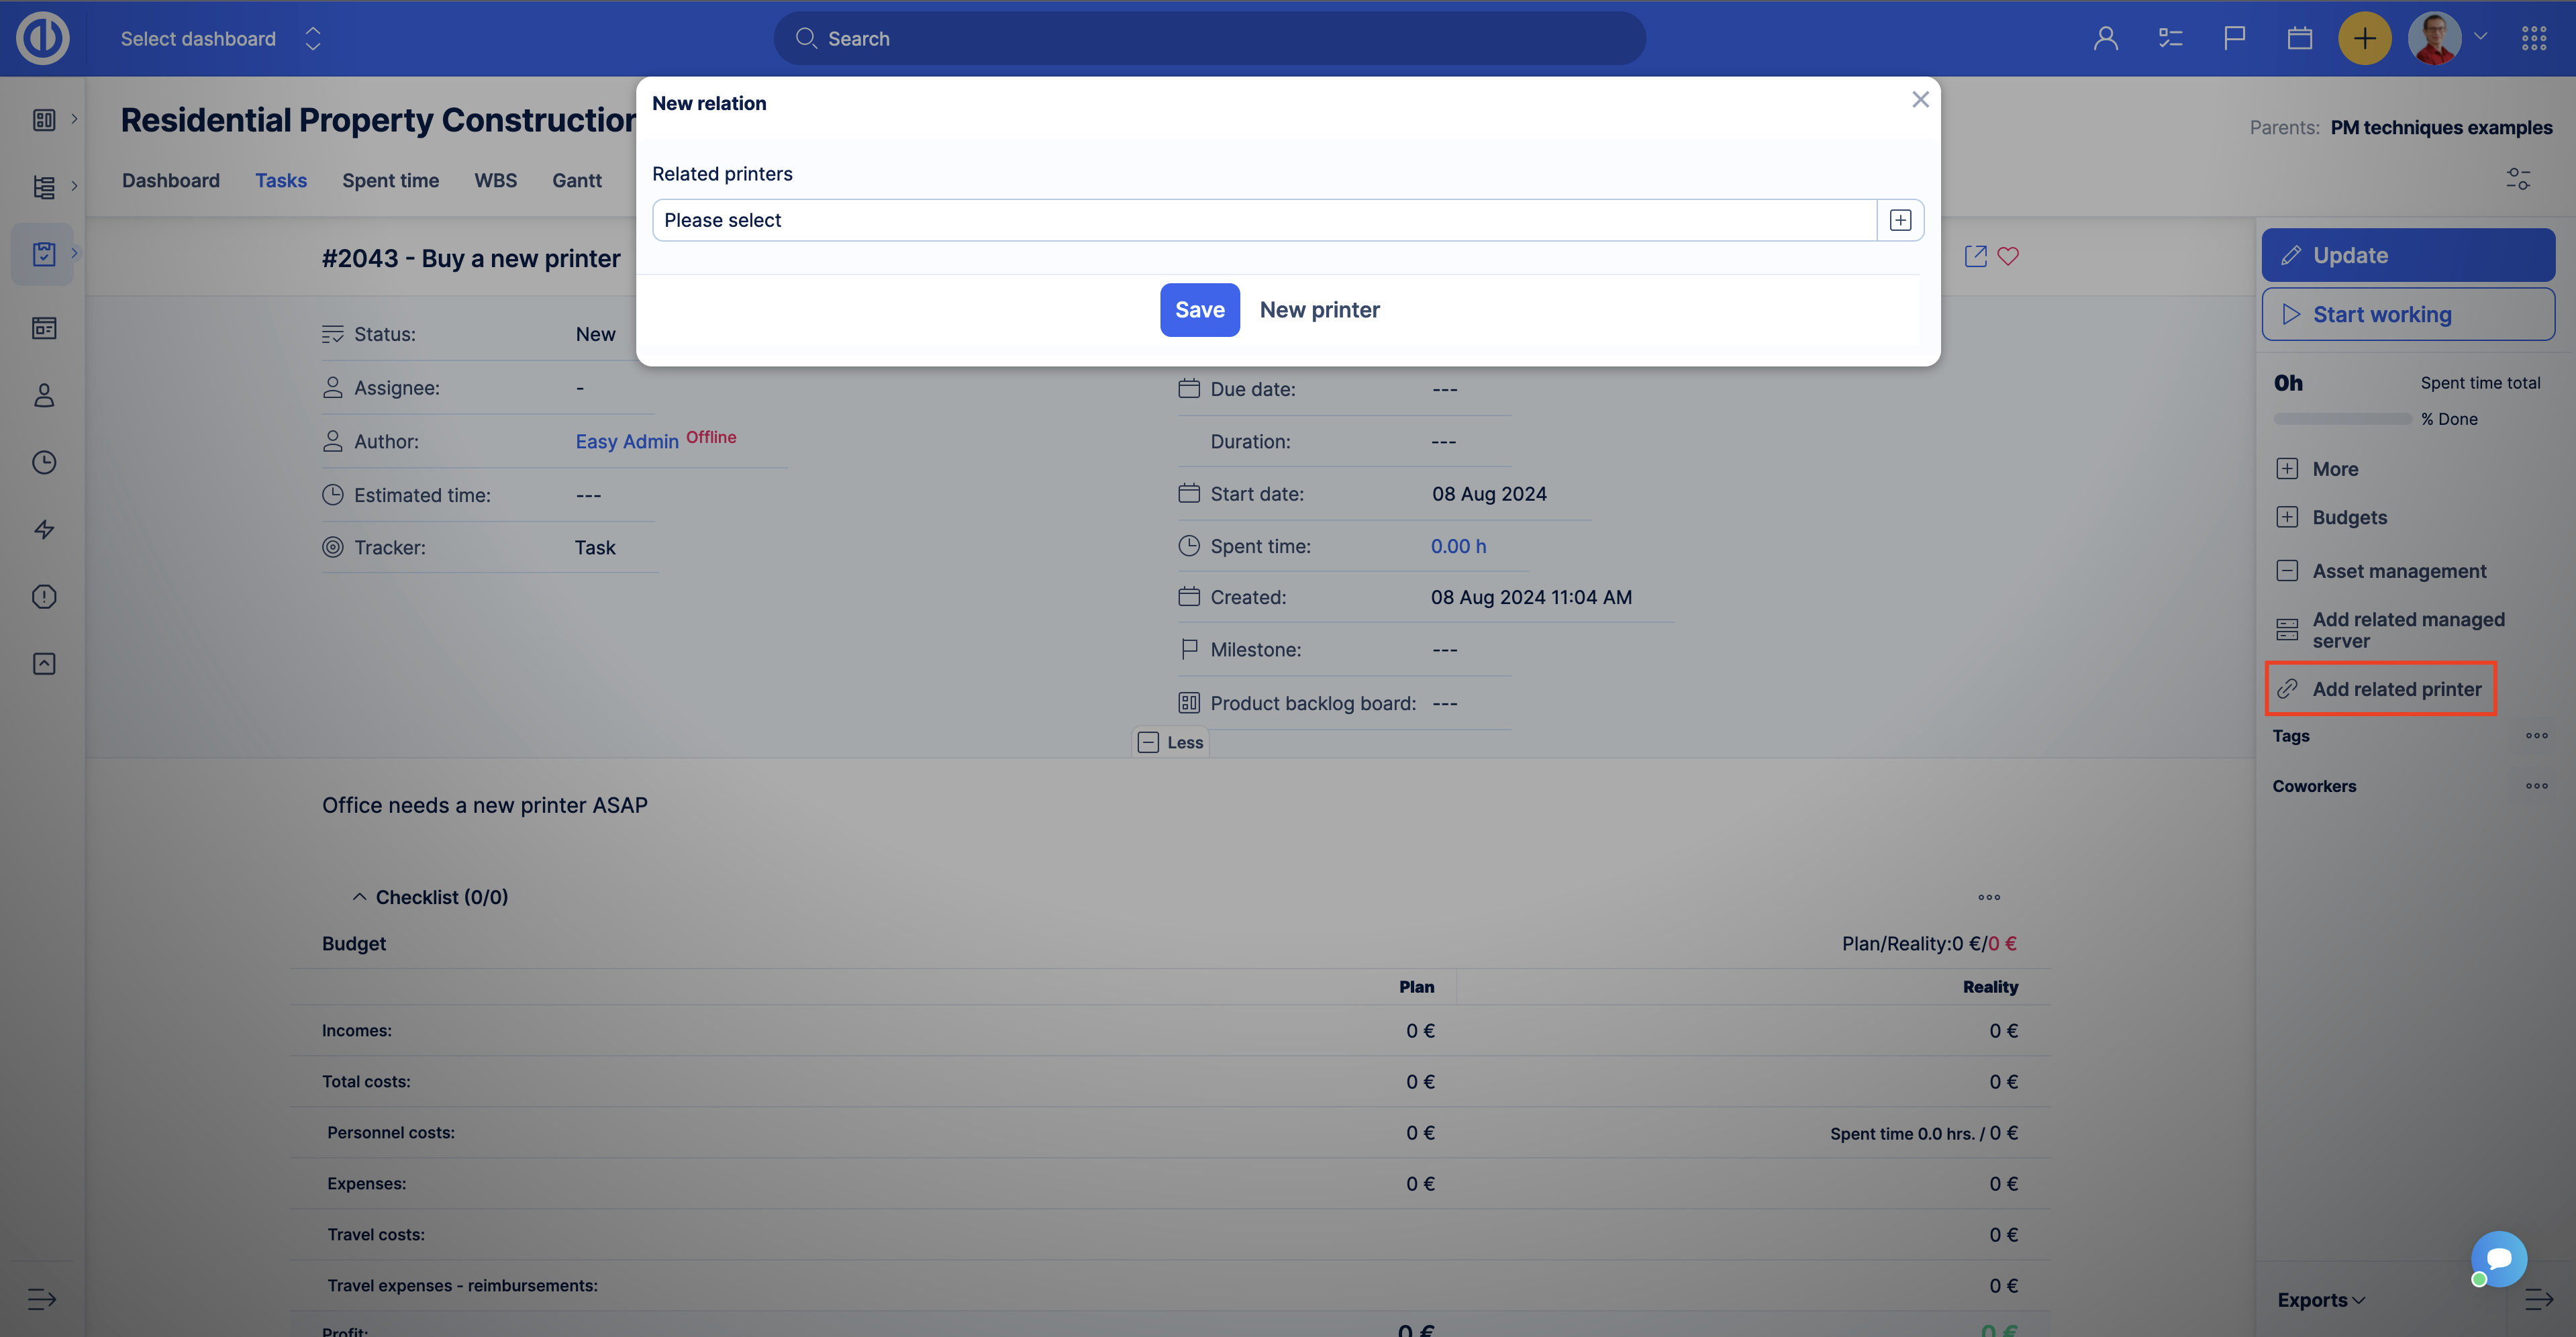
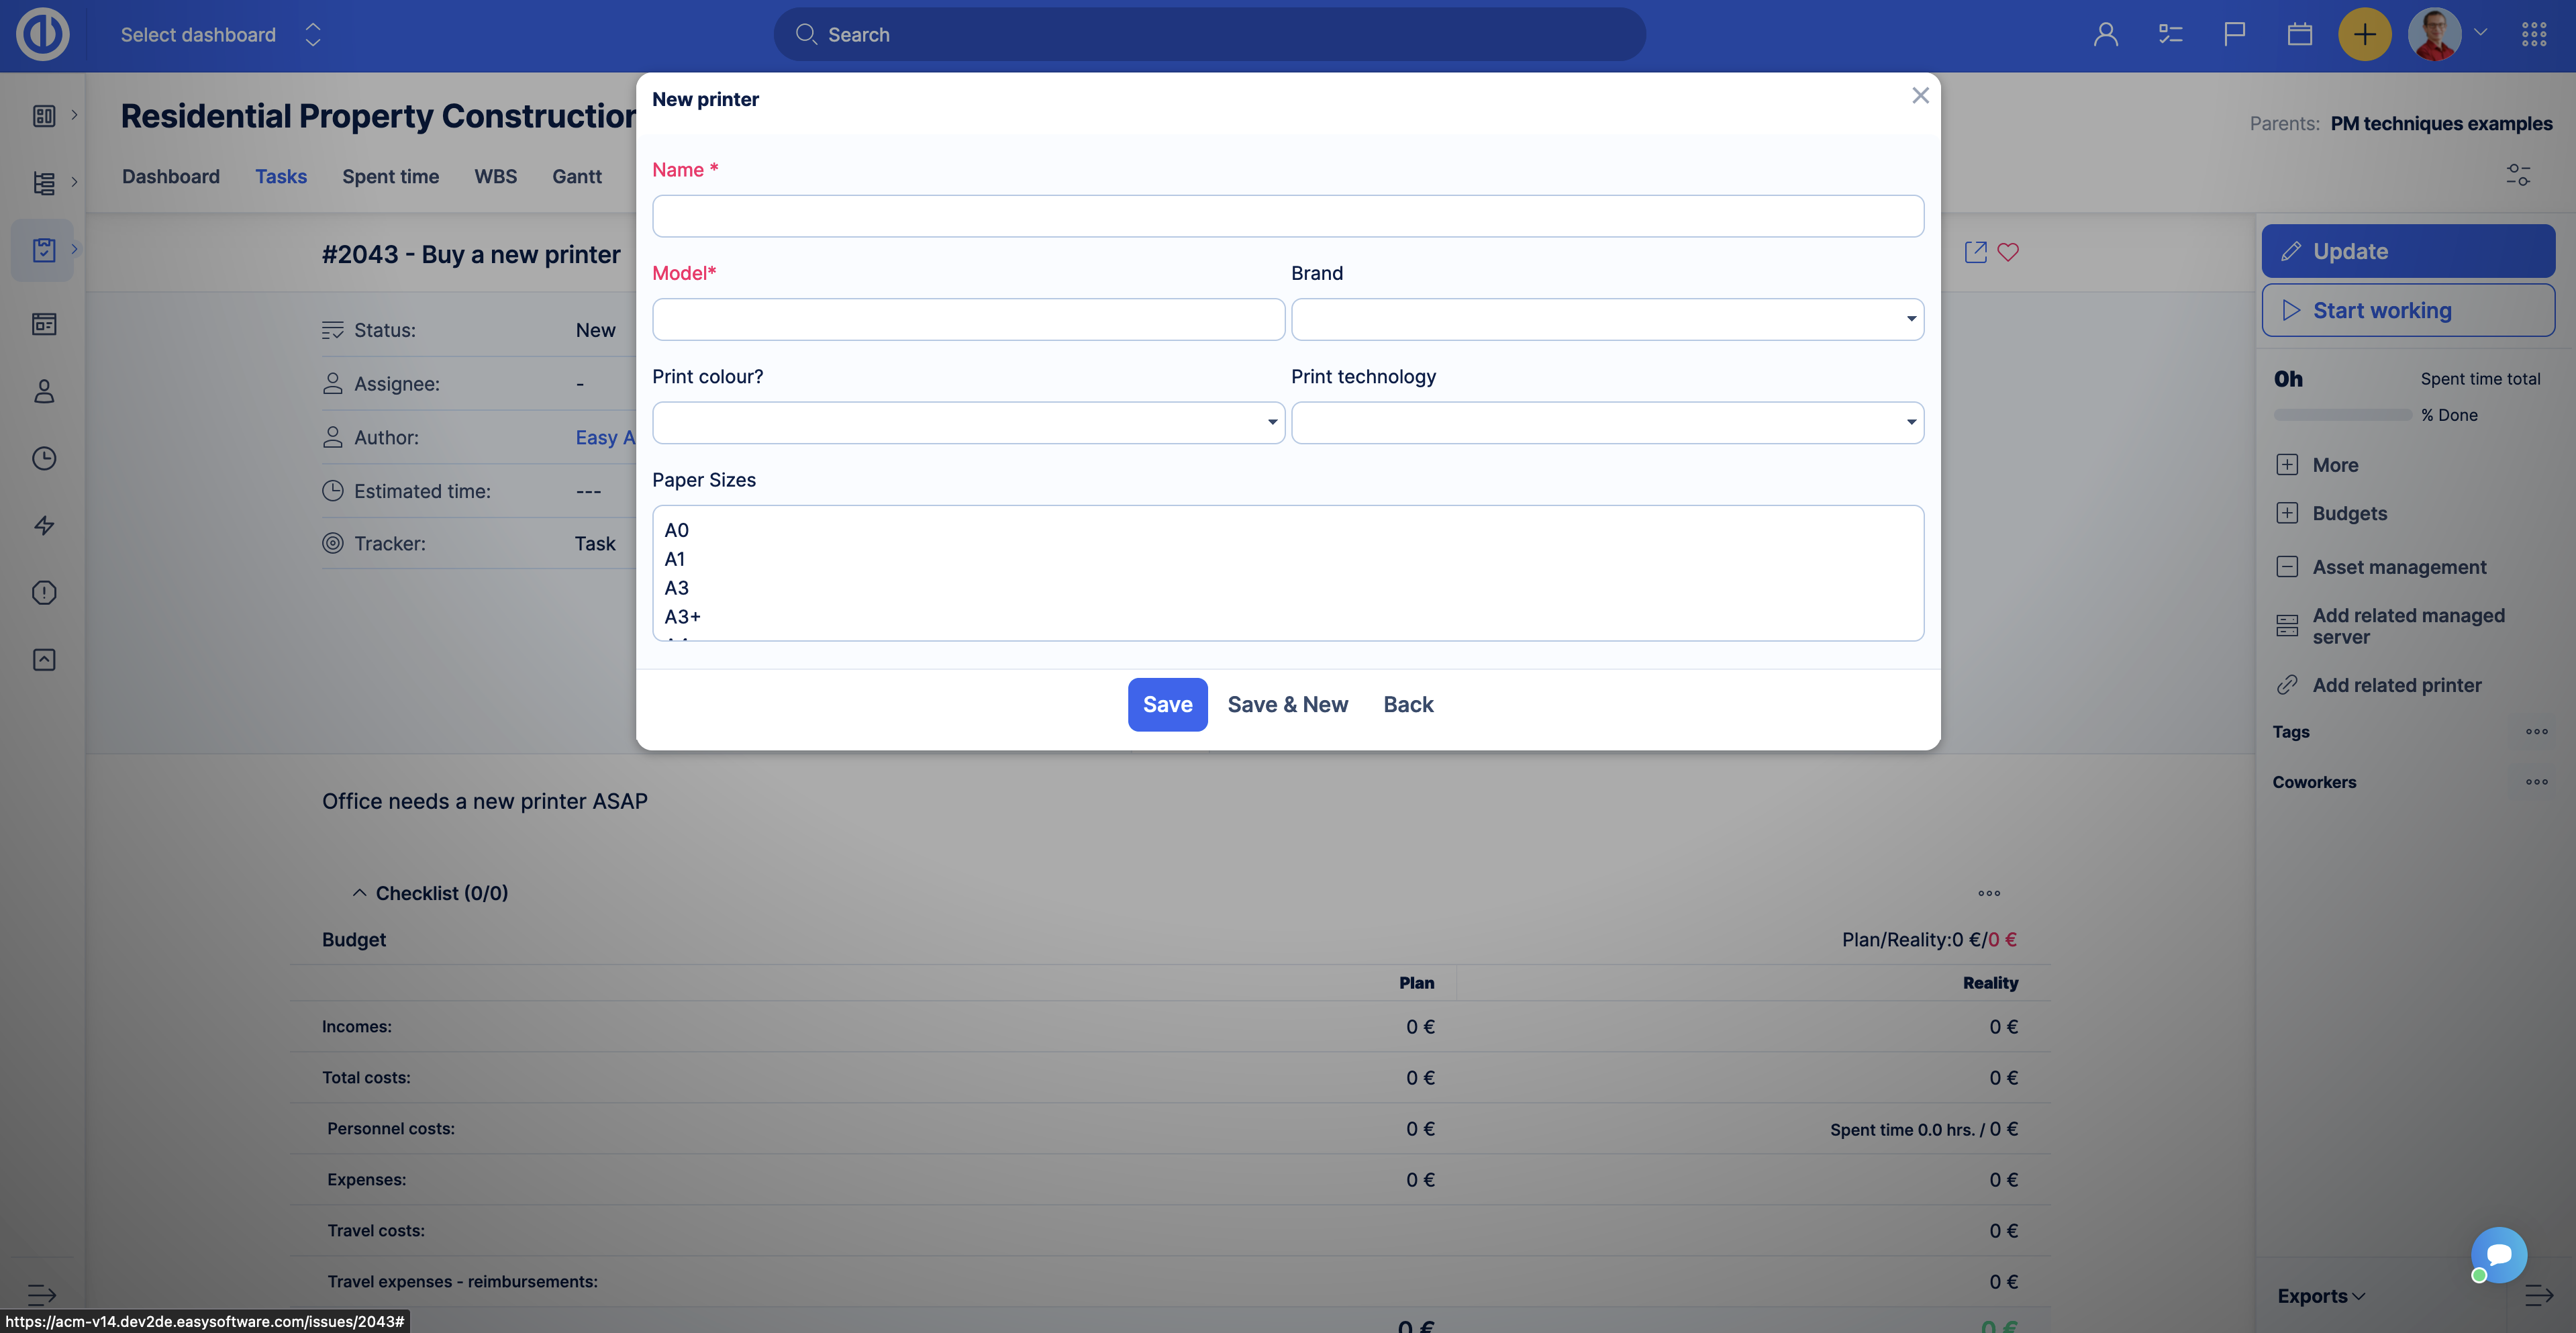
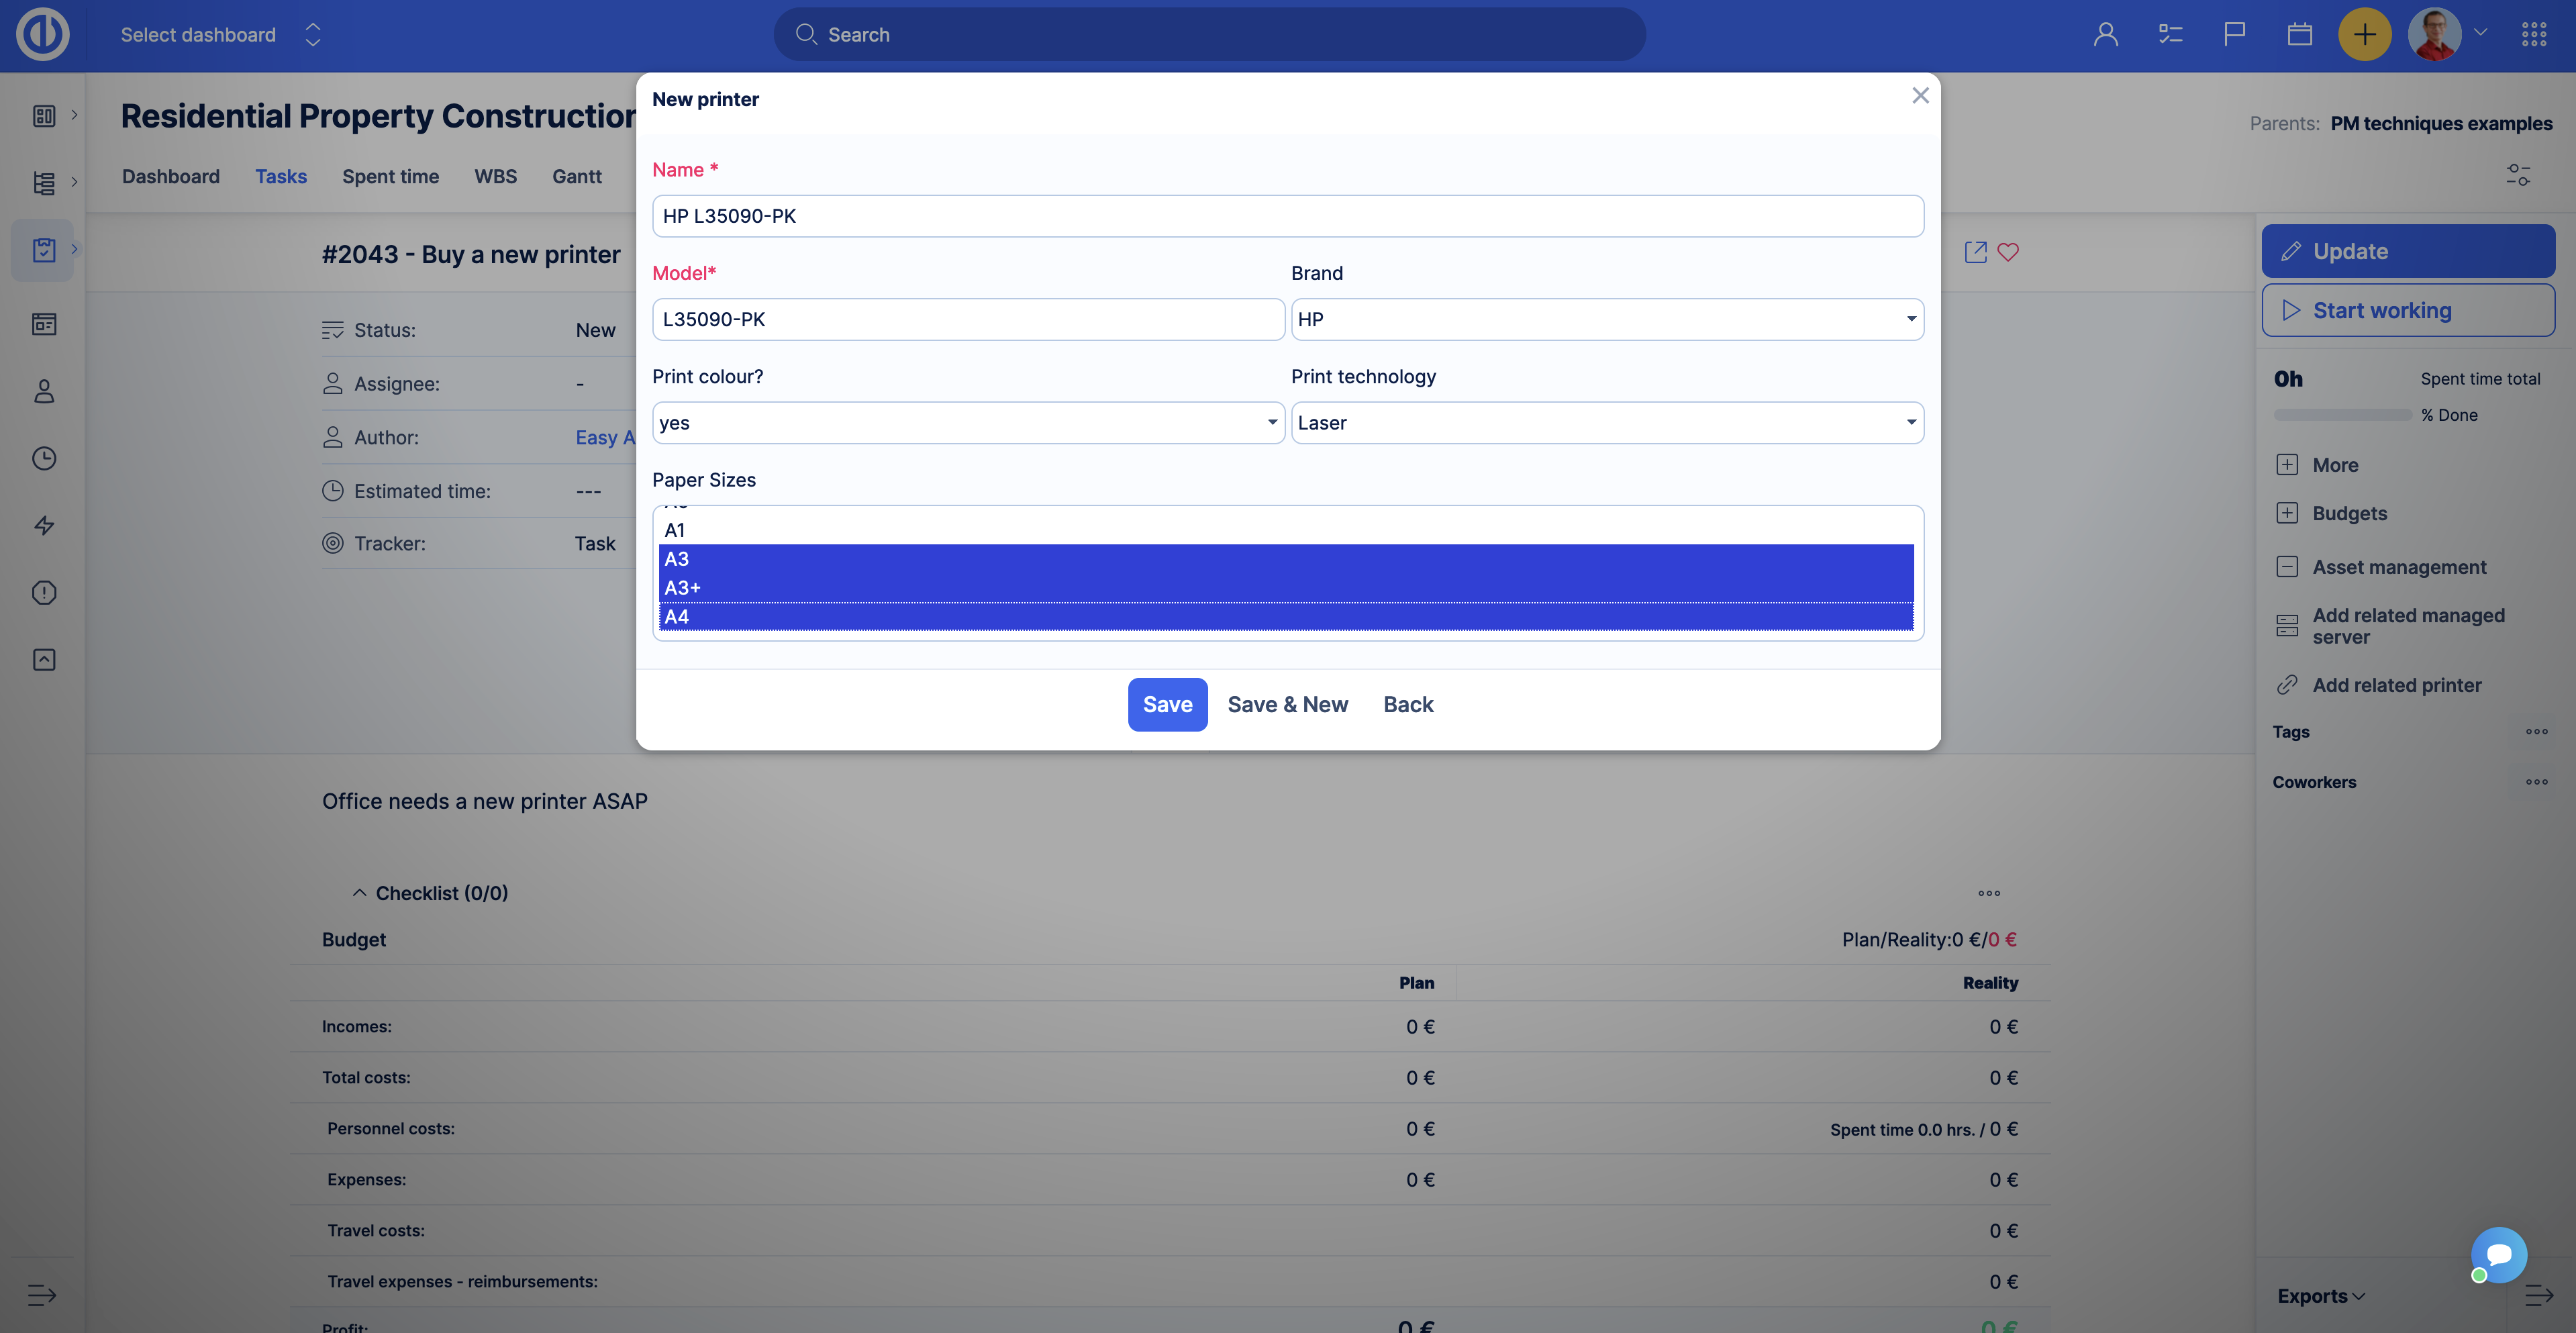
In the form, you can select an existing printer to link it with the task or create a new one by clicking the New printer button.
Example
We created the table Printers and added the custom fields to it. Now, let’s connect it to Tasks.
Imagine you have back-office workers who buy printers for your office. When your company needs a new printer, a manager will create a task for the back office to buy a new one. Connecting a custom table to Tasks will allow back-office workers to enter the printer’s details straight from the task overview page.
So, go to the custom table edit page. Open the General tab.
Find the field Trackers and select the trackers you want the table to be connected to. In our example, we want it to be connected to Tasks with Task and Issue trackers.
![]()
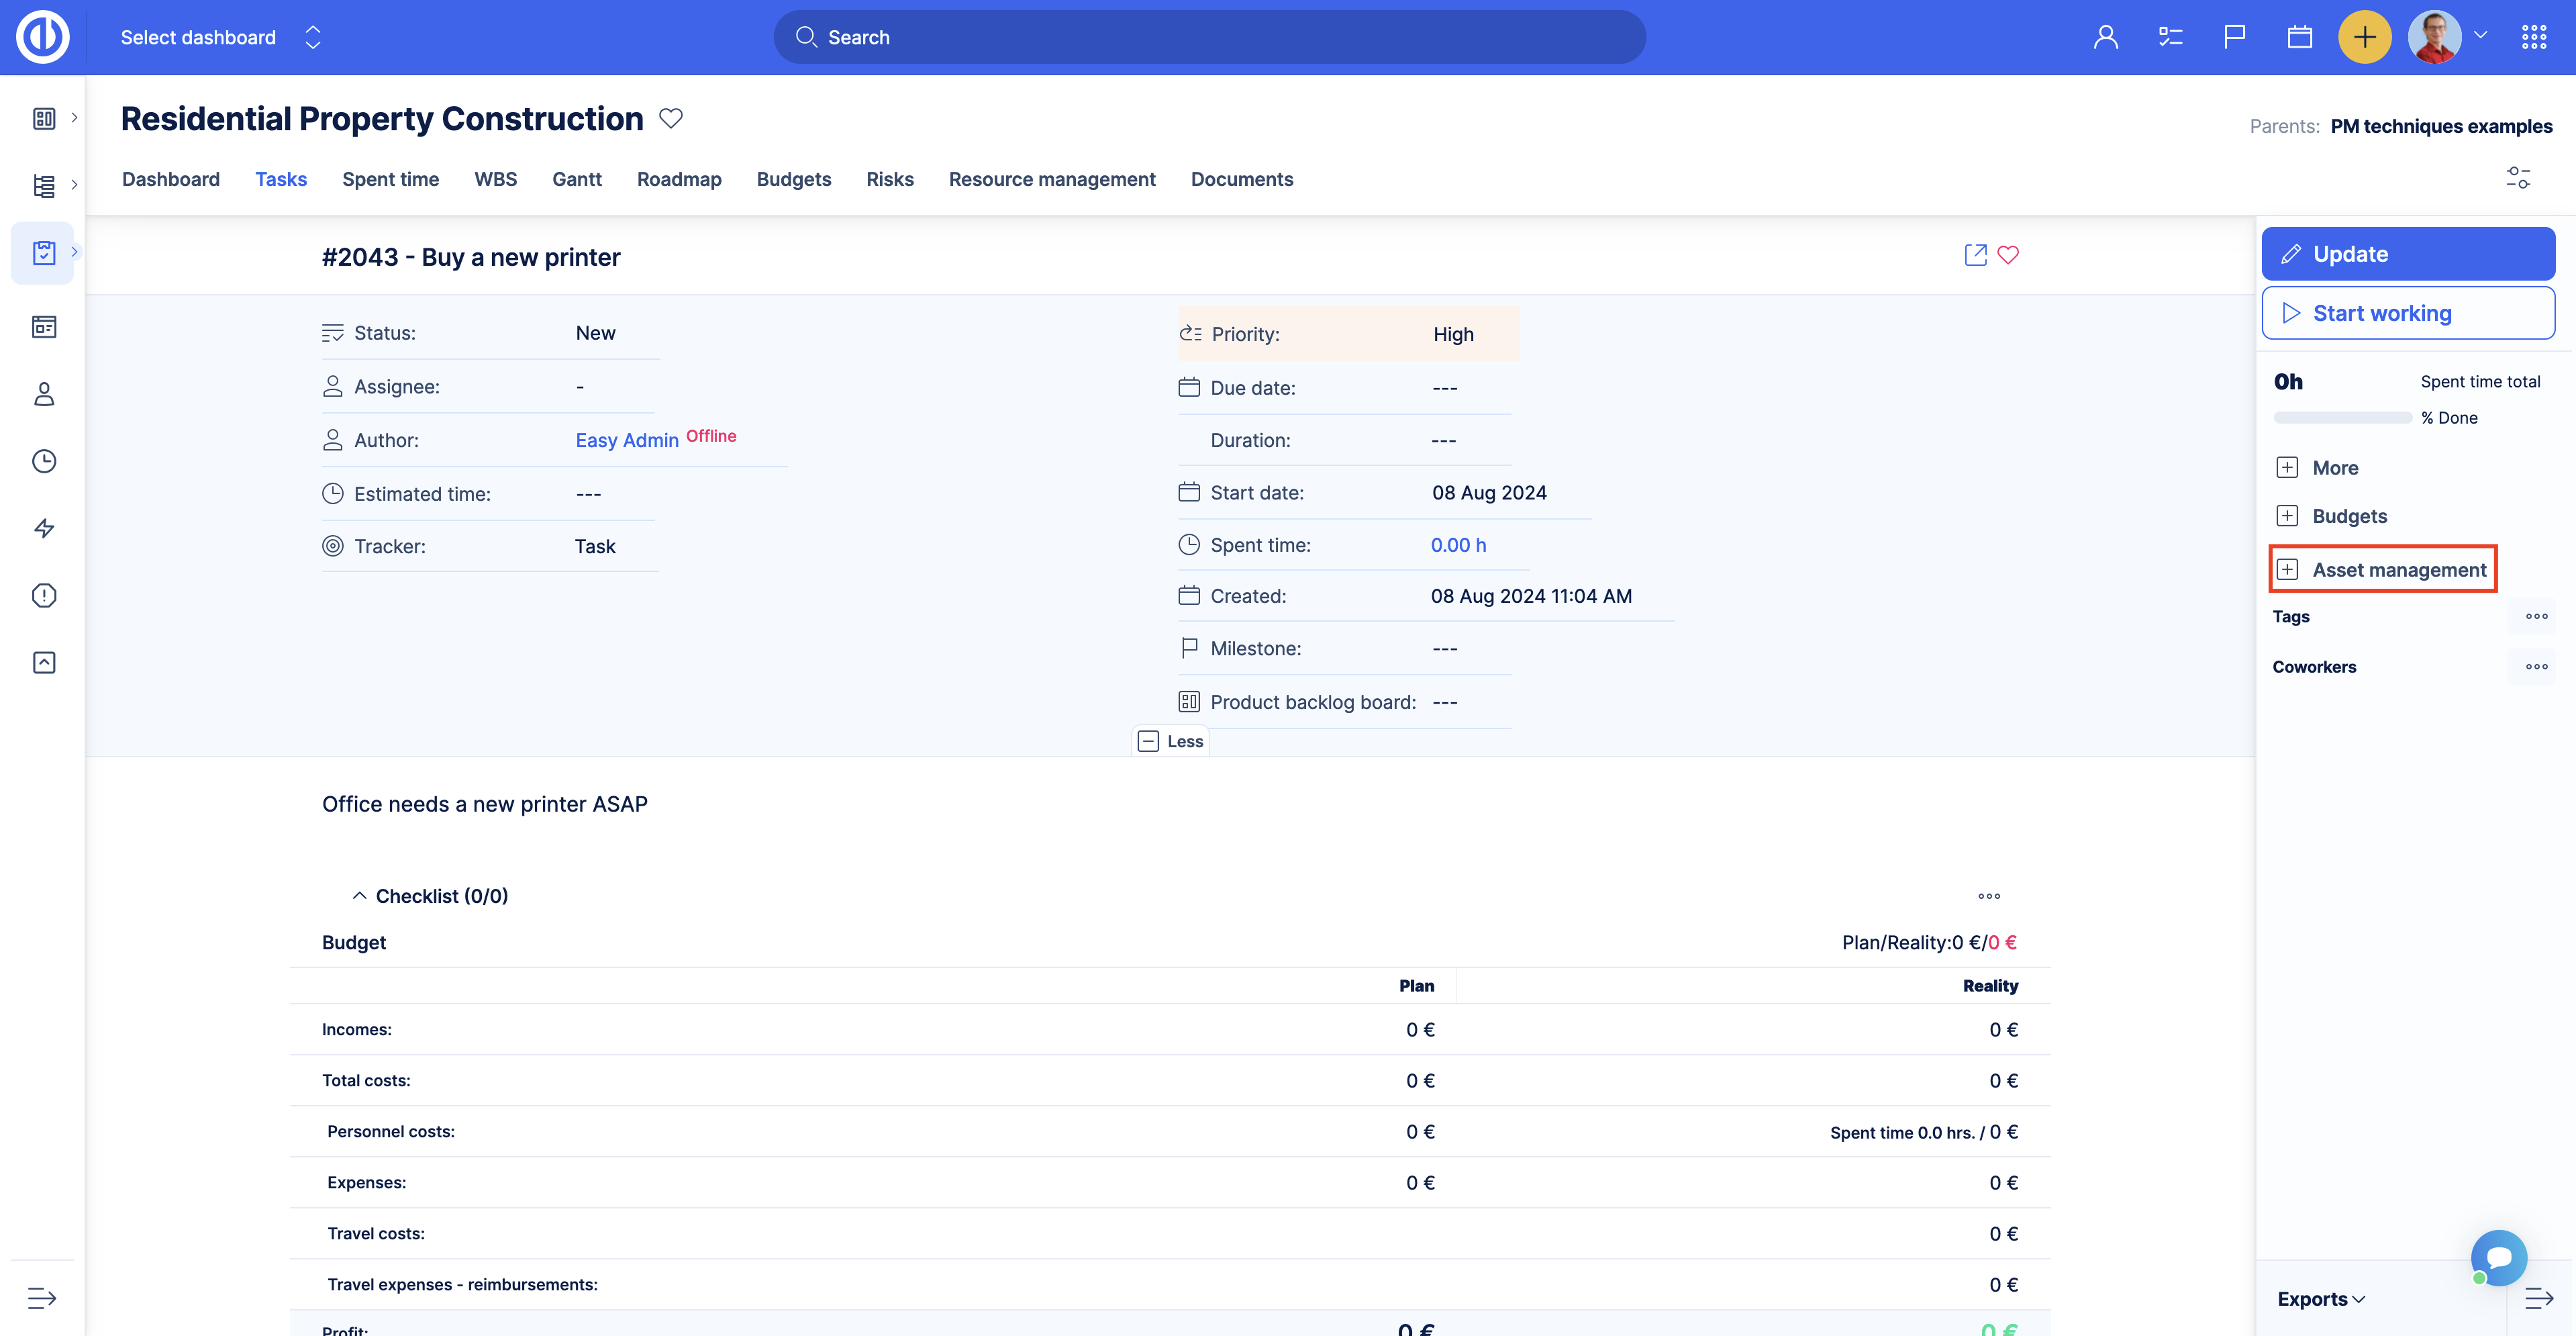
After selecting the tracker, click the Update button to save the changes. Now, open any project where you have Tasks with tracker Task or Issue. Then open a task (go to the task overview page). In our example, we have the back office project and the task of buying a new printer.
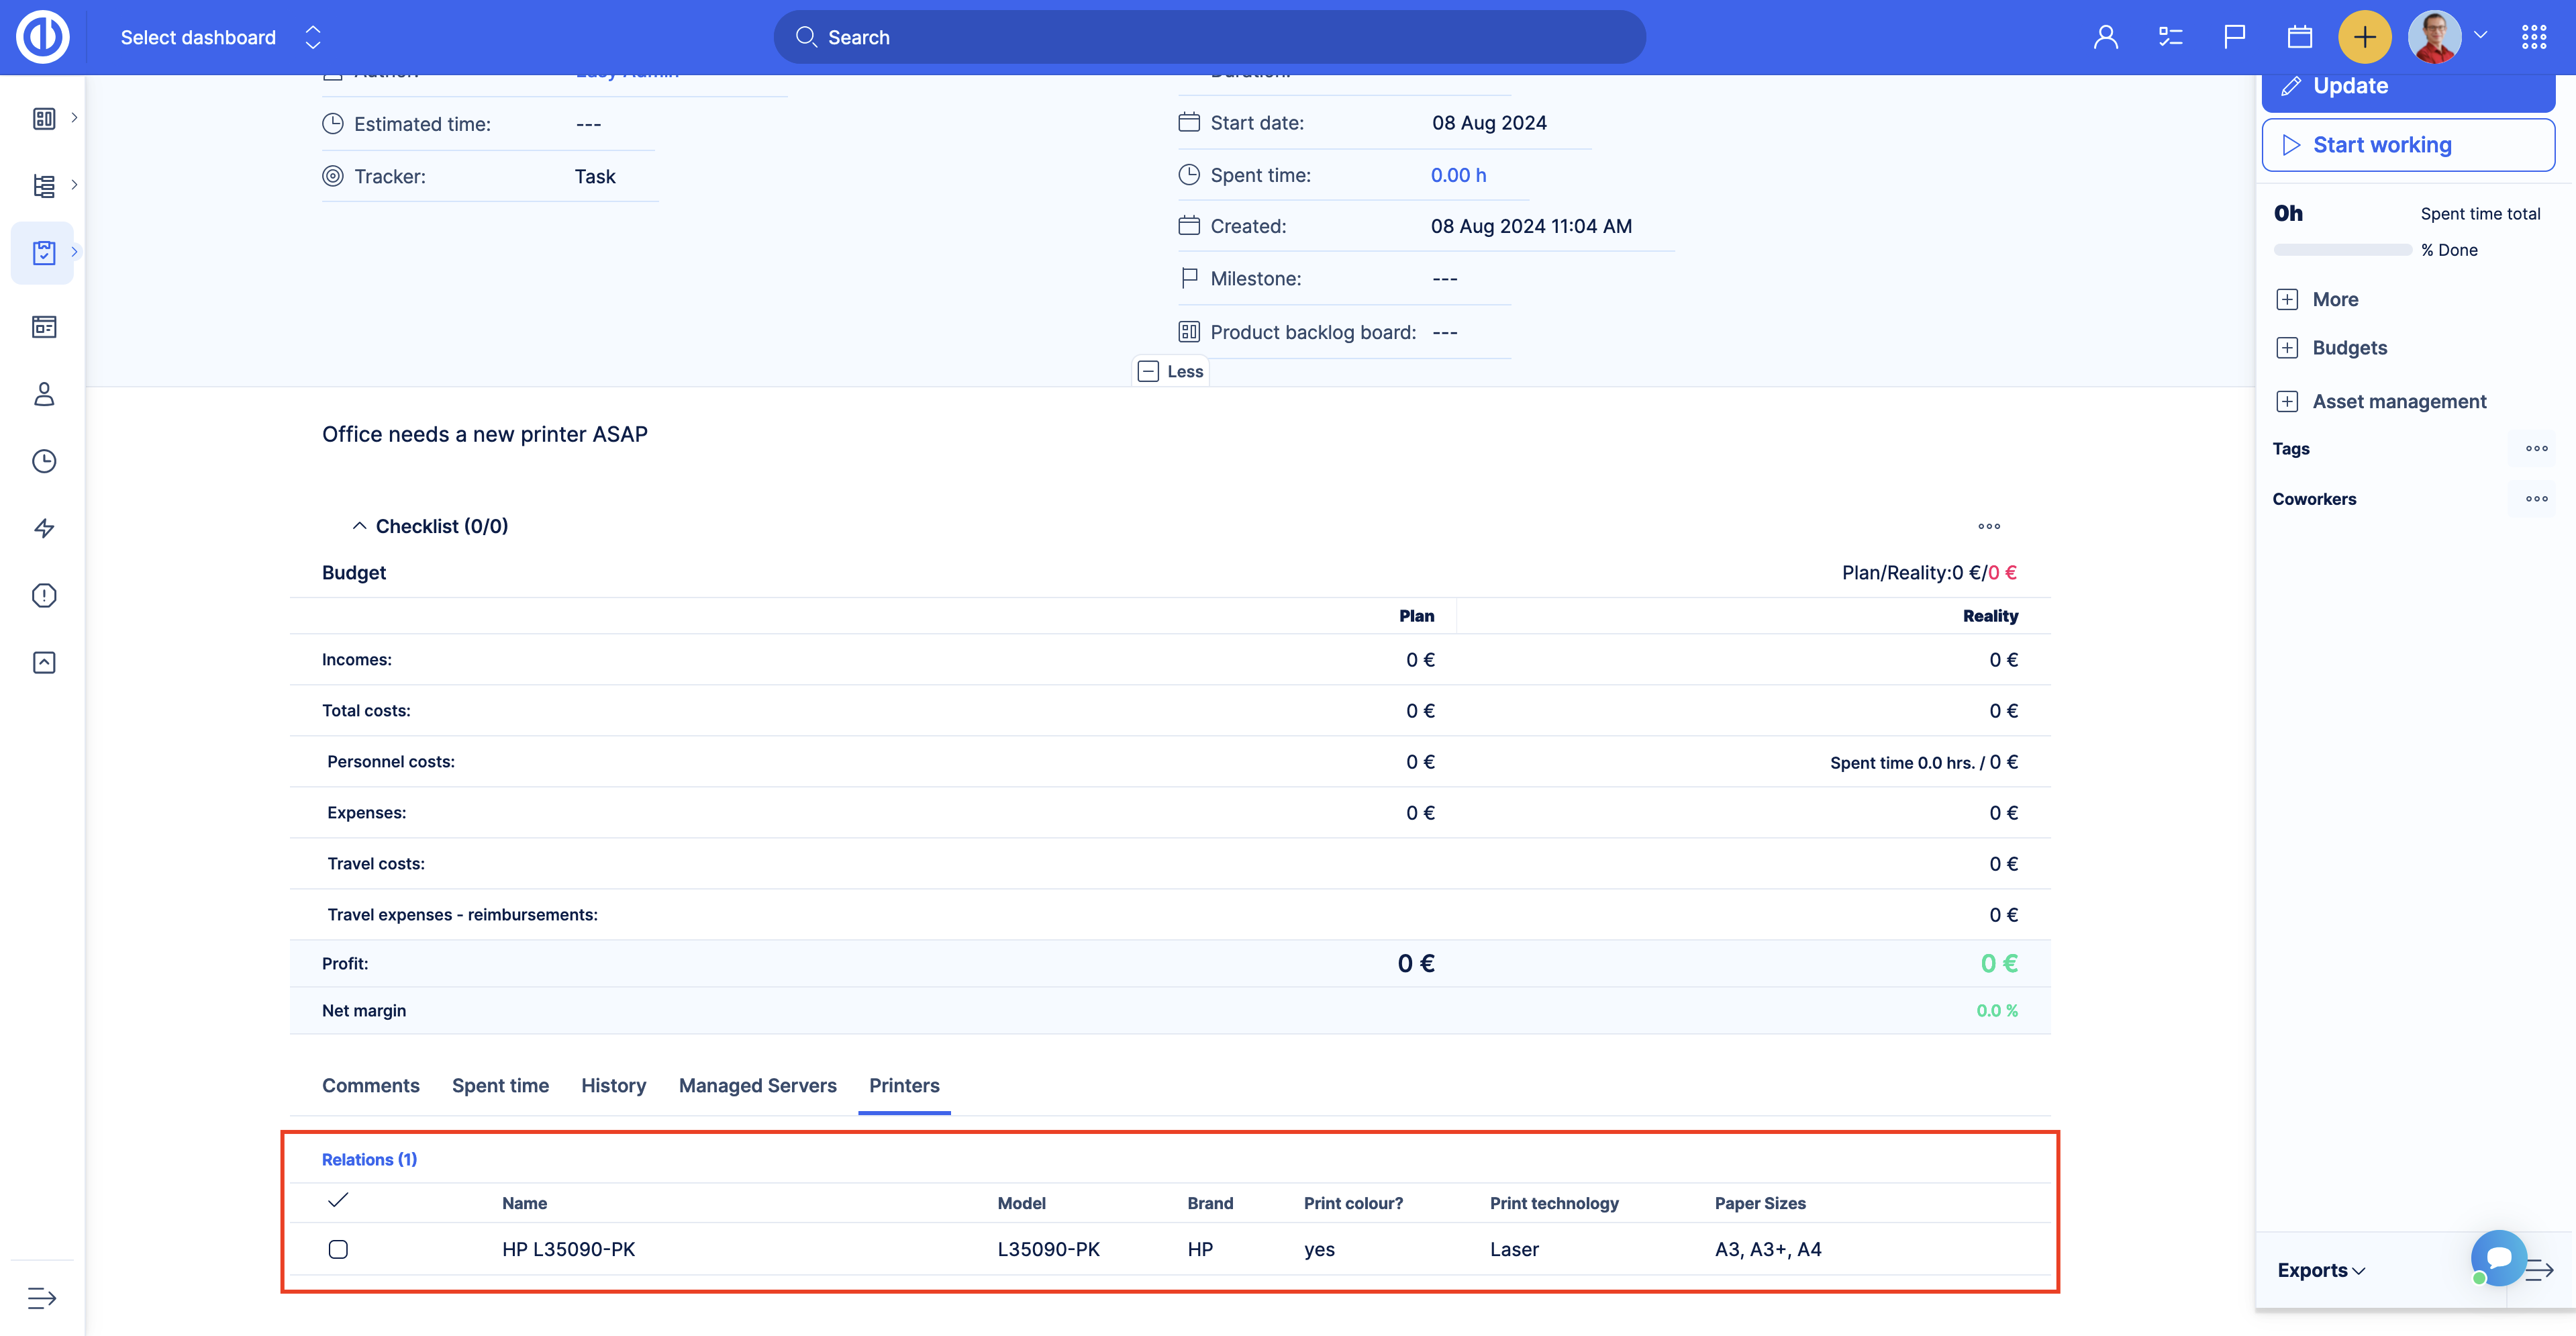
On the task overview page, you should see the button with the same name as our Printers’ table type - Asset management.
Click the button, you will see the Add related printer button. Click the button to add an existing printer or create a new one. Since our task is about buying a new printer we will create a new one.
Once you create a new printer, scroll down and click the Printers tab. You will see the printer created.
Once the custom record is created you can create related tasks from the custom record overview page. Open the printer page from the previous example. In the right menu click the Add related Task button. Enter the task information and click Save.
How to show custom table’s records on projects, tasks and other entities in a field
Imagine you have a custom table filled in with data and you want to have a field on the project where you can select data from the table. There are two ways you can do so.
Lookup custom field
Go to the Global menu >> Administration >> Custom fields. Click the New custom field and select the object to which you want to add the custom field, in our example, it is a project.
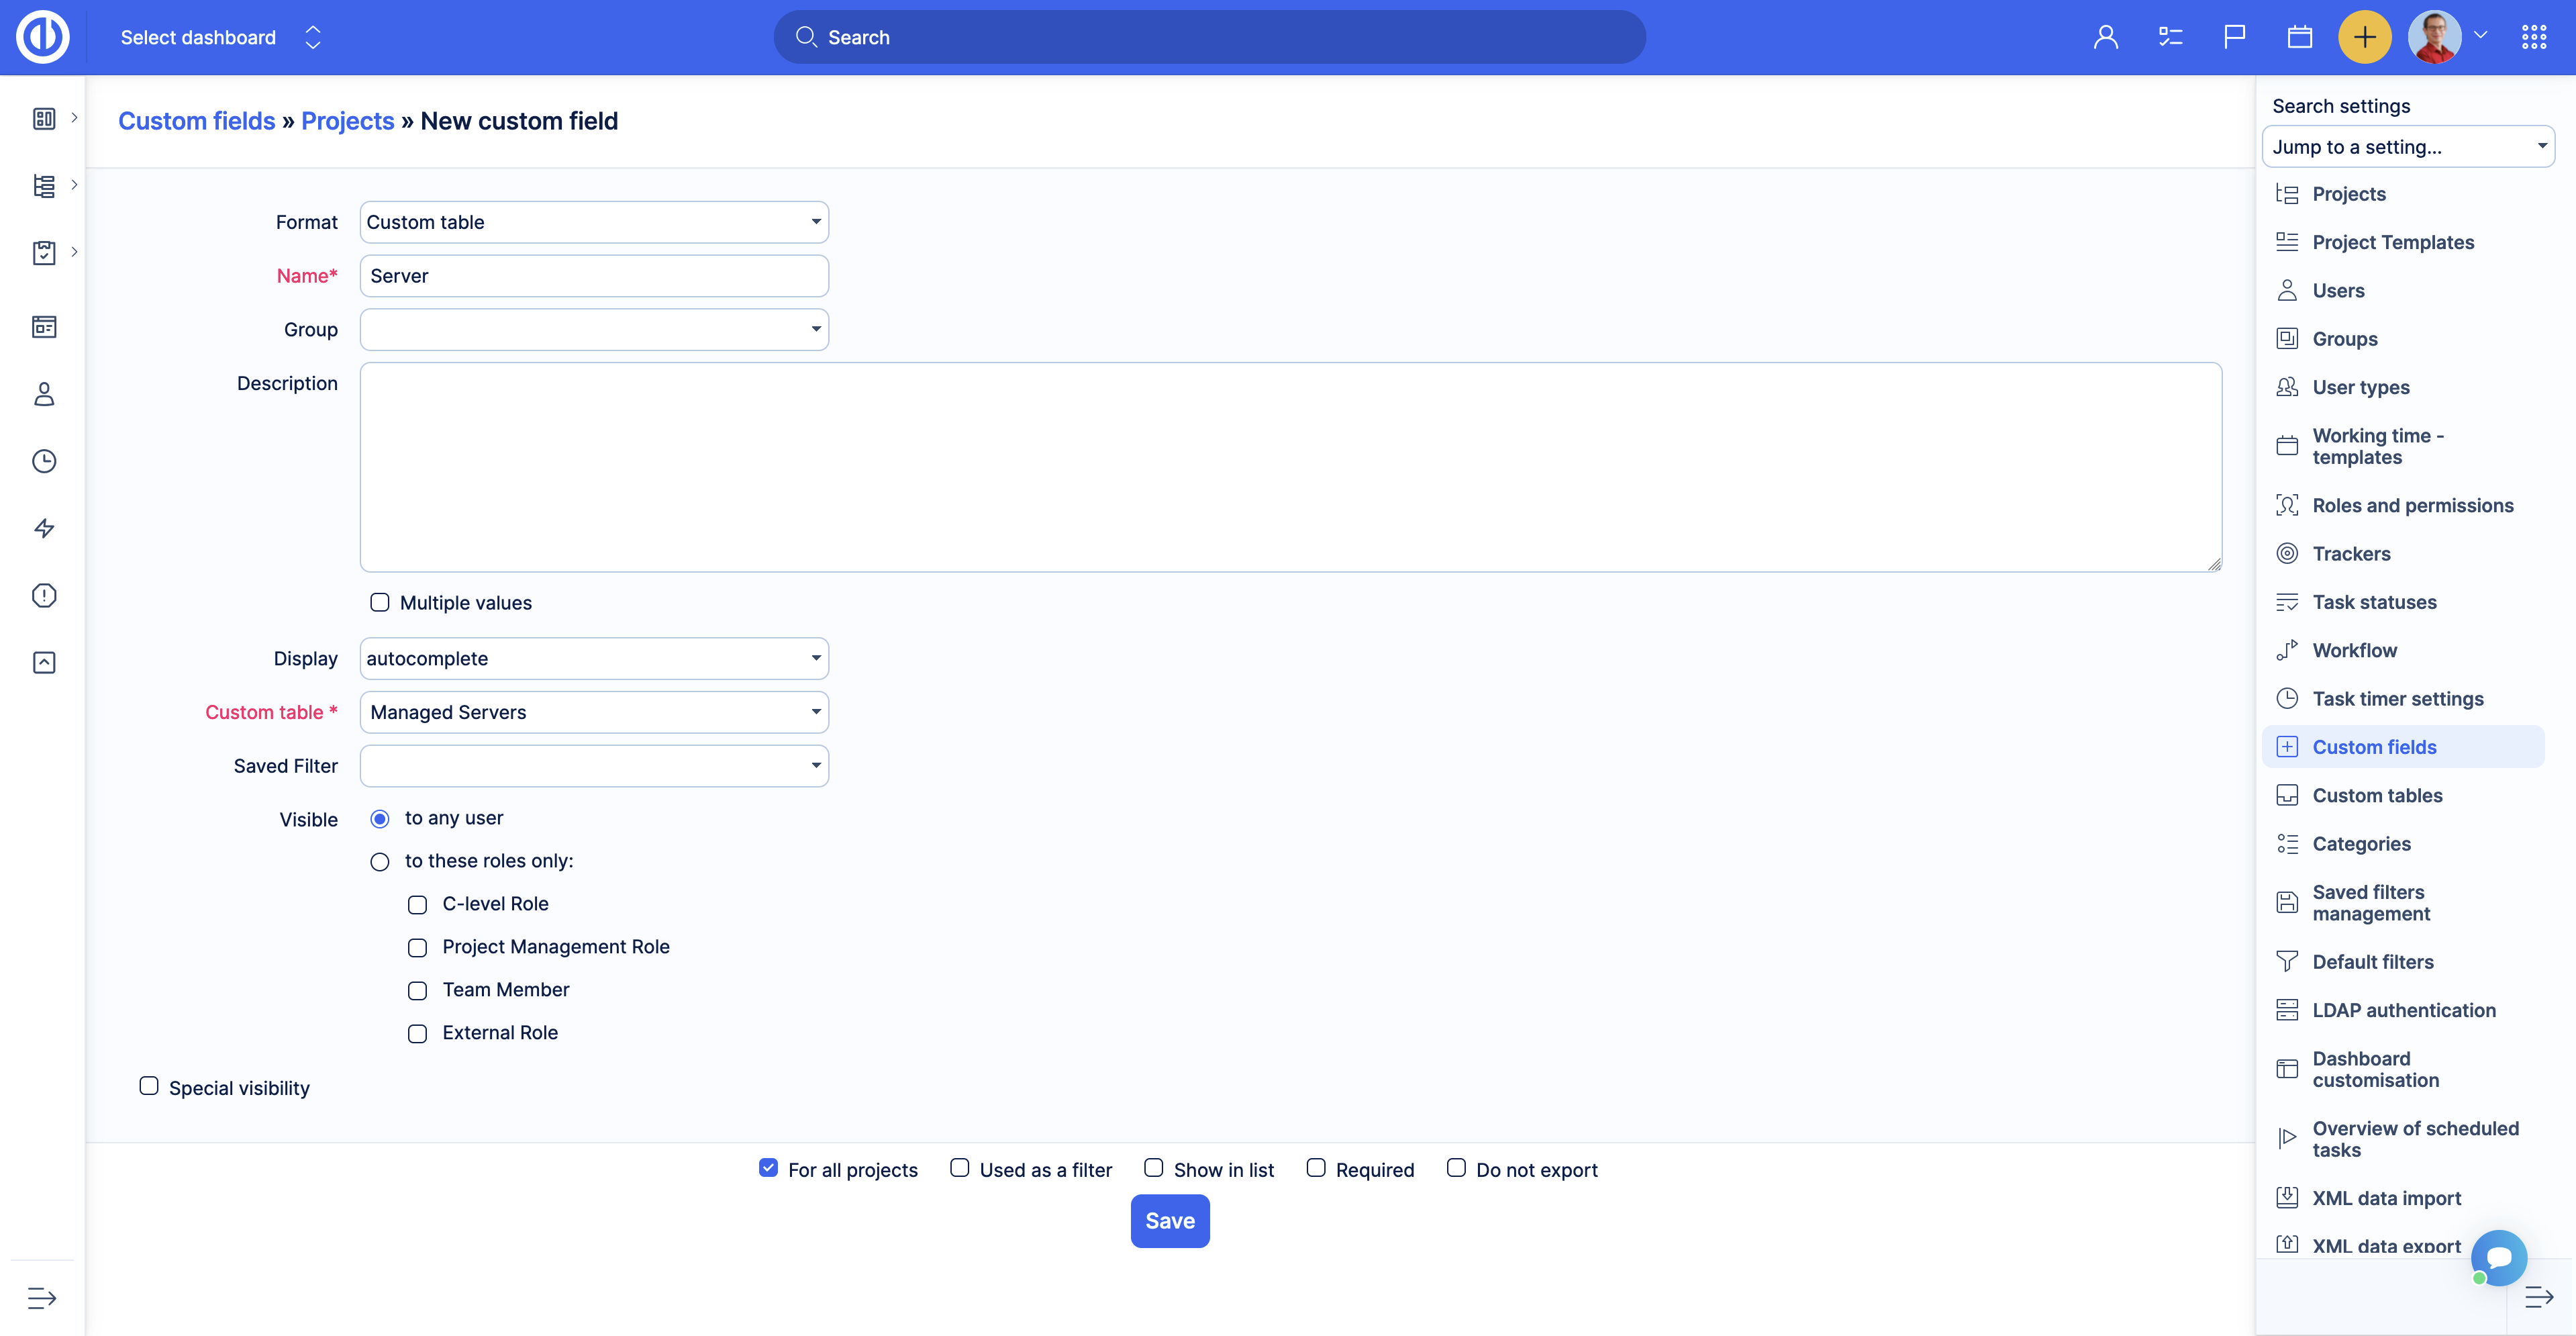
You will see a custom field creation page. In the Format field select the Lookup option. Give a name to the field, in our example, we will name it Server. In the Entity field select the Custom table, then in the Custom table field select the table you want to get data from.
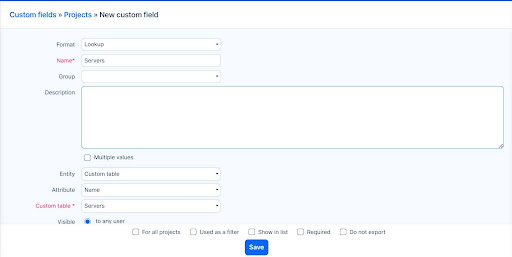
Apply other settings if needed and click Save.
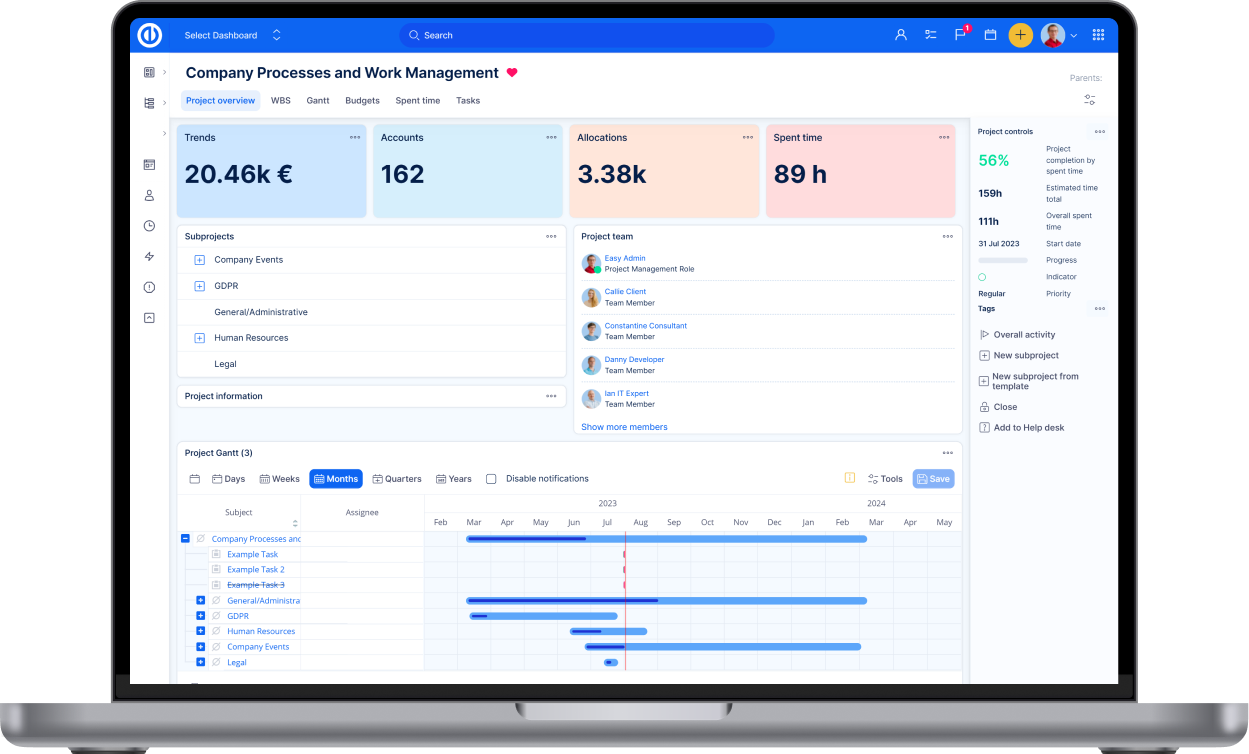
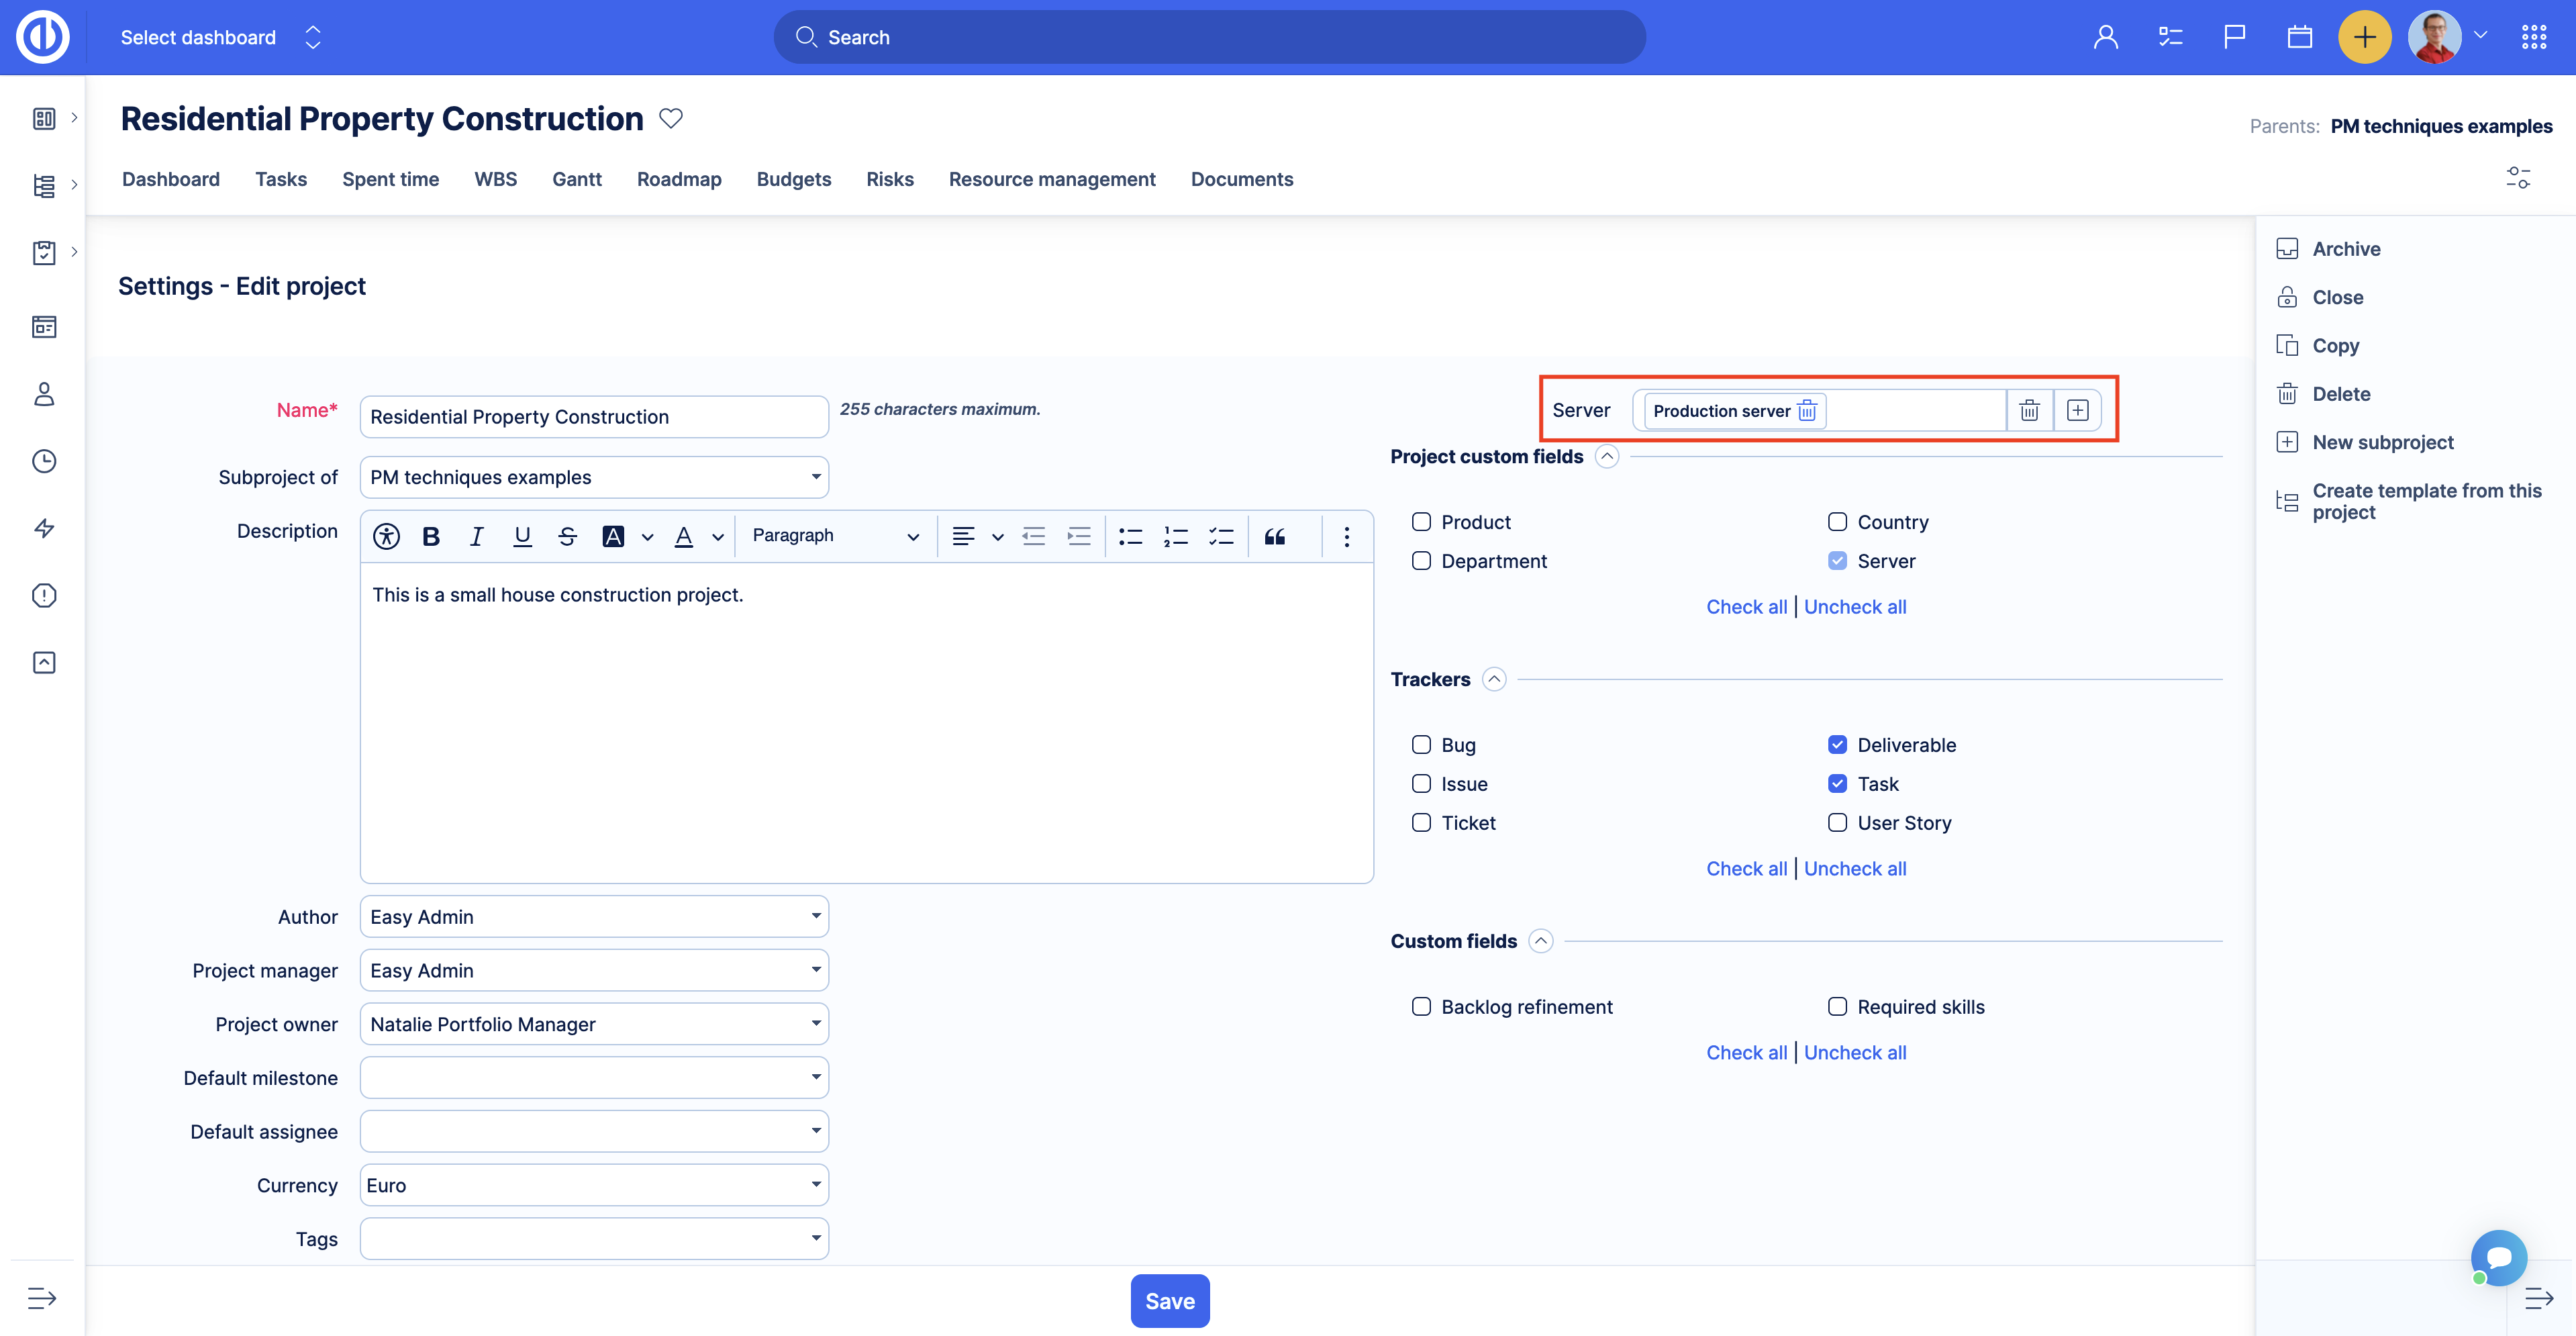
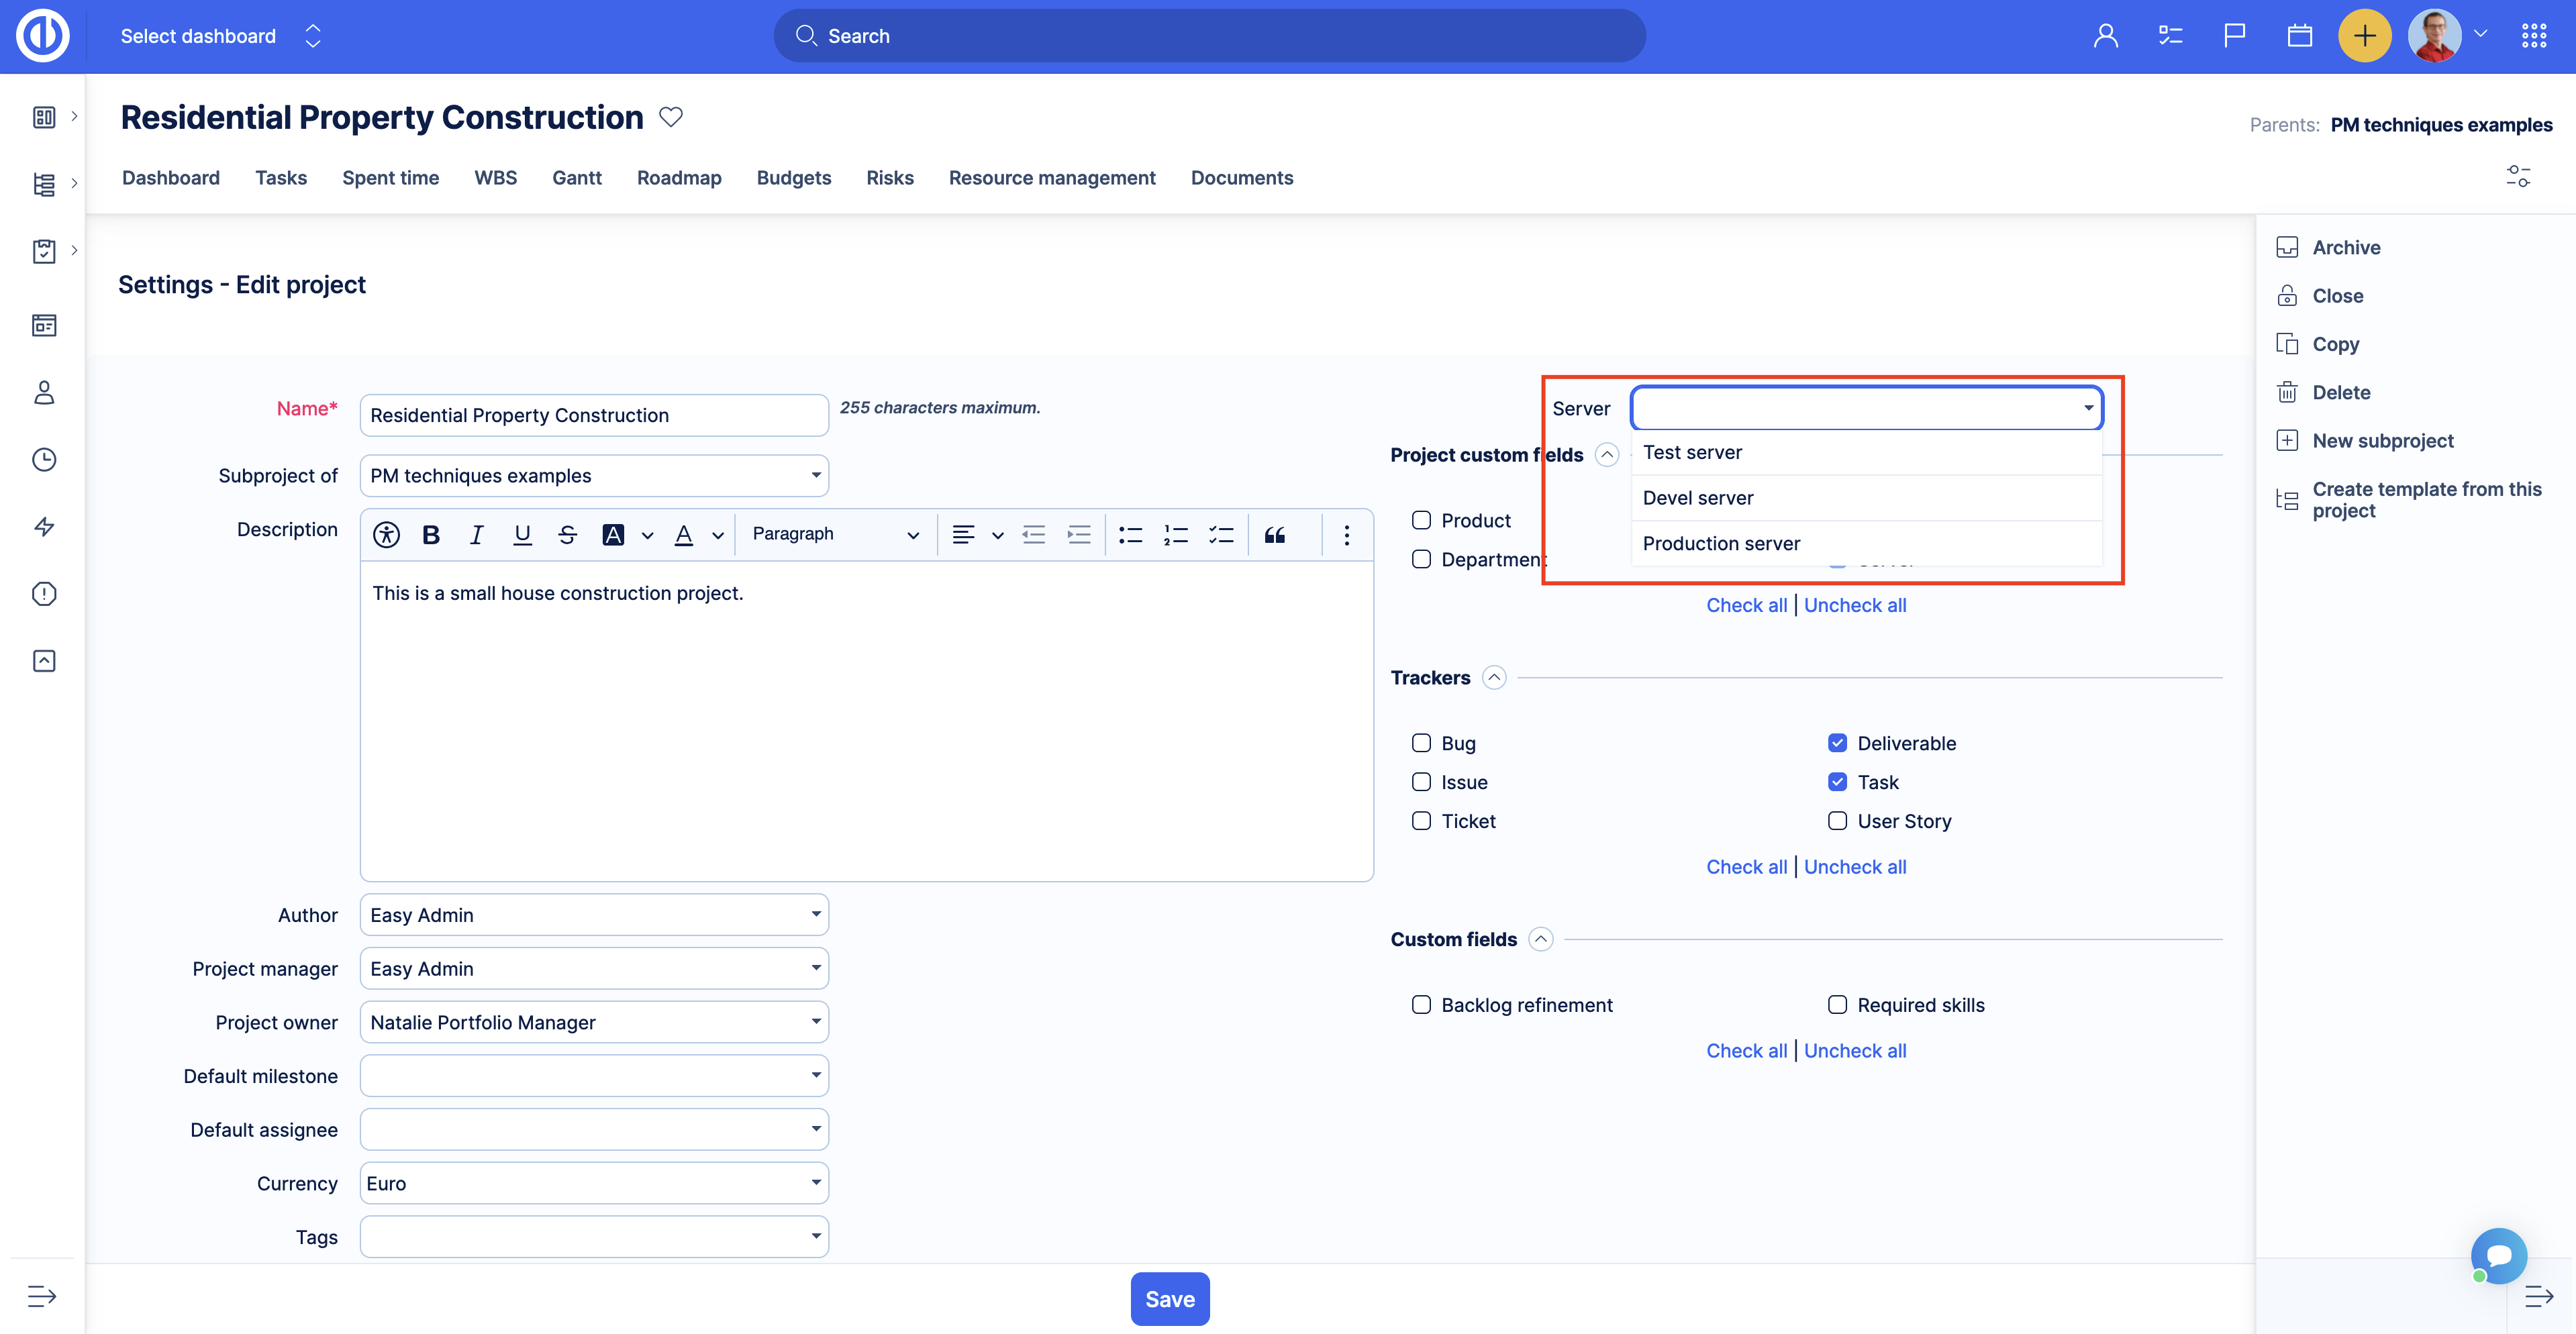
Now let’s open a project and see how it works. On the project information page, we see a field where we are able to select the data from the table. In our example, we have a table where we have a list of available servers, and we want to know for this example on which server some work is being done, or where the work for this project resides.
Custom table custom field
In the same way, as described above you can use the Custom table custom field. Example of the settings:
On the project page, it will look like this:
What is the difference between these two options?
The custom table custom field has additional feature compared to Lookup. It allows you to show records that suit specified filters. Imagine you have a list of Servers, every server belongs to a different company and you want to show users only servers from certain companies. Create a saved filter for the table and select it in the Saved filter field in the custom field settings.
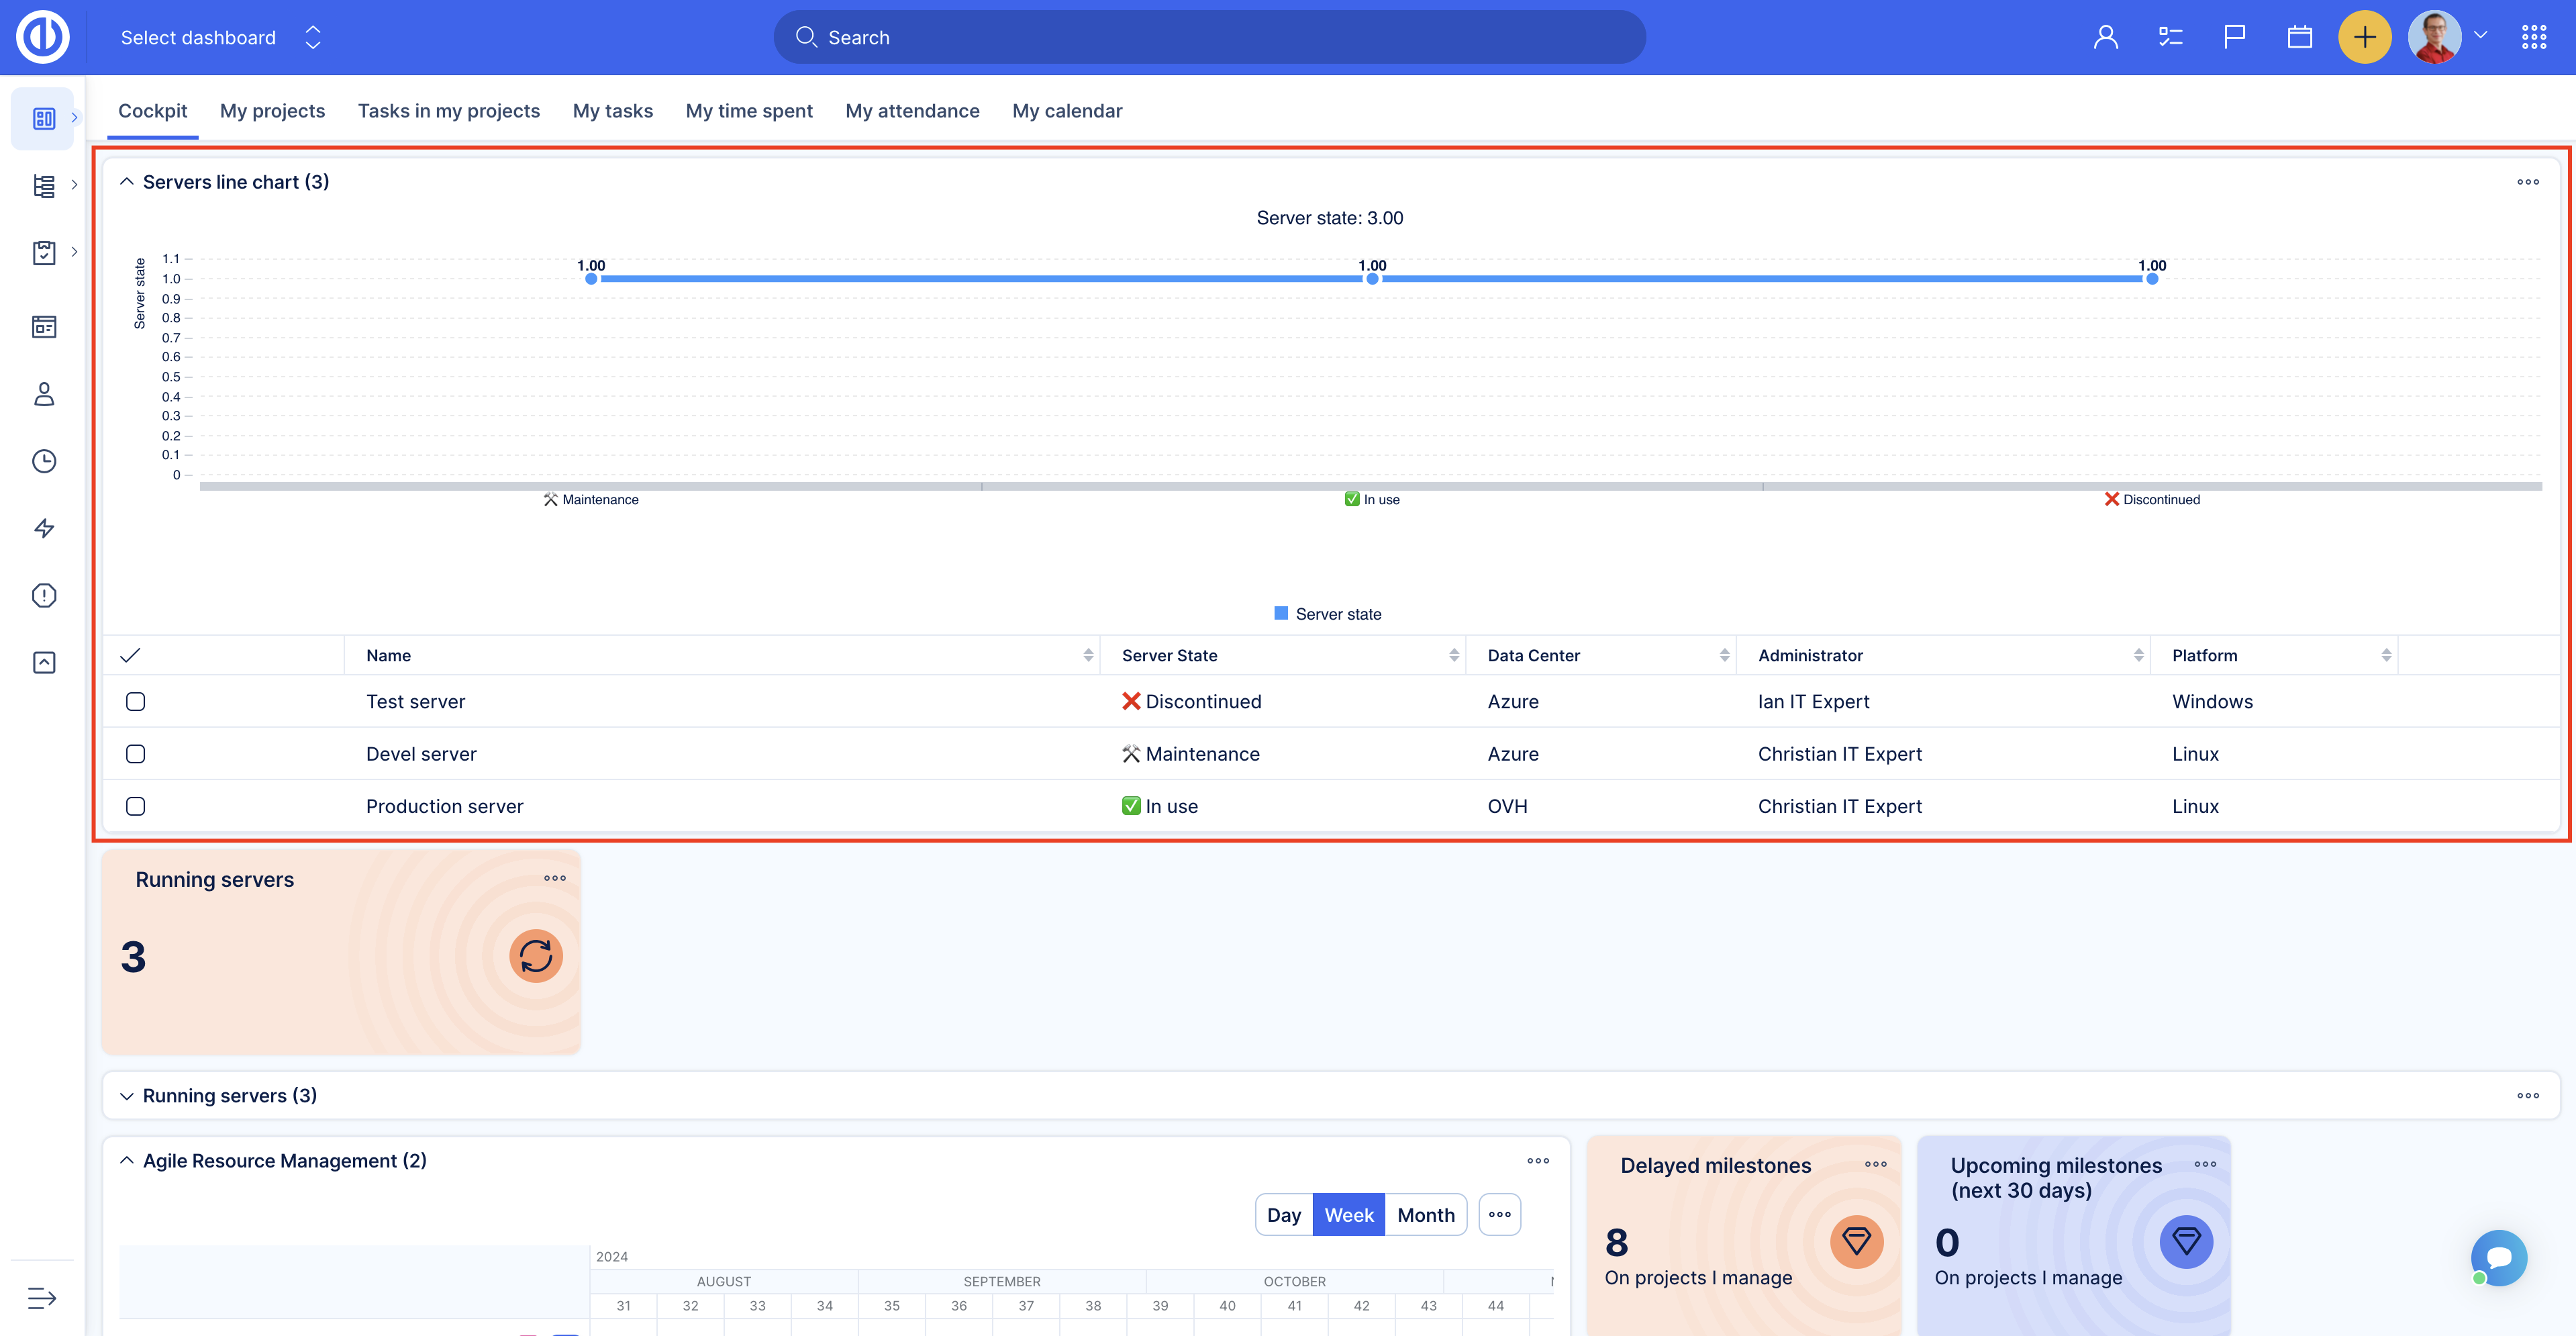
How to show data from custom tables on dashboards
The Asset & Configuration management plugin adds a new dashboard module. This module is called Asset & Configuration management and can be used in List and Trends form. It allows to show records from the Custom tables on any customizable page.
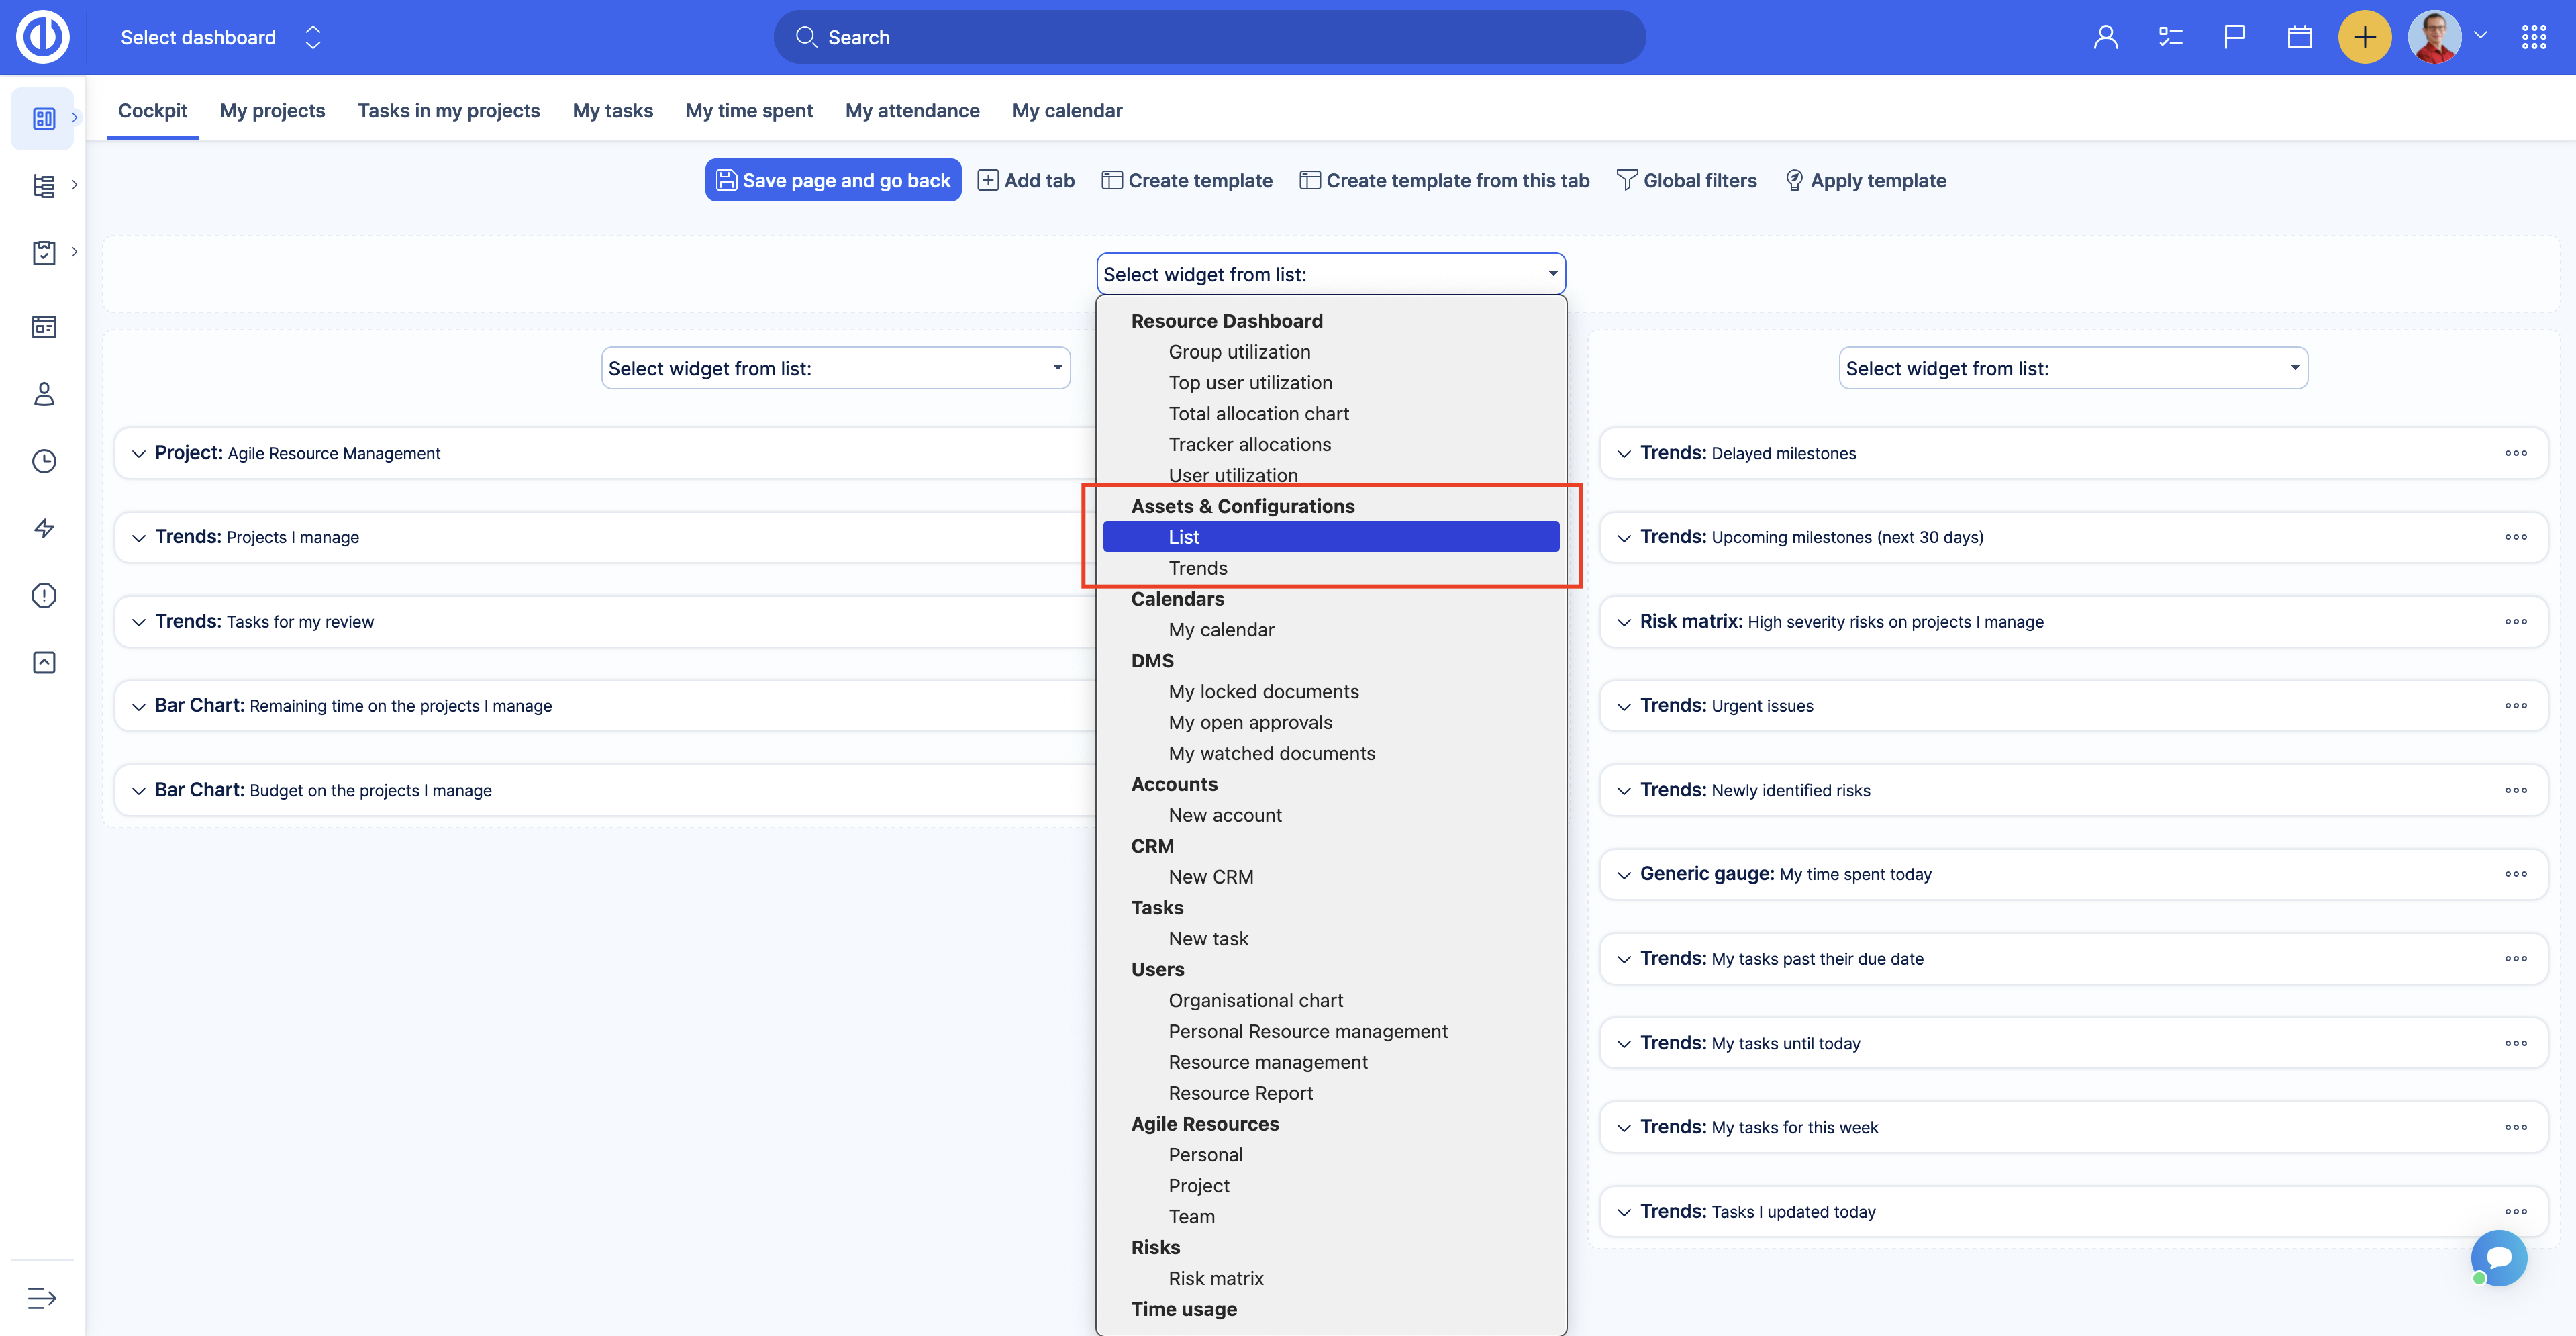
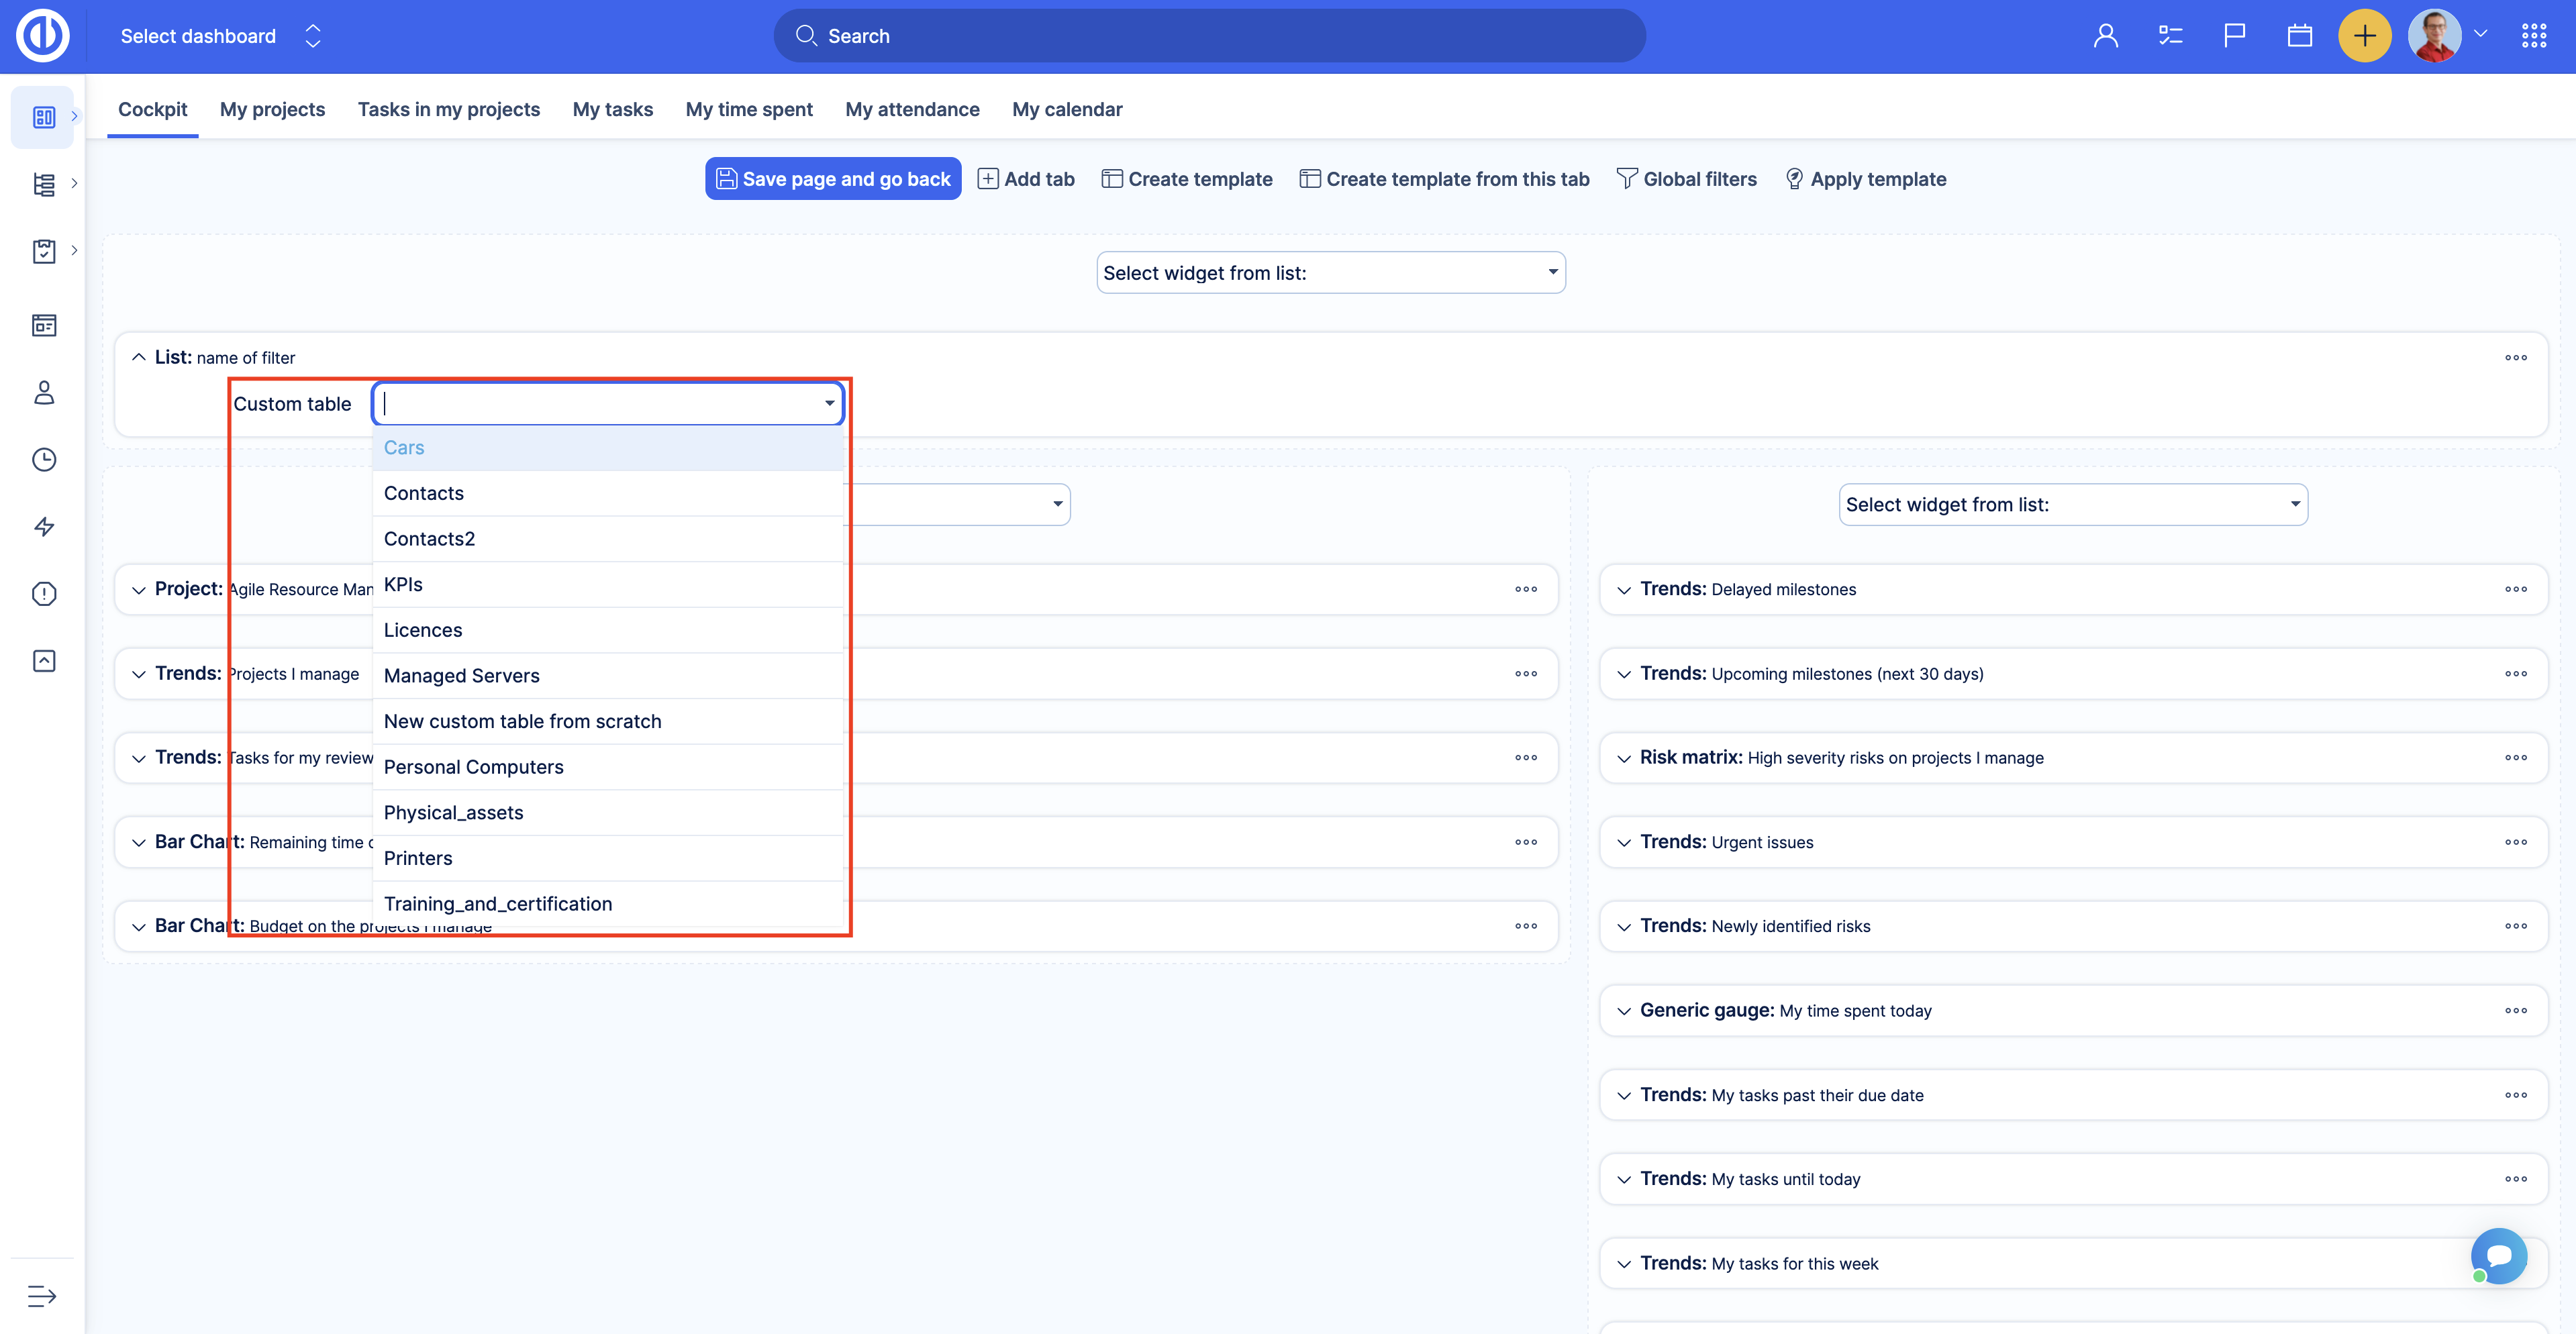
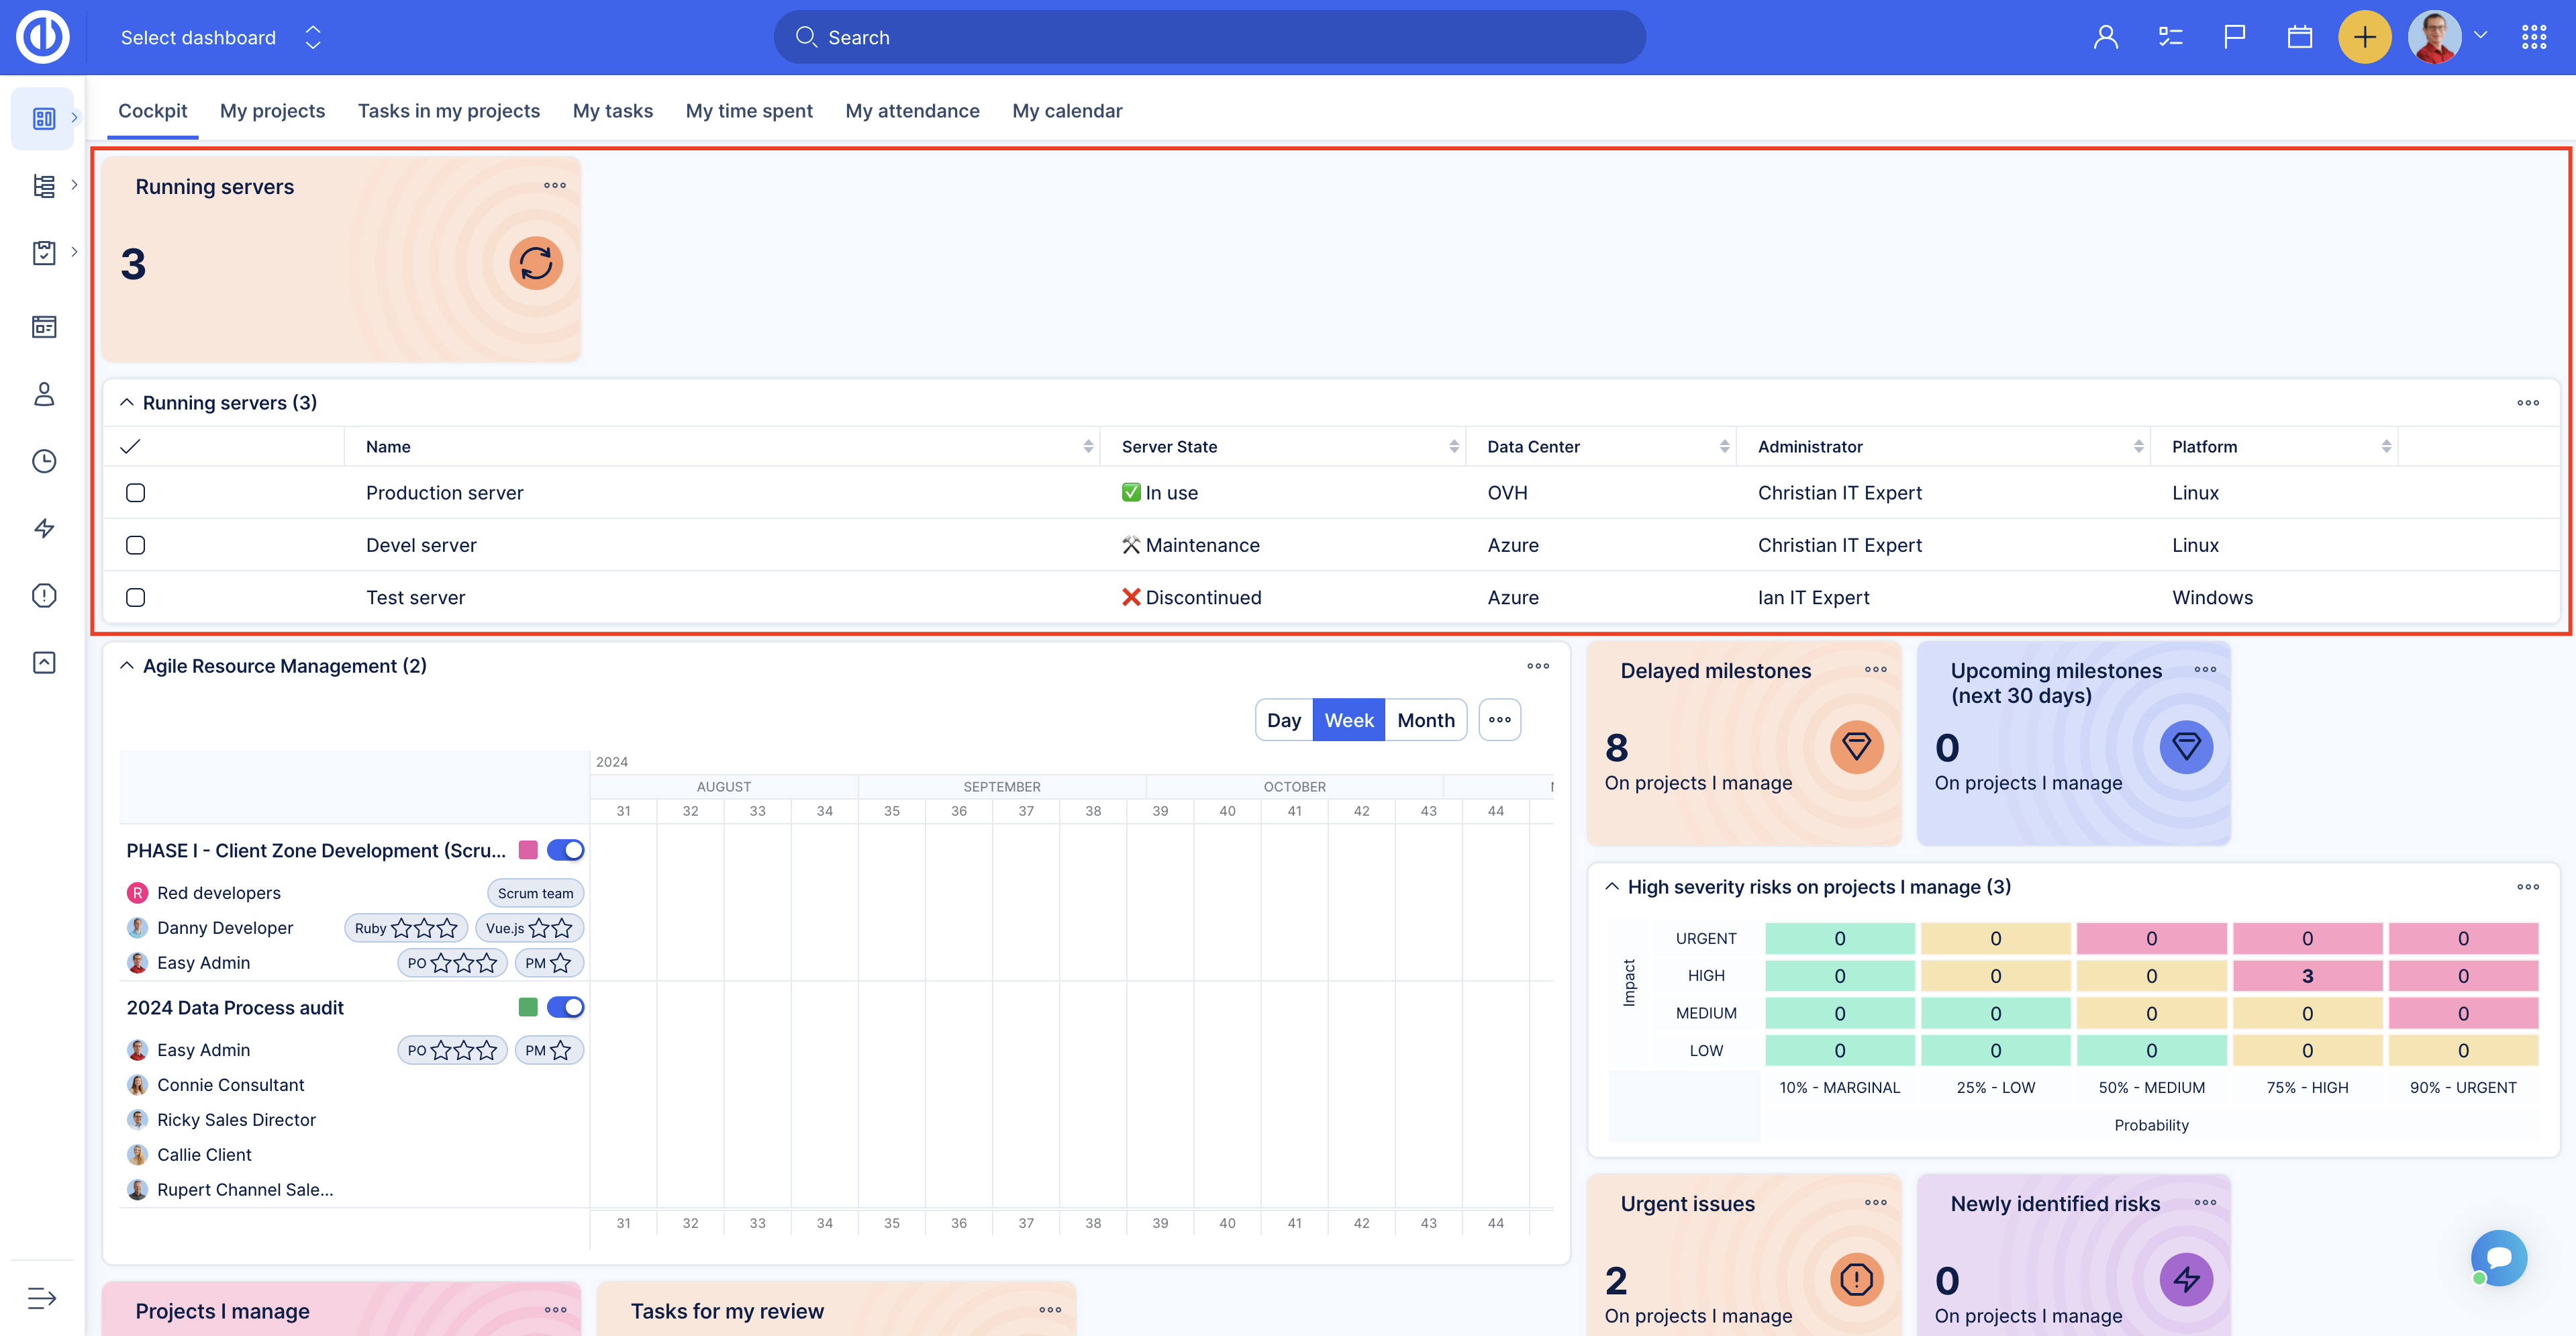
These dashboards can be added like any other dashboard module. Select the custom table you want to show after adding the List dashboard module to the page.
Saved, ad-hoc and global filters work the same way as for the standard List dashboard. Standard features like Sort, Columns, Group result by, and Display are available and work the same way as for the standard List dashboard.
For the Trends module it works similarly. Select what you would like to watch and save.
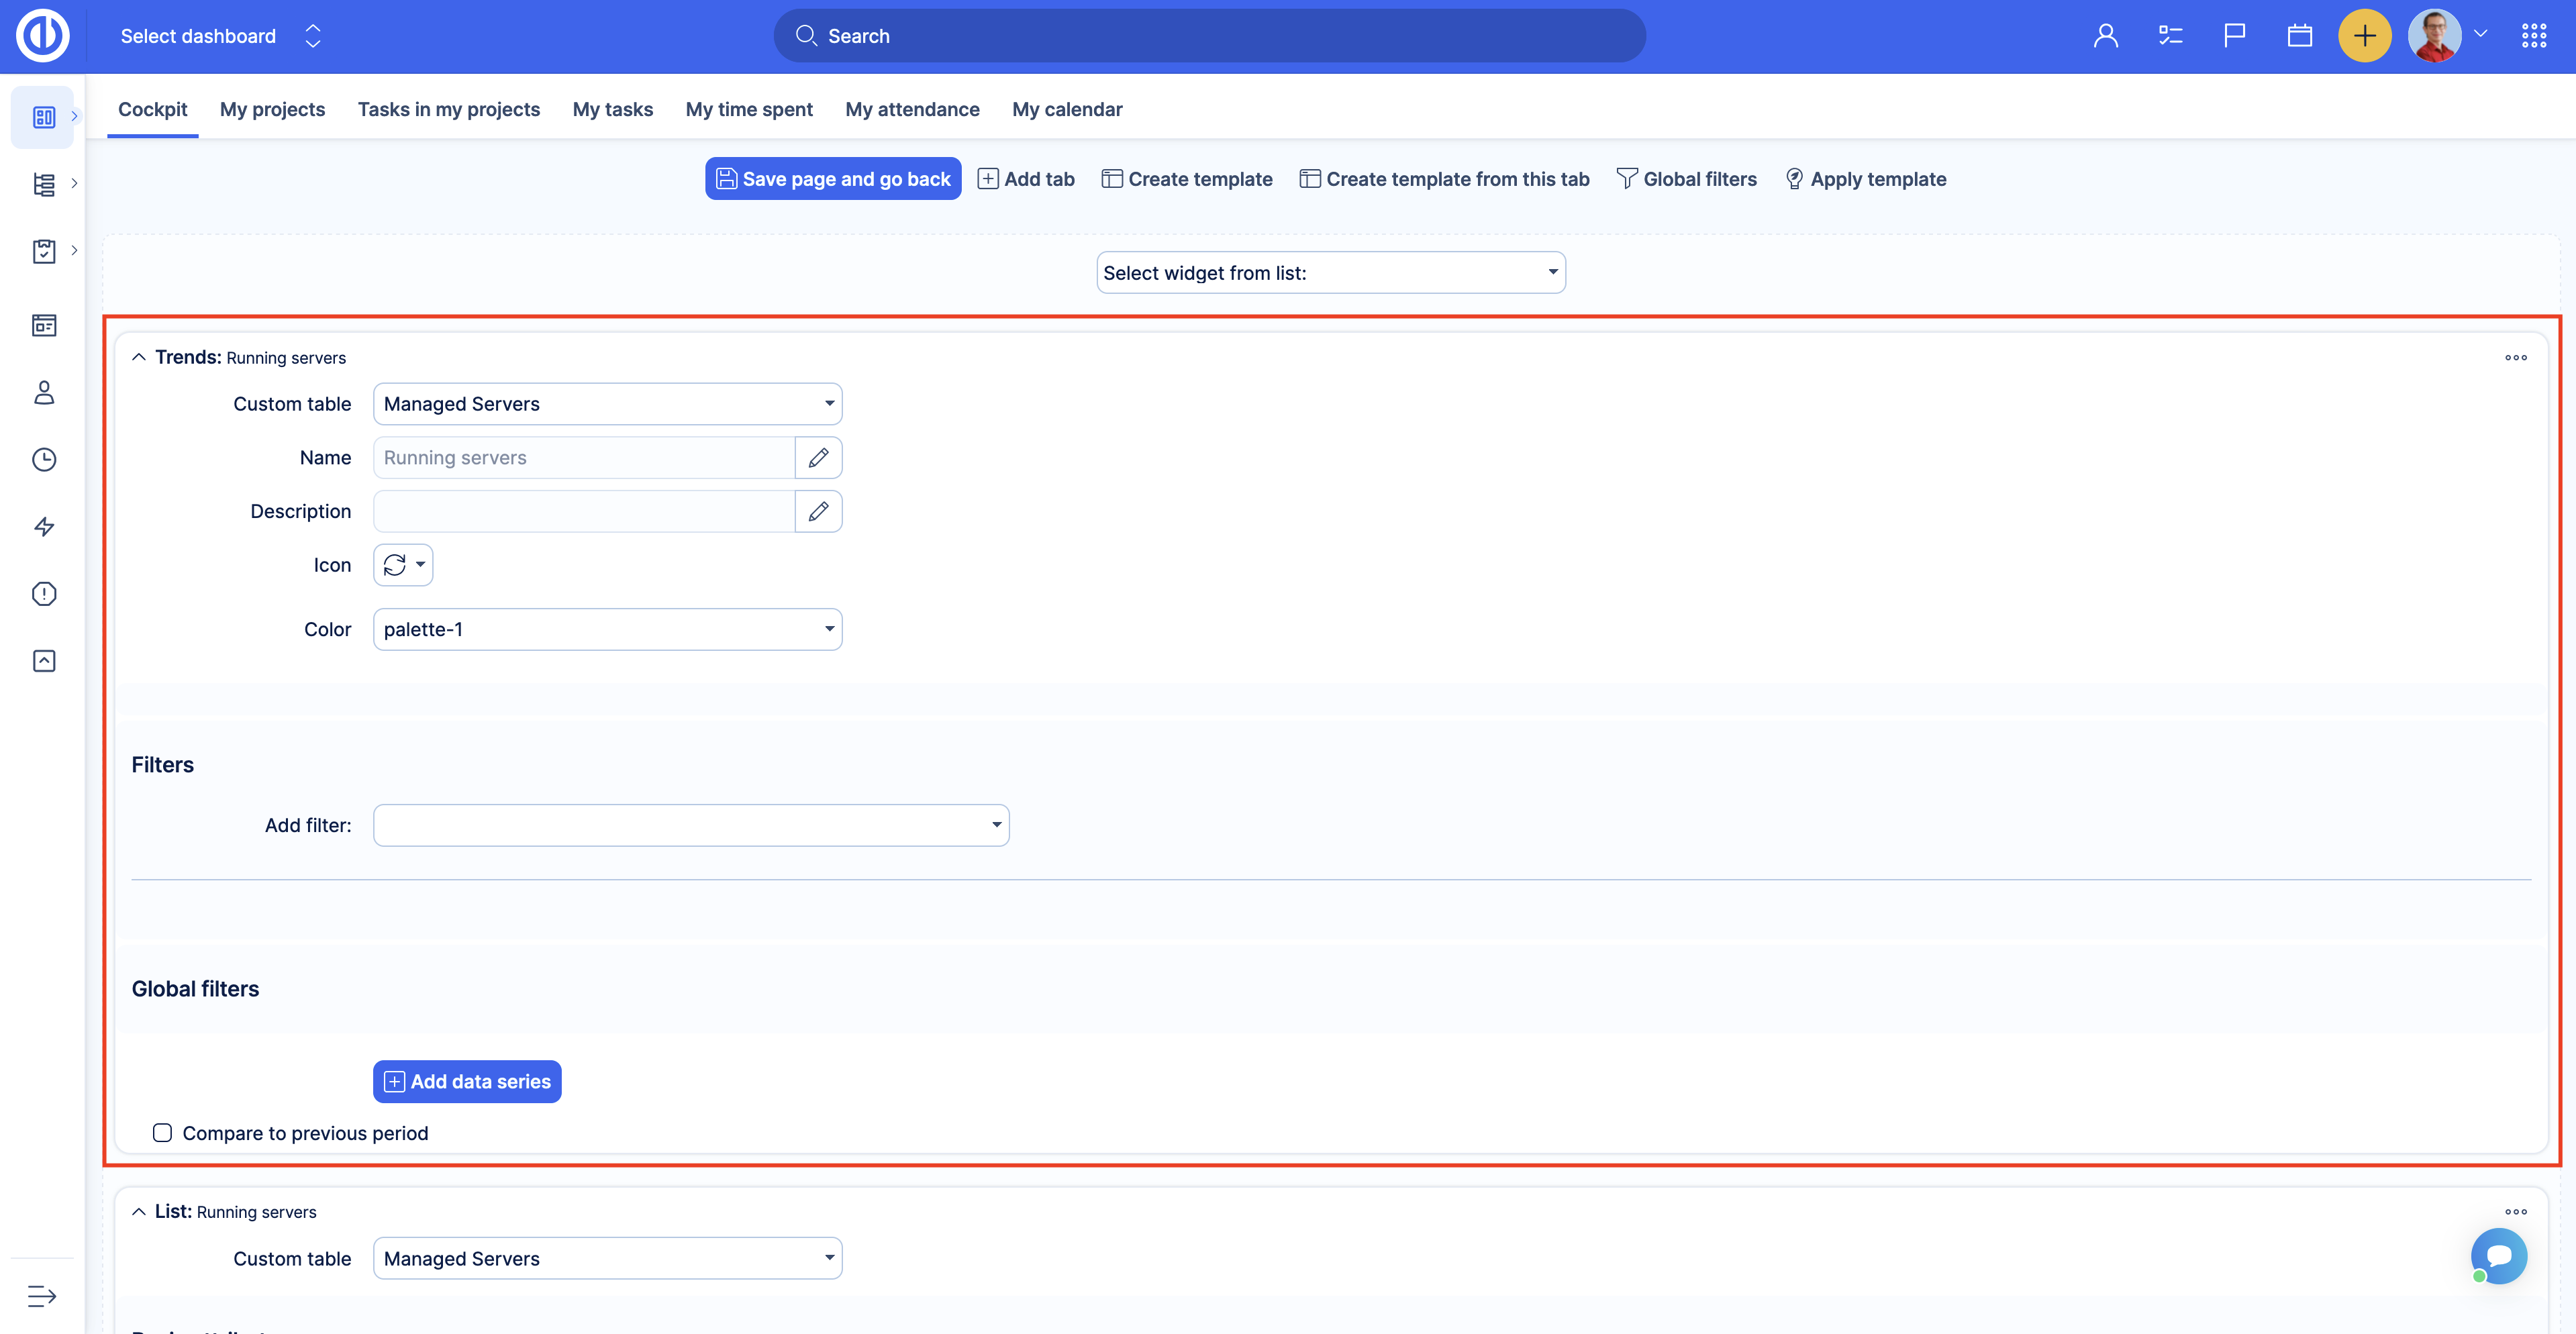
Here are the results for both options:
How to add graphs & charts based on Assets to the customisable page
To add a graph based on a Custom table to a dashboard page you need to create a Saved filter for the Custom table.
First of all, go to the Custom table overview page. Then apply the query settings. In the Outputs select the Chart option. After that, apply the graph settings.

Save the filter. Please read more about saved filters in the documentation.
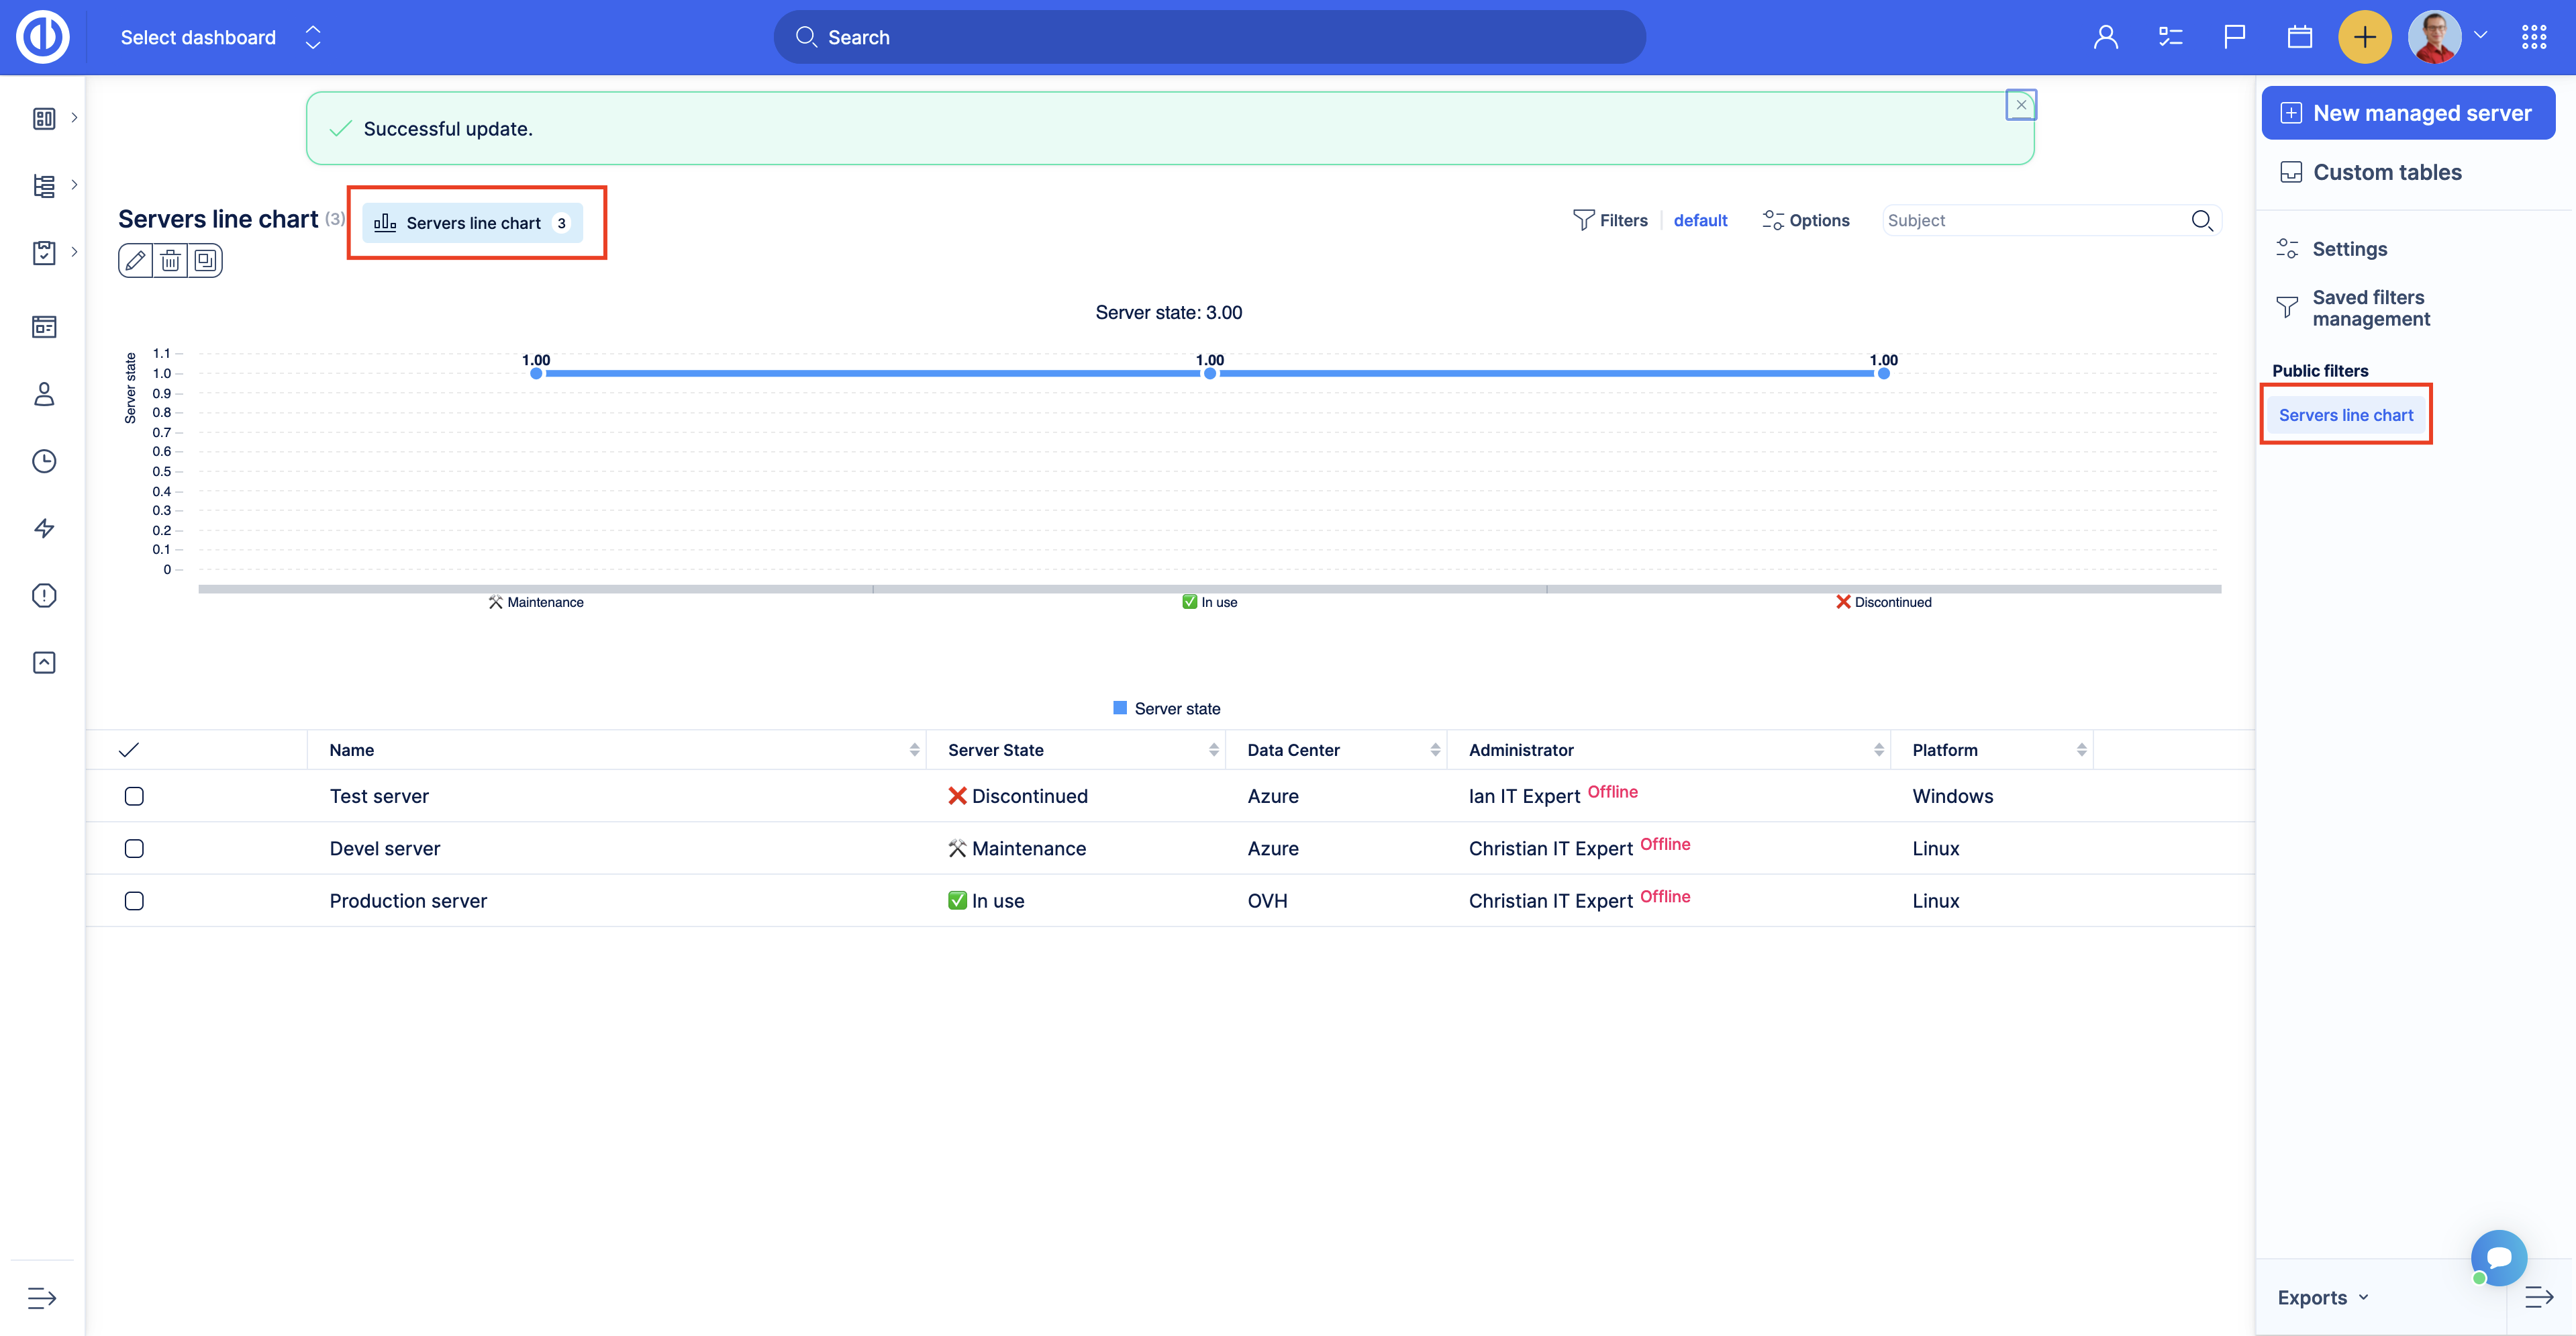
Once the saved filter is ready, go to the dashboard page where you want to see the graph.
Add the Asset & Configuration management List module and select the Custom table you want to show.
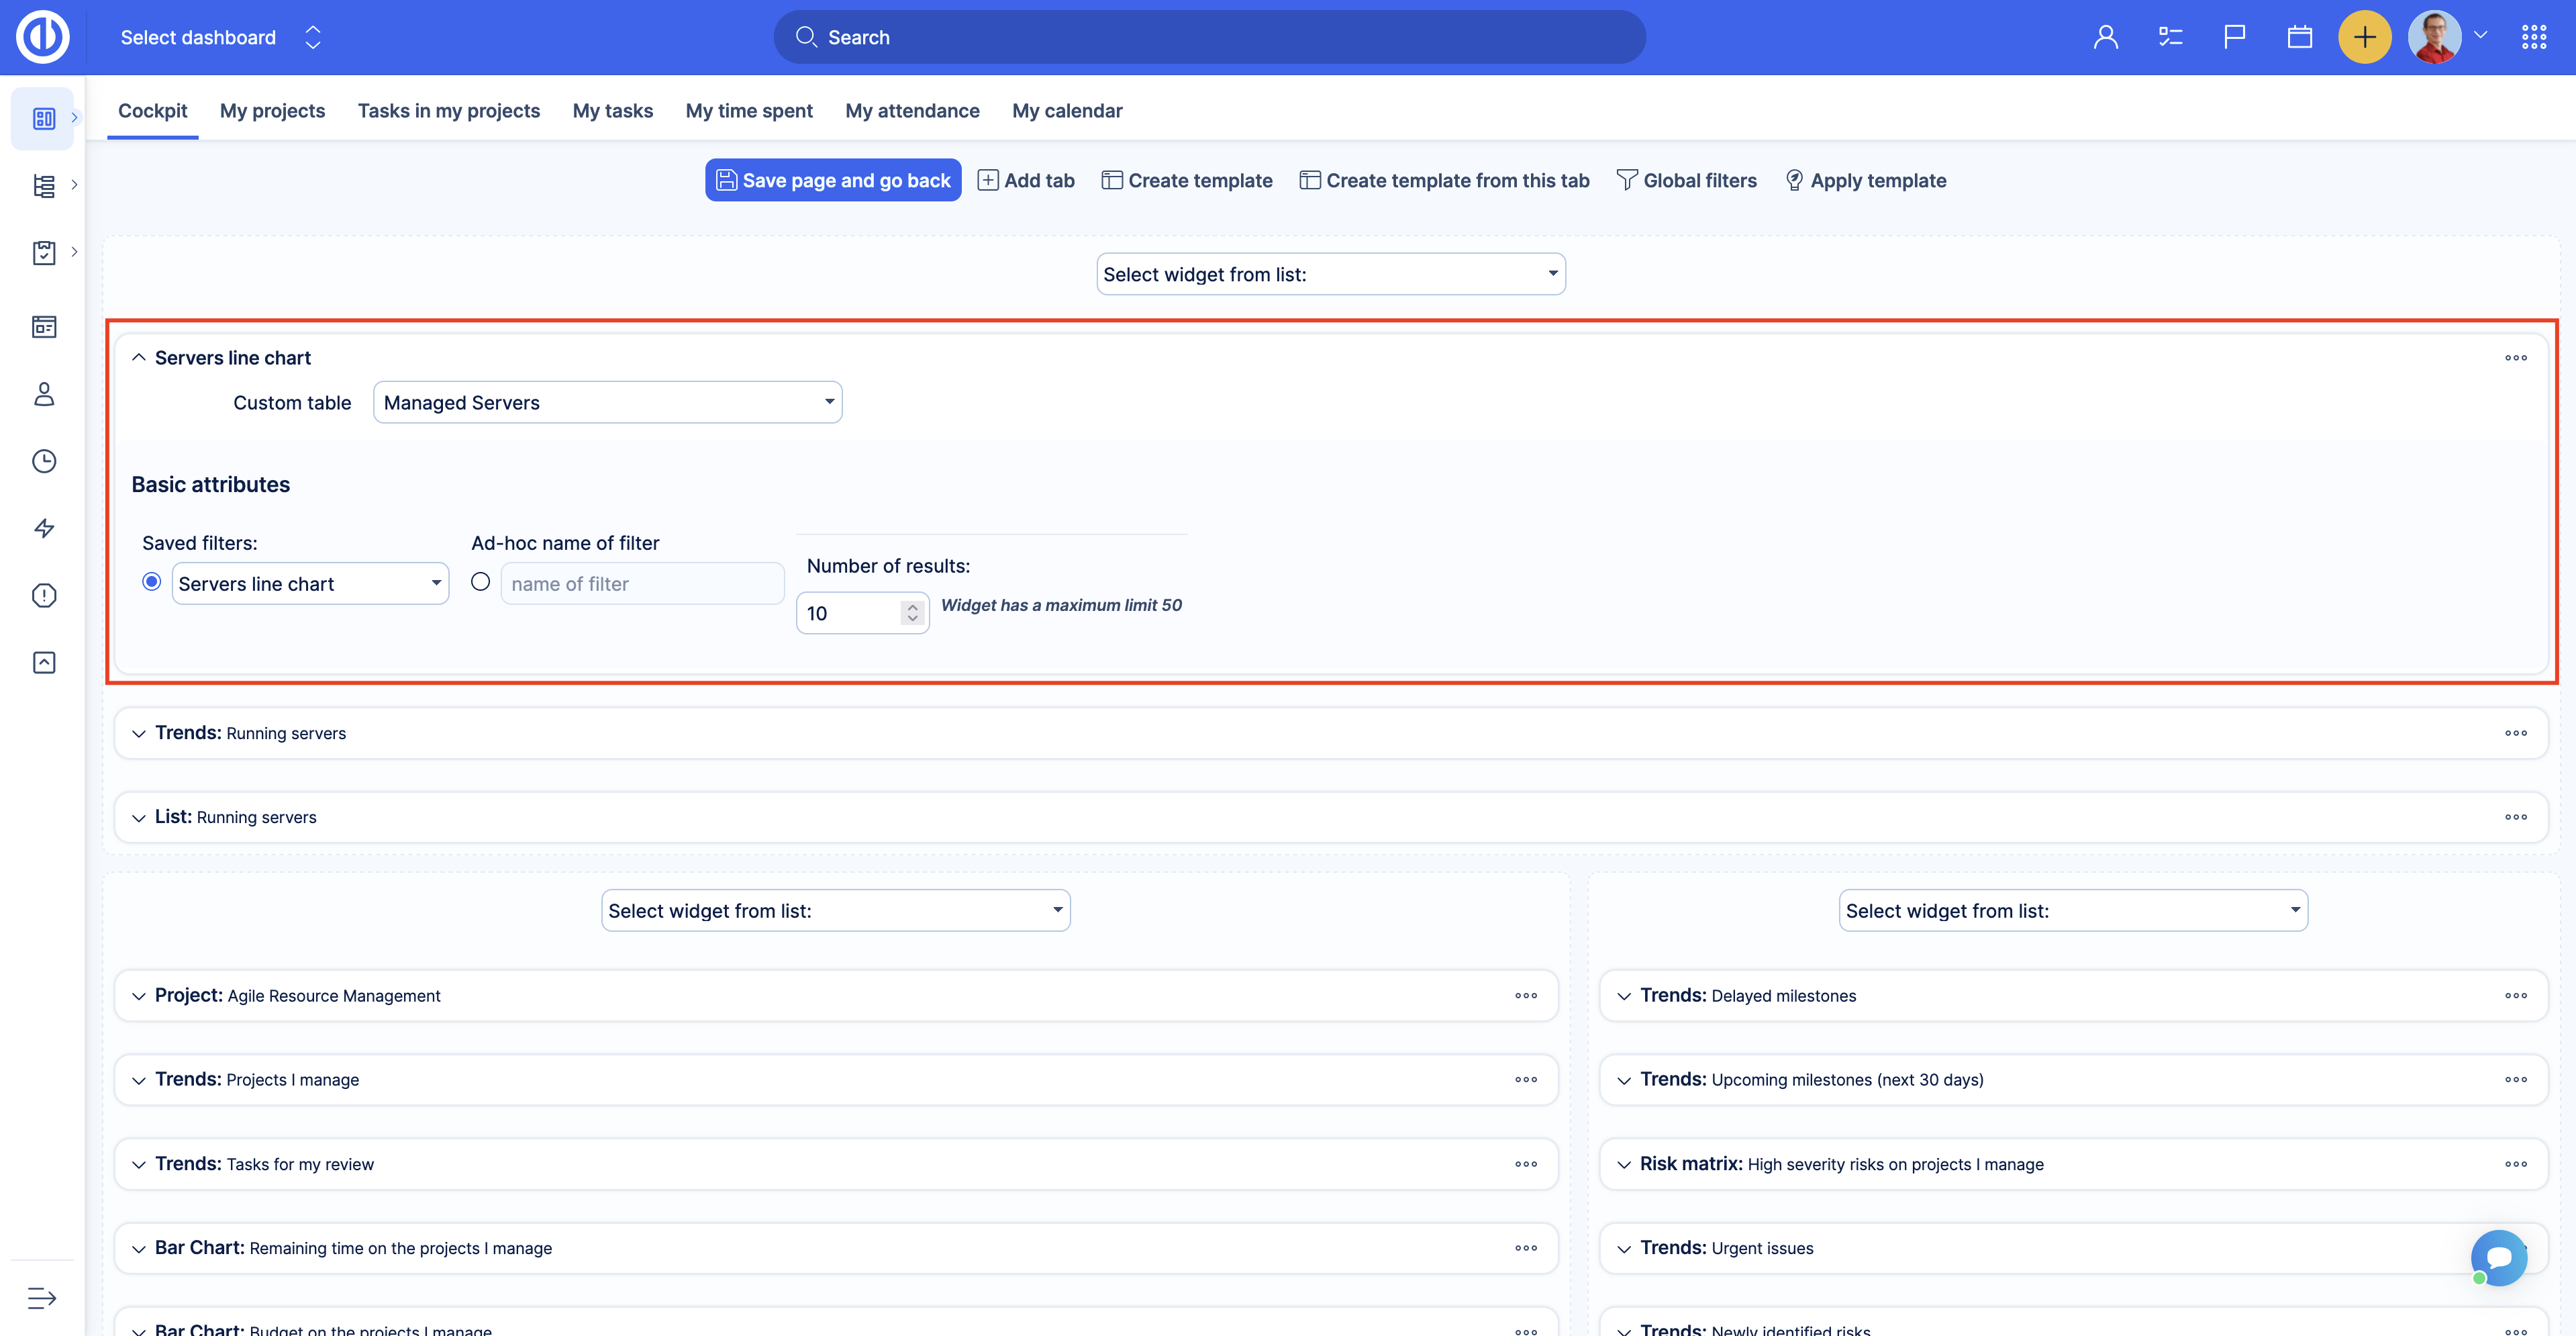
Choose the Saved filter option and select your saved filter from the list.
How to import data to custom tables
The Asset & Configuration management plugin adds import functionality for Custom tables.
To access import go to the Easy Imports page Administration >> XML data import >> Advanced import.
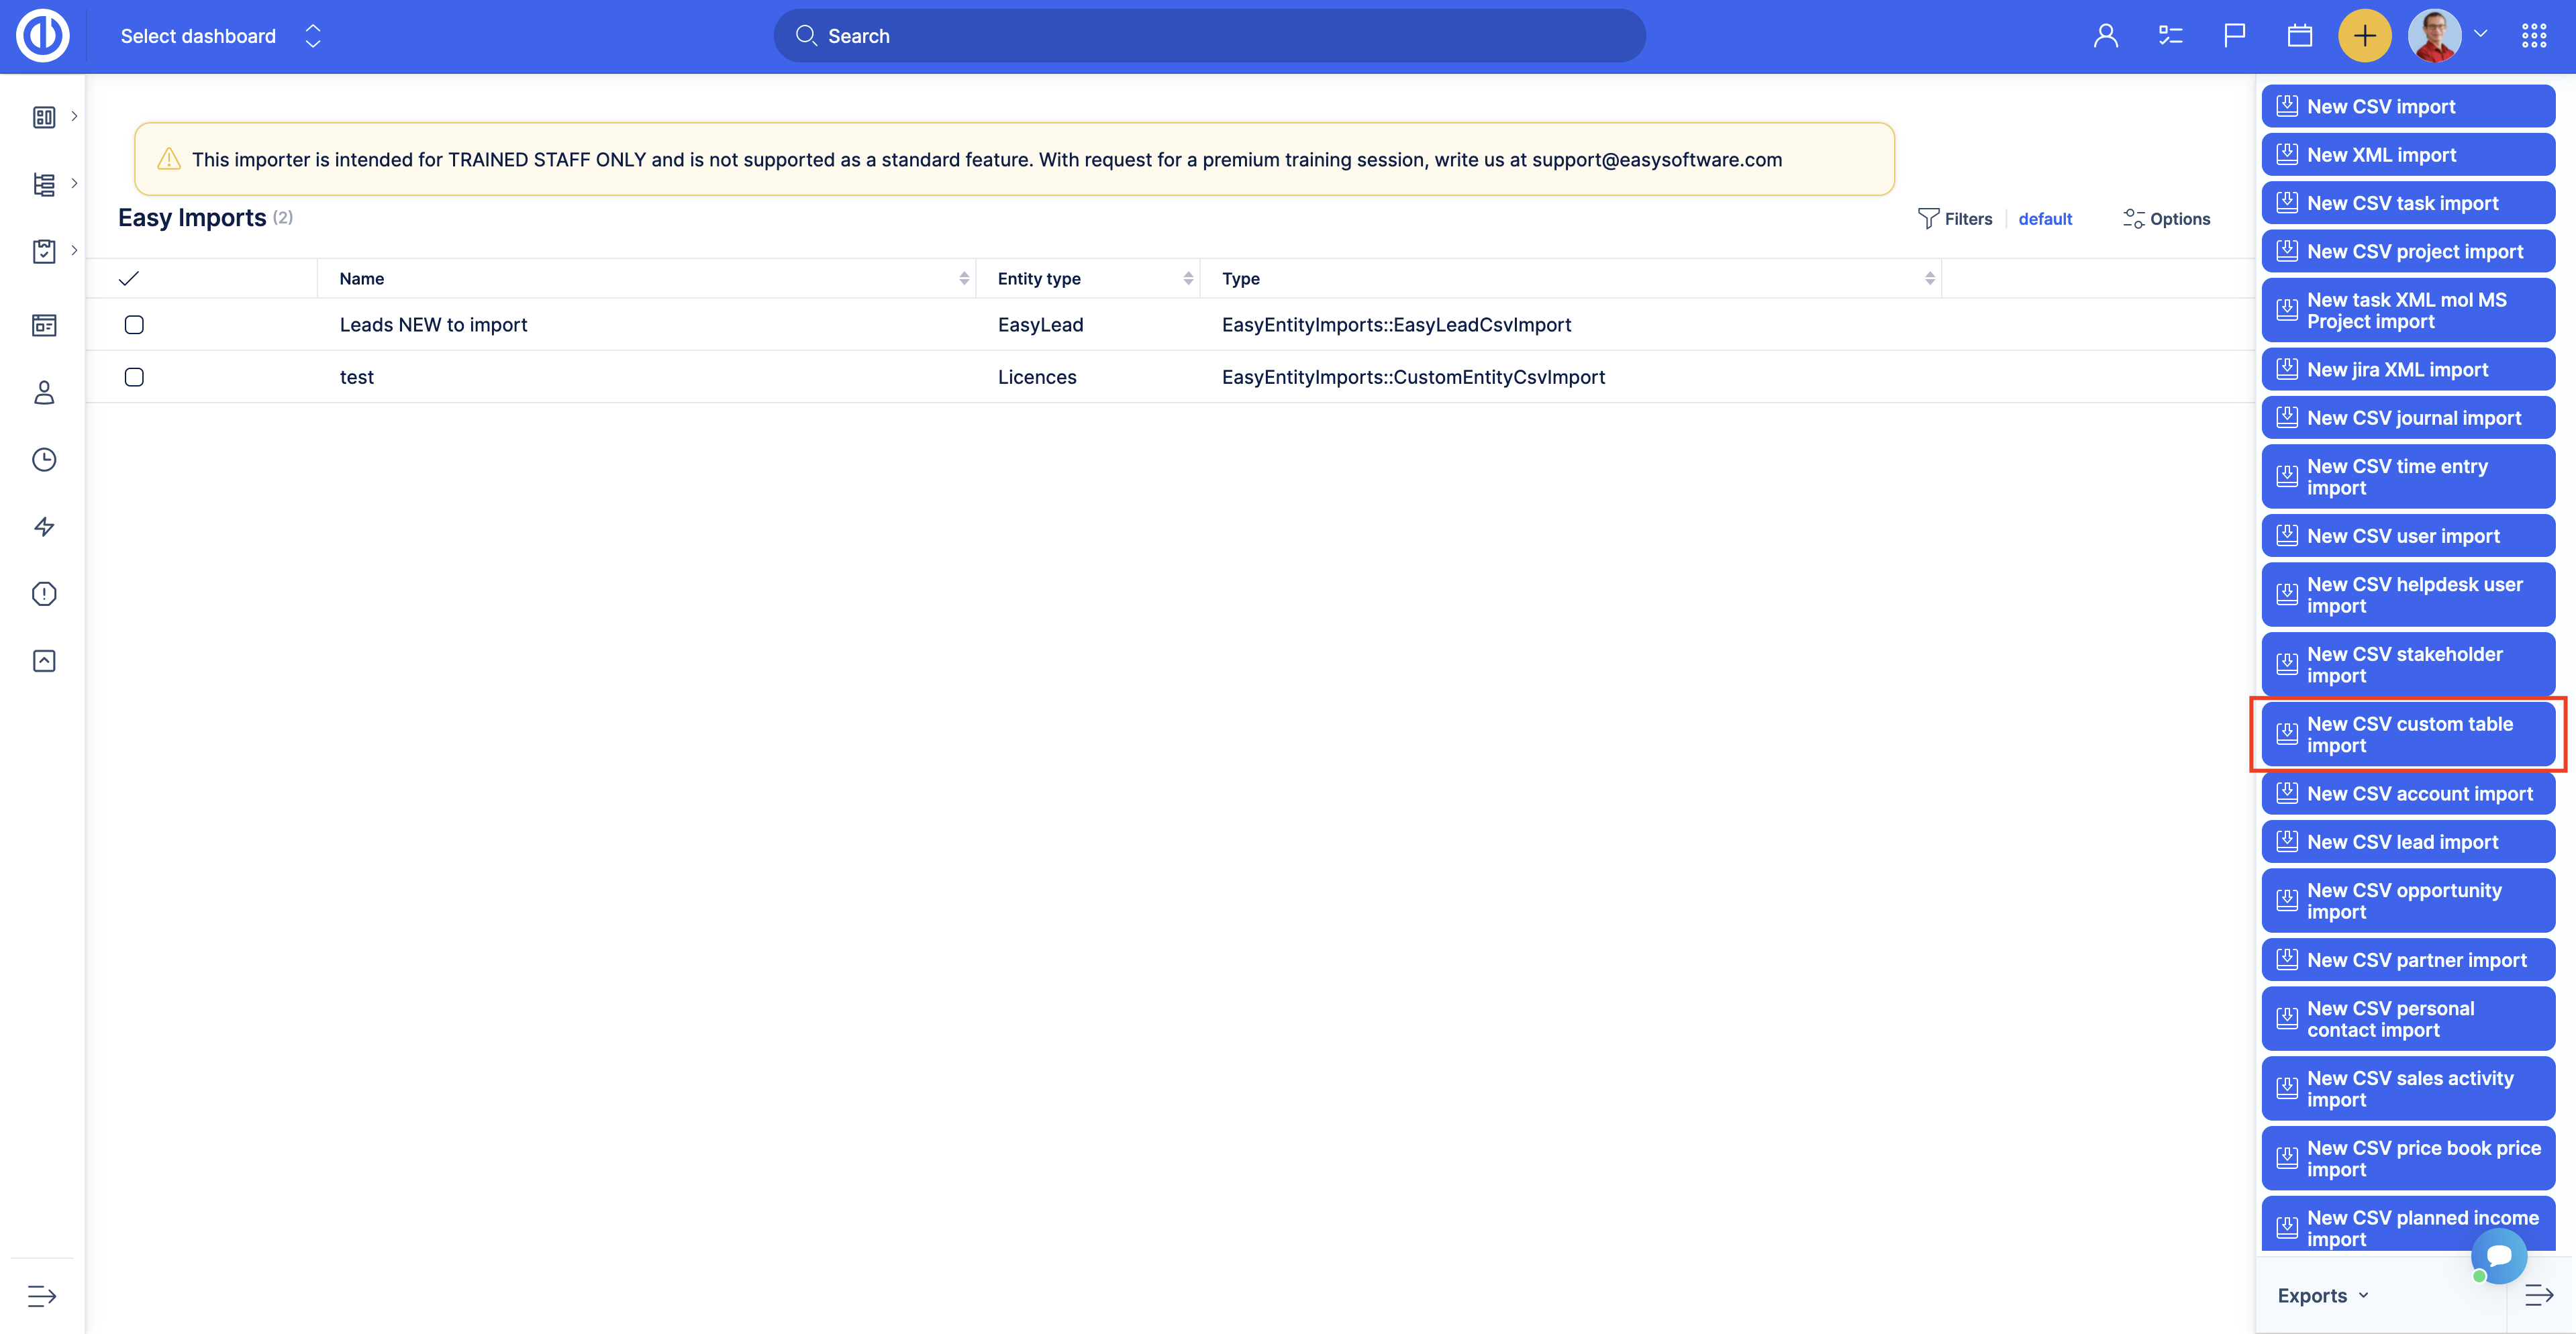
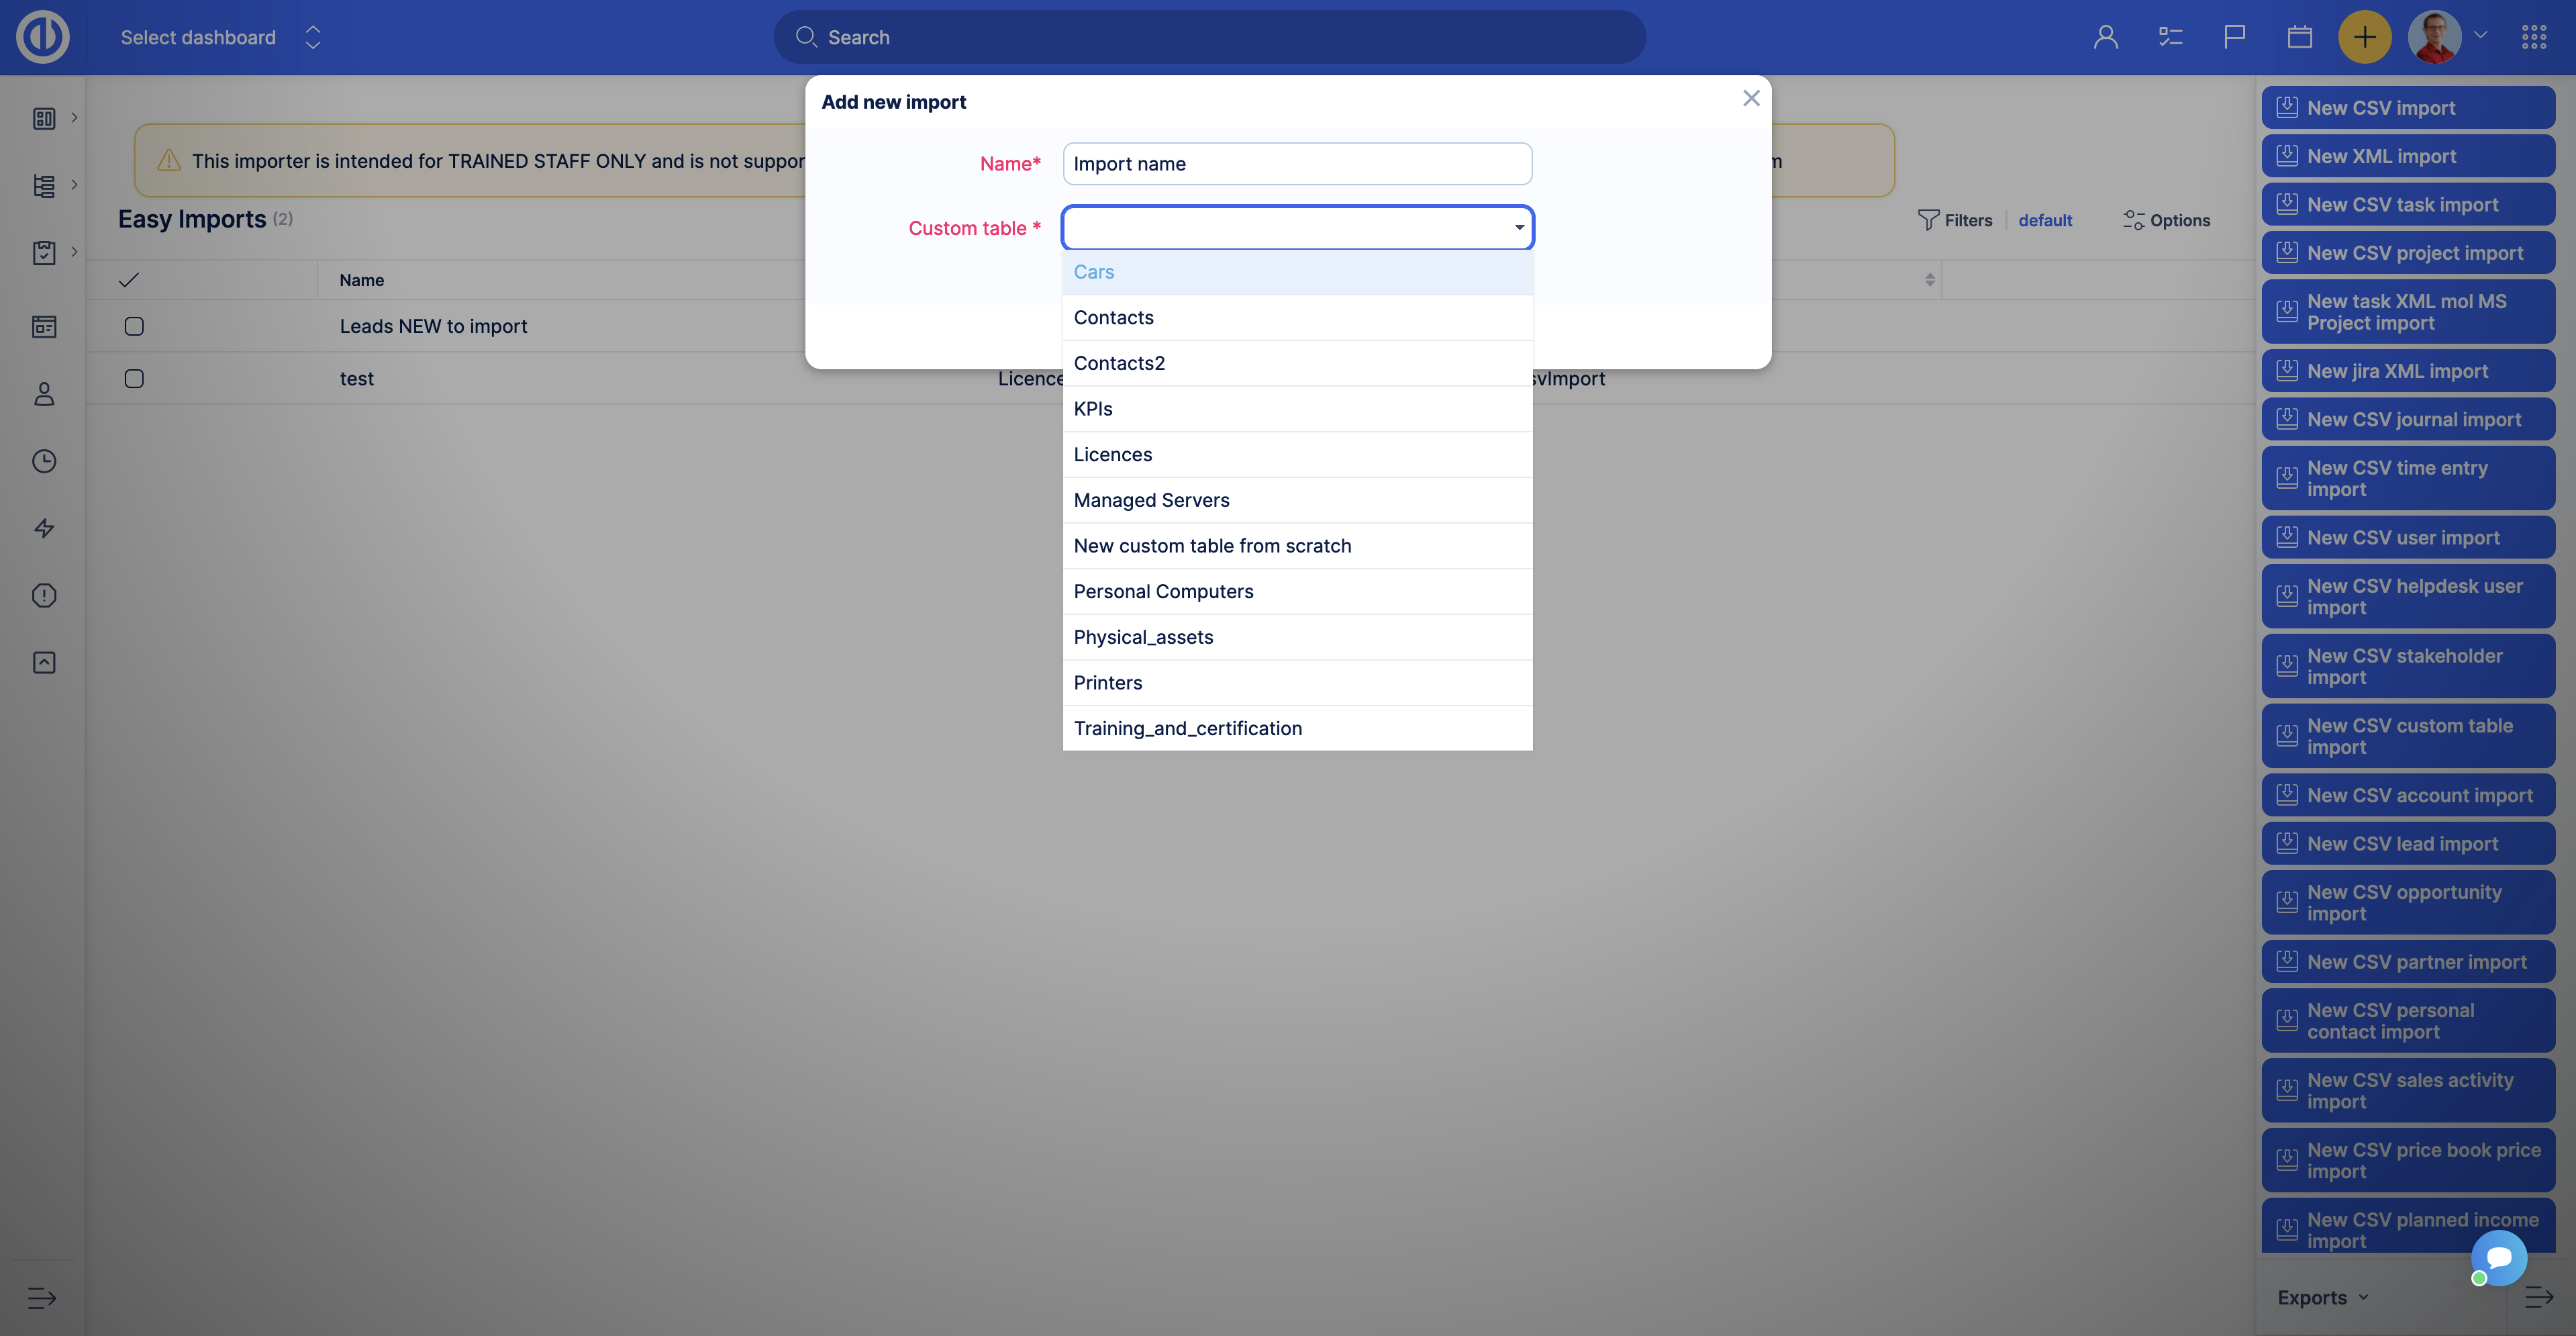
Click the New CSV custom table import button. Enter a name for the import and select the Custom table you would like to import.
After this step, the importer works the same way as for any other entity. Briefly:
- Upload CSV file.
- Do the mapping.
- Import.
Advanced import functionality is for trained personnel only. Please do not ignore this warning as this may have consequences. For more information please contact us.
How to integrate (synchronize) data from custom tables
The Asset & Configuration management plugin adds API for Custom tables and Custom records. API documentation is available in Easy Swagger on the page - /easy_swagger.
For Custom tables, refer to Custom table documentation. For Custom records refer to Custom entity documentation.

The Asset & Configuration management plugin adds Webhooks for Custom tables. To access webhooks settings, go to Easy WebHooks. To create a new webhook for the Custom table click the New Easy Web Hook button. In the Entity field select CustomEntity.
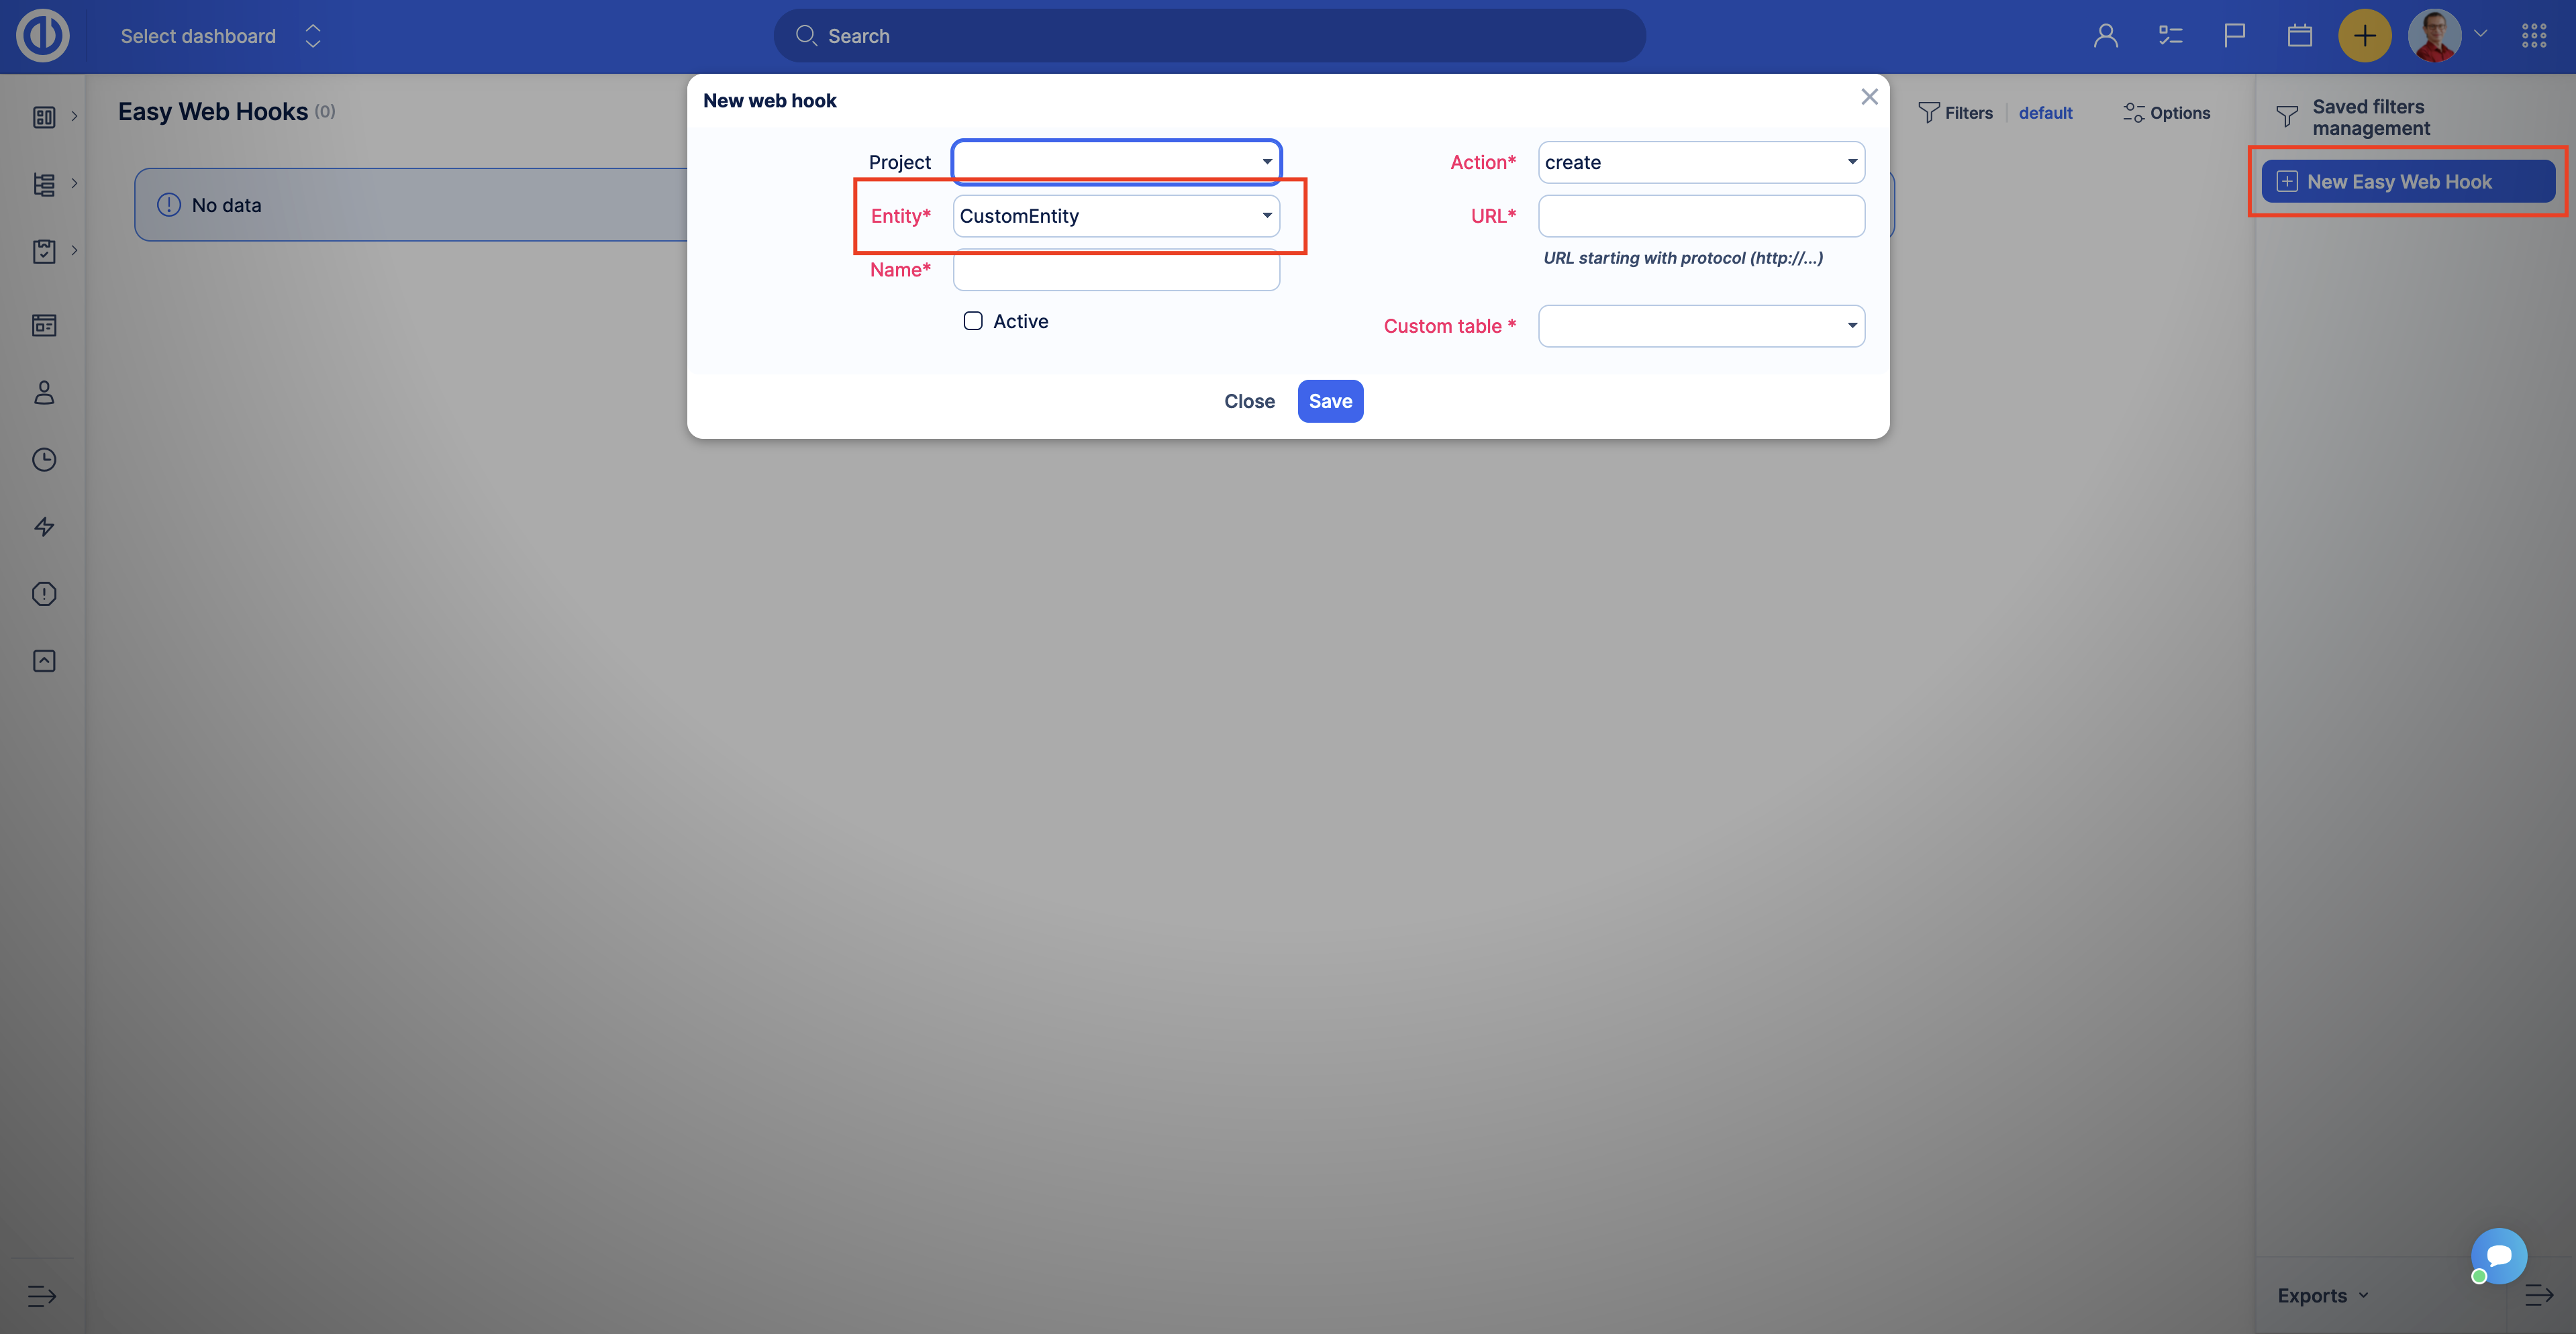
All other webhook settings are the same as for other easy webhooks.
How to use Alerts (early warning system) with custom tables
Alerts notify you about important deadlines, budget overdrafts or overdrafts of allocated time. The Asset & Configuration management plugin extends the functionality of the Early warning system by allowing you to set up alerts for custom tables.
To create an alert for a custom table, you need to create a Saved filter that will be watched by the Early warning system. Here is an example of how to create an alert for a custom table.
Imagine your company providing laptops to the employees and you have table Personal Computers to manage all the assets like laptops and PCs.
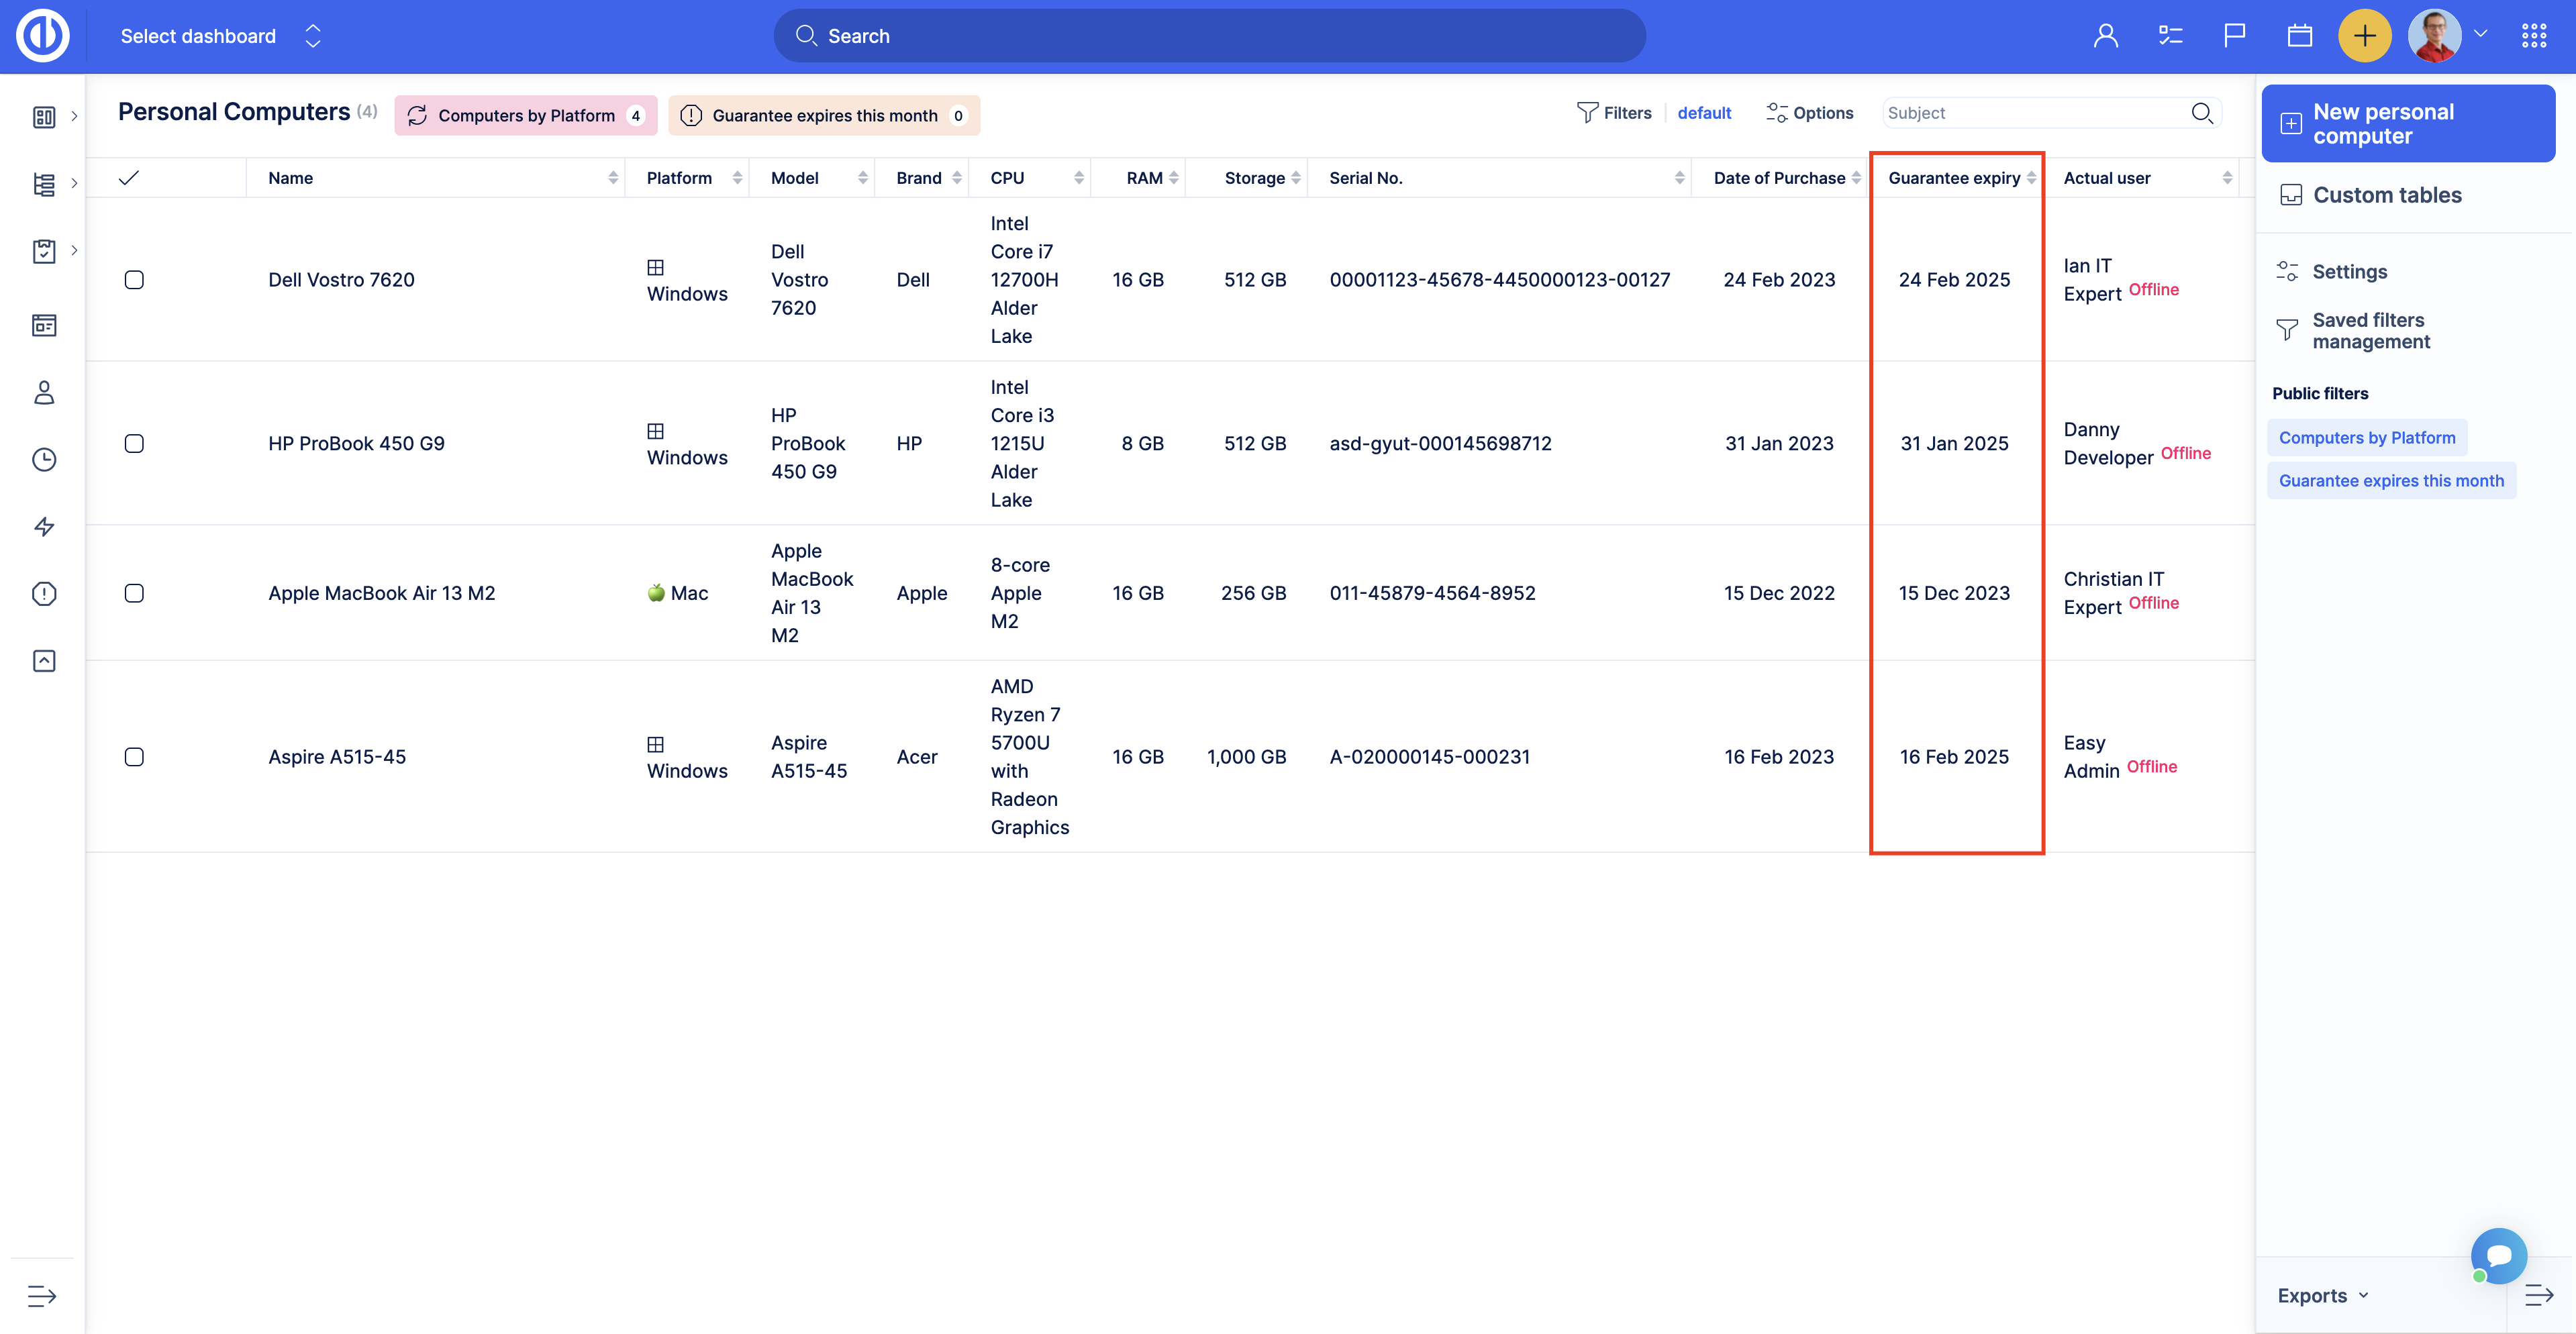
Every computer has a Guarantee expiry field. After the date in the field back office should sell the computer and buy a new one to minimize the risks. So, you create a filter to show your computers with the Guarantee expiry this month.
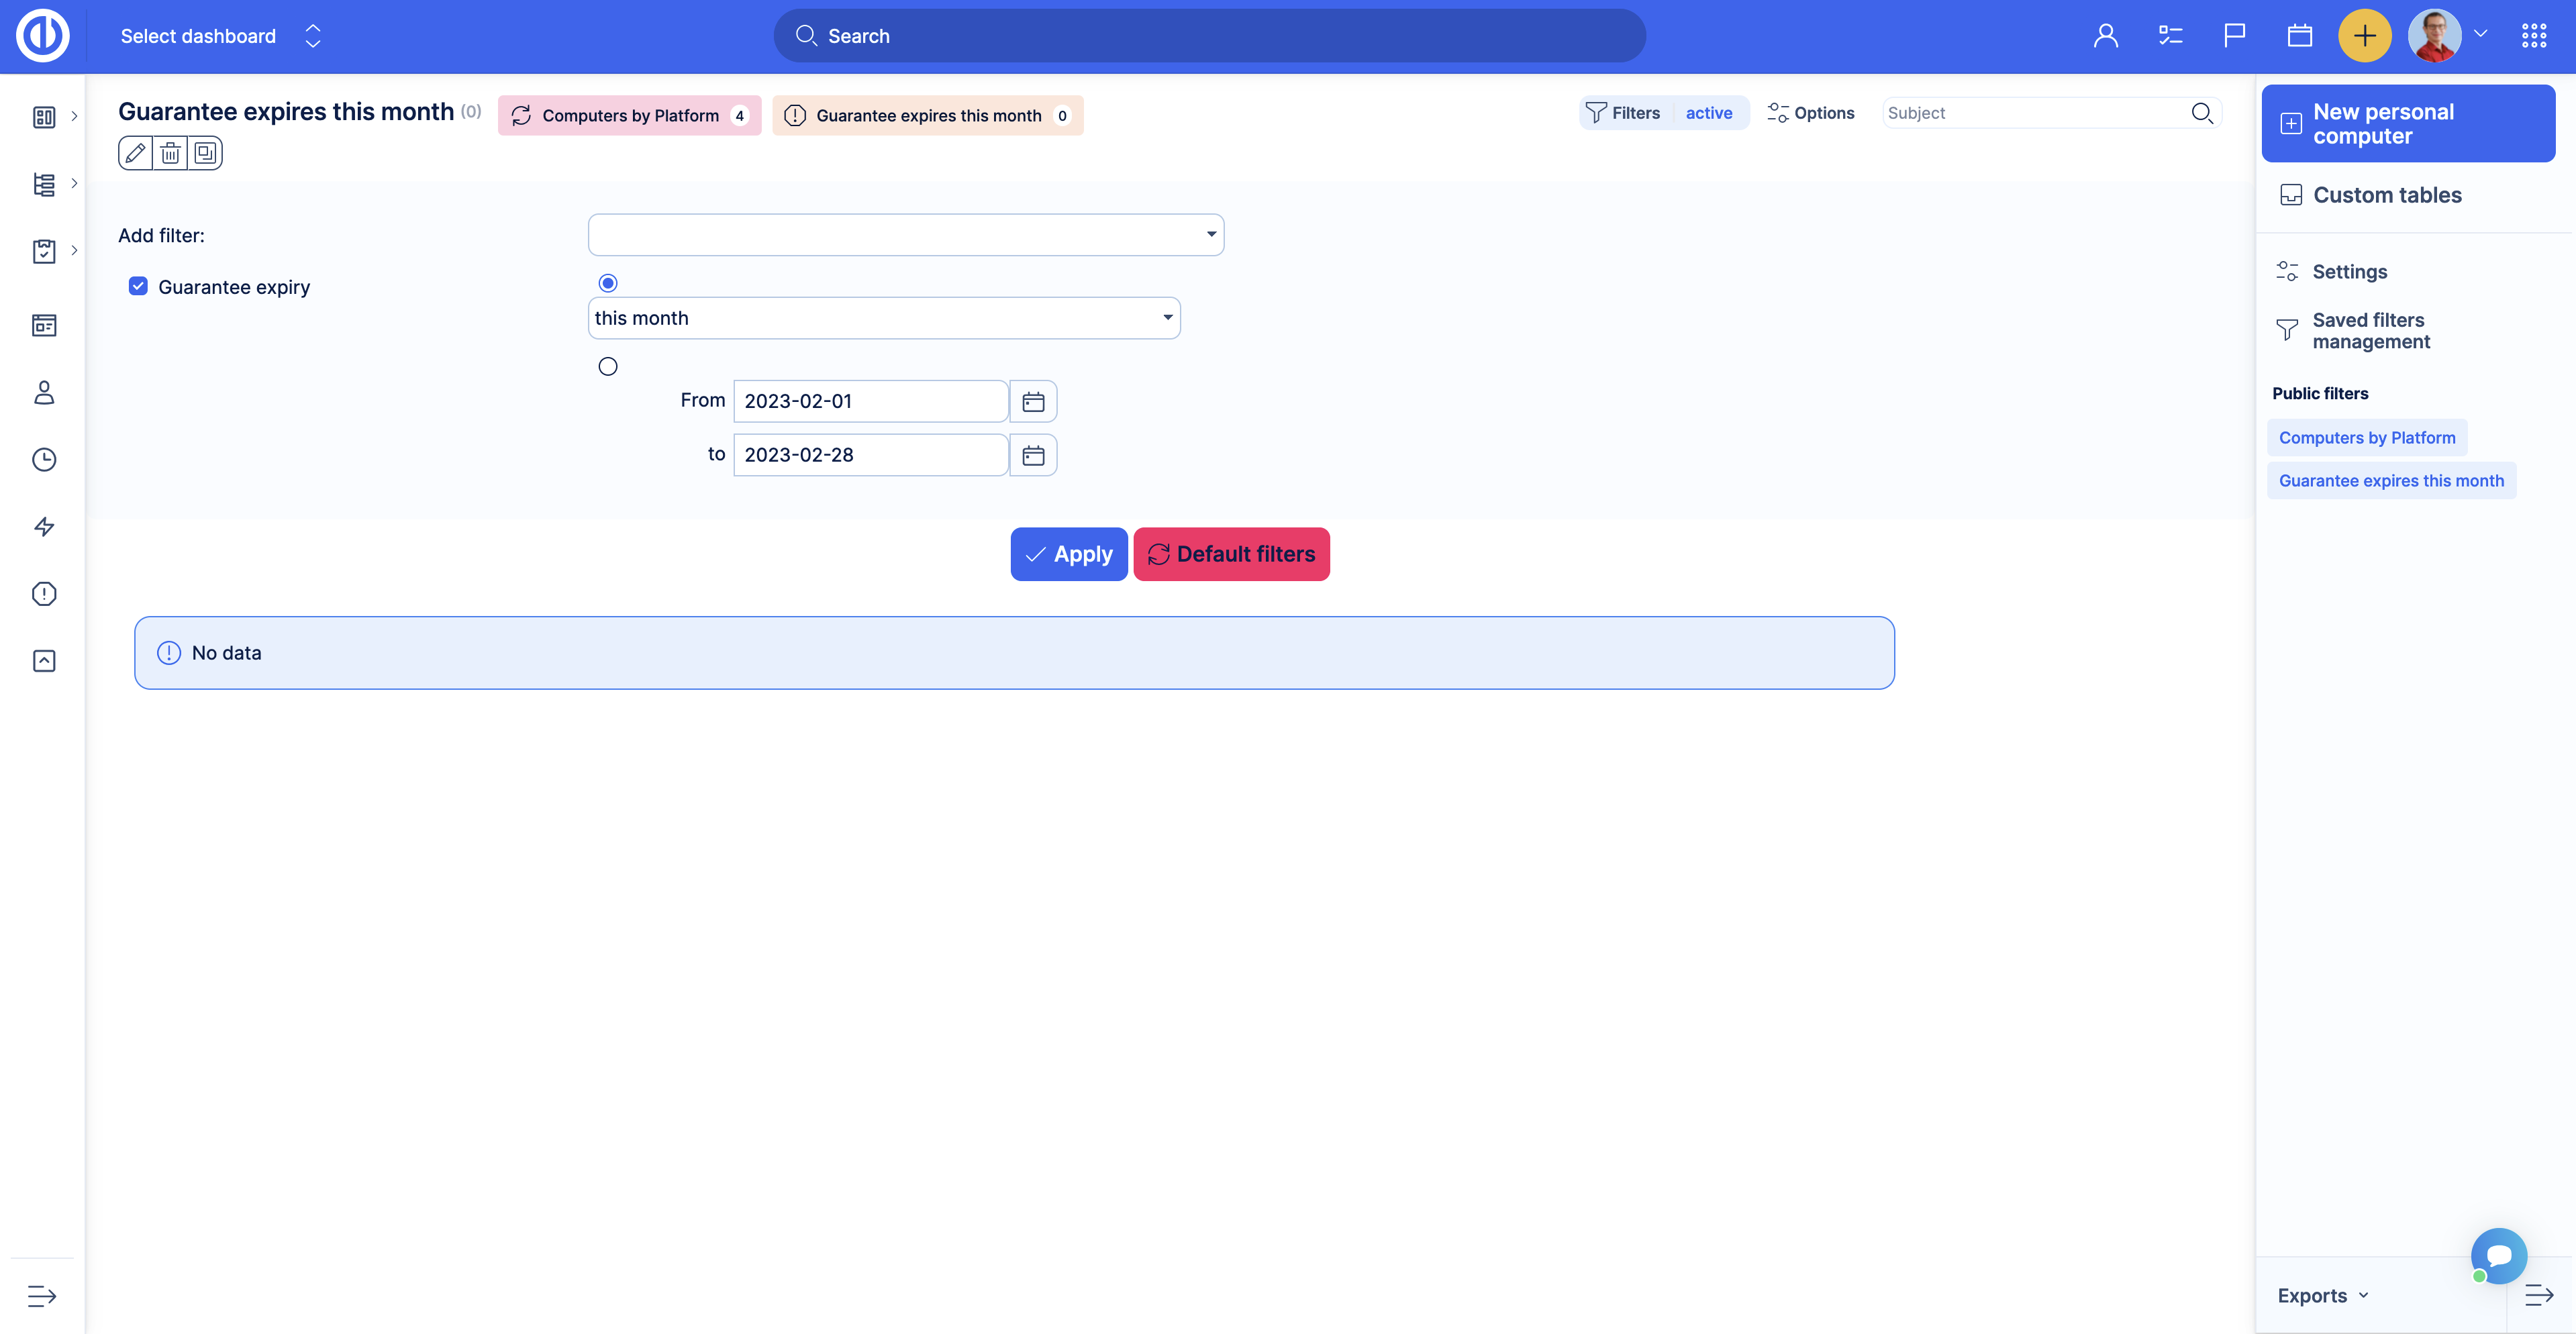
This filter will show you computers that need to be changed this month. After that, you can create an alert to notify you when there is a new item in the filter.
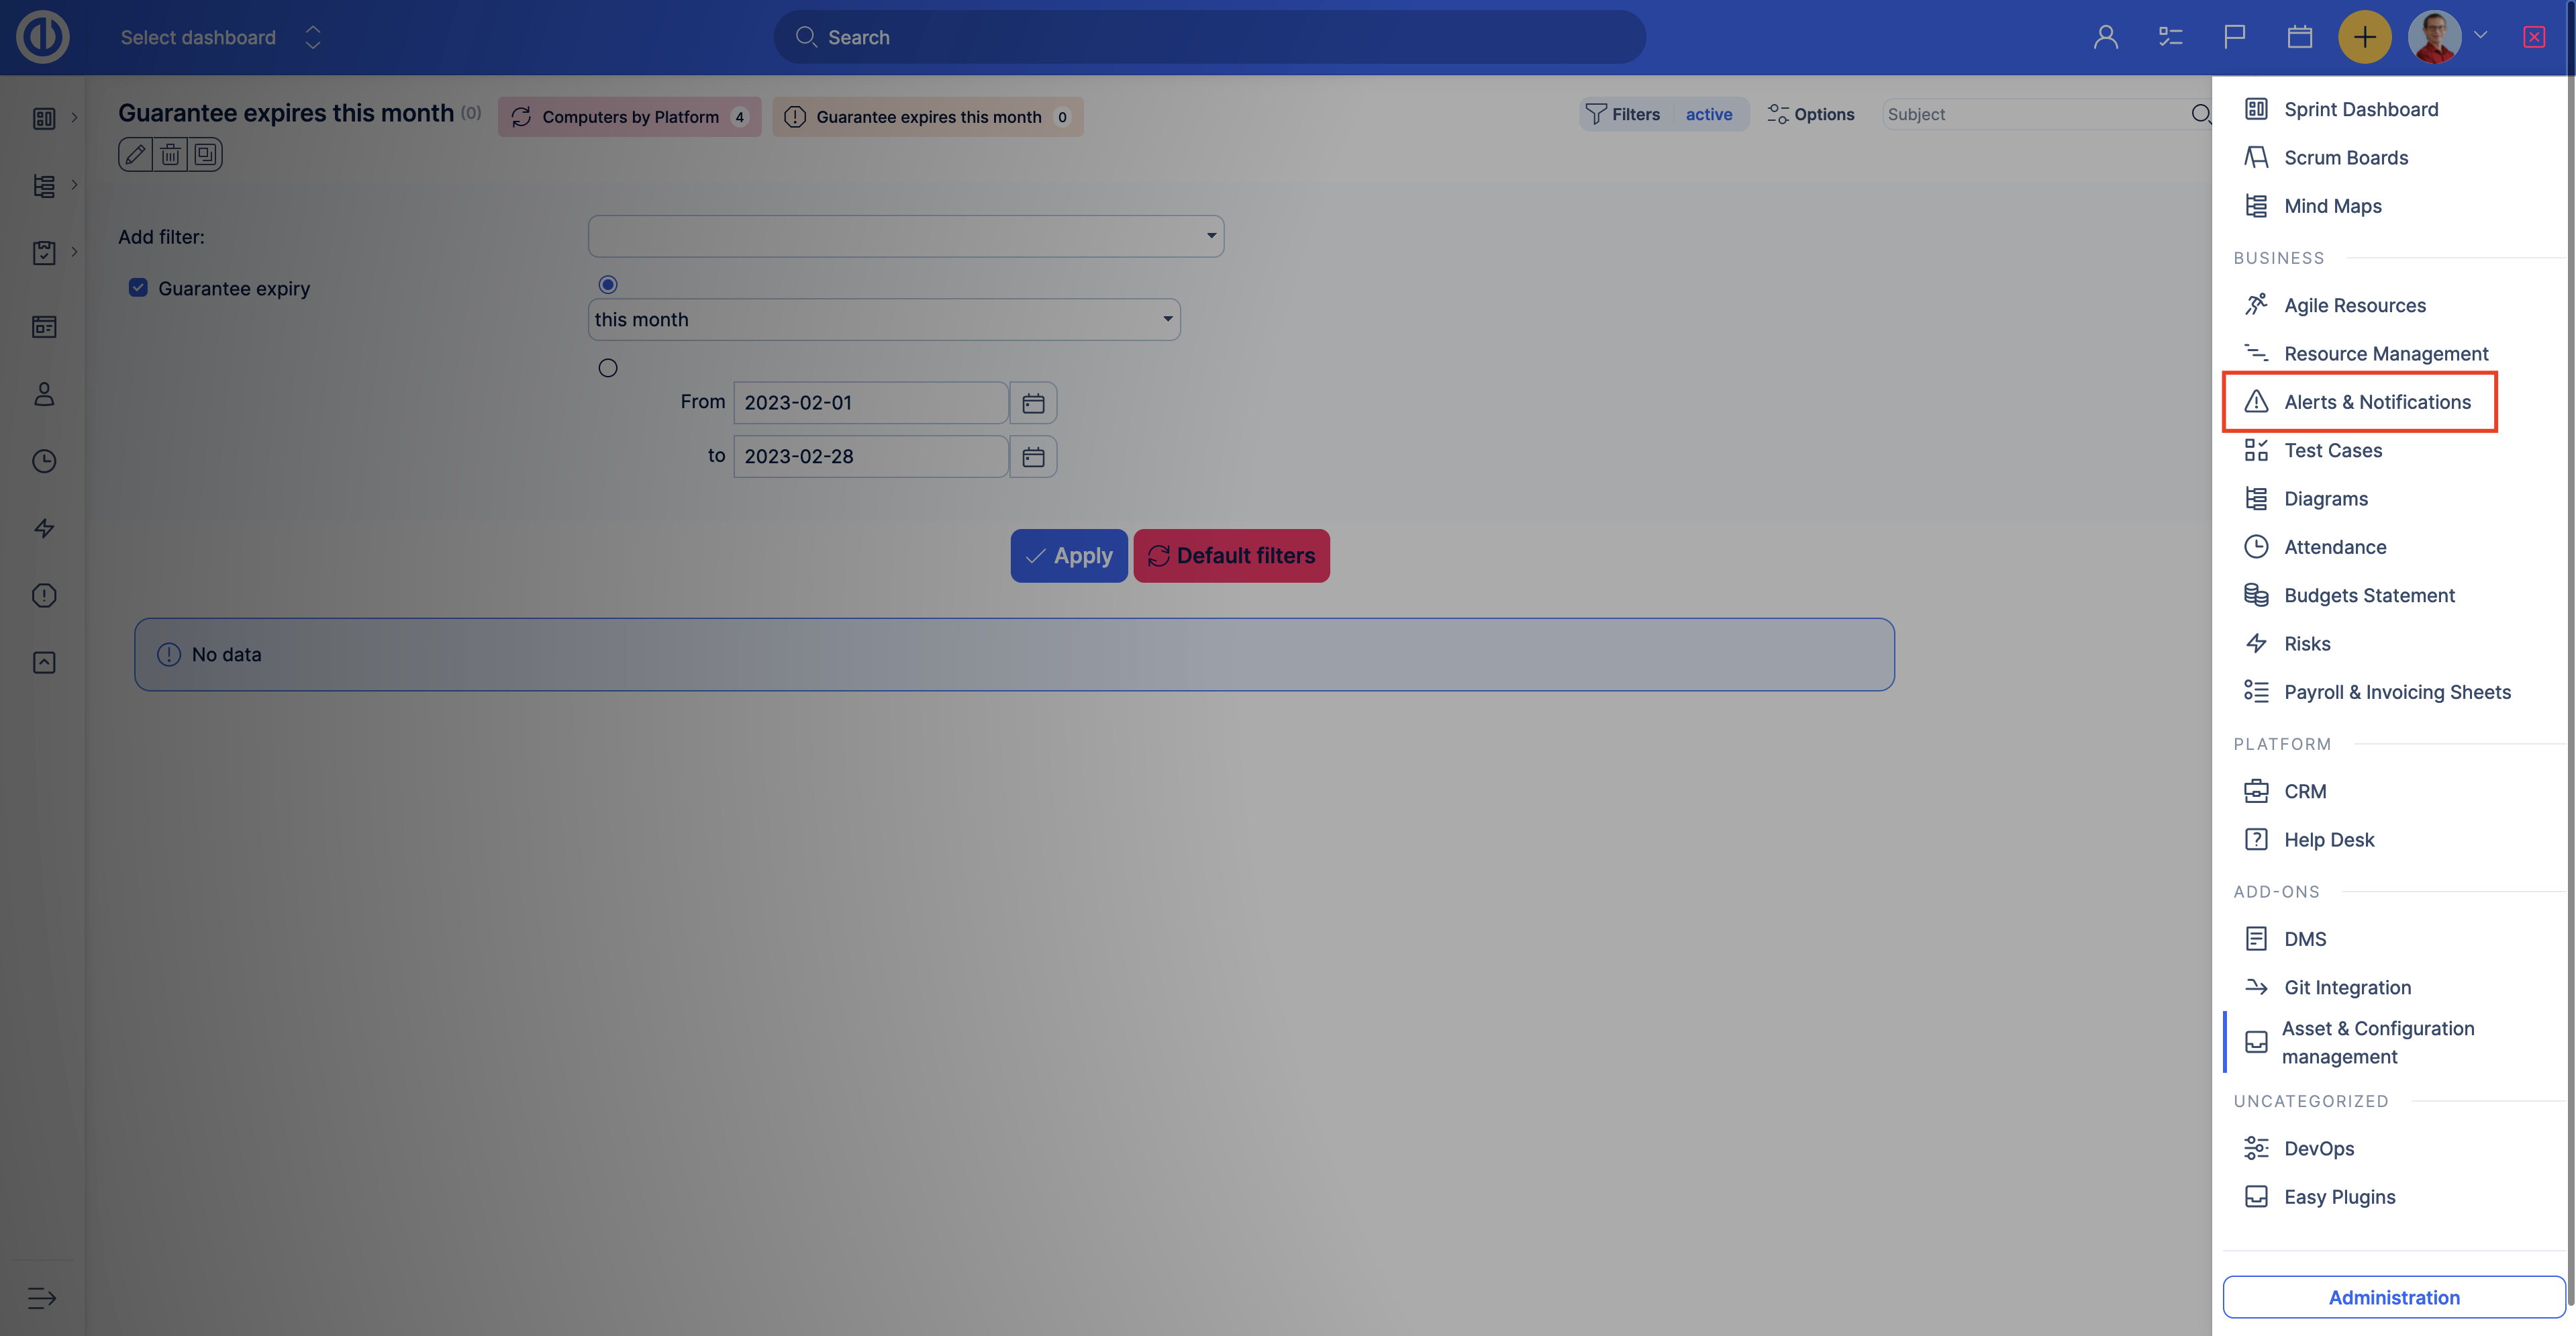
Go to Global menu >> Alerts & Notifications.
Click the New alert button. Name your alert. In the Watch field choose the Saved filter option under the Asset & Configuration management. Then select the custom table you want to set up the alert for. In the 'Warn if the number of records in the filter' field select the Saved filter you want to watch. Apply other settings based on your requirements and click Save.
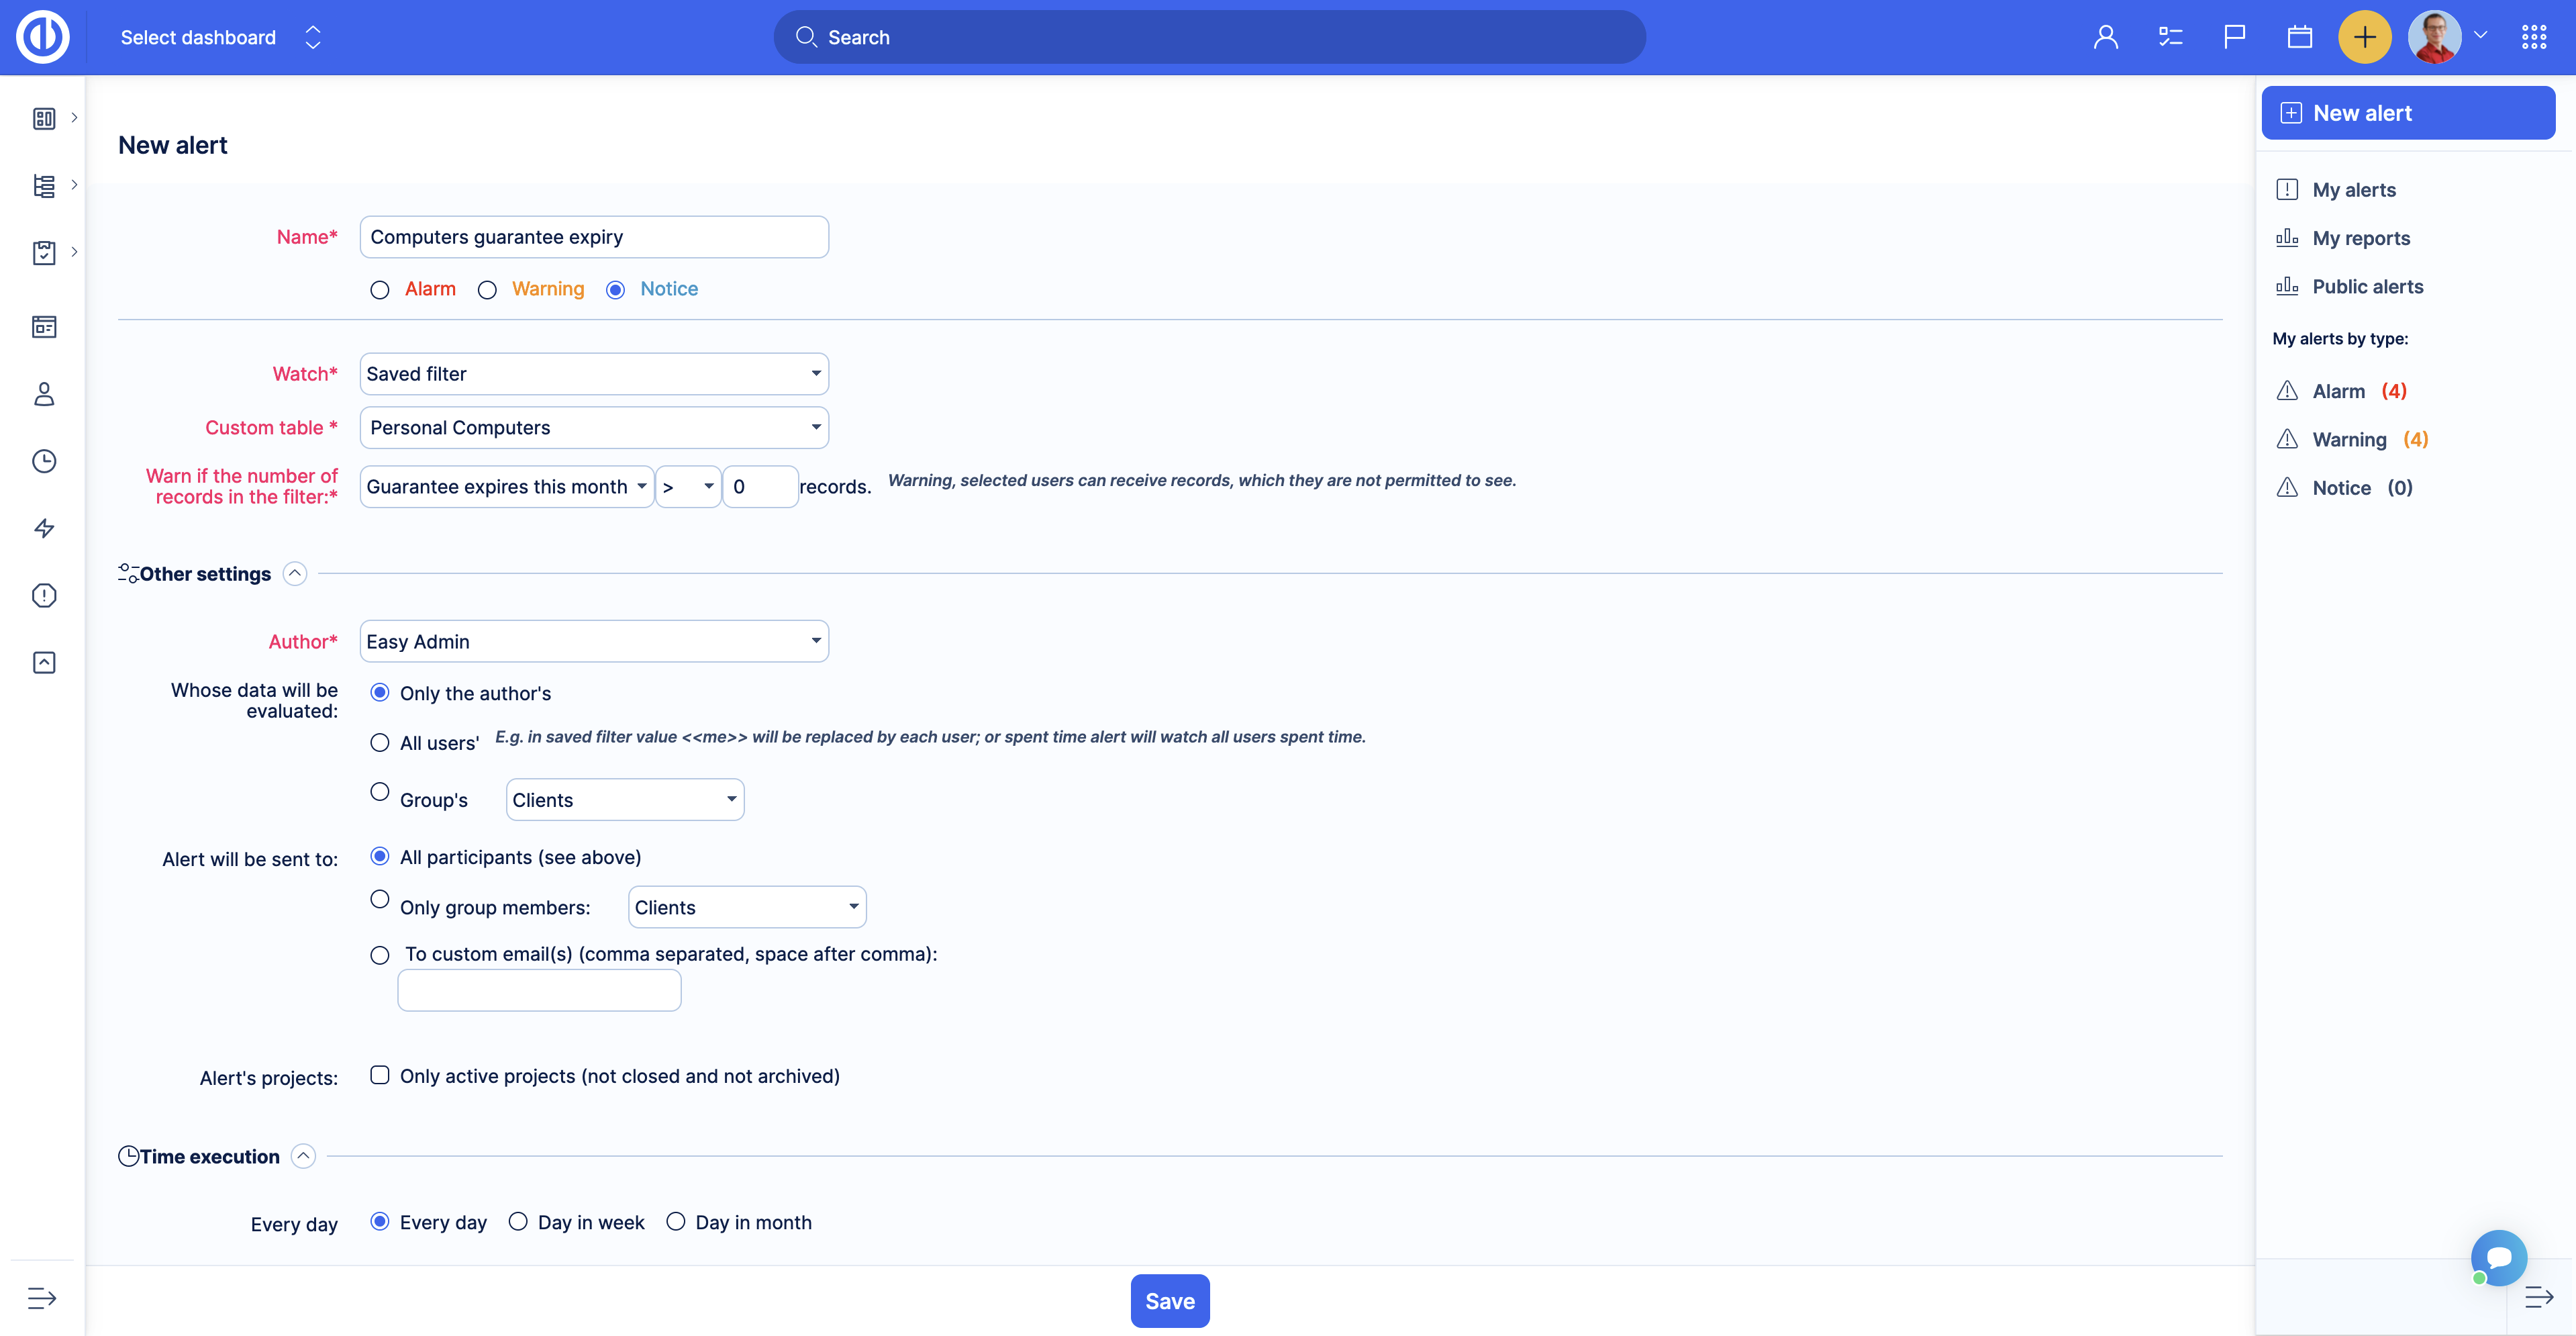
Now, all responsible workers will receive notification by email when there is any computer with the Guarantee expiry this month.
To find out more about Alerts, please read the article about Alerts (early warning system).