Attendance Management
Contents
What is Attendance
Types of view
Attendance settings
Roles and permissions
Approving of attendance for subordinates
How to setup an attendance calendar My dashboard
Synchronize Attendance with other systems
How to set attendance day limits for individual users
How to display autocomplete field with attendance status of users
Online/offline status of a user
Corner situations
What is Attendance
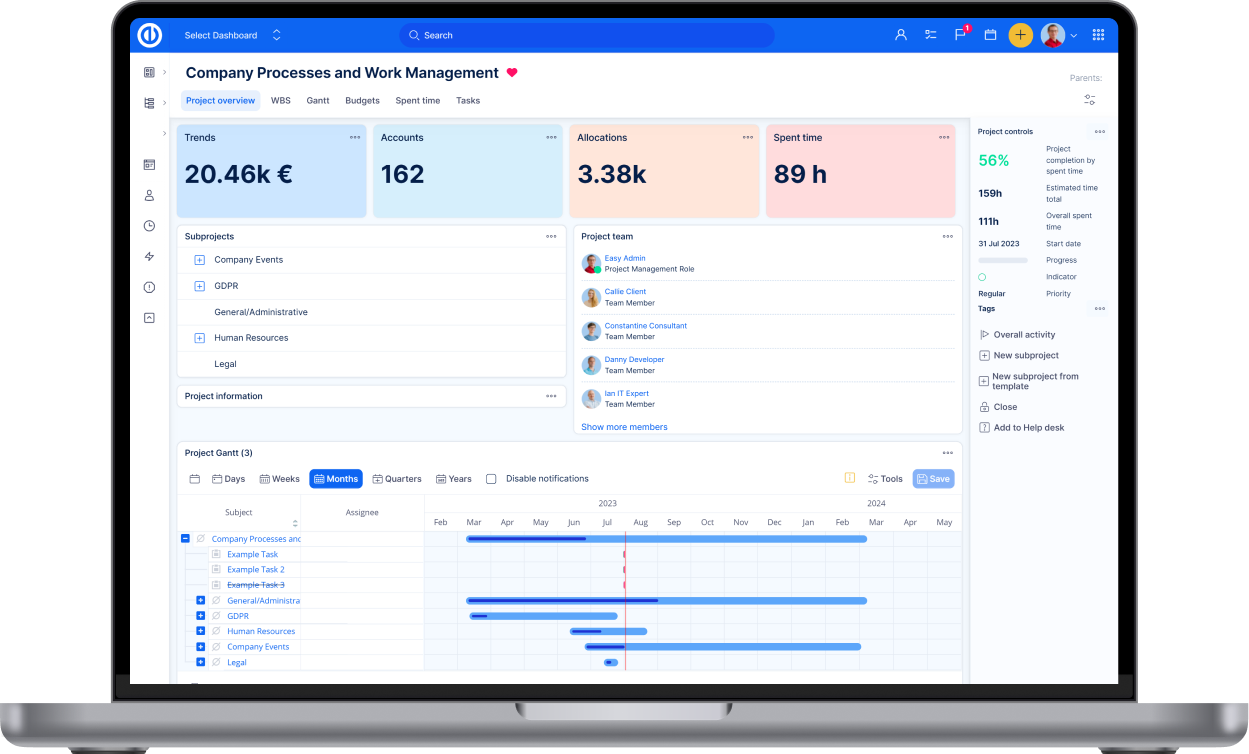
This Easy Project plugin will help you to professionalize your attendance monitoring. Monitor vacations, home-office, day-offs, sick leaves or simply time in office in your Project.
-
Users plan their vacation, users log time in work - easily via one button - start / stop. Users log sick days or home offices.

Everything easily via a widget from their personal dashboard.
-
System administrators are notified about planned vacations, home-offices or sick days via e-mail.
-
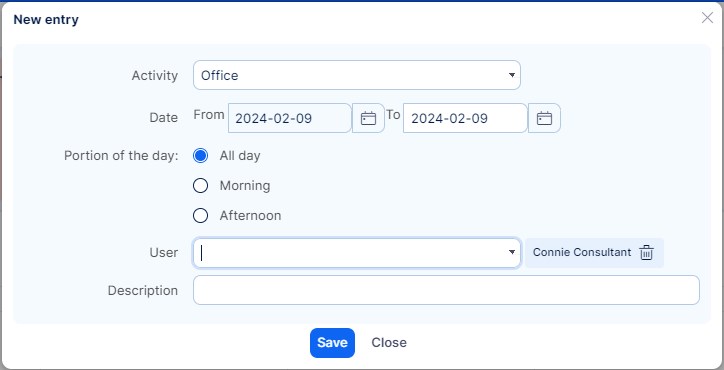
While logging to the particular day, the user just chooses the time period and activity.
-
Administrators, managers have perfect stats about vacations and sick days as well as worked time.
-
Or have it as a list with a possibility of export.
Types of view
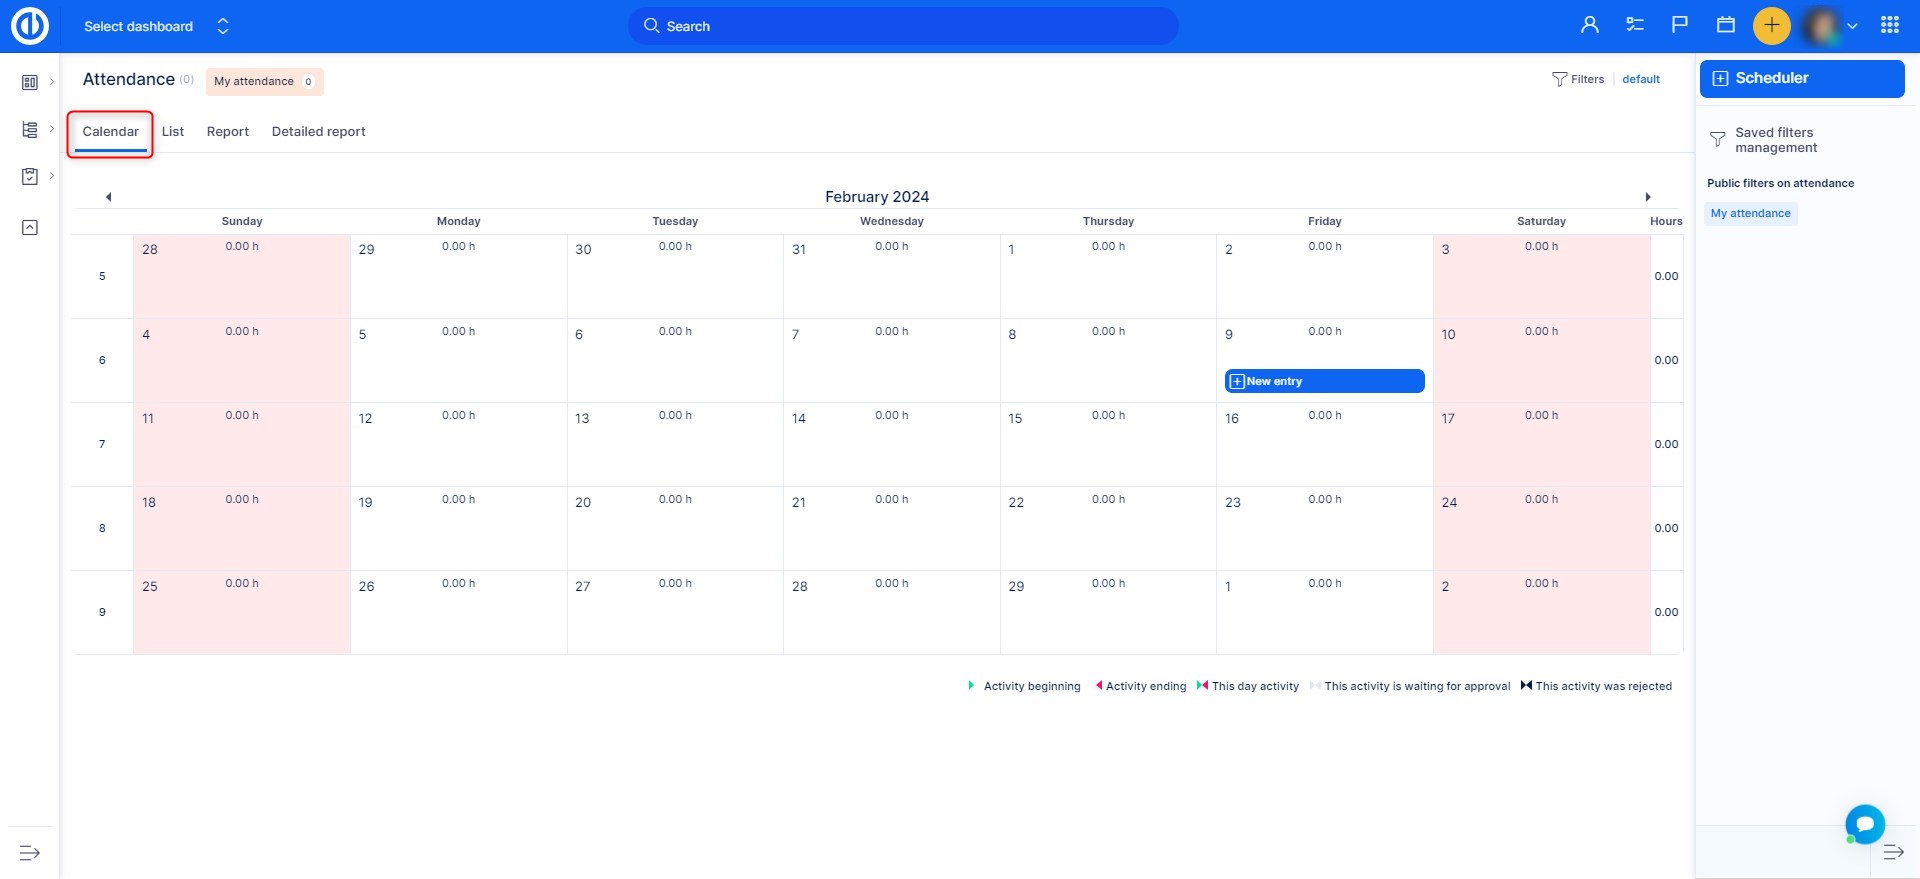
When you go to More: Attendance, you can switch between 4 basic types of view of attendance records as follows:
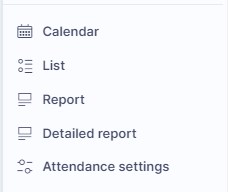
- Calendar - attendance records are displayed per days, weeks or months in a calendar view
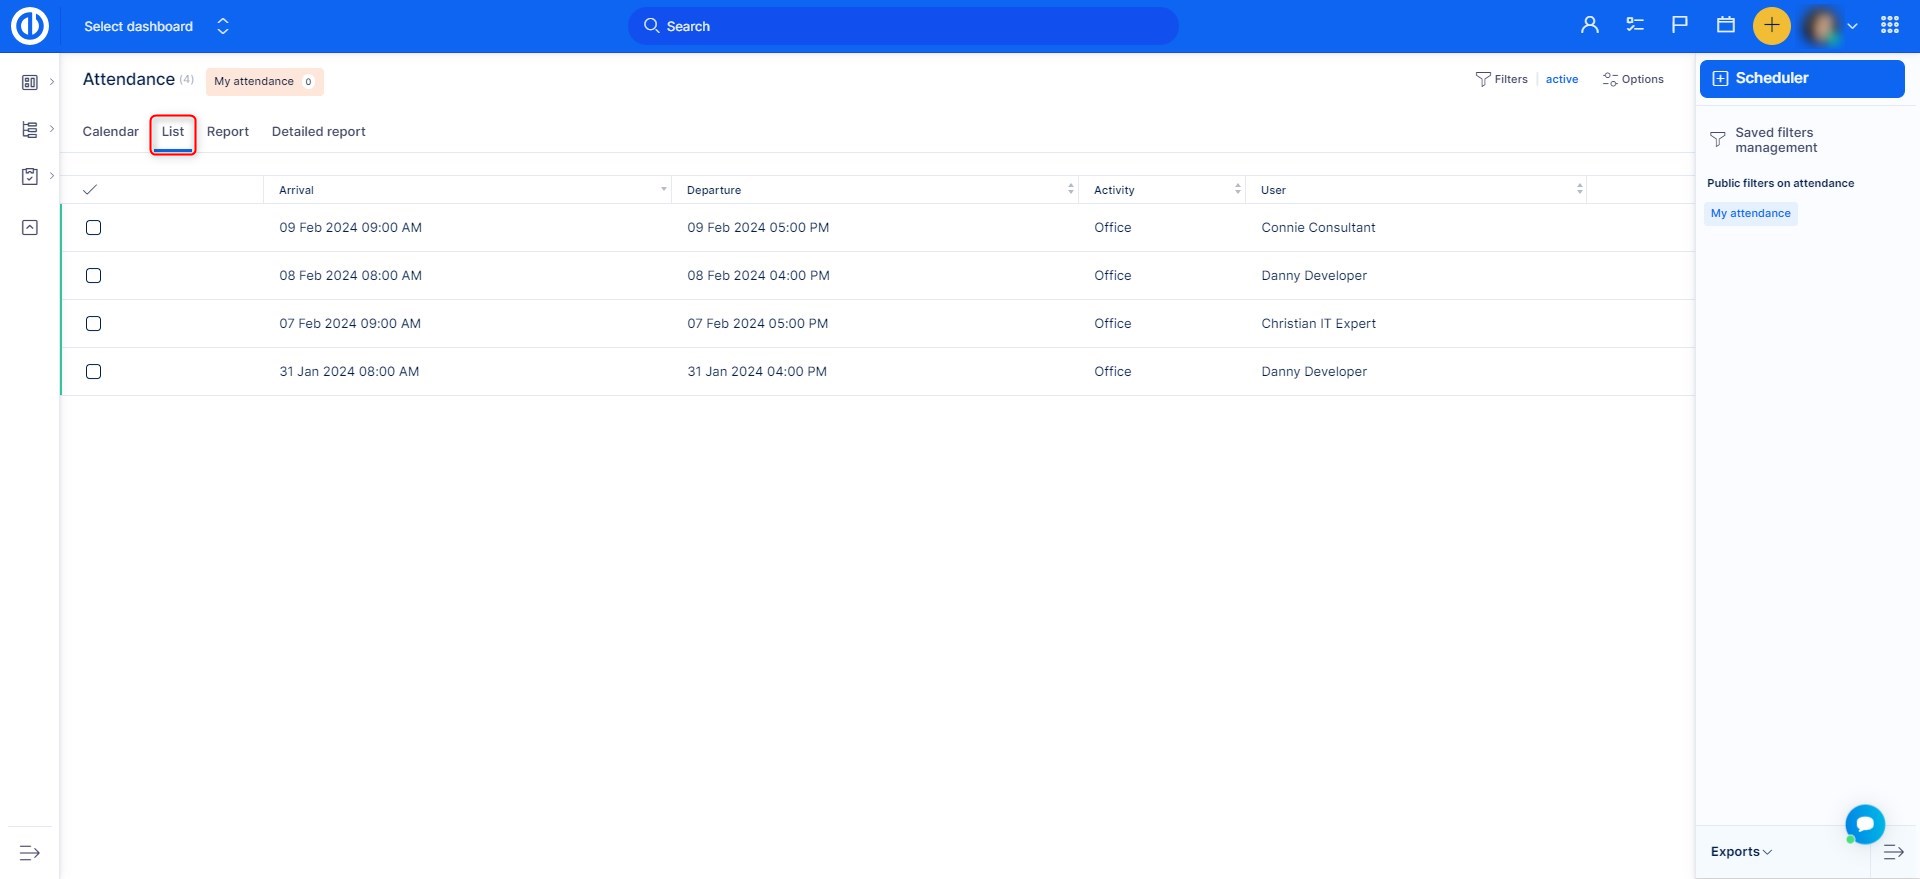
- List - attendance records are displayed in a list, which can be filtered and columns may be added/removed as per your needs
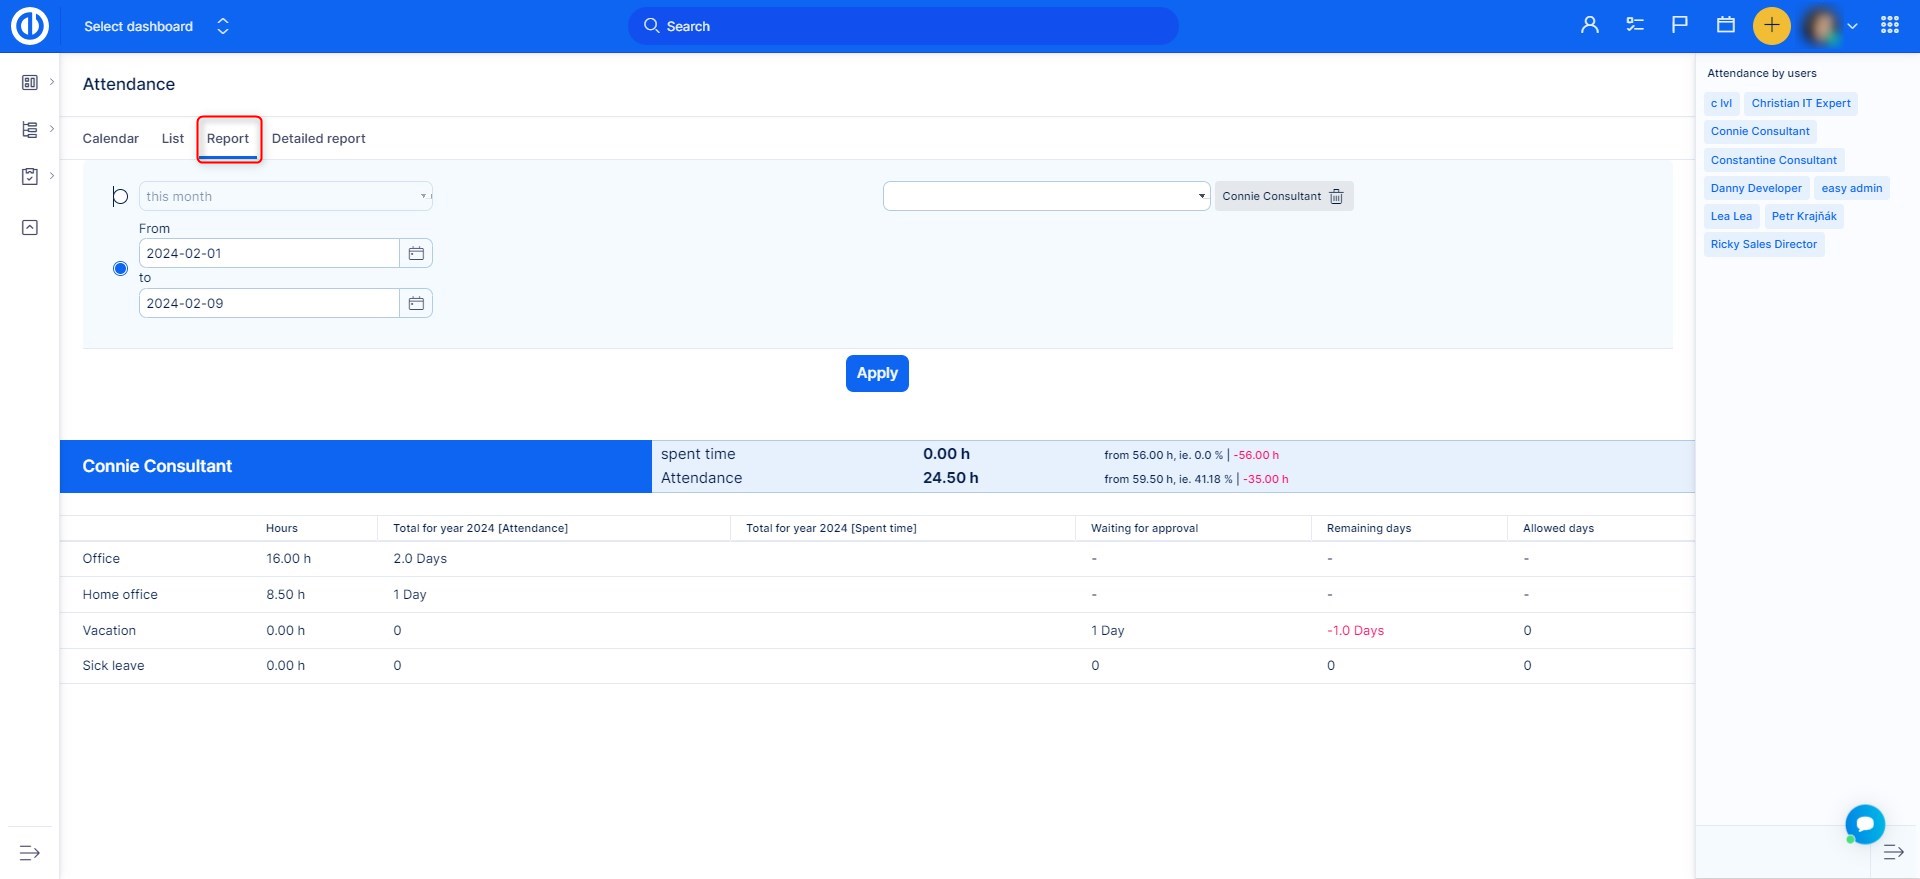
- Report - attendance records are displayed per selected user and time interval in a report view
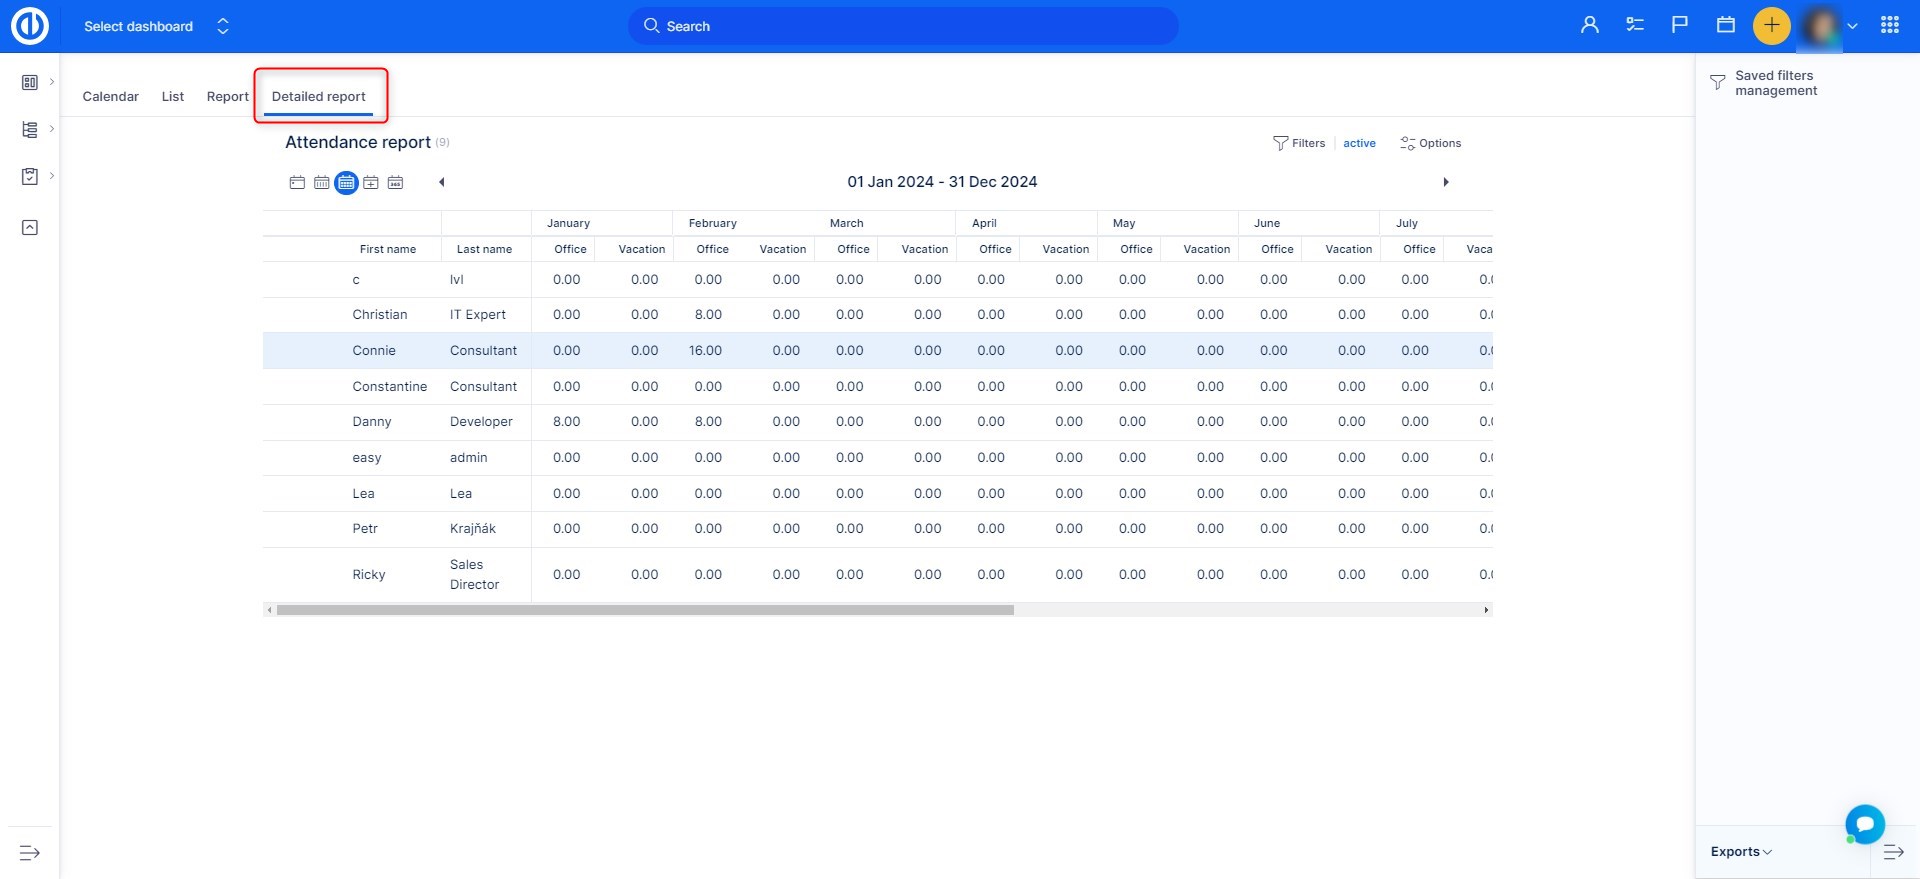
- Detailed report - attendance records are displayed in a detailed table encompassing all users and their hourly attendance values per days, weeks, months, quarters or years, which you can easily switch between
Attendance settings
In Global menu >> Attendance >> Attendance settings, you can set up all working time calendars, attendance categories, and attendance settings.
I. All working time calendars
The working calendar can also be edited directly from the Administration.
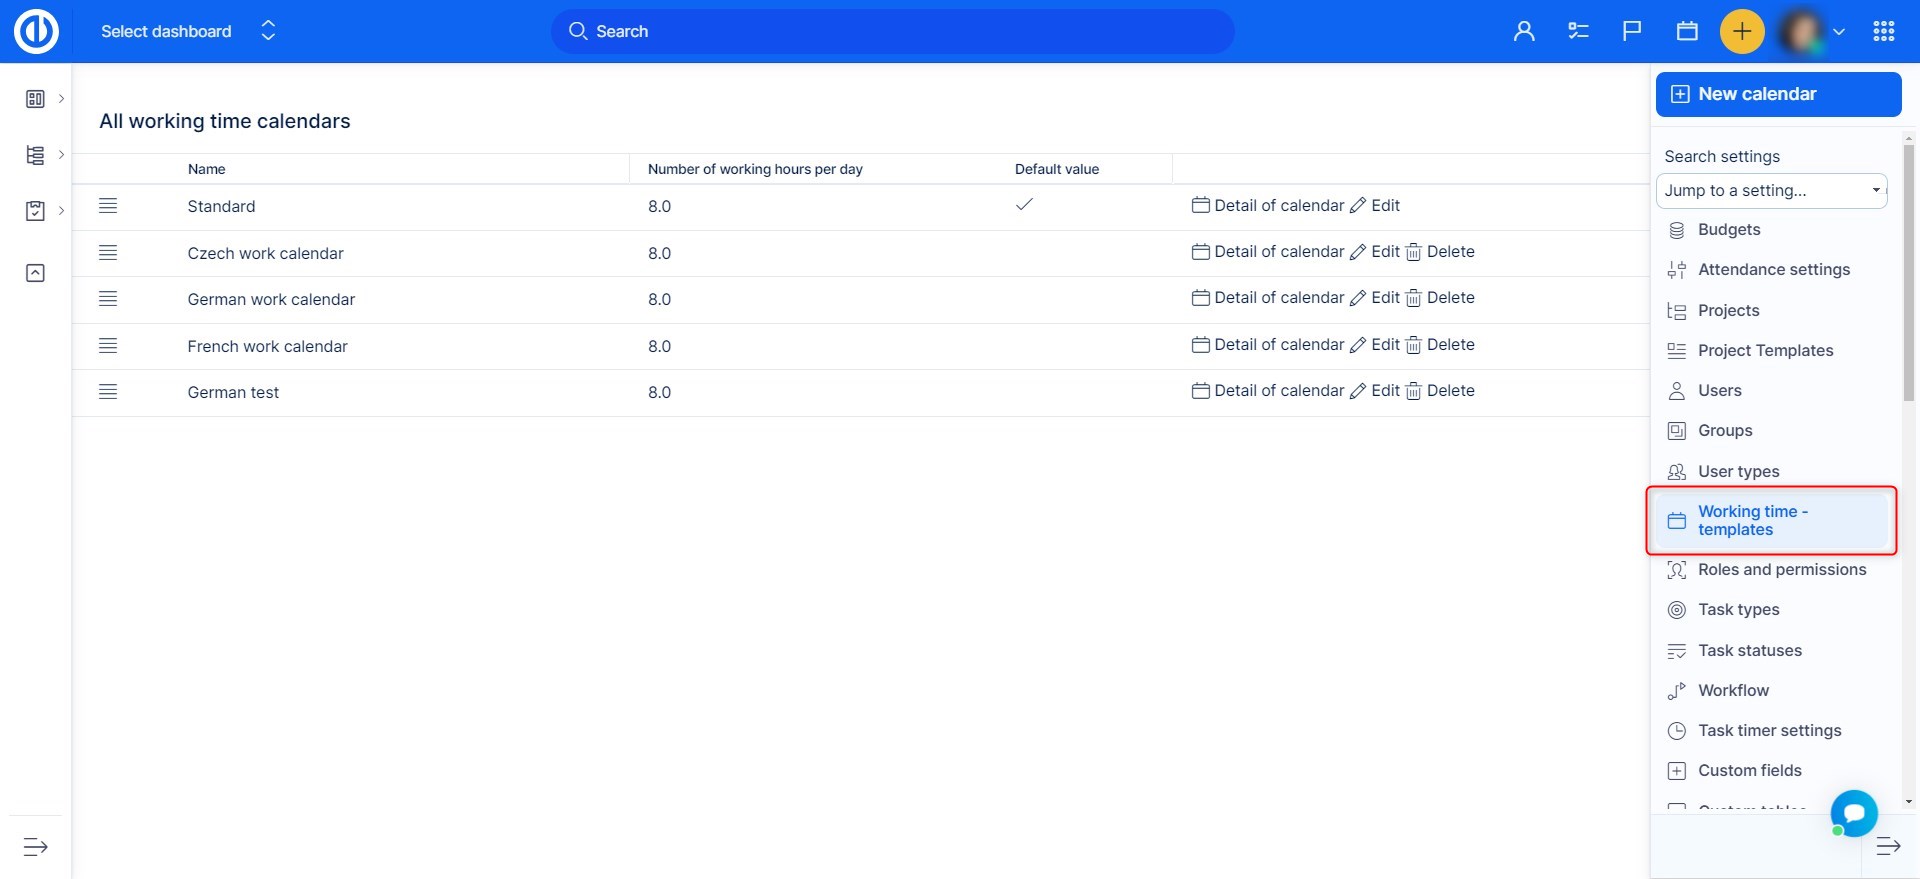
You can either choose from existing calendars or you can add a new custom one on the right. You can name the calendar, set when work starts and ends, set working hours per day, working days in a week, whether the calendar is the default one, and you can import holidays via an ICS file if needed. Please note that default starting/ending time of work, as well as working hours per day, have a direct impact on which data will be pre-filled automatically in the window for signing arrival/departure, so it can ease your work a bit. Of course, all the data can be manually edited for each attendance record separately.
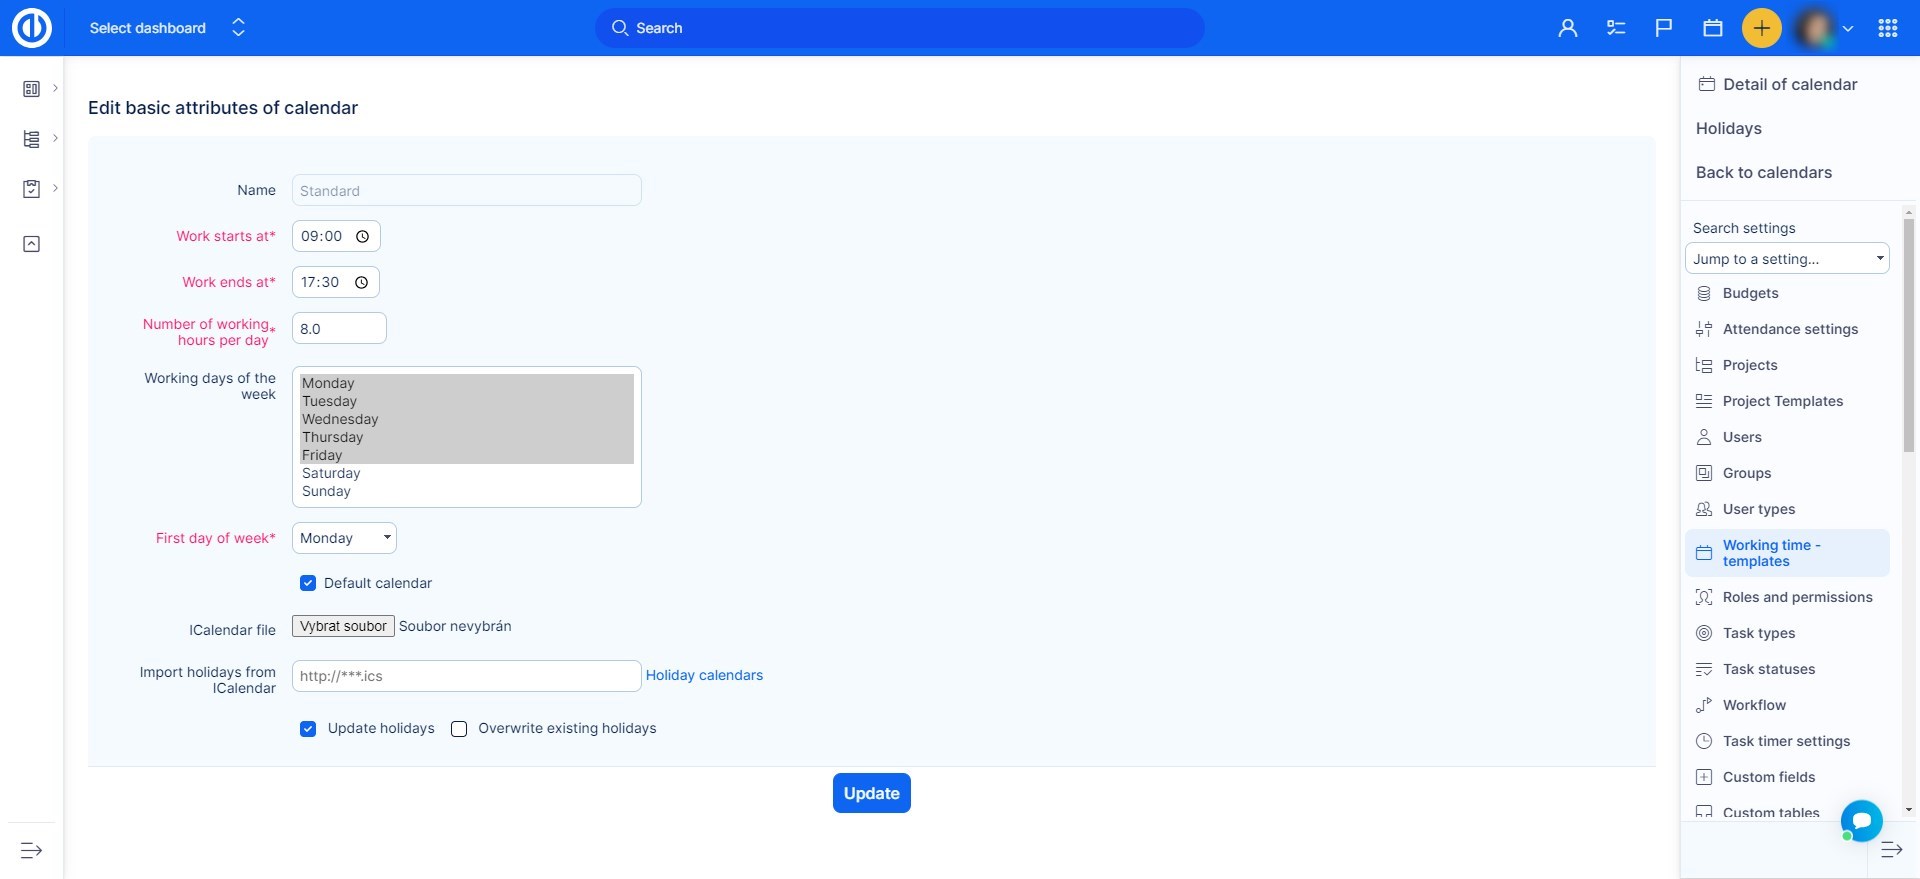
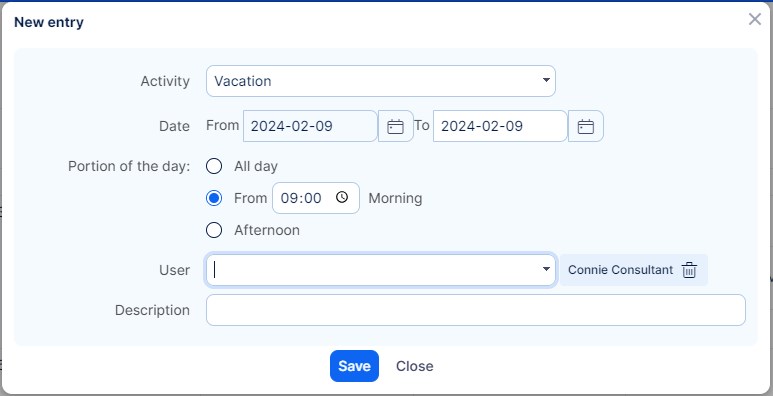
When logging an attendance record, you may either insert the from-to time manually (if enabled by the category settings) or automatically by choosing a portion of the day, which might be: all day (=from start to end of your working time as per your calendar), morning (=Work starts at + the number of working hours / 2) or afternoon (=Work ends at - the number of working hours / 2).
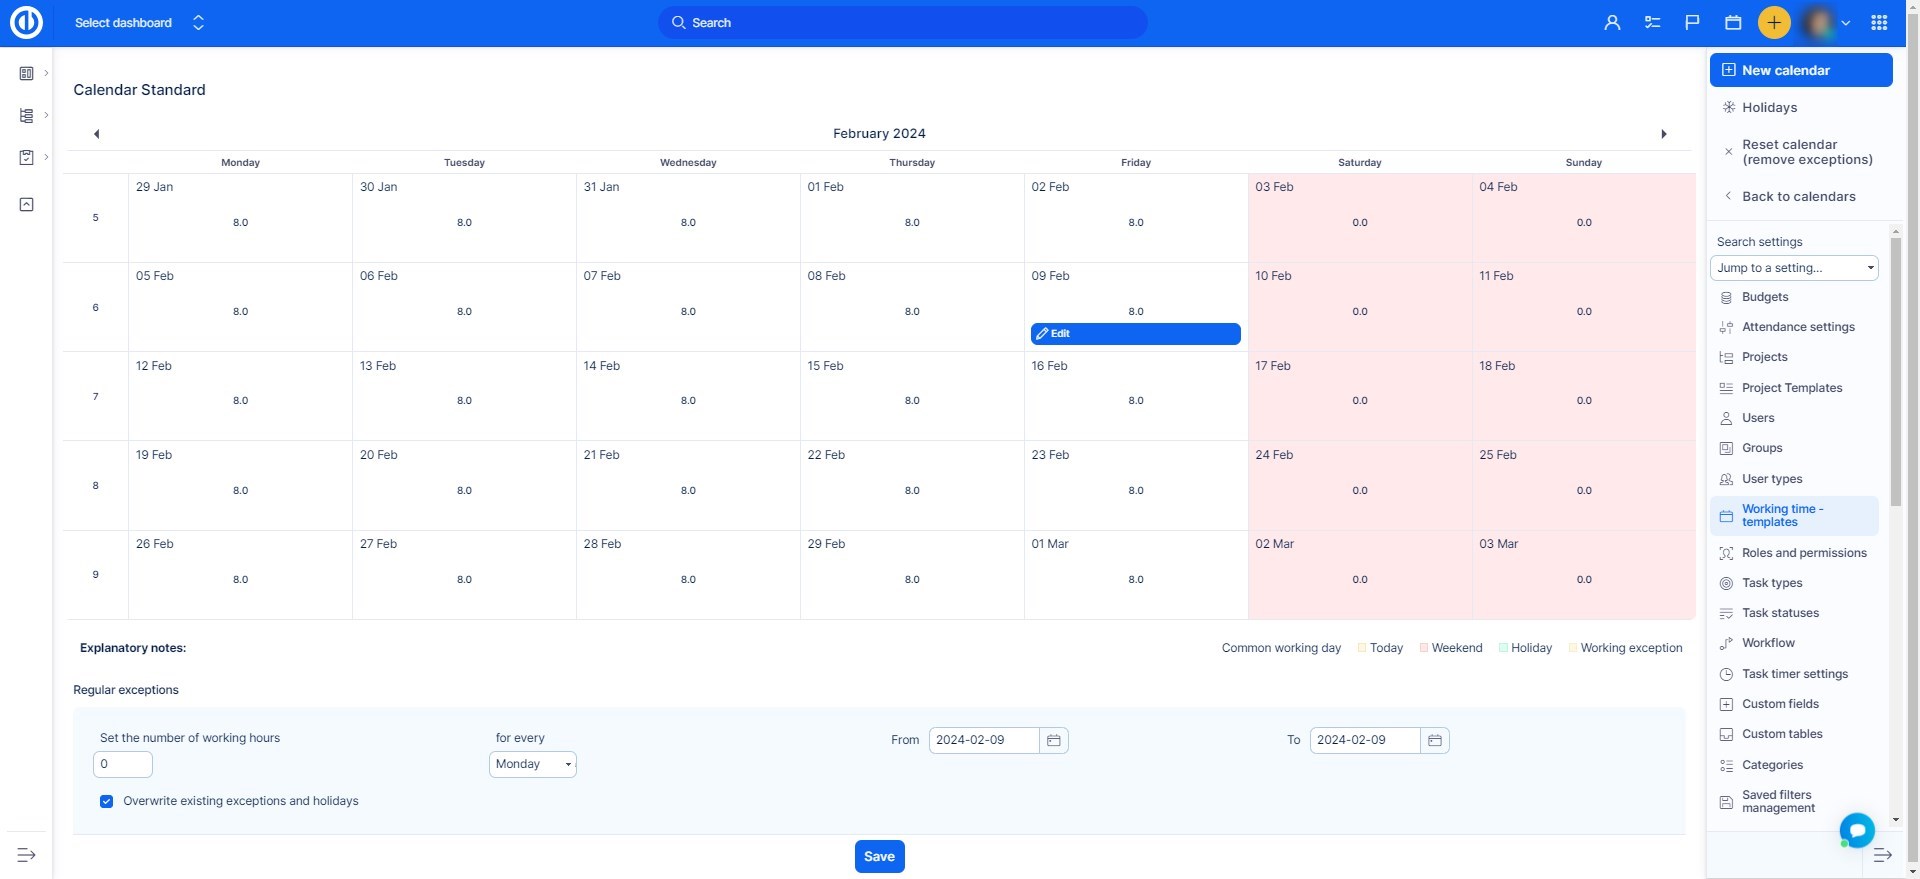
Once your calendar is created you can edit it even further, add working exceptions and edit working hours for only some days.
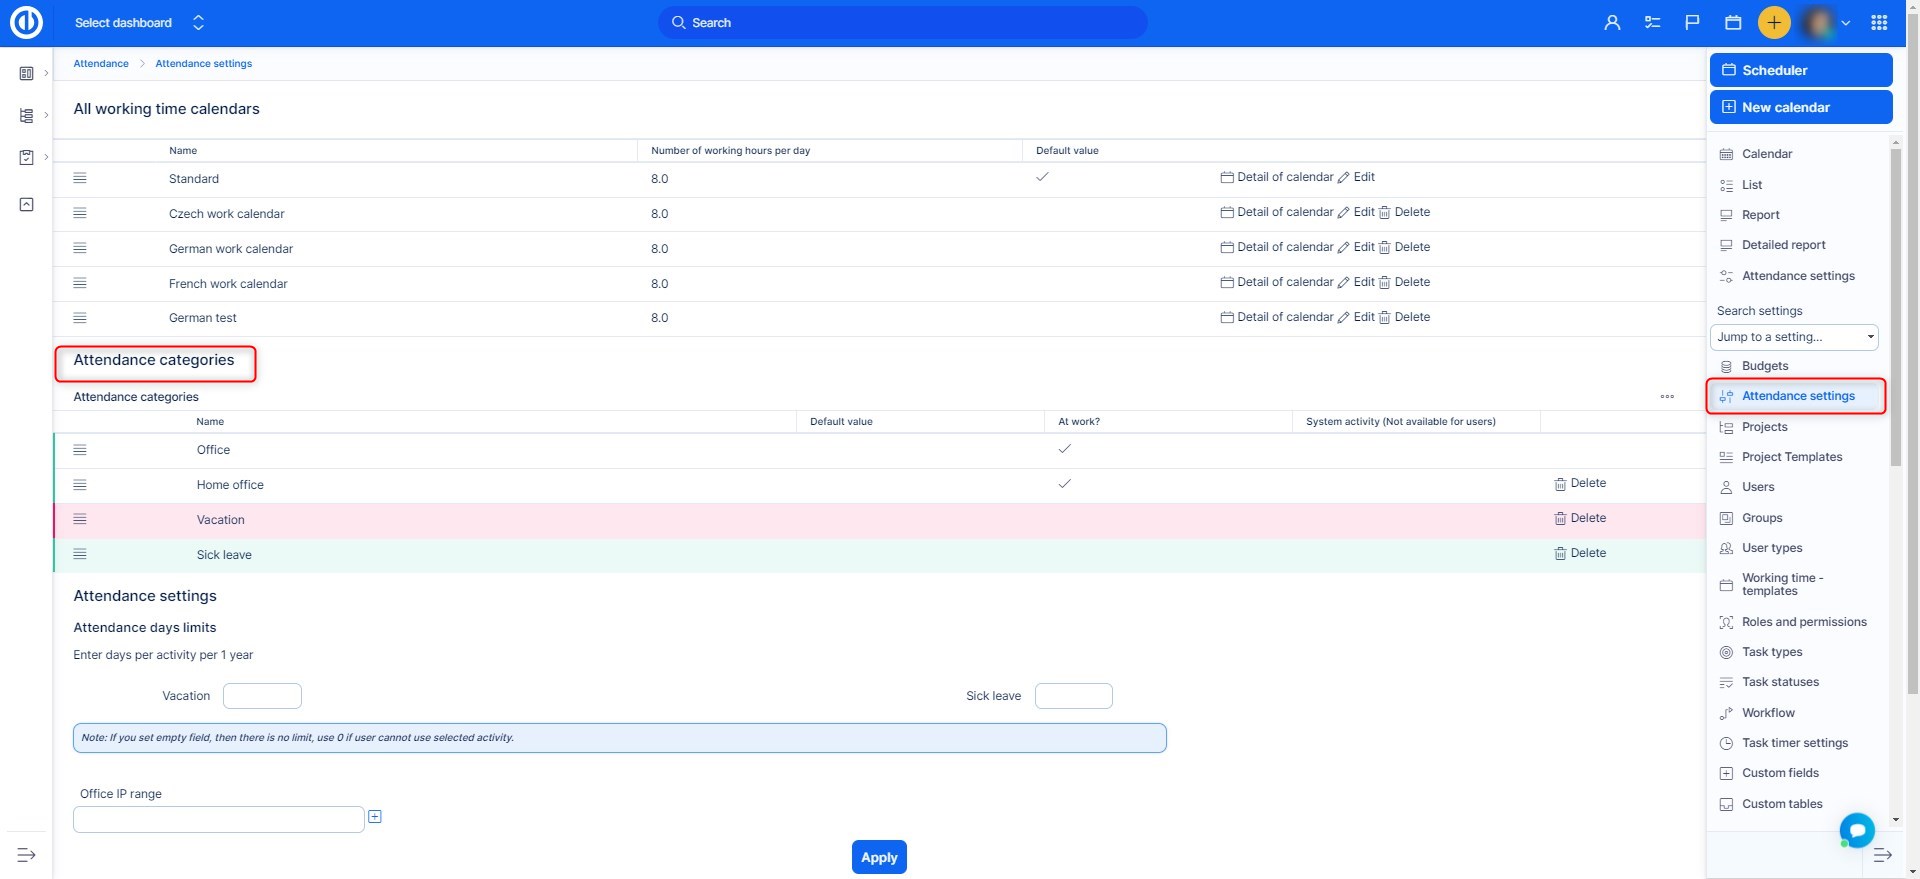
II. Attendance categories
In Attendance settings, also attendance categories can be created, edited or deleted. To create a new category, just click on the "New value" button on the right. To edit a category, click on its name. To delete it, just use the "Delete" button with trash icon on the right of each item. To rearrange the order of categories as they appear in the list, use the "Reorder" button on the left of each item.
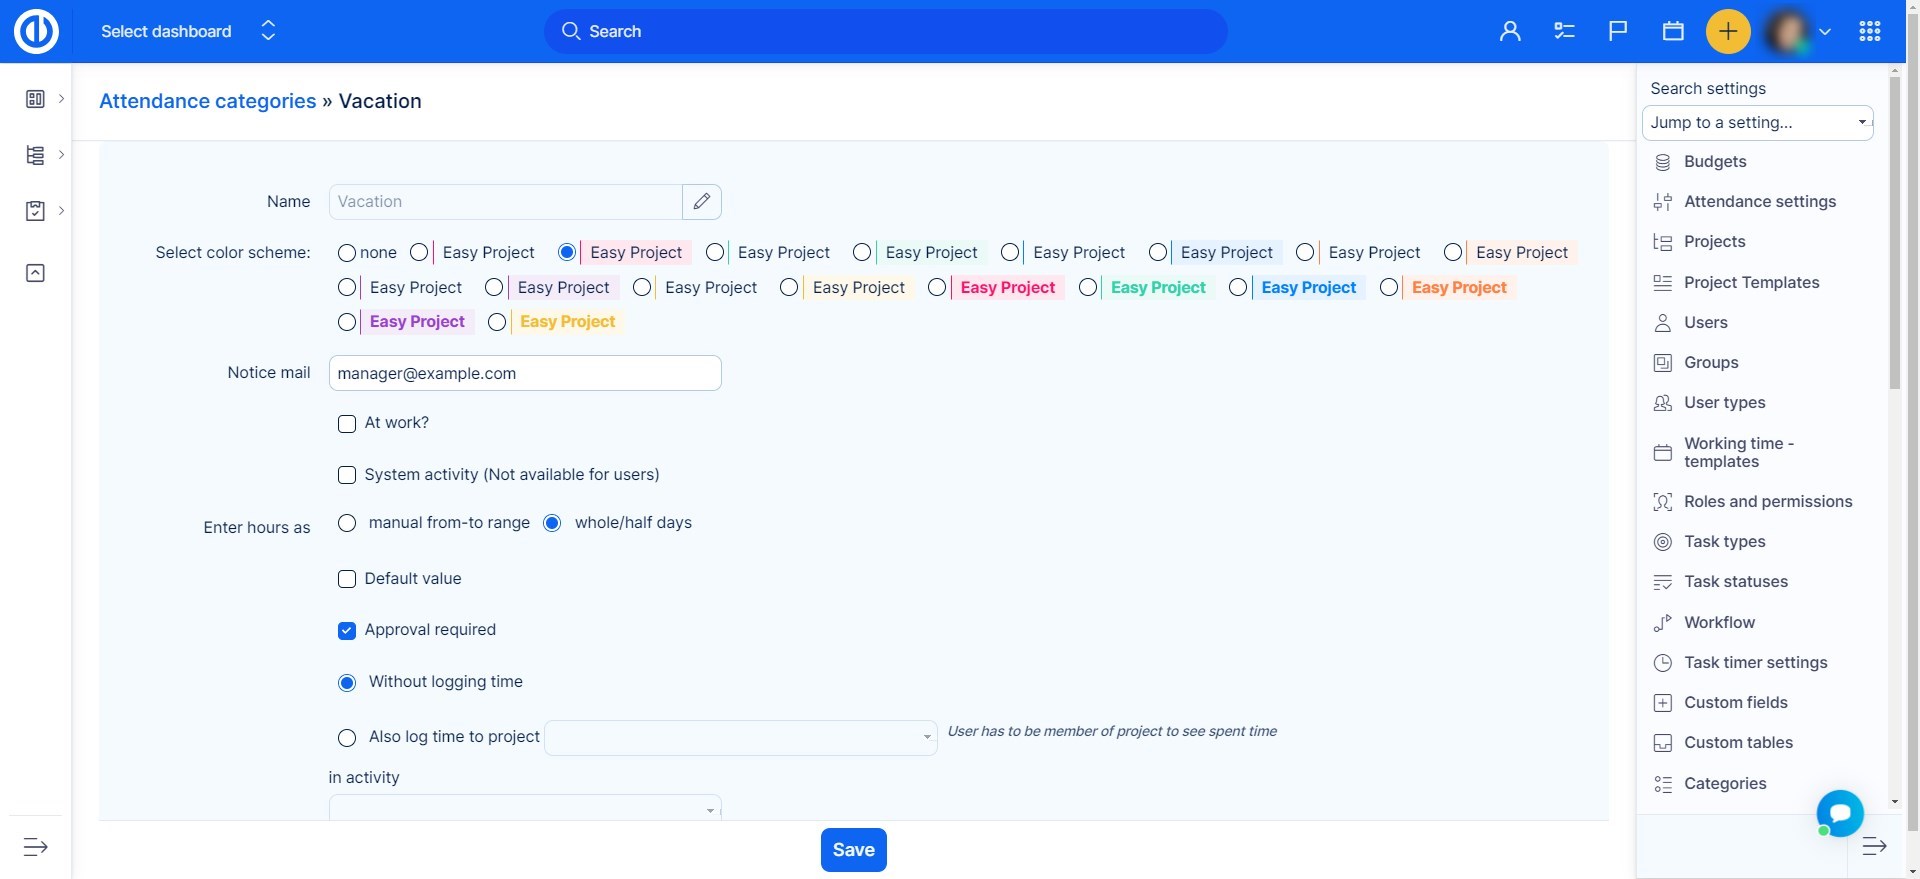
When creating a new category, such as Vacation, there are some settings to be configured, such as:
- Name - Fill in the name for this category
- Select color scheme - Choose color scheme for this category as it appears in the calendar
- Notice mail - Which e-mail address will receive notification when time is logged under this category
- At work? - Choose whether this category means working hours or non-working hours
- System activity (not available for users) - This checkbox refers to an activity that is used for operations using REST API, such as importing activities from an external system. The activity is included in purchased licenses. The activity appears only at the necessary locations, otherwise, its state is hidden.
- Enter hours as - Choose between automatic/manual range of time interval
- Default value - This category will be preselected by default when logging attendance
- Approval required - Do attendance records in this category require approval from the superior worker?
- Without logging time - No logging this time on any project
- Also log time to project - Select a project the logged time will also appear on. Please note that you have to be a member of such a project to see its related attendance records. This setting is sensitive to the settings of the project. Make sure that you never disable the activity on the given project - you won't be able to approve attendance in that case.
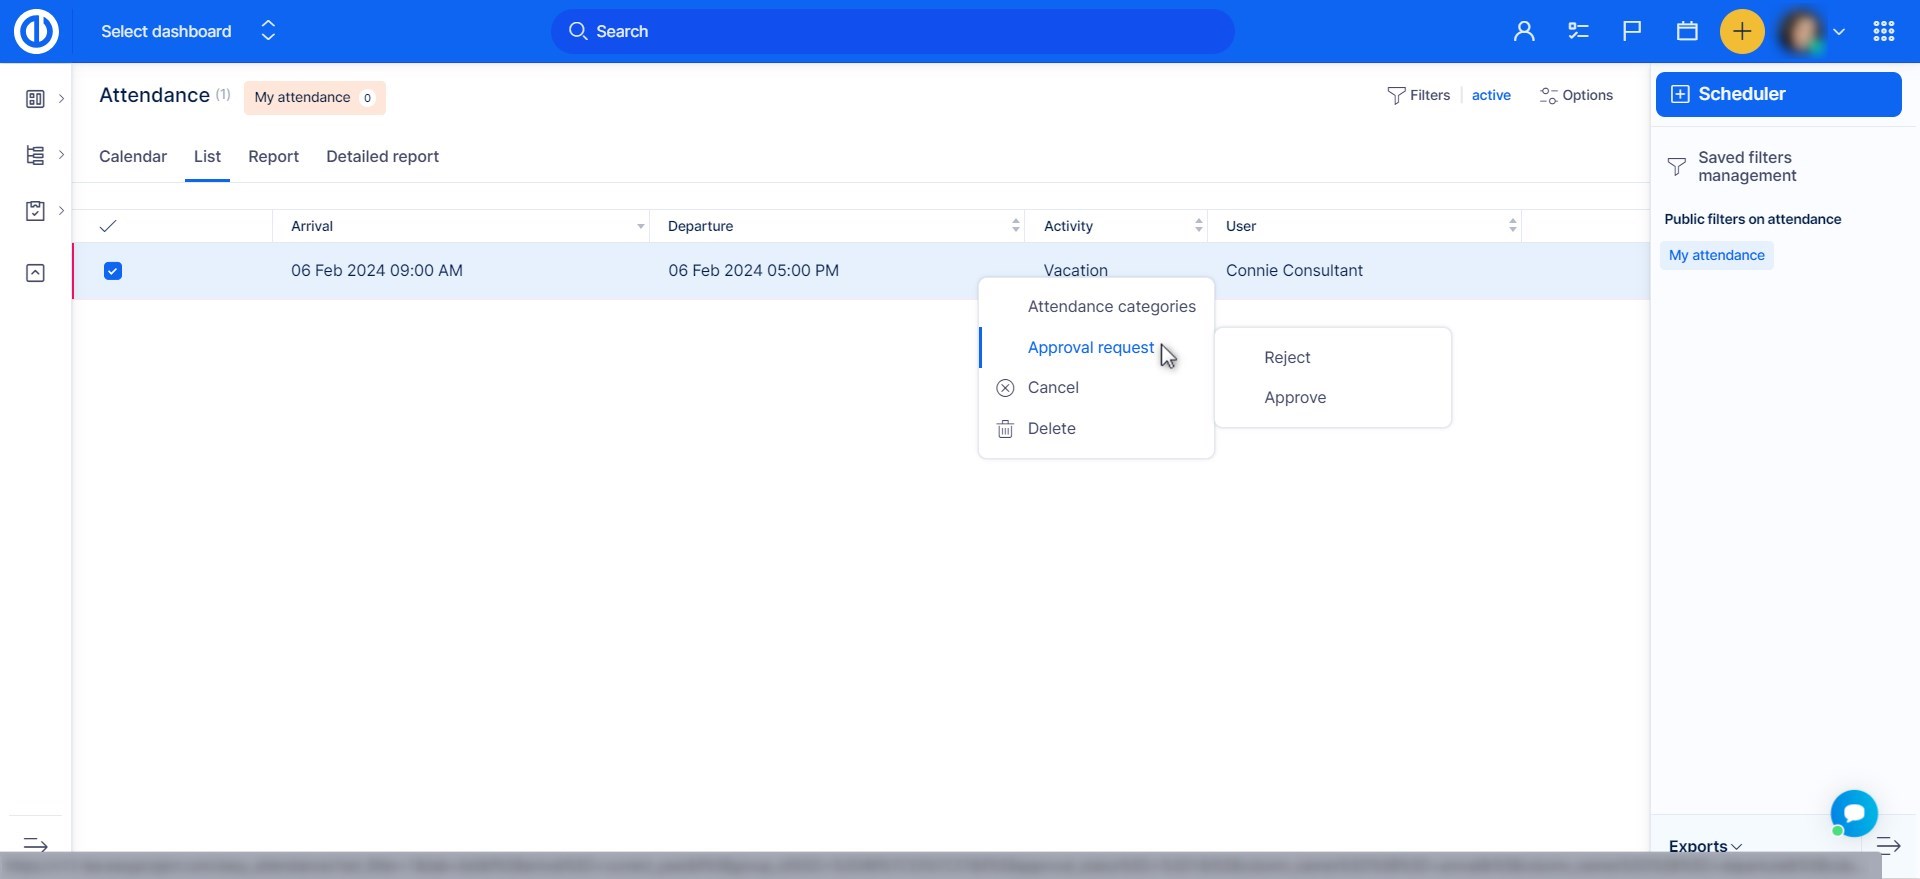
By the way, when "Approval required" checkbox ticked, any added vacation by the worker will be subject to approval. This change does not affect already existing vacation entries. To approve or deny vacation request, go to Global menu >> Attendance >> List and filter out what you want to approve or deny. In this case, Jerry filled in he wants a vacation on the 2017-07-31. Click on it with the right mouse button and choose Reject, or Approve. The worker can see if his vacation was approved or denied, or when it waits for approval. If an attendance record requires approval, it is saved as unapproved. If additional changes are made to an already approved attendance record in arrival, departure, user, or activity, it automatically returns to an unapproved status, requiring a new approval.
III. How to set up office IP to separate office and home office time
If your users can also work from home, you can keep track of from where they are working, easily by setting the office IP. When a user logs in in the morning, the system automatically logs his attendance with the default attendance which is usually Office.
This is how you can set the IP of your office, so if the user logs in from another location, the attendance will log him in as "Home office".

Office IP range
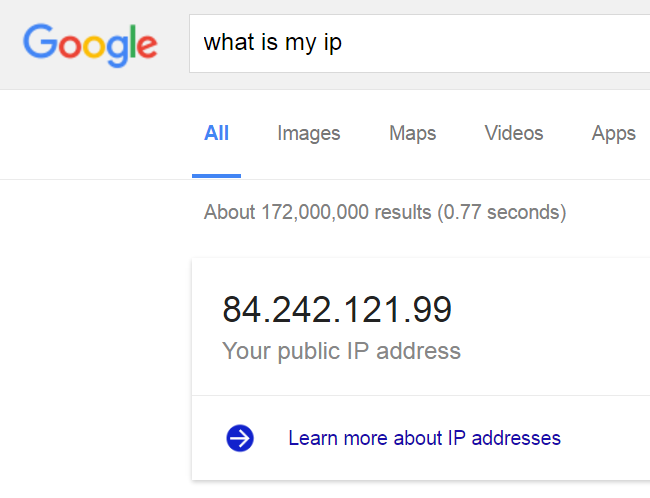
Here you fill in your office IP ( you can find out what IP you got on this page https://www.whatismyip.com/ or by simply writing a search in google " What is my IP" google will tell you.
Activity in the range
Here you choose which activity will be assigned to the user who logs in in the office.
Activity outside of range
Here you will choose which activity will be assigned when a user logs in, for example at home.
Round time
You can allow logged attendance time to be rounded up. If you put a number 15 there, for example, means that if the user logs in at 9:05 the system will log him in as if he came at 9:15. The same comes with departure. The time between 11,46pm – 11,59pm is automatically rounded to 11,59pm because 0,00am is already the time of the next day.
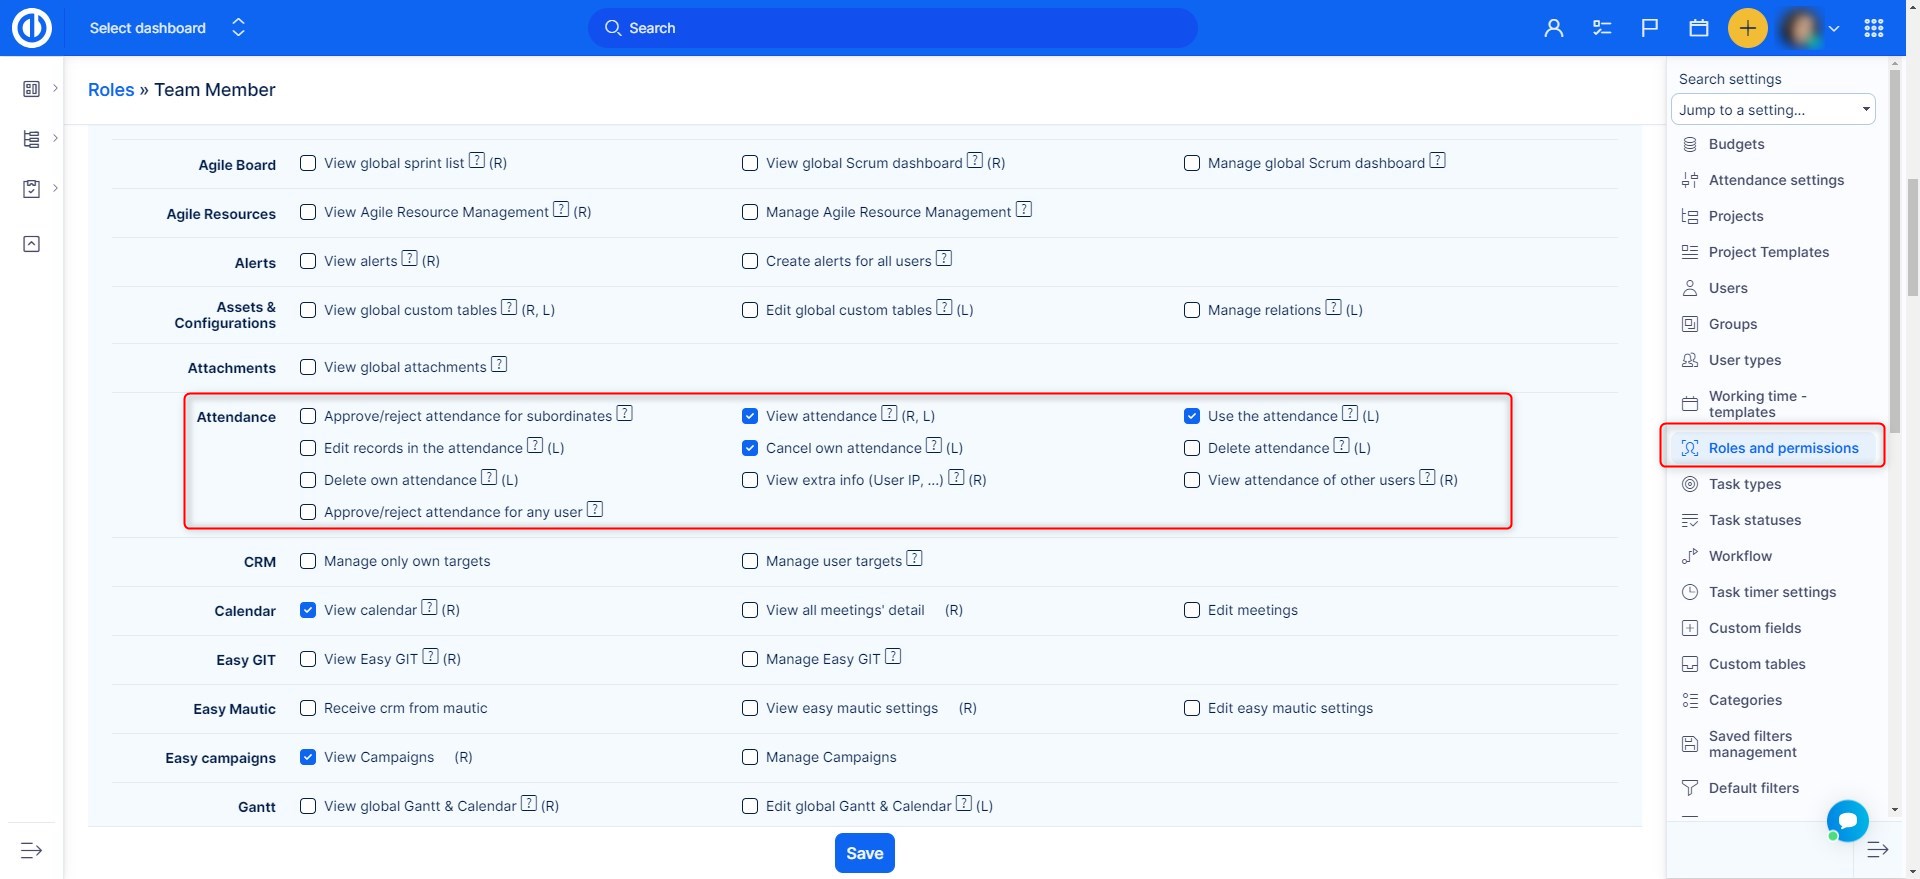
Roles and permissions
The permissions for Attendance can be set up in Global menu >> Administration >> Roles and permissions (see below).
Approving of attendance for subordinates
- Activate plugin Org structures (Global menu >> Administration >> Plugins >> Other >> Easy - organisation structure).
- Create the structure of users
- Modify roles and permissions for users who can approve attendance for subordinates

- Prepare filters for a quick view of attendance entries waiting for approval
Connection with other plugins
- Org Structures - creating of structure of users to approve their attendance
- Meeting Manager - visibility of out of office activities of the user when planning a meeting
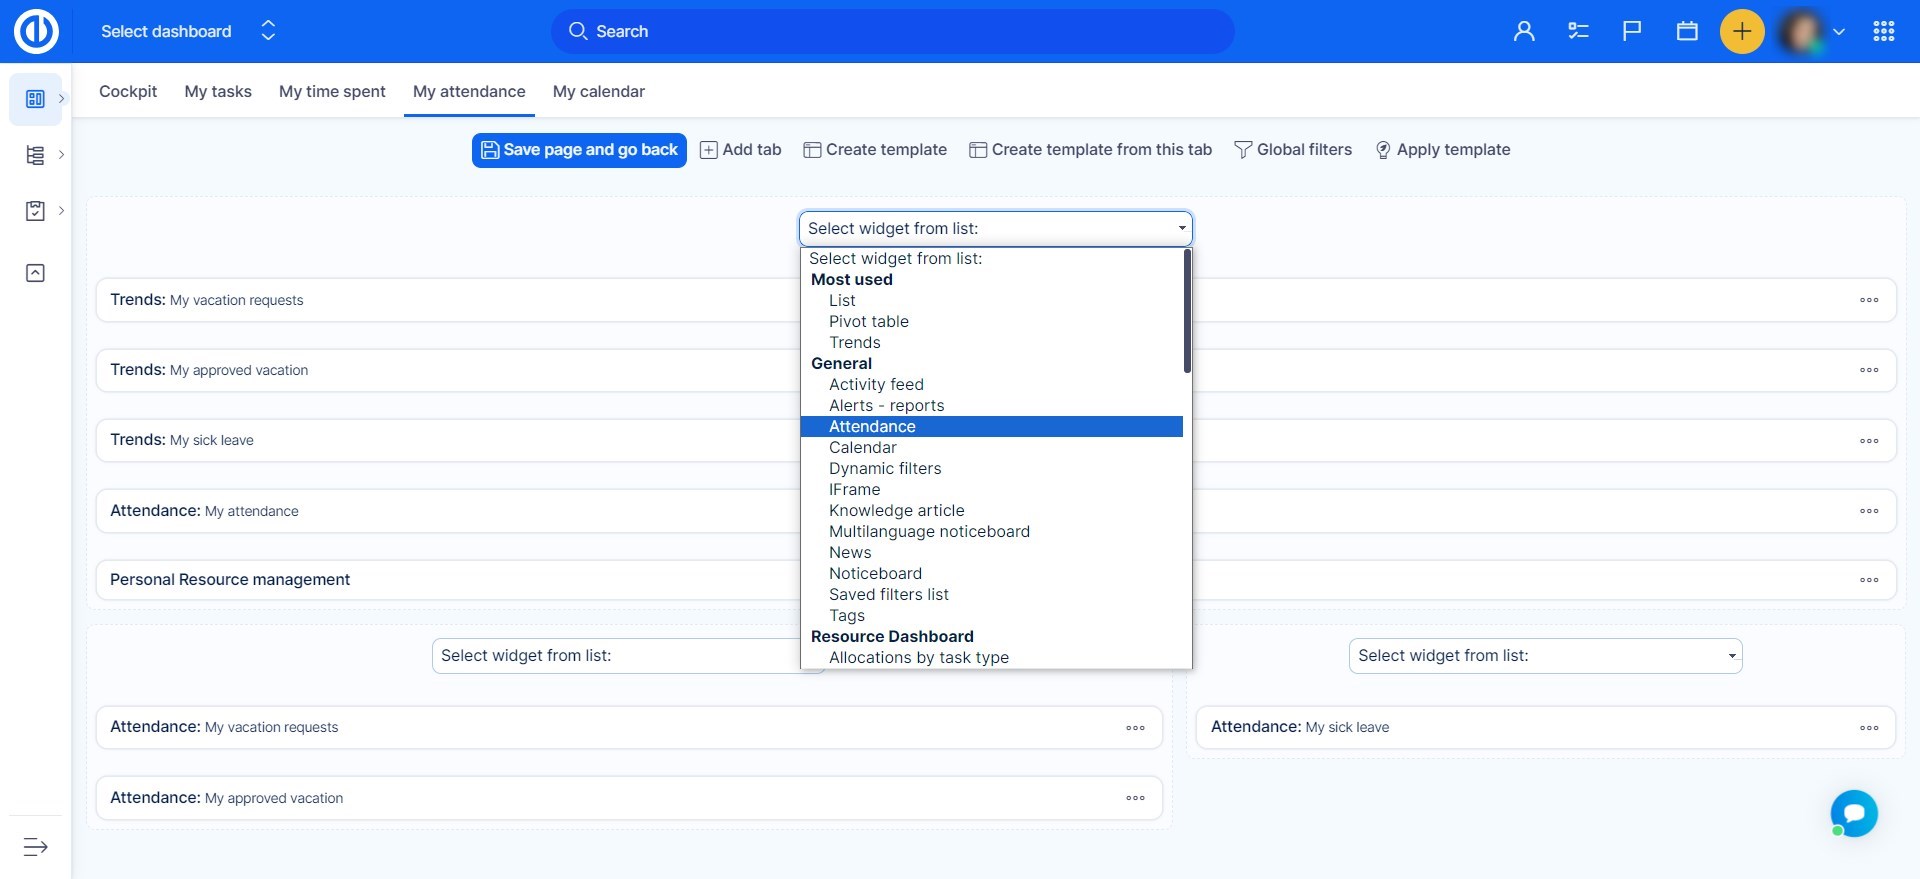
How to setup an attendance calendar on My dashboard
By default, the attendance calendar is available in Global menu >> Attendance >> Calendar. To add attendance calendar on My dashboard, go down on the page and click on the following button. Then choose the box where you would add the Attendance widget and select Attendance from the list of available widgets as shown below.
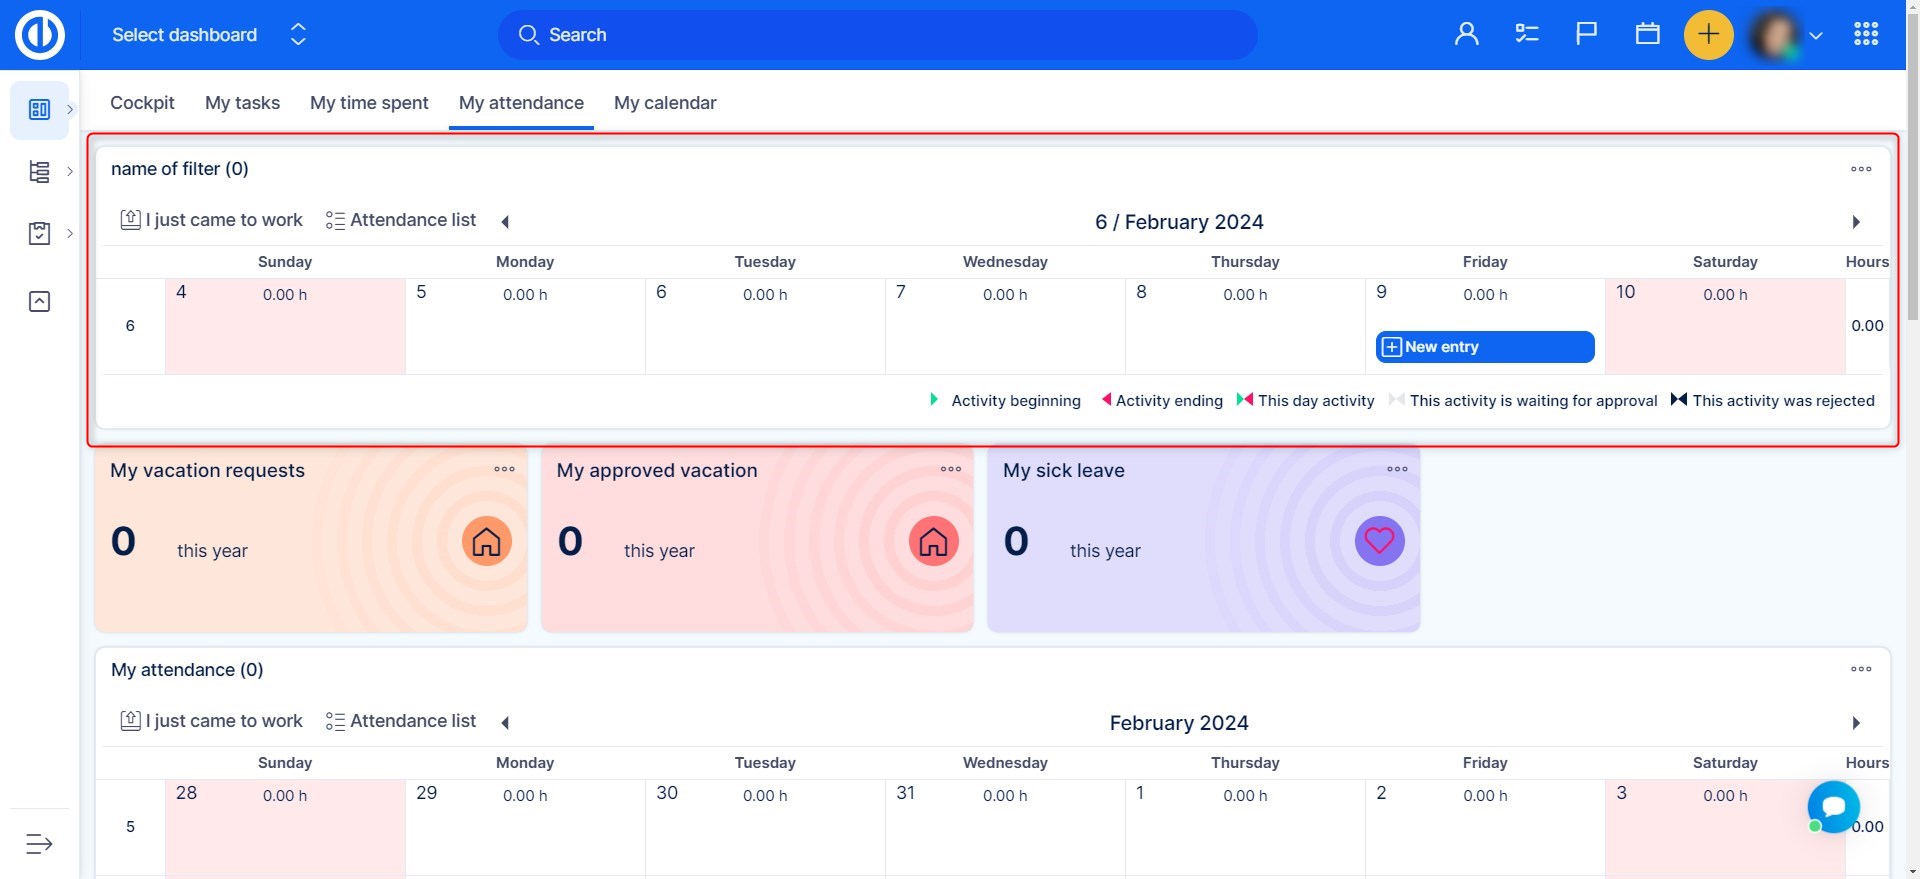
In the next step, configure your attendance widget. You can change basic attributes, filters, list options, chart options, calendar options, report options etc.

When configured, save the page by clicking on the green button on the top. Now, you should see the widget on your dashboard. Depending on how did you set it up, it might look variously like the below example.
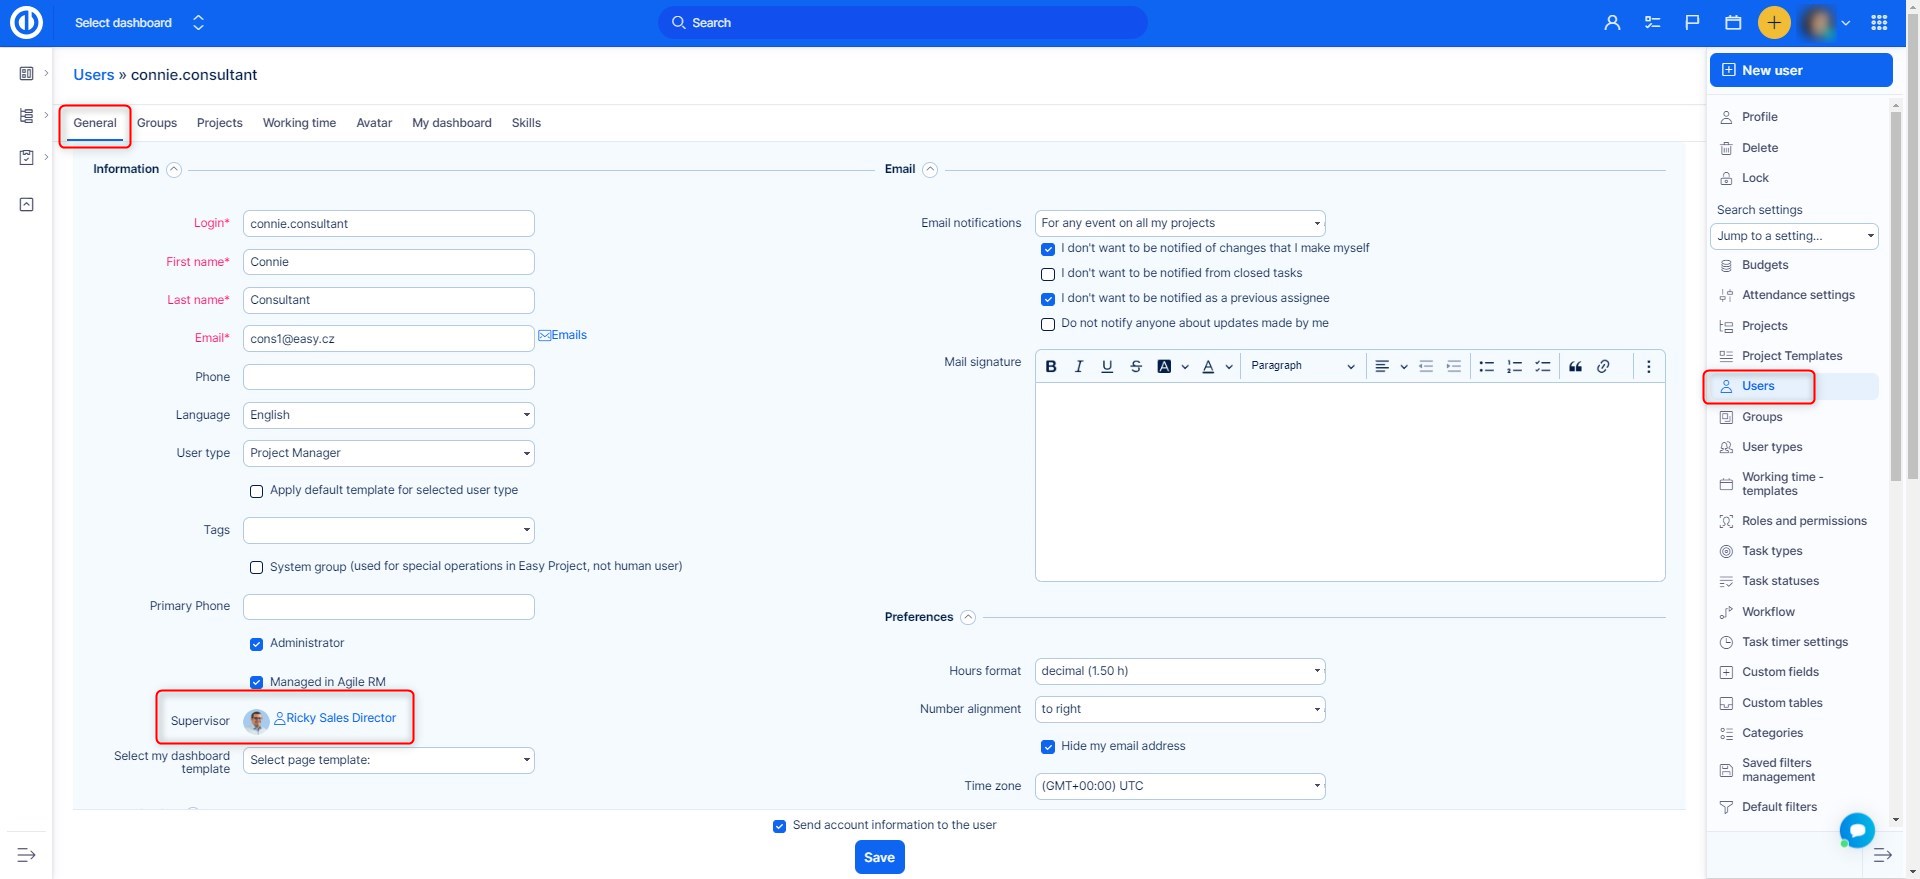
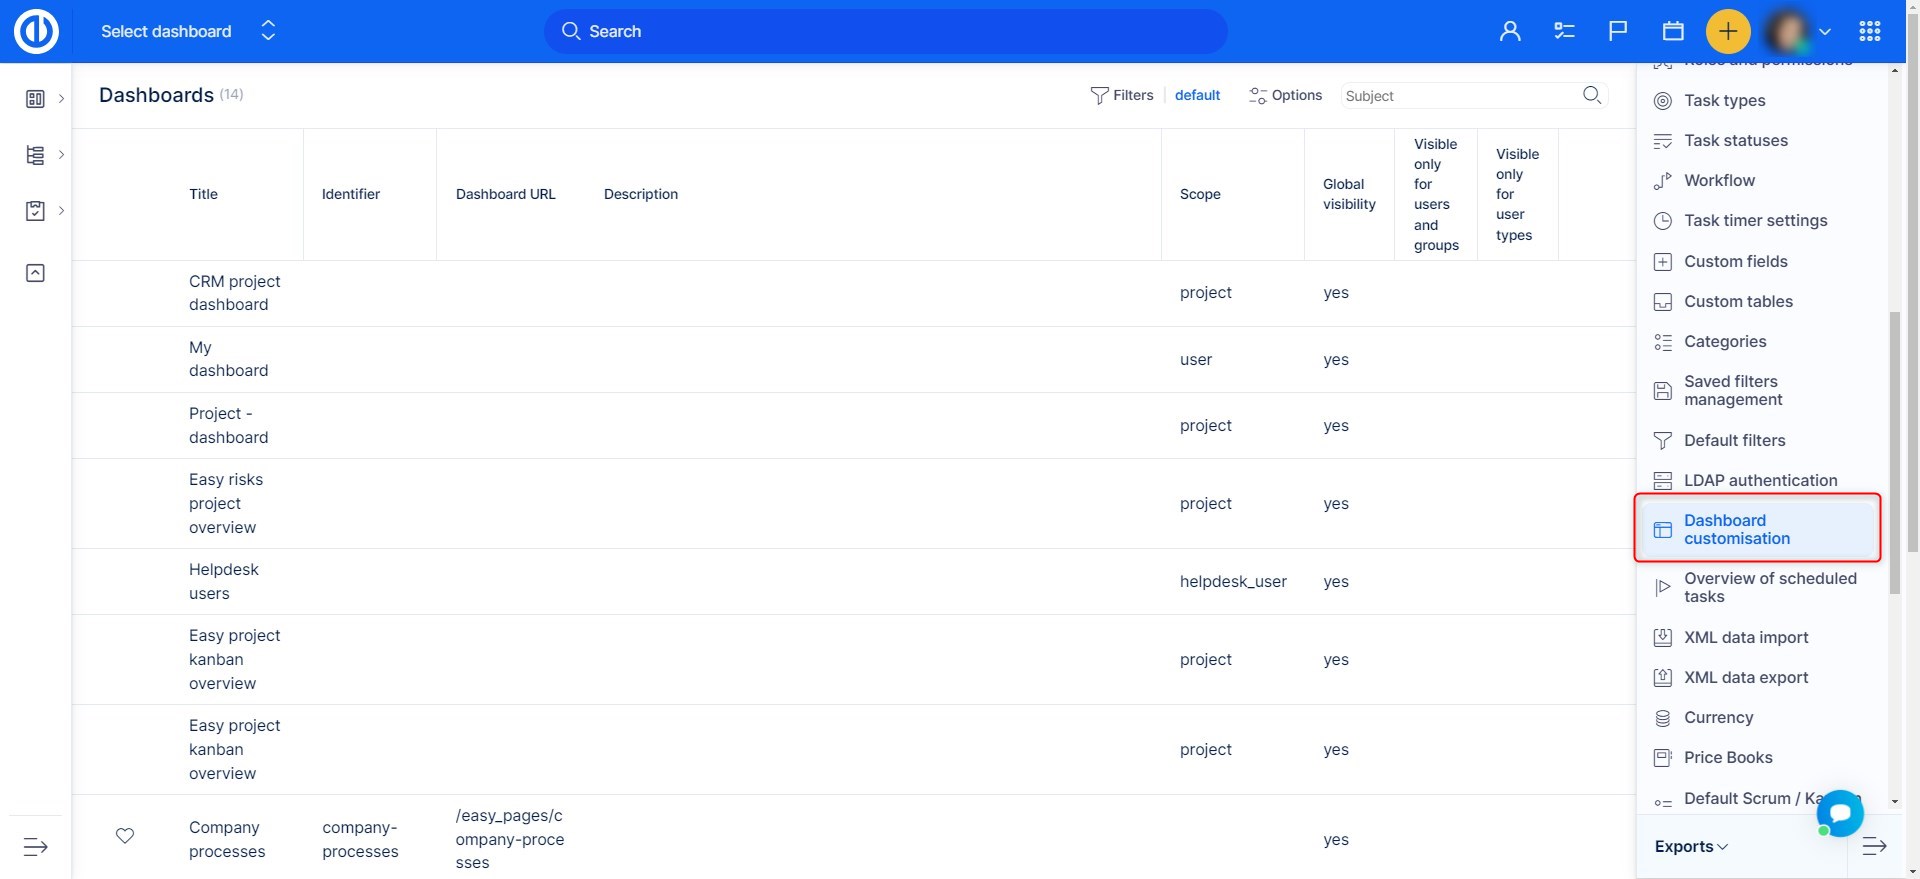
To add Attendance widget on My dashboard for all or selected users in bulk, you must create a template of My dashboard first by going to Global menu >> Administration >> Dashboard customisation >> My dashboard >> Templates overview >> New template. More information can be found in this tutorial. Afterward, go to User's account: >> Edit >> My dashboard and apply the created template on this user's dashboarrd (only Administrator has permission to change dashboards of other users).
Synchronize Attendance with other systems
Examples of use:
- gathering data from arrival/departure monitoring devices
- reporting attendance to external systems
How to set attendance day limits for individual users
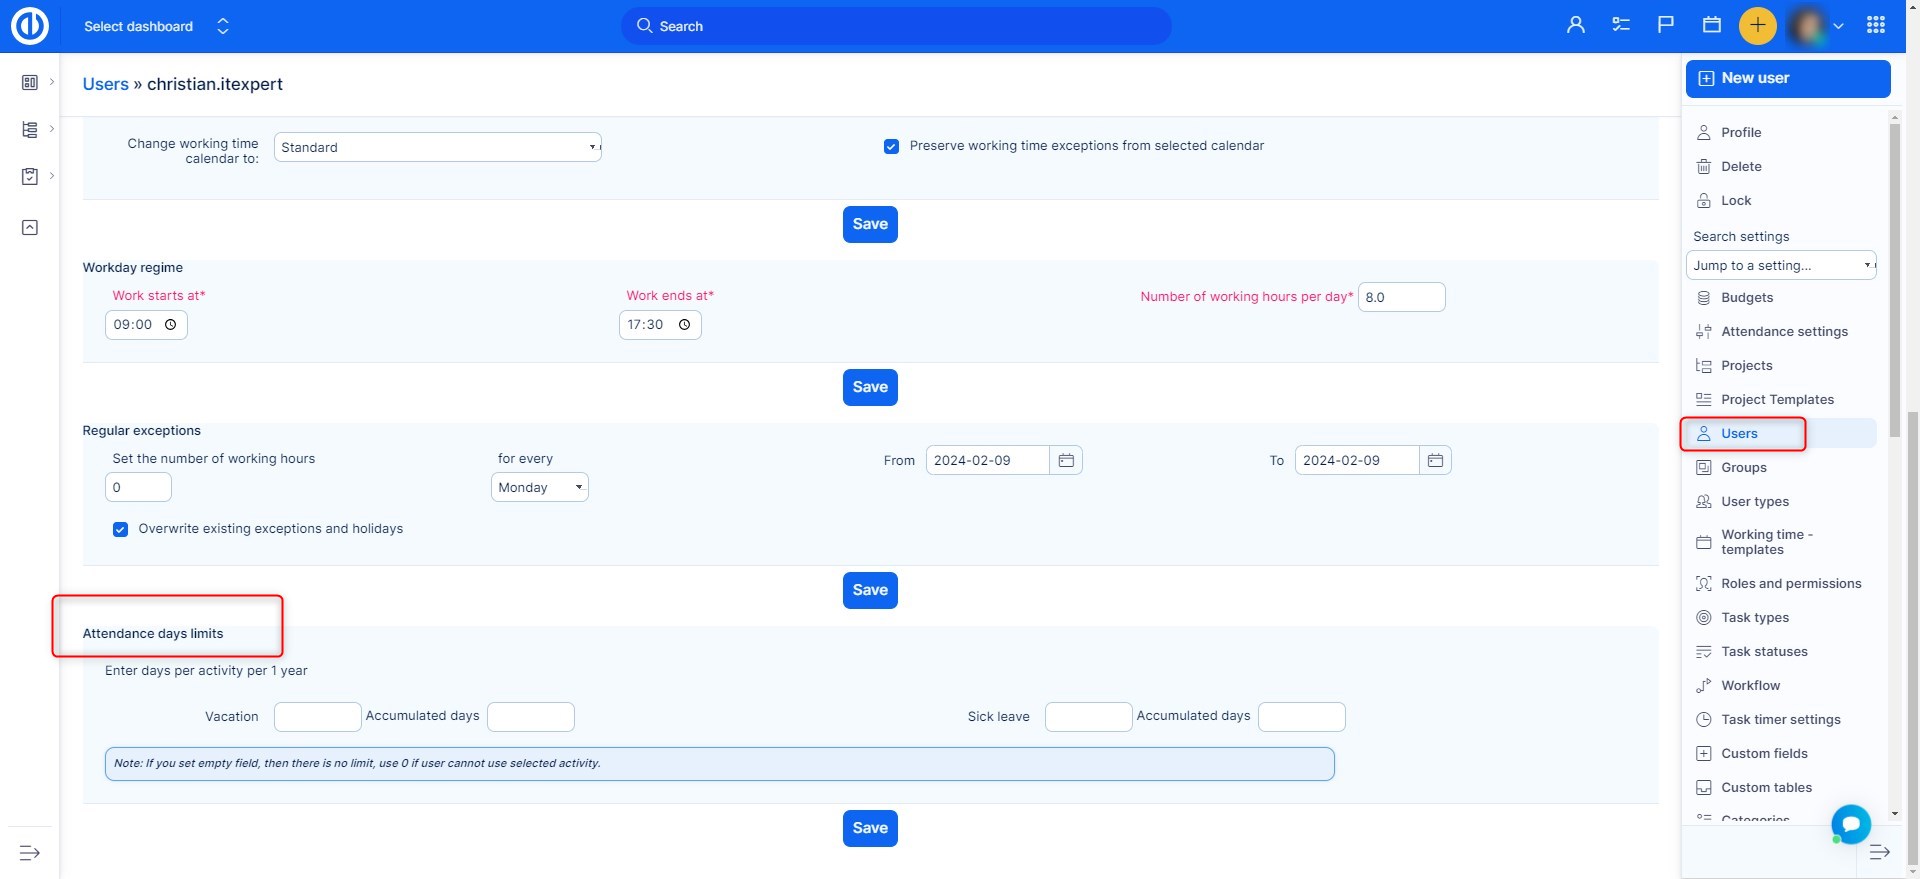
You can set daily limits for attendance categories that represent time off work (such as vacation or sick) for individual users independently. This can be done in More: Users: select a user: go to Working time tab: scroll down to Attendance days limits as illustrated below. Here you find some fields to enter days per activity per 1 year. For example, vacation 20 means the user has 20 days of vacation per year, analogically it applies for sick days.
Accumulated days - This value represents an amount of unexpended leave (remaining days) which passes to the next year. Accumulated days must be enetered manualy at the end of every year.
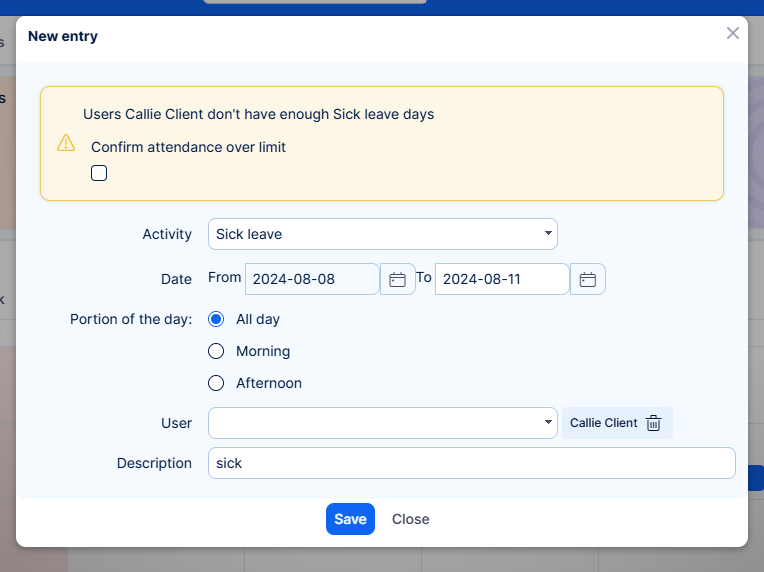
Important: The attendance limit is not preventing users from logging a greater number of days than is the set limit. This is to prevent users from getting stuck, where they might not be able to log their attendance at all.
When filling in attendance, a message will appear to inform the user that they are over the limit.
The hours will appear in the detailed attendance report as a negative number. Please see the example below, where a user logged in more sick days than is the limit.

How to display autocomplete field with attendance status of users
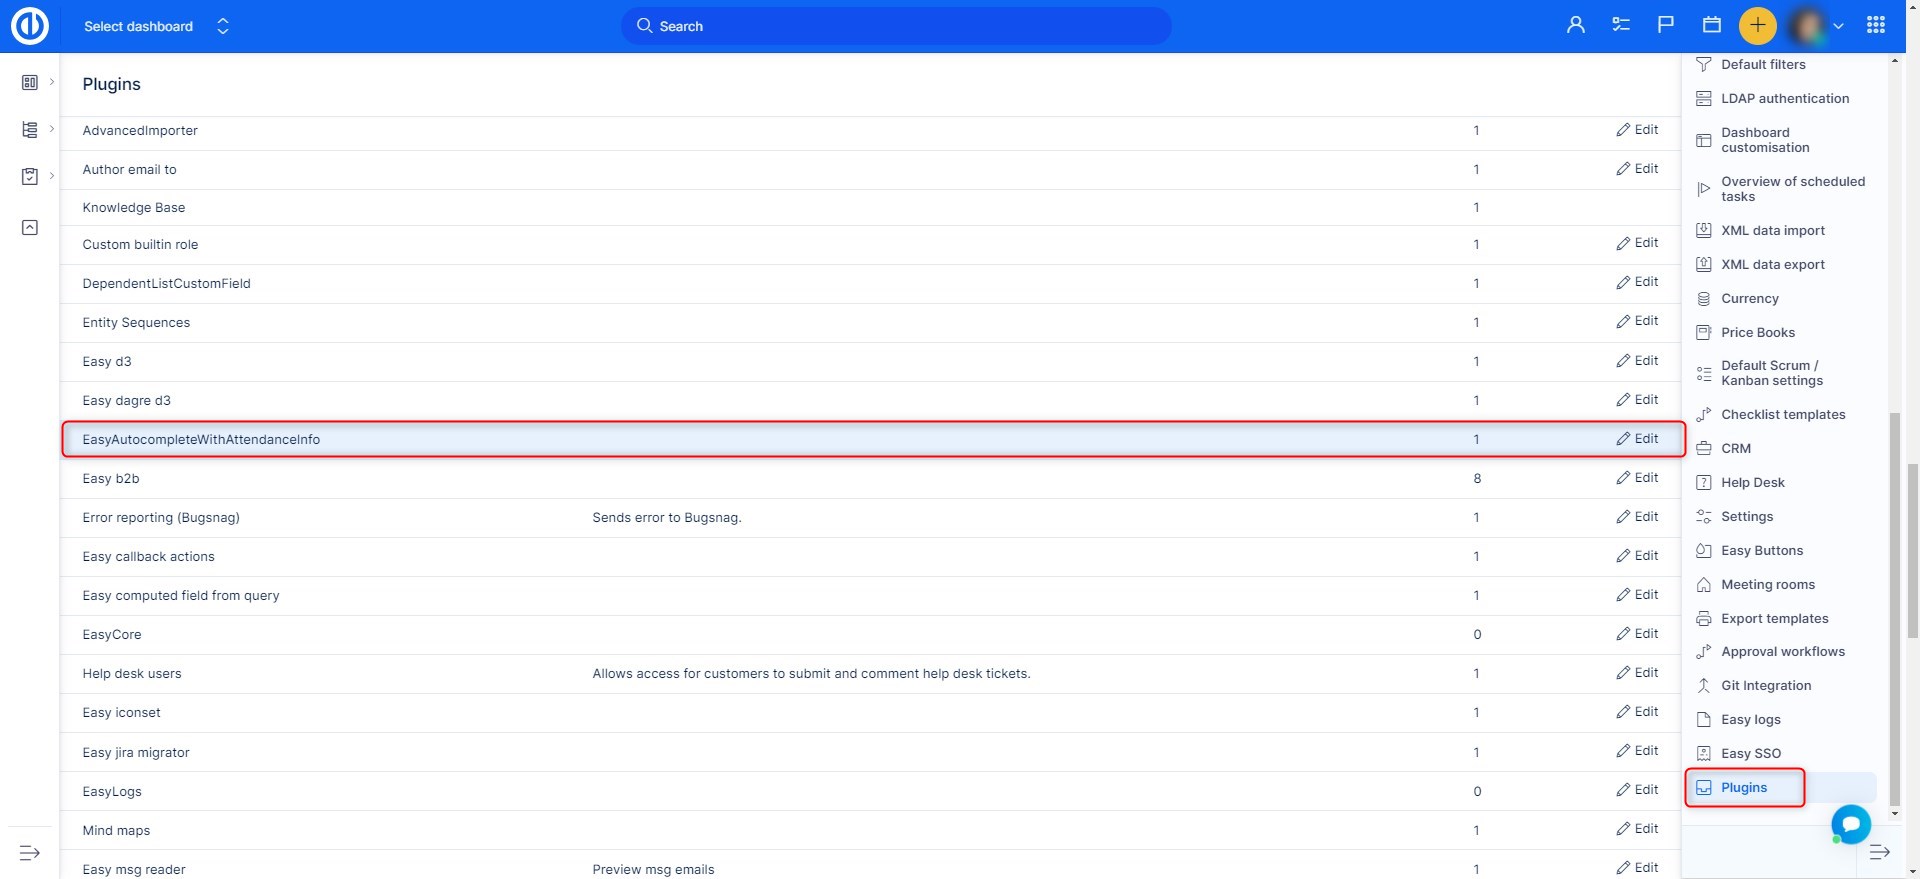
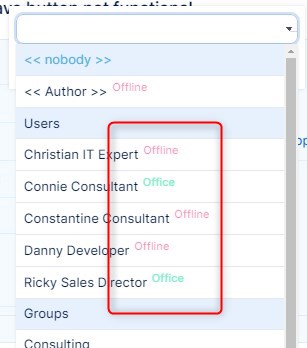
When you browse through an autocomplete field of users (such as Assignee), you can watch their attendance status instantly in the list. For this purpose, simply activate the rys plugin called "EasyAutocompleteWithAttendanceInfo", which is available in Administration >> Plugins.
The result will then look like this. Such a feature can simplify assigning tasks to available users, who are ready to work on them right away.
Online/offline status of a user
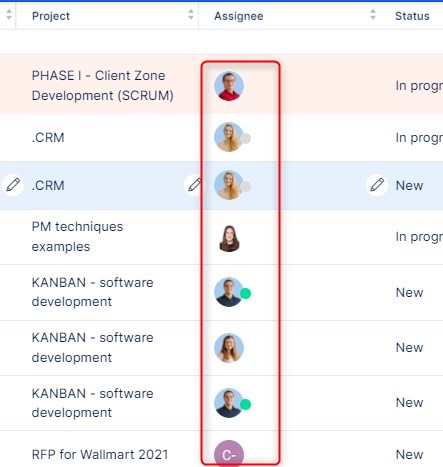
The online/offline status of a user can be seen regardless of his/her attendance status. Each user avatar is equipped with an indicator of this status based on the real-time activity of the user. This indicator takes the form of a green dot (online) or grey dot (offline) next to the avatar at the bottom right. To have this feature (WebSockets) activated, the Action Cable / Redis framework for Ruby on Rails needs to be enabled.
Corner situations
- When you have set vacation for some day and you click on the button "I just come to work" on the same day, your office attendance gets started regardless of the vacation, which also runs simultaneously. However, when you click on "Leaving work" button then, it will say "Date is already taken by another activity". That is intentional behavior that forces you to change your attendance status either to vacation or office, not both at the same time.
- When in attendance calendar, and you filter data for multiple users or a group, weekends and holidays will not appear in color. This is due to the possibility of each user having different holidays, which could cause issues in displaying non-working days
- In the Attendance Report (/easy_attendances/overview), Remaining days and Allowed days can be found for each non-working attendance category such as Vacation or Sick. While Allowed days represent this year's limit, Remaining days represent unexpended days of this year's limit + accumulated days from previous years, which have passed to this year. The problem may occur when you need to see Remaining days for another year than this one. Since there is no history tracking of Remaining days for previous years, this value is always calculated as the currently valid amount of remaining days minus amount of days spent in the respective year. Therefore, the number of Remaining days can only be considered correct for this year, but not for any older one.
- When you have synchronized Easy Attendance Calendar with an external calendar system via CalDav, a valid approval of attendance (such as a vacation) in Easy Project would be canceled by accidentally moving this attendance to another day in the external calendar system, without notification of this change in the CalDav journal. The very same thing might happen even without CalDav synchronization just by moving an approved attendance to another day in Easy Attendance Calendar, however, in such a case, notification of this change is available in the CalDav journal.
- When exceptions are entered in the user's calendar, it takes one more day for them to appear in the user's attendance report (the number of attendance hours) as the attendance report is recalculated only once a day due to performance reasons.
- In the Detailed report page of Attendance, the "Quarter" and "Yearly" views don't show data for "Vacation" and "Sick leave" columns for the time filters "this year" and "next year".