Contacts (v10)
This post regards contacts plugin in version 10. Contacts are in later versions part of the CRM module as Accounts.
The features of contacts
Contact creation
Working with contacts
Contacts export
Contacts visibility
Contacts sync via CardDav
Corner situations
The features of contacts
Contacts are an essential part of customer management. It helps you to find the necessary information about a person, a company, an account or any other type of contact you may have. It is a database of contacts that connect together all of the customer management plugins such as CRM, and helpdesk. Contacts module allows you to:
- create the contacts
- edit them
- export them to vCard or QR code
- filter the contacts according to various parameters
- add notes and documents to them (as well as create other fields)
- sort them into groups – personal or public
- assign them to a chosen project
- remove them from project contacts
- share project or generic contacts
- send by e-mail
- interconnect them
- delete them
Contact creation
Open Contacts from the More menu or Administration.
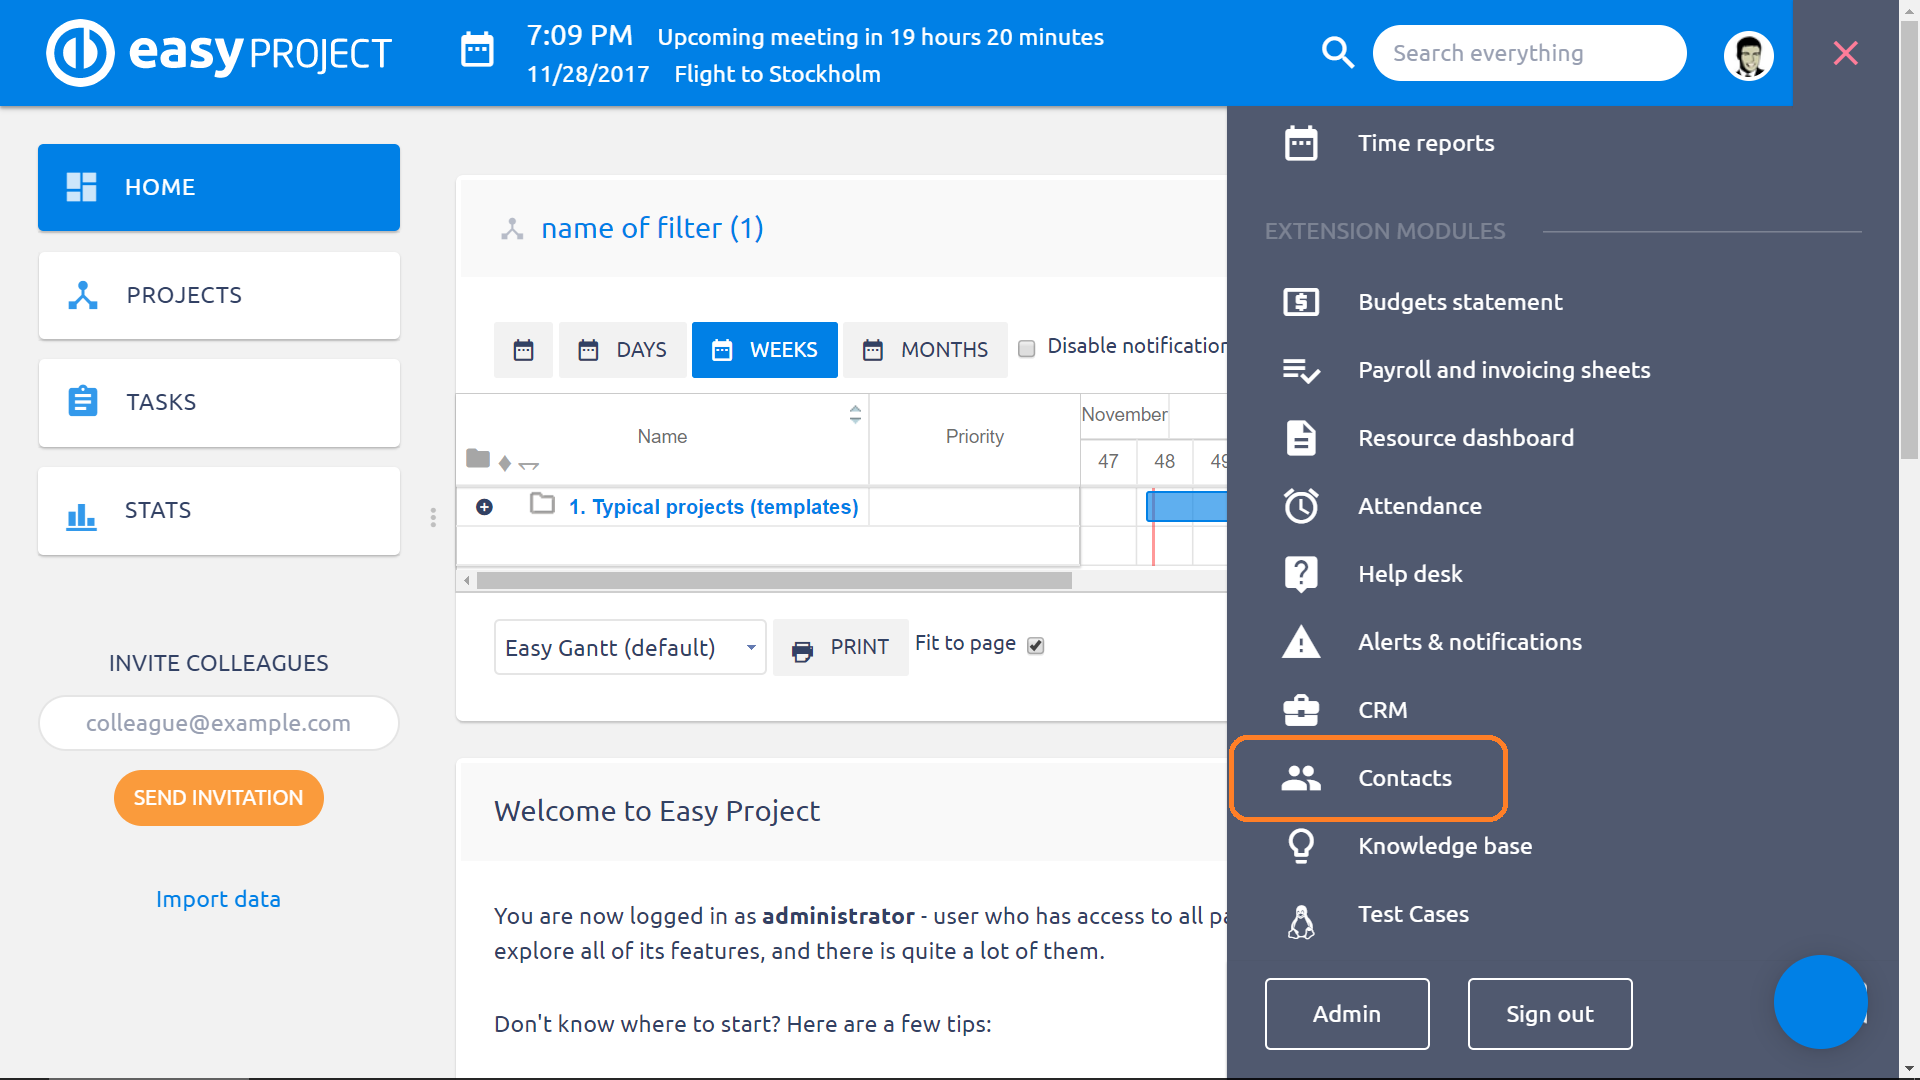
Click the "New contact" button in the sidebar of Contacts overview.
After clicking the New contact button, a form will open. It may look like this.
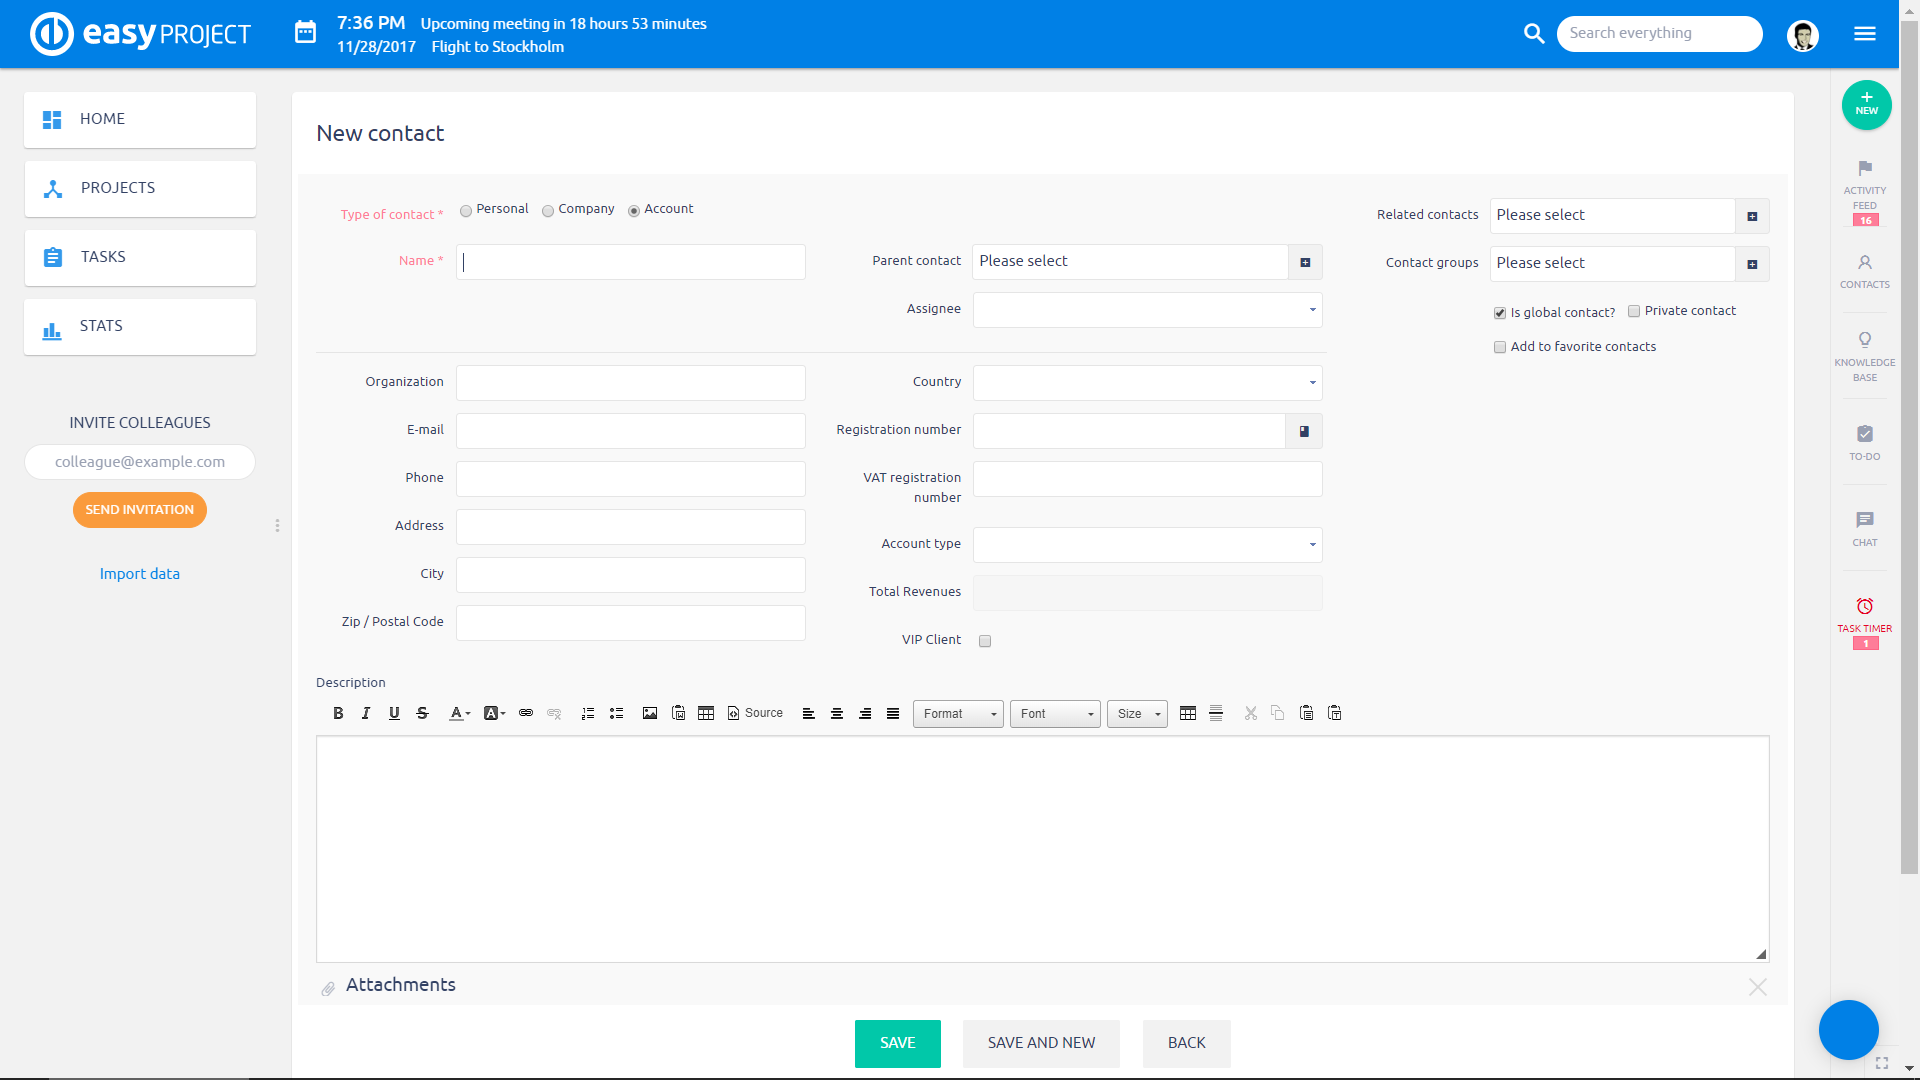
In the first step, you must select the type of contact. By default, there are three contact types in total:
- Account - this type of contact displays account which a user has in Easy Project or in your company site such as e-shop etc.
- Company - this contact displays a company contact in the meaning of official company credentials
- Personal - this contact type shows a personal contact in the meaning of personal credentials such as personal number and personal e-mail
Native fields include:
- First name and last name when creating personal contact. In other words, if the contact type has enabled both First and Last name.
- Name when creating account or company contact. If the contact type has enabled only First name, it is called "Name".
- IMPORTANT - Do not disable both native fields on a contact type. You will not be able to name the contact.
Custom (voluntary) fields include:
- Organization
- Phone
- Street (this will allow showing the contact in Google Maps)
- City
- Postal code
- Country
- Registration number (identification number)
- VAT registration number
- Add other attribute (your custom fields such as state, SWIFT, IBAN, BIC, variable symbol etc. - they might be either optional or required)
- Groups (groups you want to add this contact to)
- checkbox "Is global contact?" (checking it will make the contact visible for all users)
- checkbox "Private contact" (checking it will only make the contact visible for you. Not even administrator can search the contact. You can only check this option if you created this contact)
- checkbox "Add to my contacts" (checking it will add the contact to your favourites)
- Comment (blank text box, where you can write your notes regarding the contact)
- Attachments (files or documents you may attach to the contact)
When you have filled up the form, click Save to create the contact.
Custom fields are configured in Adminstration >> Custom fields >> Contacts. You can rename, enable/disable, add language mutations. If in your application, you see these fields in a different language then you expect, you need to change the name of the field.
Working with contacts
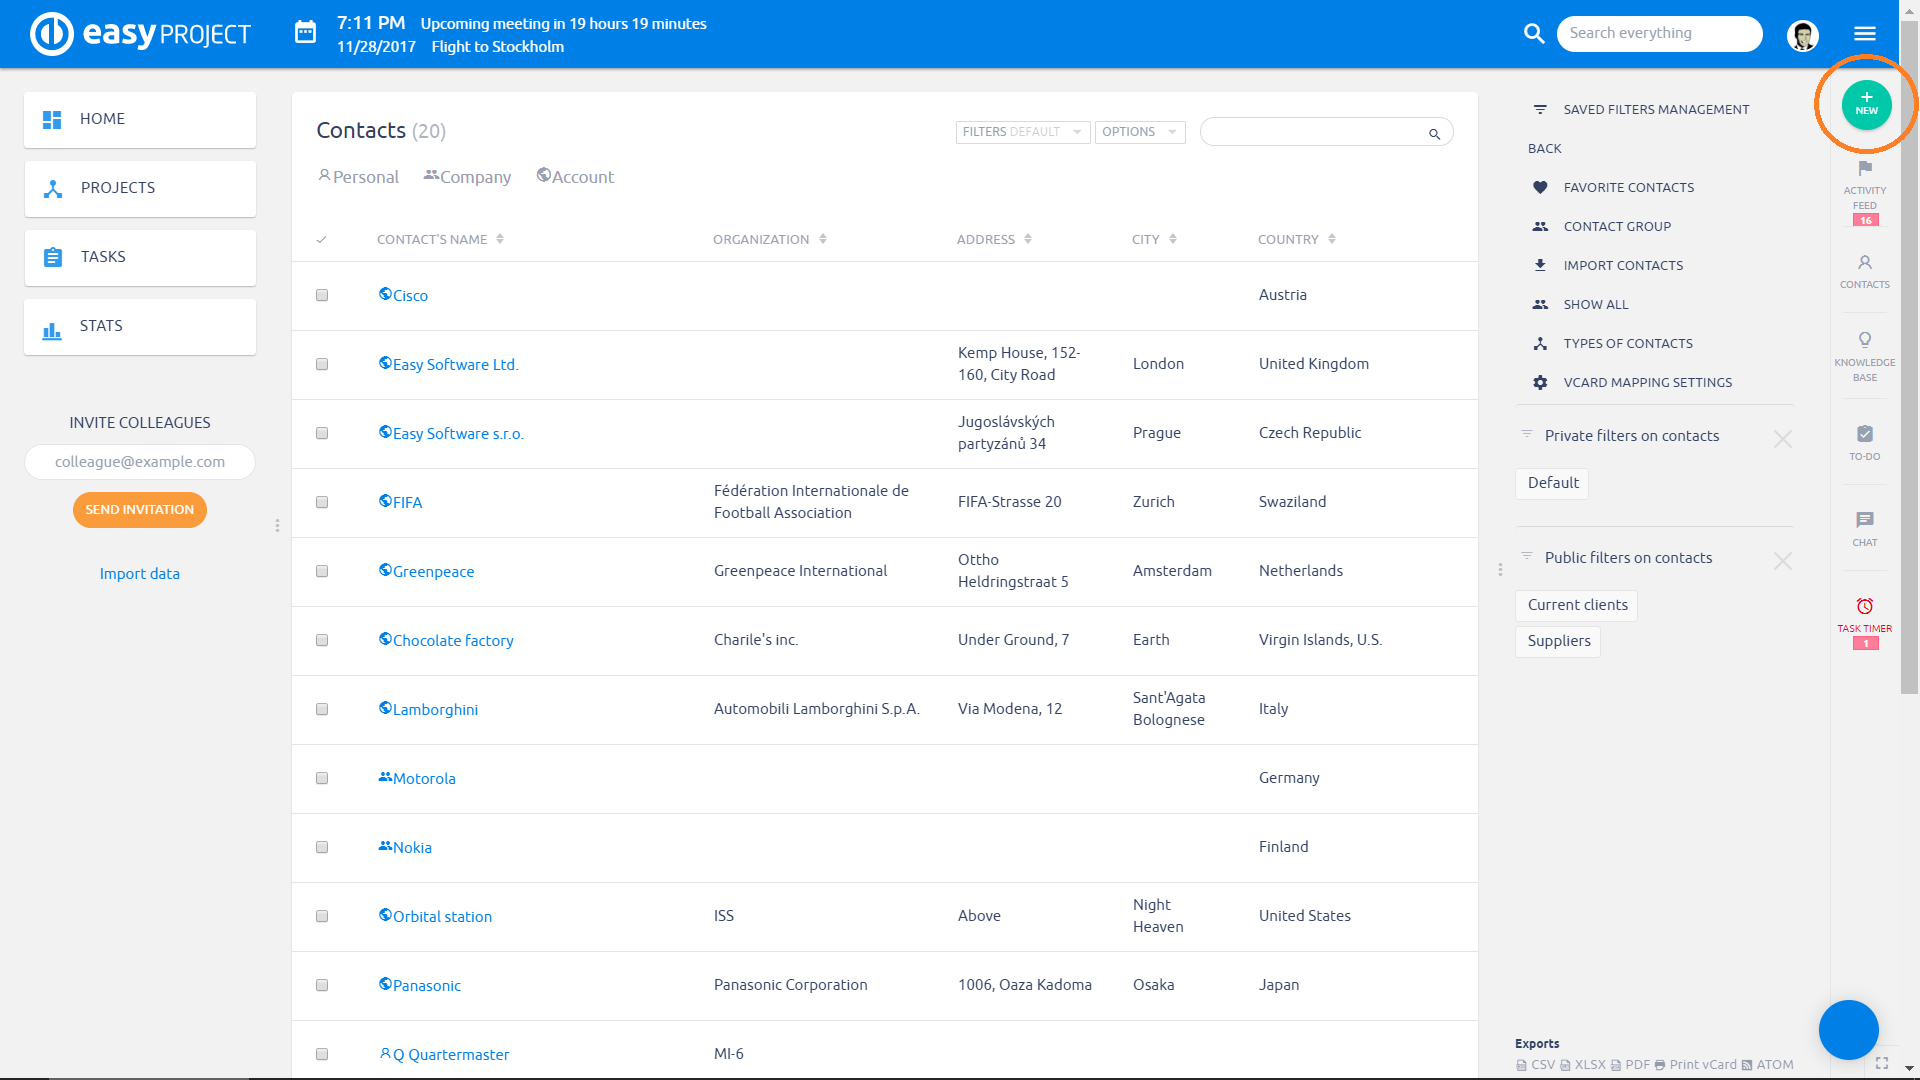
Now, when you are on the Contacts list, you are able to see all contacts in one place. You can filter them by type in the tabs above as shown in the picture below.
In the right menu you can see some buttons:

- Favorite contacts - shows all your favorite contacts
- Contact group - shows groups of contacts; after clicking this, you will be also able to create a new group of contacts
- Import contacts - lets you import the contacts from a CSV file, so you don´t have to fill them in one by one
- Show all - shows all contacts
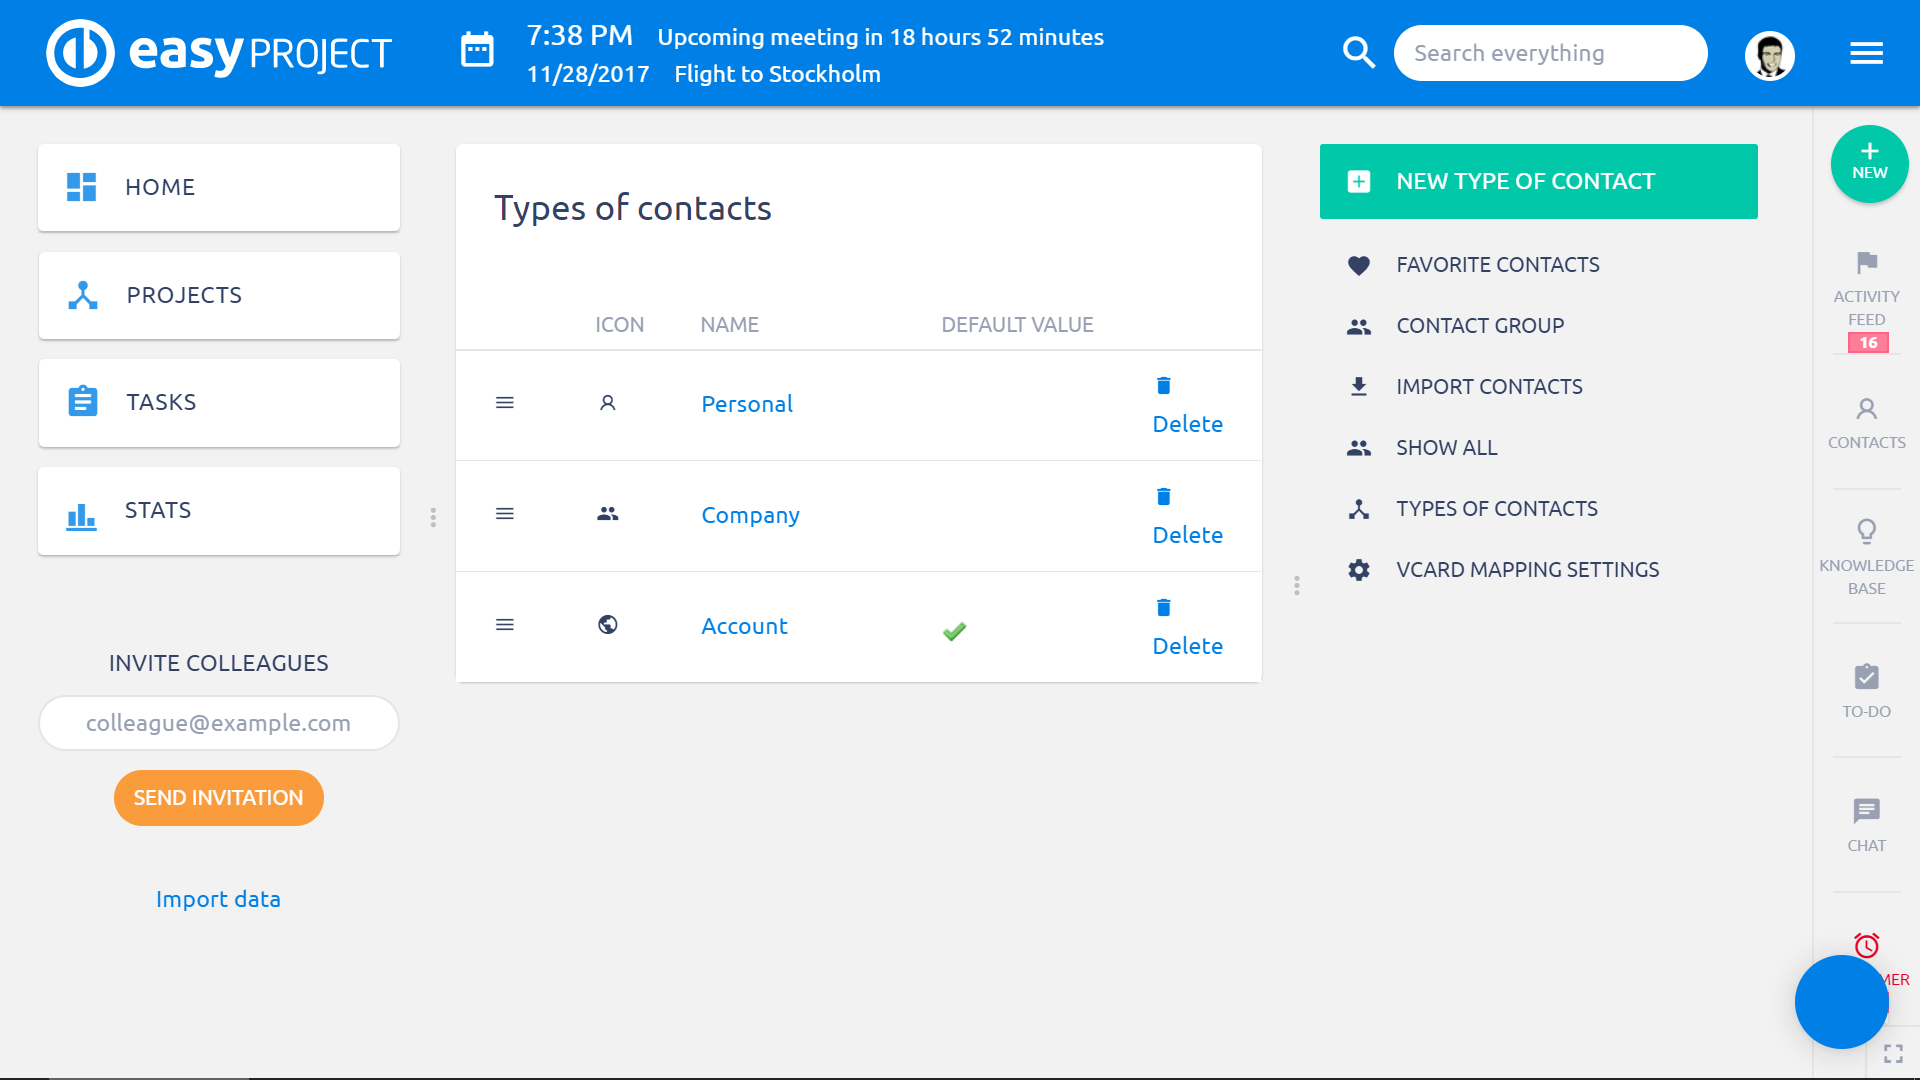
- Types of contacts - here you can create new types of contact or modify/delete existing ones
- VCard mapping settings - In order to make import from vCard and QR code work properly, you have to map the fields from ER contacts into vCard contacts.
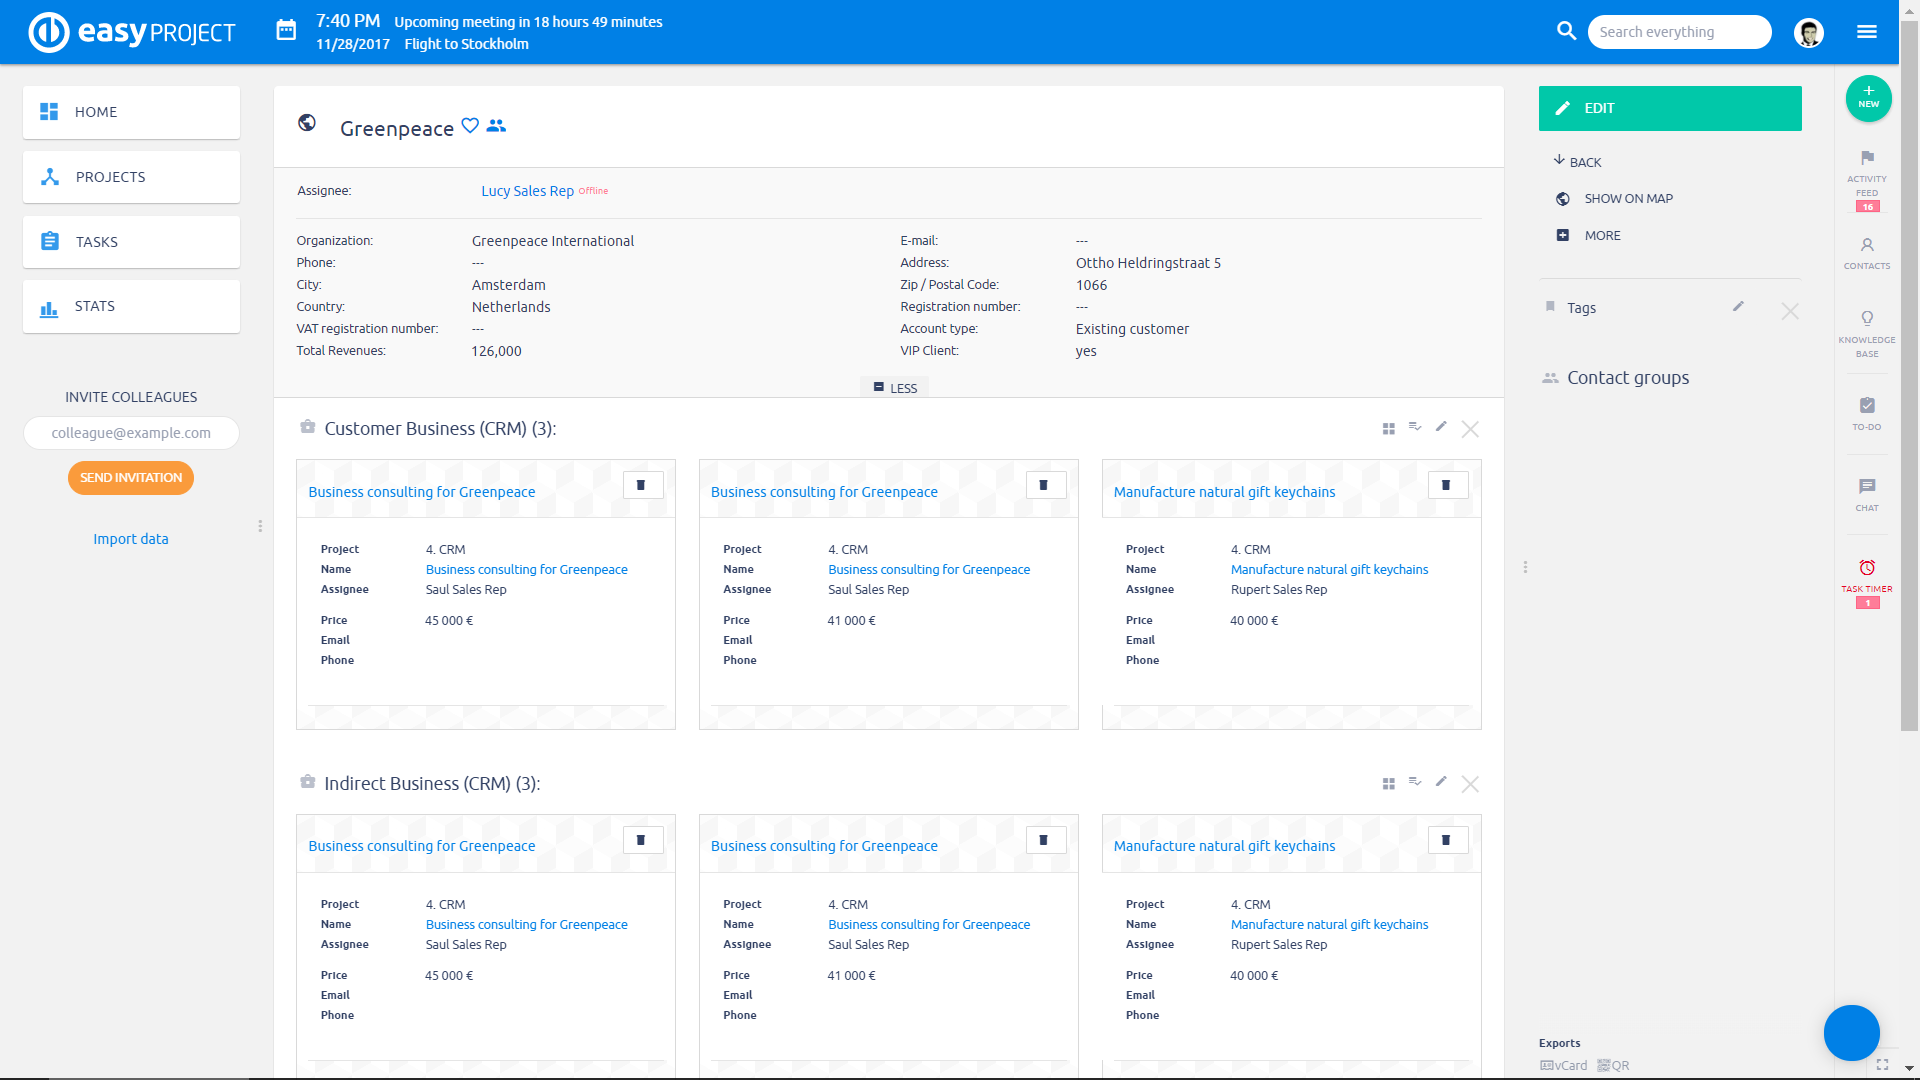
Now, when you open a particular contact, it might look like this. As you can see on the picture below, the contact is already linked with CRM case and project. To remove any of the connections, just click the unlink icon in the upper right corner of the particular entity. In the upper left corner of the screen there two little icons: a globe which tells you the contact is global and a pencil which you can use to change the avatar of the contact. In the upper right corner of the screen, you can find some additional information about contact attributes.
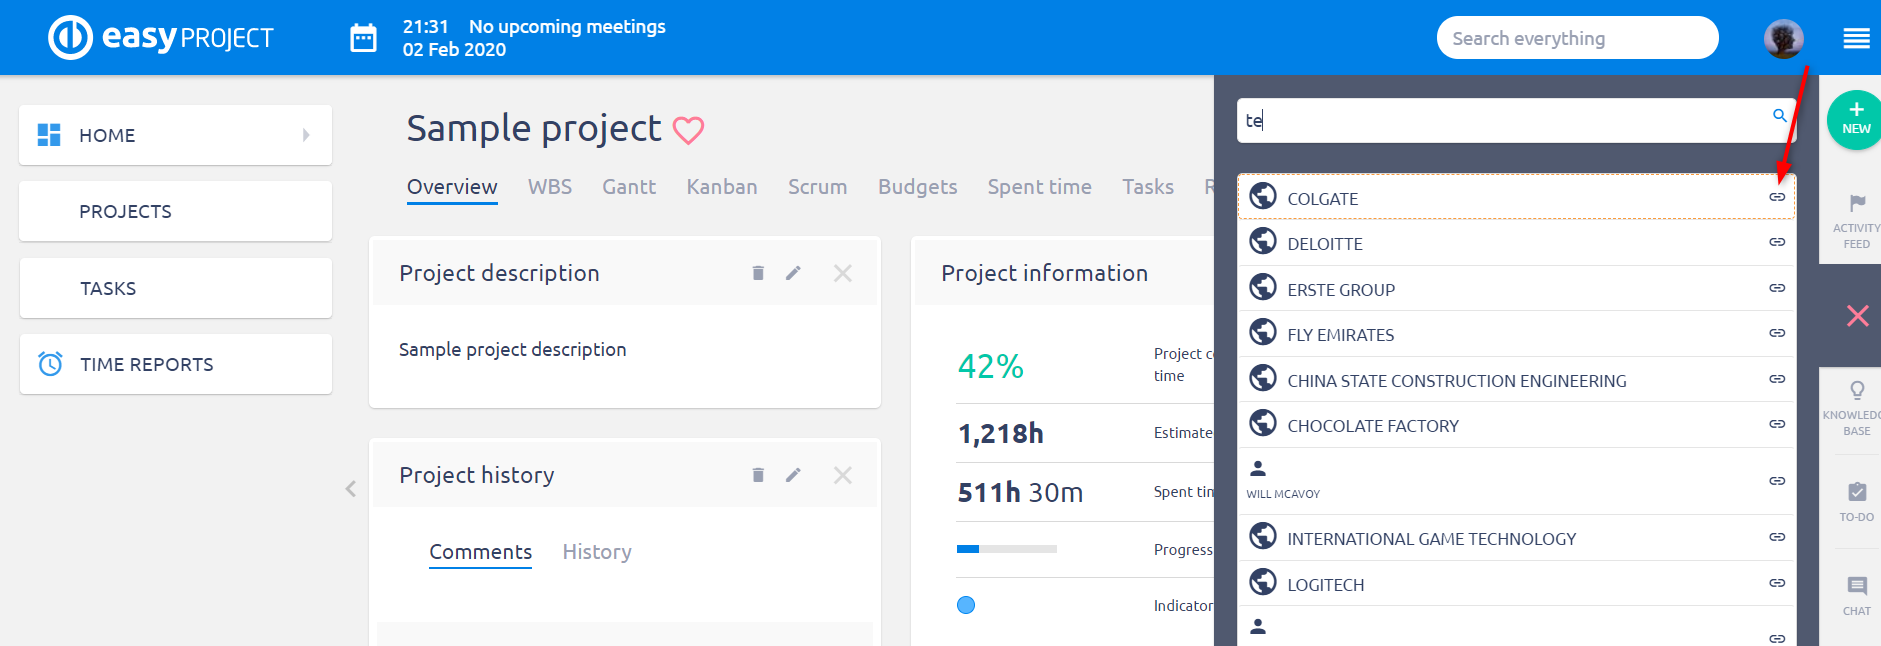
Moreover, you can link contact with a project. To do it, just open any project and simultaneously open the Contacts window from the right panel. Then simply search the required contact and click on the link icon next to it to add it to the currently opened project. The analogical way you can link the contact with a task or CRM case.
When you have a particular contact open, you can find some options in the right menu bar after expanding More menu:
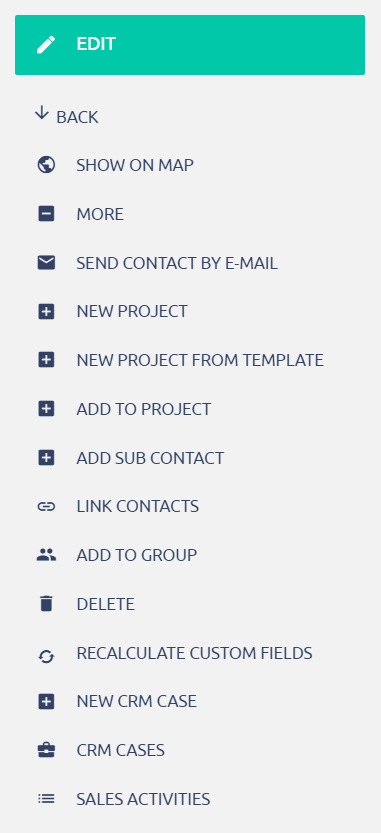
- Show contact in Google map - displays the contact address in Google Maps (address must be filled in)
- Send contact by e-mail - sends an e-mail to the selected recipient with a contact as an attachment (vCard)
- Add to project - shows the list of projects so you can select one or more to add the contact to
- Link contacts - select one or more contacts you would like to link the particular contact with
- Add to group - select one or more groups you want this particular contact to add into
- Delete - permanently delete the contact
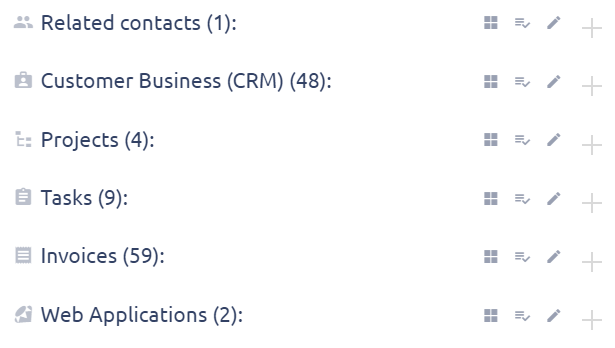
On a contact detail just below the contact description, you can find a collapsed list of entities with which this particular contact is linked. To see the full list of linked items per each entity, just click on the entity name to expand the list.
Contacts export
When you have a particular contact open, you can find Exports menu in the bottom right corner. By default, contacts can by exported into vCard (VCF file), QR code or XML. QR code is an easy way to add a contact to any device with QR code reader such as mobile devices (smartphones, tablets etc.).

Contacts visibility
The visibility of contacts for a user depends on two different permissions:
- Go to Roles and permissions » select a user role » Contacts visibility.
- Go to User types » select a user type » Visibility options » Visible contact types.
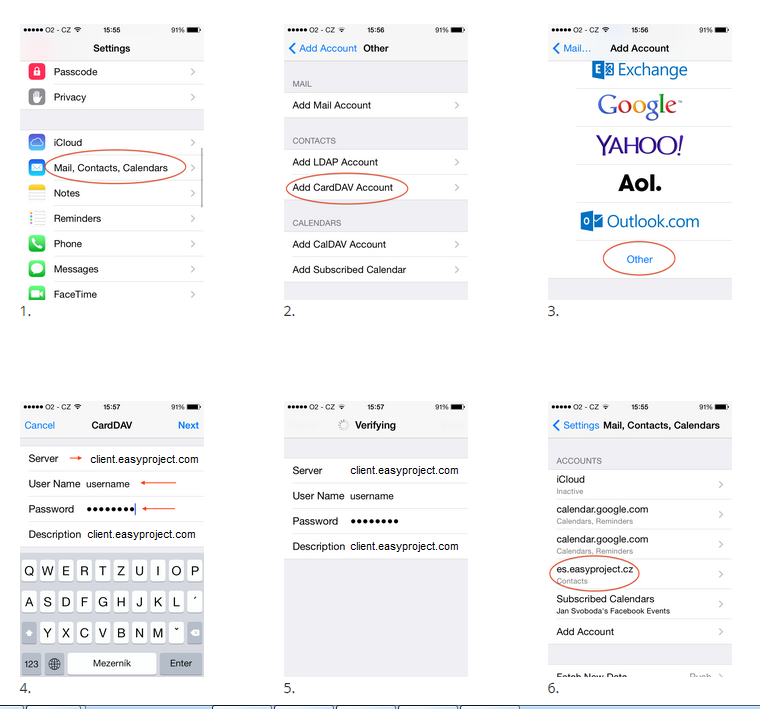
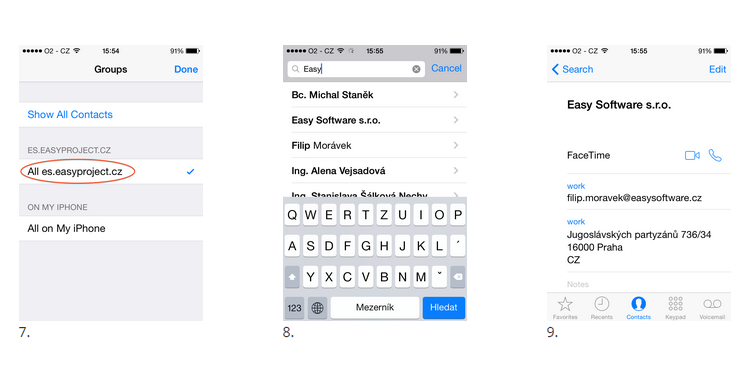
Contacts sync via CardDav
This extended feature allows you to quickly sync contacts from Easy Project without undue effort. Periodic synchronization can be set done so all your new contacts in Easy Project will be automatically added to your mobile device. For Android devices, you can use different CardDav applications and use configuration as described in iOS.
How to sync in iOS
Corner situations
- Contacts on related entities (such as task, CRM case or project) can be displayed in two different views - as tiles or a list. The view itself cannot be saved/remembered and depends on the number of contacts (tiles view is used for fewer contacts than list view).
- Contact-related alerts (no matter if personal or business) never include personal information such as name or e-mail address directly in the message content of the alert. This is due to preventive reasons so that no unauthorized third party can access such contact details. However, contact information is visible upon login to the system based on the URL link provided and the user's permissions.